Note
Access to this page requires authorization. You can try signing in or changing directories.
Access to this page requires authorization. You can try changing directories.
In this article, you'll learn how to generate user delegation shared access signature (SAS) tokens for Azure Blob Storage containers. A user delegation SAS token is signed with Azure Active Directory (Azure AD) credentials instead of Azure Storage keys. It provides superior secure and delegated access to resources in your Azure storage account.
At a high level, here's how it works: your application provides the SAS token to Azure Storage as part of a request. If the storage service verifies that the shared access signature is valid, the request is authorized. If the shared access signature is considered invalid, the request is declined with error code 403 (Forbidden).
Azure Blob Storage offers three types of resources:
- Storage accounts provide a unique namespace in Azure for your data.
- Containers are located in storage accounts and organize sets of blobs.
- Blobs are located in containers and store text and binary data.
When to use a shared access signature
- If you're using storage containers with public access, you can opt to use a SAS token to grant limited access to your storage resources.
- When you're training a custom model, your assembled set of training documents must be uploaded to an Azure Blob Storage container. You can grant permission to your training resources with a user delegation SAS token.
Prerequisites
To get started, you'll need:
An active Azure account. If you don't have one, you can create a Trial.
A Form Recognizer or Cognitive Services multi-service resource.
A standard performance Azure Blob Storage account. You'll create containers to store and organize your blob data within your storage account. If you don't know how to create an Azure storage account with a container, following these quickstarts:
- Create a storage account. When you create your storage account, select Standard performance in the Instance details > Performance field.
- Create a container. When you create your container, set Public access level to Container (anonymous read access for containers and blobs) in the New Container window.
Upload your documents
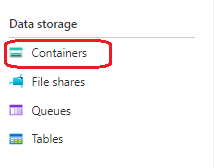
Go to the Azure portal. Select Your storage account > Data storage > Containers.
Select a container from the list.
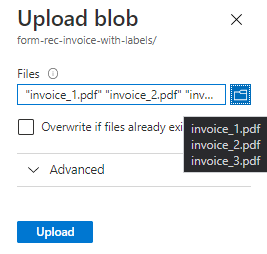
Select Upload from the menu at the top of the page.

The Upload blob window appears.
Select your files to upload.
Note
By default, the REST API uses form documents located at the root of your container. You can also use data organized in subfolders if specified in the API call. For more information, see Organize your data in subfolders.
Create a shared access signature with the Azure portal
Important
Generate and retrieve the shared access signature for your container, not for the storage account itself.
In the Azure portal, select Your storage account > Containers.
Select a container from the list.
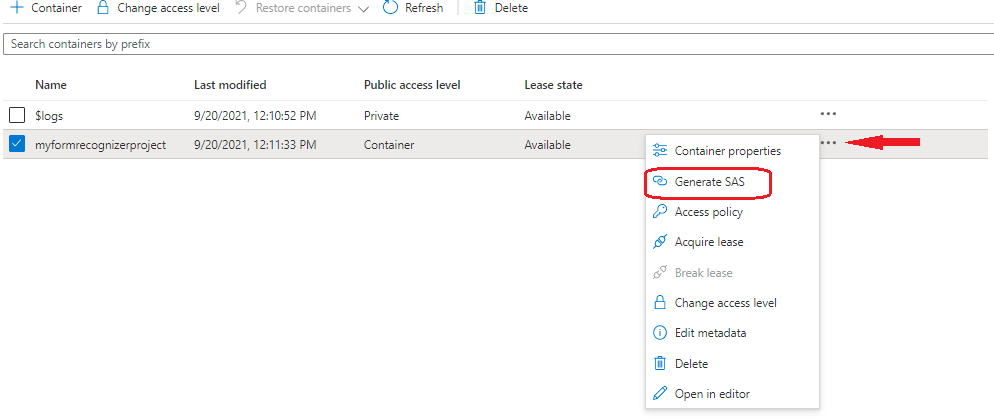
Go to the right of the main window, and select the three ellipses associated with your chosen container.
Select Generate SAS from the dropdown menu to open the Generate SAS window.
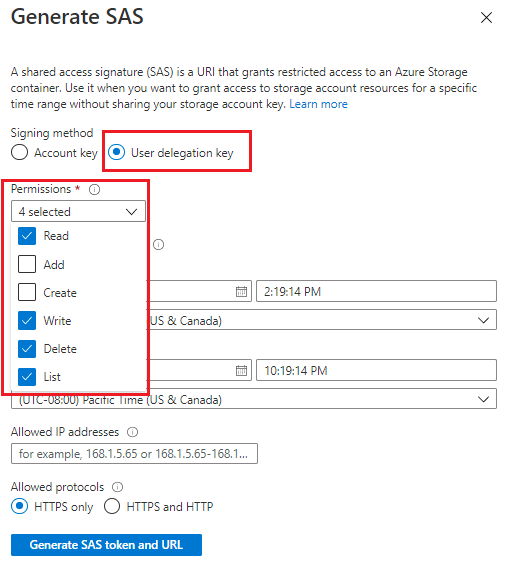
Select Signing method > User delegation key.
Define Permissions by selecting or clearing the appropriate checkbox. Make sure the Read, Write, Delete, and List permissions are selected.
Important
If you receive a message similar to the following one, you'll need to assign access to the blob data in your storage account:

Azure role-based access control (Azure RBAC) is the authorization system used to manage access to Azure resources. Azure RBAC helps you manage access and permissions for your Azure resources.
Assign an Azure role for access to blob data shows you how to assign a role that allows for read, write, and delete permissions for your Azure storage container. For example, see Storage Blob Data Contributor.
Specify the signed key Start and Expiry times. The value for the expiry time is a maximum of seven days from the start of the shared access signature.
The Allowed IP addresses field is optional and specifies an IP address or a range of IP addresses from which to accept requests. If the request IP address doesn't match the IP address or address range specified on the SAS token, it won't be authorized.
The Allowed protocols field is optional and specifies the protocol permitted for a request made with the shared access signature. The default value is HTTPS.
Select Generate SAS token and URL.
The Blob SAS token query string and Blob SAS URL appear in the lower area of the window. To use the Blob SAS token, append it to a storage service URI.
Copy and paste the Blob SAS token and Blob SAS URL values in a secure location. They're displayed only once and can't be retrieved after the window is closed.
Create a shared access signature with the Azure CLI
To create a user delegation SAS for a container by using the Azure CLI, make sure that you've installed version 2.0.78 or later. To check your installed version, use the
az --versioncommand.Call the az storage container generate-sas command.
The following parameters are required:
auth-mode login. This parameter ensures that requests made to Azure Storage are authorized with your Azure AD credentials.as-user. This parameter indicates that the generated SAS is a user delegation SAS.
Supported permissions for a user delegation SAS on a container include Add (a), Create (c), Delete (d), List (l), Read (r), and Write (w). Make sure r, w, d, and l are included as part of the permissions parameters.
When you create a user delegation SAS with the Azure CLI, the maximum interval during which the user delegation key is valid is seven days from the start date. Specify an expiry time for the shared access signature that's within seven days of the start time. For more information, see Create a user delegation SAS for a container or blob with the Azure CLI.
Example
Generate a user delegation SAS. Replace the placeholder values in the brackets with your own values:
az storage container generate-sas \
    --account-name <storage-account> \
    --name <container> \
    --permissions rwdl \
    --expiry <date-time> \
    --auth-mode login \
    --as-user
Use your Blob SAS URL
Two options are available:
To use your Blob SAS URL with the REST API, add the SAS URL to the request body:
{
    "source":"<BLOB SAS URL>"
}
To use your Blob SAS URL with the Form Recognizer labeling tool, add the SAS URL to the Connection Settings > Azure blob container > SAS URI field:

That's it. You've learned how to generate SAS tokens to authorize how clients access your data.