Note
Access to this page requires authorization. You can try signing in or changing directories.
Access to this page requires authorization. You can try changing directories.
In conversational language understanding projects, the schema is defined as the combination of intents and entities within your project. Schema design is a crucial part of your project's success. When you create a schema, think about which intents and entities should be included in your project.
Guidelines and recommendations
Consider the following guidelines when you choose intents for your project:
- Create distinct, separable intents. An intent is best described as action that the user wants to perform. Think of the project you're building and identify all the different actions that your users might take when they interact with your project. Sending, calling, and canceling are all actions that are best represented as different intents. "Canceling an order" and "canceling an appointment" are similar, with the distinction being what they're canceling. Those two actions should be represented under the same intent, cancel.
- Create entities to extract relevant pieces of information within your text. The entities should be used to capture the relevant information that's needed to fulfill your user's action. For example, order or appointment could be different things that a user is trying to cancel, and you should create an entity to capture that piece of information.
You can "send a message," "send an email," or "send a package." Creating an intent to capture each of those requirements won't scale over time, and you should use entities to identify what the user was sending. The combination of intents and entities should determine your conversation flow.
For example, consider a company where the bot developers identified the three most common actions that their users take when they use a calendar:
- Set up new meetings.
- Respond to meeting requests.
- Cancel meetings.
They might create an intent to represent each of these actions. They might also include entities to help complete these actions, such as:
- Meeting attendants
- Date
- Meeting durations
Add intents
To build a project schema within Language Studio:
Select Schema definition from the left side menu.
From the top pivots, you can change the view to be Intents or Entities.
To create an intent, select Add from the top menu. You will be prompted to type in a name before completing creating the intent.
Repeat the above step to create all the intents to capture all the actions that you think the user will want to perform while using the project.
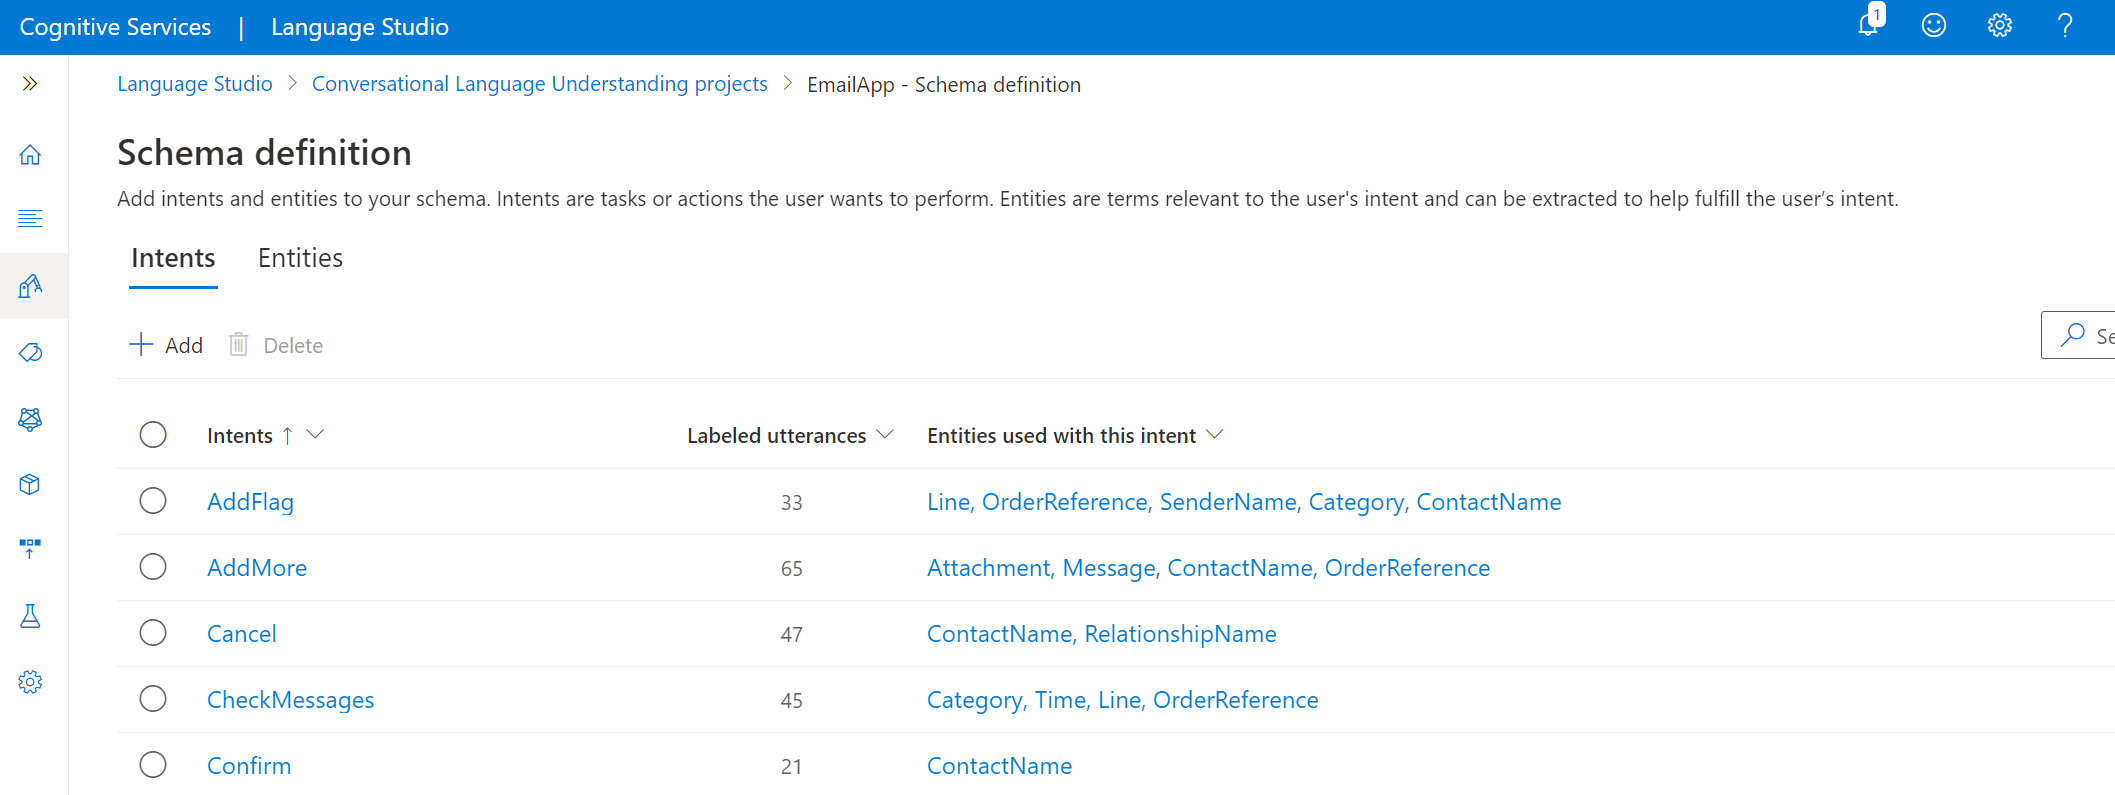
When you select the intent, you will be directed to the Data labeling page, with a filter set for the intent you selected. You can add examples for intents and label them with entities.

Add entities
Move to Entities pivot from the top of the page.
To add an entity, select Add from the top menu. You will be prompted to type in a name before completing creating the entity.
After creating an entity, you'll be routed to the entity details page where you can define the composition settings for this entity.
Every entity can be defined by multiple components: learned, list or prebuilt. A learned component is added to all your entities once you label them in your utterances.
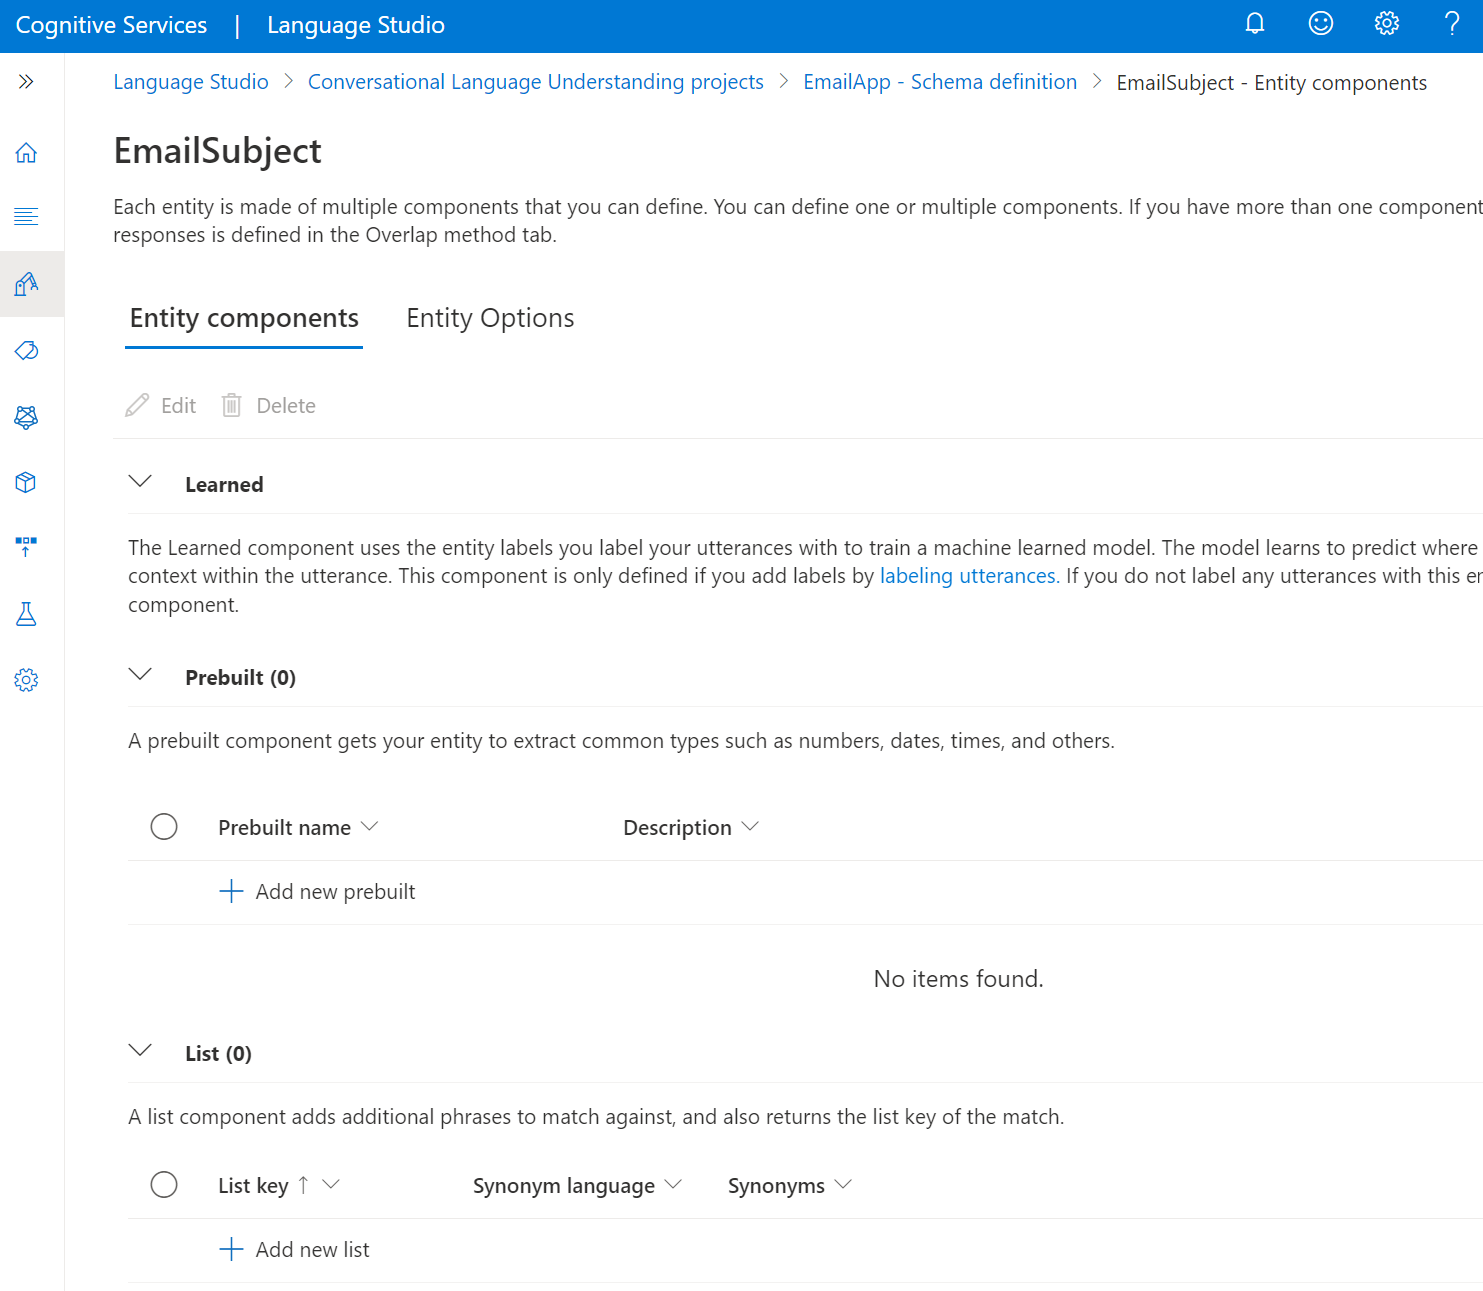

5.You can add a list or prebuilt component to each entity.
Add prebuilt component
To add a prebuilt component, select Add new prebuilt and from the drop-down menu, select the prebuilt type to you want to add to this entity.
Add a list component
To add a list component, select Add list. You can add multiple lists to each entity:
Create a new list, and in the List key text box, enter the normalized value that was returned when any of the synonyms values were extracted.
Enter your synonyms and select Enter after each one. We recommend having a synonym list in multiple languages.
Add a regex component
To add a regex component, select Add expression. Name the regex key, and enter a regular expression that matches the entity to be extracted.
Define entity options
Select the Entity Options tab on the entity details page. When multiple components are defined for an entity, their predictions might overlap. When an overlap occurs, each entity's final prediction is determined based on the entity option that you select in this step. Select the option that you want to apply to this entity, and then select Save.
After you create your entities, you can come back and edit them. You can edit entity components or delete them by selecting Edit or Delete.