Note
Access to this page requires authorization. You can try signing in or changing directories.
Access to this page requires authorization. You can try changing directories.
After you build a schema for your fine-tuning task, you add training utterances to your project. The utterances should be similar to what your users use when they interact with the project. When you add an utterance, you have to assign which intent it belongs to. After the utterance is added, label the words within your utterance that you want to extract as entities.
Data labeling is a crucial step in the conversational language understanding (CLU) trained development lifecycle. This data is used in the next step when you train your model so that your model can learn from the labeled data. If you already labeled utterances, you can directly import them into your project, if your data follows the accepted data format. To learn more about importing labeled data, see Create a CLU fine-tuning task. Labeled data informs the model about how to interpret text and is used for training and evaluation.
Tip
Use the Quick Deploy option to implement custom CLU intent routing, which is powered by your own large language model deployment without adding or labeling any training data.
Prerequisites
- A successfully created project.
For more information, see the CLU development lifecycle.
Data labeling guidelines
After you build your schema and create your project, you need to label your data. Labeling your data is important so that your model knows which sentences and words are associated with the intents and entities in your project. Spend time labeling your utterances to introduce and refine the data that's used in training your models.
As you add utterances and label them, keep in mind:
The machine learning models generalize based on the labeled examples that you provide. The more examples that you provide, the more data points the model has to make better generalizations.
The precision, consistency, and completeness of your labeled data are key factors to determining model performance:
- Label precisely: Label each intent and entity to its right type always. Only include what you want classified and extracted. Avoid unnecessary data in your labels.
- Label consistently: The same entity should have the same label across all the utterances.
- Label completely: Provide varied utterances for every intent. Label all the instances of the entity in all your utterances.
Clearly label utterances
Ensure that the concepts that your entities refer to are well defined and separable. Check if you can easily determine the differences reliably. If you can't, this lack of distinction might indicate difficulty for the learned component.
Ensure that some aspect of your data can provide a signal for differences when there's a similarity between entities.
For example, if you built a model to book flights, a user might use an utterance like "I want a flight from Boston to Seattle." The origin city and destination city for such utterances would be expected to be similar. A signal to differentiate origin city might be that the word from often precedes it.
Ensure that you label all instances of each entity in both your training and testing data. One approach is to use the search function to find all instances of a word or phrase in your data to check if they're correctly labeled.
Ensure that you label test data for entities without learned components and also for the entities with them. This practice helps to ensure that your evaluation metrics are accurate.
For multilingual projects, adding utterances in other languages increases the model's performance in these languages. Avoid duplicating your data across all the languages that you want to support. For example, to improve a calender bot's performance with users, a developer might add examples mostly in English and a few in Spanish or French. They might add utterances such as:
Set a meeting with **Matt** and **Kevin** **tomorrow** at **12 PM**.(English)Reply as **tentative** to the **weekly update** meeting.(English)Cancelar mi **próxima** reunión.(Spanish)
Label your utterances
Use the following steps to label your utterances:
Go to your project page in Language Studio.
On the left pane, select Manage data. On this page, you can add your utterances and label them. You can also upload your utterances directly by selecting Upload utterance file from the top menu. Make sure to follow the accepted format.
By using the top tabs, you can change the view to Training set or Testing set. Learn more about training and testing sets and how they're used for model training and evaluation.
Tip
If you plan to use Automatically split the testing set from training data splitting, add all your utterances to the training set.
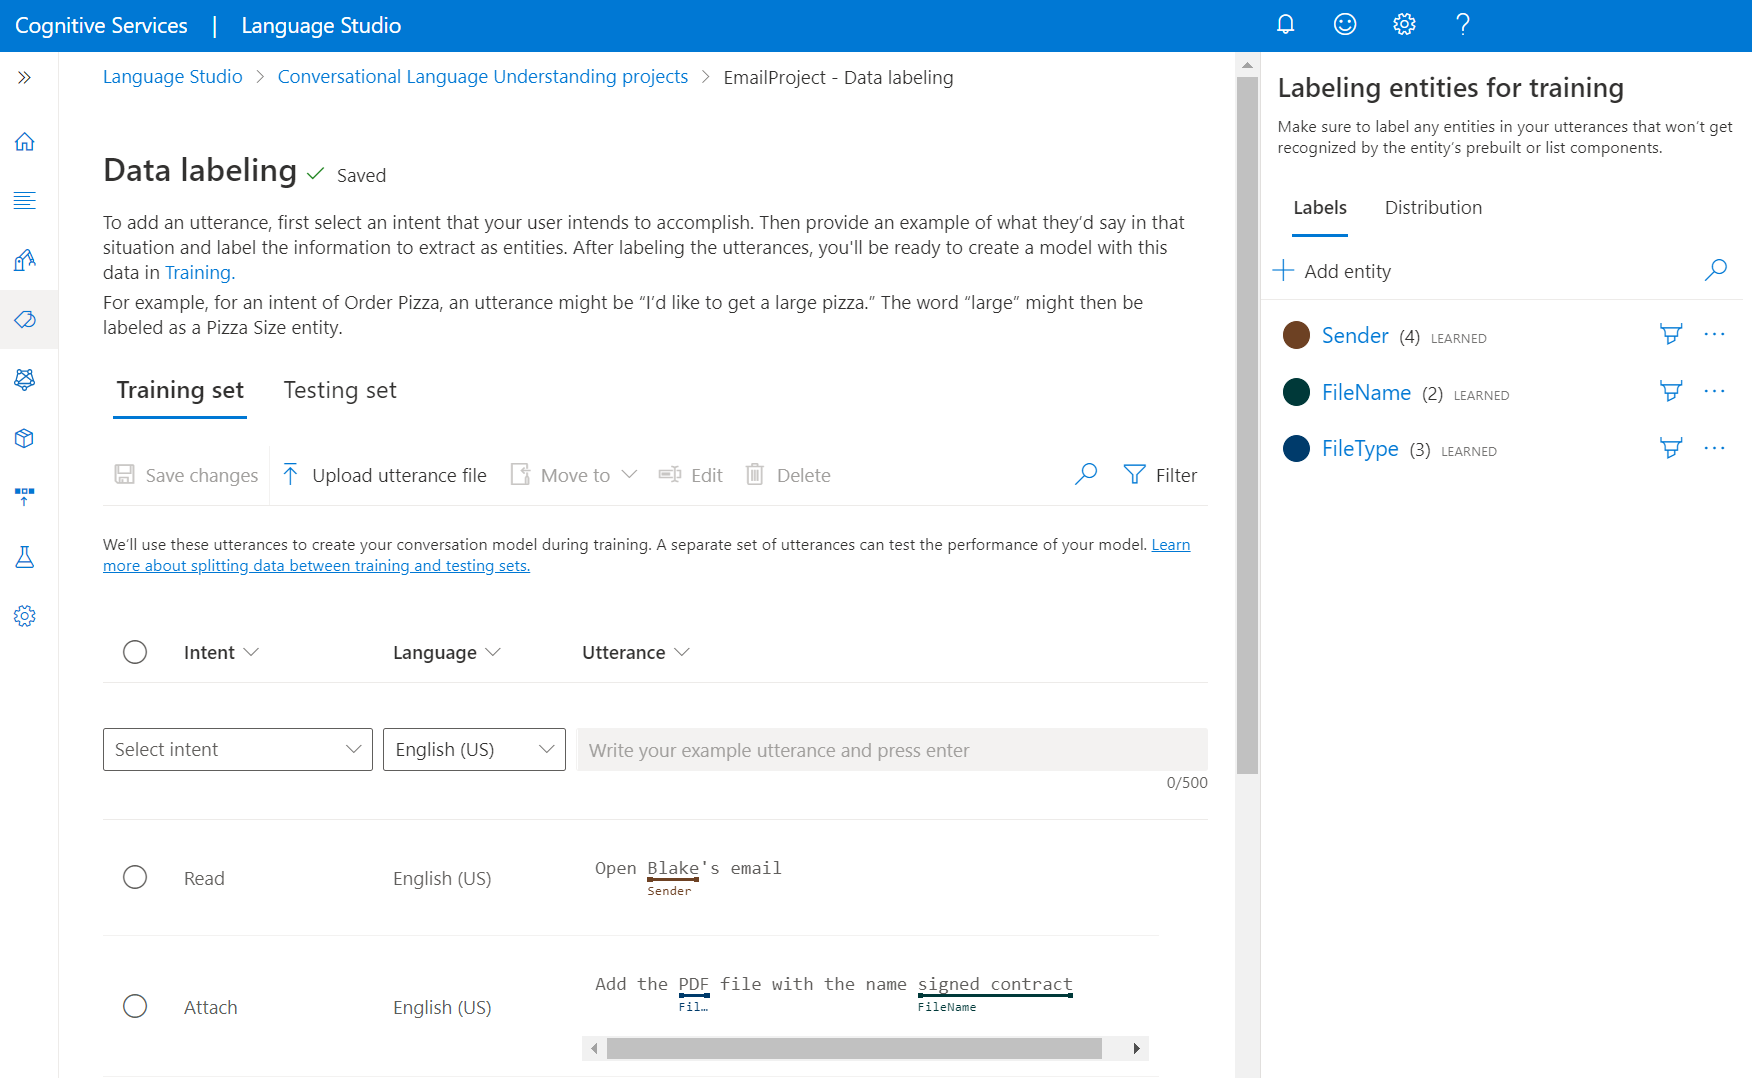
From the Select intent dropdown menu, select one of the intents, the language of the utterance (for multilingual projects), and the utterance itself. Press the Enter key in the utterance's text box and add the utterance.
You have two options to label entities in an utterance:
Option Description Label by using a brush Select the brush icon next to an entity in the pane on the right, and then highlight the text in the utterance that you want to label. Label by using inline menu Highlight the word that you want to label as an entity, and a menu appears. Select the entity that you want to label these words with. In the pane on the right, on the Labels tab, you can find all the entity types in your project and the count of labeled instances per each one.
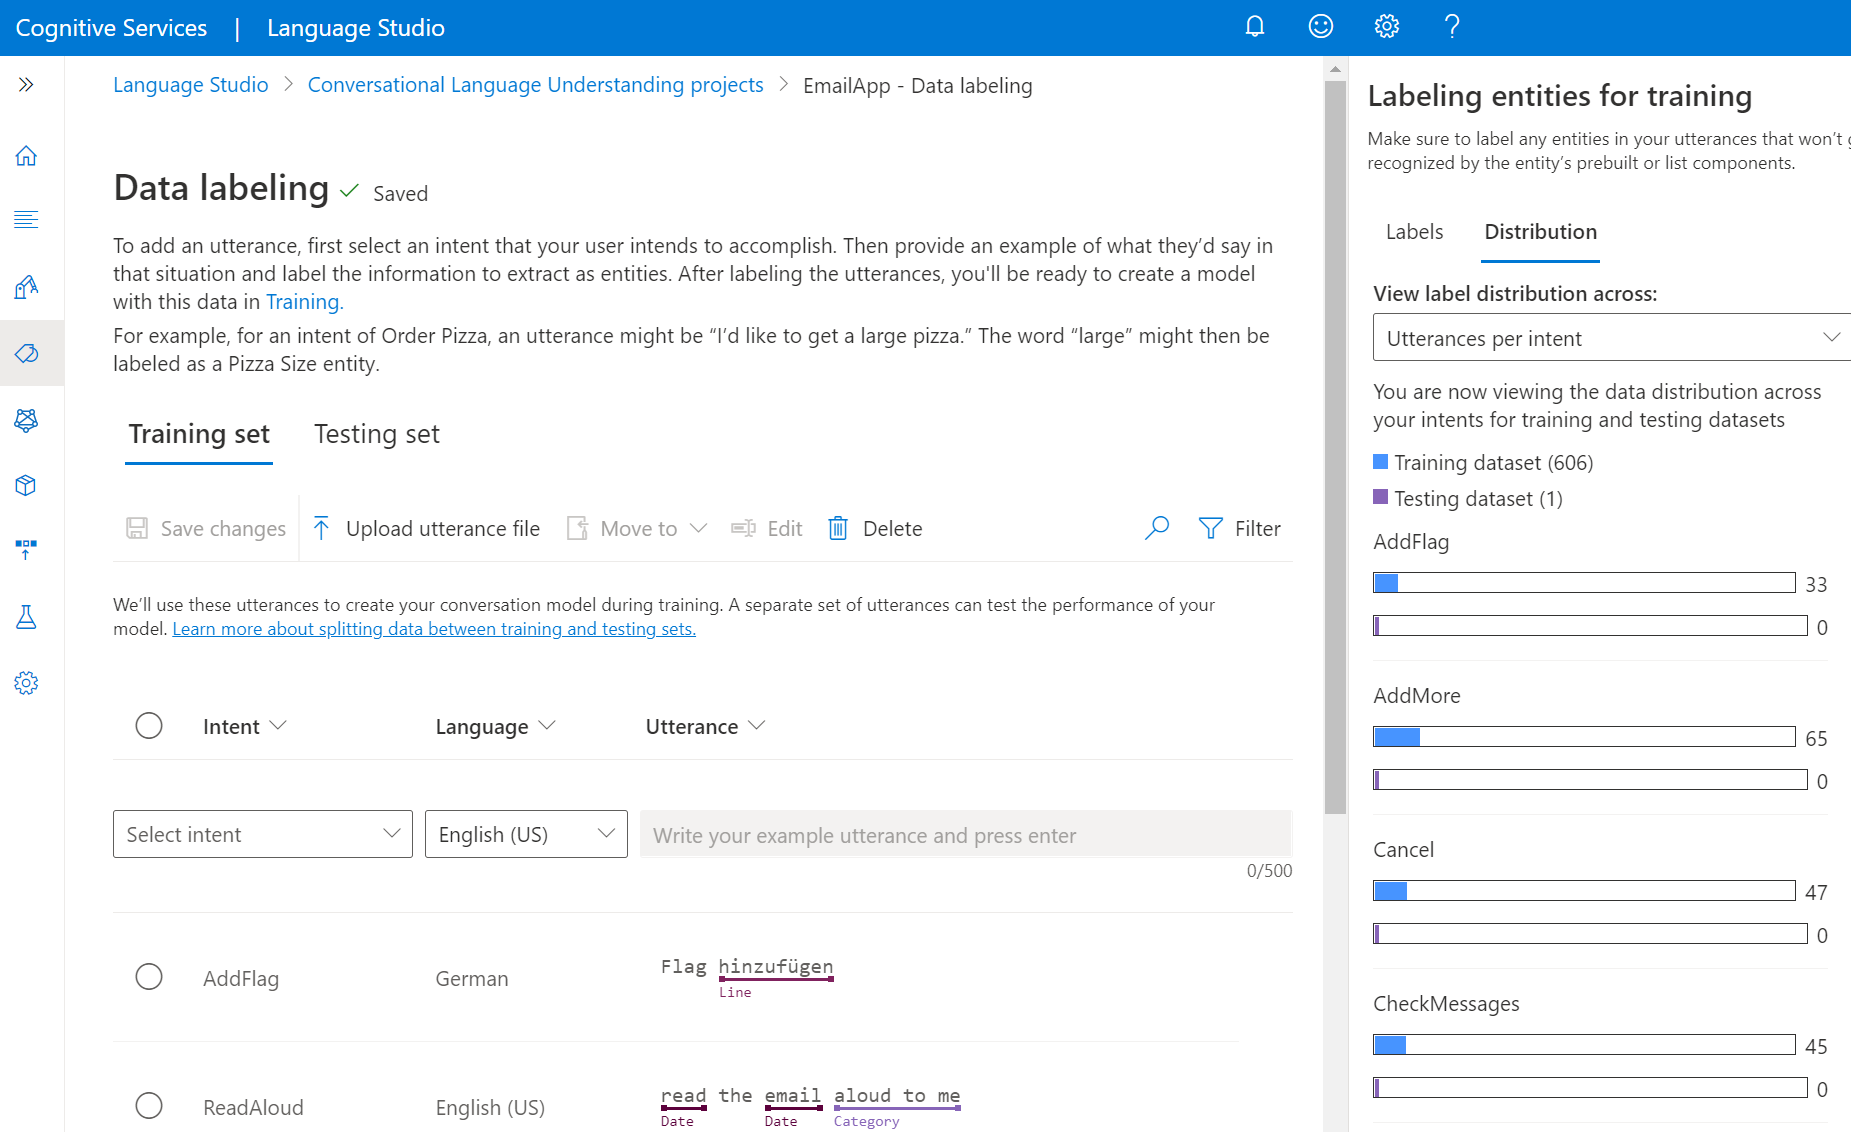
On the Distribution tab, you can view the distribution across training and testing sets. You have these options for viewing:
- Total instances per labeled entity: You can view the count of all labeled instances of a specific entity.
- Unique utterances per labeled entity: Each utterance is counted if it contains at least one labeled instance of this entity.
- Utterances per intent: You can view the count of utterances per intent.


Note
List, regex, and prebuilt components aren't shown on the data labeling page. All labels here apply to the learned component only.
To remove a label:
- From within your utterance, select the entity from which you want to remove a label.
- Scroll through the menu that appears, and select Remove label.
To delete an entity:
- Select the garbage bin icon next to the entity that you want to edit in the pane on the right.
- Select Delete to confirm.