Note
Access to this page requires authorization. You can try signing in or changing directories.
Access to this page requires authorization. You can try changing directories.
After the deployment is added successfully, you can query the deployment for intent and entities predictions from your utterance based on the model you assigned to the deployment. You can query the deployment programmatically Prediction API or through the Client libraries (Azure SDK).
Test deployed model
First you need to get your resource key and endpoint:
Go to your resource overview page in the Azure portal. From the menu on the left side, select Keys and Endpoint. You will use the endpoint and key for API requests.

Query your model
Create a POST request using the following URL, headers, and JSON body to start testing an orchestration workflow model.
Request URL
{ENDPOINT}/language/:analyze-conversations?api-version={API-VERSION}
| Placeholder | Value | Example |
|---|---|---|
{ENDPOINT} |
The endpoint for authenticating your API request. | https://<your-custom-subdomain>.cognitiveservices.azure.cn |
{API-VERSION} |
The version of the API you're calling. | 2023-04-01 |
Headers
Use the following header to authenticate your request.
| Key | Value |
|---|---|
Ocp-Apim-Subscription-Key |
The key to your resource. Used for authenticating your API requests. |
Request Body
{
  "kind": "Conversation",
  "analysisInput": {
    "conversationItem": {
      "text": "Text1",
      "participantId": "1",
      "id": "1"
    }
  },
  "parameters": {
    "projectName": "{PROJECT-NAME}",
    "deploymentName": "{DEPLOYMENT-NAME}",
    "directTarget": "qnaProject",
    "targetProjectParameters": {
      "qnaProject": {
        "targetProjectKind": "QuestionAnswering",
        "callingOptions": {
          "context": {
            "previousUserQuery": "Meet Surface Pro 4",
            "previousQnaId": 4
          },
          "top": 1,
          "question": "App Service overview"
        }
      }
    }
  }
}
Response Body
Once you send the request, you get the following response for the prediction!
{
  "kind": "ConversationResult",
  "result": {
    "query": "App Service overview",
    "prediction": {
      "projectKind": "Orchestration",
      "topIntent": "qnaTargetApp",
      "intents": {
        "qnaTargetApp": {
          "targetProjectKind": "QuestionAnswering",
          "confidenceScore": 1,
          "result": {
            "answers": [
              {
                "questions": [
                  "App Service overview"
                ],
                "answer": "The compute resources you use are determined by the *App Service plan* that you run your apps on.",
                "confidenceScore": 0.7384000000000001,
                "id": 1,
                "source": "https://learn.microsoft.com/azure/app-service/overview",
                "metadata": {},
                "dialog": {
                  "isContextOnly": false,
                  "prompts": []
                }
              }
            ]
          }
        }
      }
    }
  }
}
First you need to get your resource key and endpoint:
Go to your resource overview page in the Azure portal. From the menu on the left side, select Keys and Endpoint. You will use the endpoint and key for API requests.
Use the client libraries (Azure SDK)
You can also use the client libraries provided by the Azure SDK to send requests to your model.
Note
The client library for conversational language understanding is only available for:
- .NET
- Python
Go to your resource overview page in the Azure portal
From the menu on the left side, select Keys and Endpoint. Use endpoint for the API requests and you will need the key for
Ocp-Apim-Subscription-Keyheader.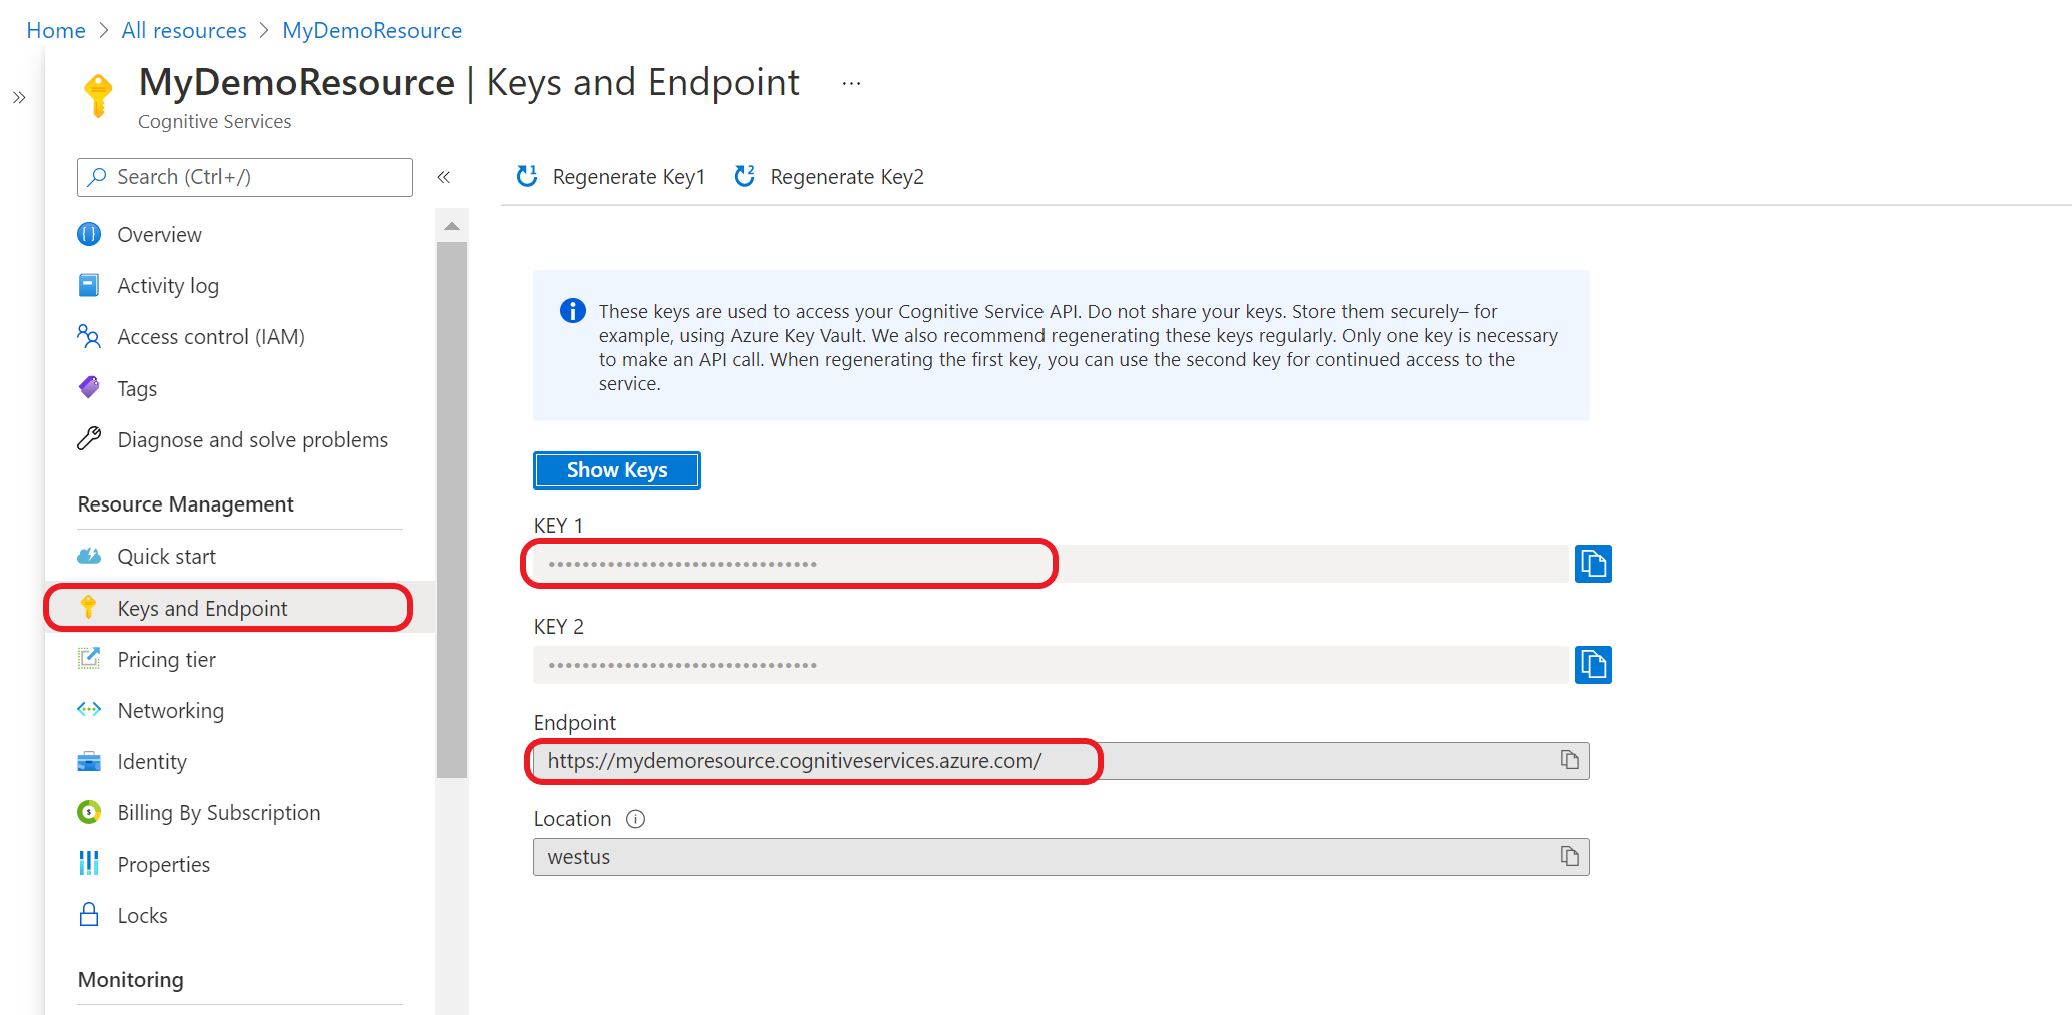
Download and install the client library package for your language of choice:
Language Package version .NET 1.0.0 Python 1.0.0 After you've installed the client library, use the following samples on GitHub to start calling the API.
See the following reference documentation for more information: