Note
Access to this page requires authorization. You can try signing in or changing directories.
Access to this page requires authorization. You can try changing directories.
Important
Starting July 28, 2025, changes to App Service Managed Certificates (ASMC) will impact how certificates are issued and renewed in certain scenarios. While most customers don’t need to take action, we recommend reviewing our ASMC detailed blog post for more information.
When you use Azure Traffic Manager to load balance traffic to Azure App Service, the App Service app can be accessed using <traffic-manager-endpoint>.trafficmanager.cn. You can assign a custom domain name, such as www.contoso.com, with your App Service app in order to provide a more recognizable domain name for your users.
This article shows you how to configure a custom domain name with an App Service app that's integrated with Traffic Manager.
Note
Only CNAME records are supported when you configure a domain name using the Traffic Manager endpoint. Because A records are not supported, a root domain mapping, such as contoso.com is also not supported.
Prepare the app
To map a custom DNS name to an app that's integrated with Azure Traffic Manager, the web app's App Service plan must be in Standard tier or higher. In this step, you make sure that the App Service app is in the supported pricing tier.
Check the pricing tier
To check the pricing tier:
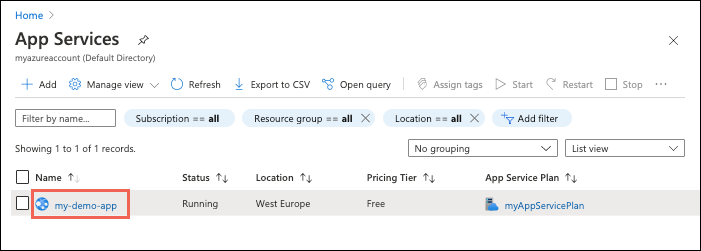
In the Azure portal, search for and select App Services.
On the App Services page, select the name of your Azure app.
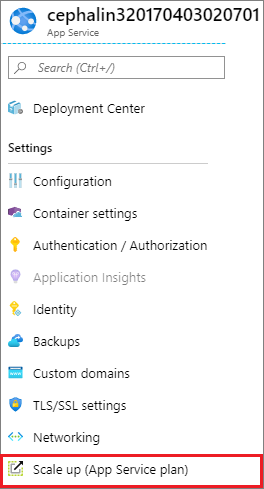
In the left navigation of the app page, select Scale up (App Service plan).
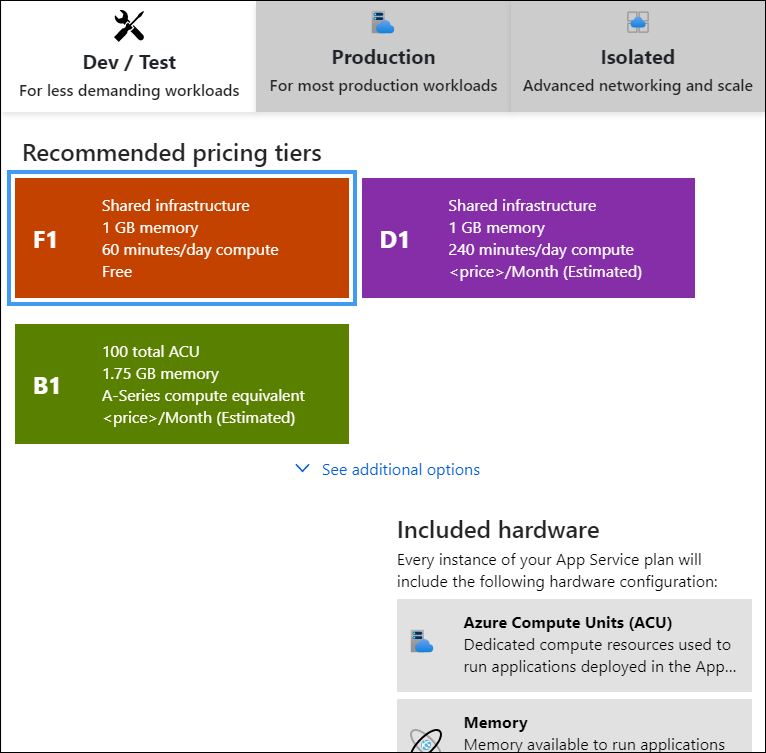
The app's current tier is highlighted by a blue border. Check to make sure that the app is in Standard tier or above (any tier in the Production or Isolated category). If yes, close the Scale up page and skip to Create the CNAME mapping.
Scale up the App Service plan
If you need to scale up your app:
Select any of the pricing tiers in the Production category. For additional options, click See additional options.
Click Apply.
Create Traffic Manager endpoint
Following the steps at Add or Delete Endpoints, add your App Service app as an endpoint in your Traffic Manager profile.
Once your App Service app is in a supported pricing tier, it shows up in the list of available App Service targets when you add the endpoint. If your app isn't listed, verify the pricing tier of your app.
Create the CNAME mapping
Sign in to the website of your domain provider.
You can use Azure DNS to manage DNS records for your domain and configure a custom DNS name for Azure App Service. For more information, see Tutorial: Host your domain in Azure DNS.
Find the page for managing DNS records.
Every domain provider has its own DNS records interface, so consult the provider's documentation. Look for areas of the site labeled Domain Name, DNS, or Name Server Management.
Often, you can find the DNS records page by viewing your account information and then looking for a link like My domains. Go to that page, and then look for a link that's named something like Zone file, DNS Records, or Advanced configuration.
The following screenshot is an example of a DNS records page:
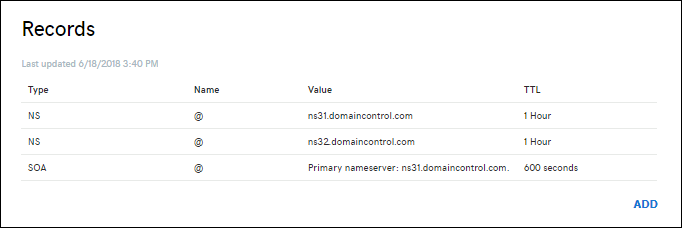
To create a record, select Add or select the appropriate widget.
Note
For certain providers, such as GoDaddy, changes to DNS records don't become effective until you select a separate Save Changes link.
While the specifics of each domain provider vary, you map from a non-root custom domain name (such as www.contoso.com) to the Traffic Manager domain name (contoso.trafficmanager.cn) that's integrated with your app.
Note
If a record is already in use and you need to preemptively bind your apps to it, you can create an additional CNAME record. For example, to preemptively bind www.contoso.com to your app, create a CNAME record from awverify.www to contoso.trafficmanager.cn. You can then add "www.contoso.com" to your app without the need to change the "www" CNAME record. For more information, see Migrate an active DNS name to Azure App Service.
Once you have finished adding or modifying DNS records at your domain provider, save the changes.
What about root domains?
Since Traffic Manager only supports custom domain mapping with CNAME records, and because DNS standards don't support CNAME records for mapping root domains (for example, contoso.com), Traffic Manager doesn't support mapping to root domains. To work around this issue, use a URL redirect from at the app level. In ASP.NET Core, for example, you can use URL Rewriting. Then, use Traffic Manager to load balance the subdomain (www.contoso.com). Another approach is you can create an alias record for your domain name apex to reference an Azure Traffic Manager profile. An example is contoso.com. Instead of using a redirecting service, you can configure Azure DNS to reference a Traffic Manager profile directly from your zone.
For high availability scenarios, you can implement a load-balancing DNS setup without Traffic Manager by creating multiple A records that point from the root domain to each app copy's IP address. Then, map the same root domain to all the app copies. Since the same domain name cannot be mapped to two different apps in the same region, this setup only works when your app copies are in different regions.
Enable custom domain
After the records for your domain name have propagated, use the browser to verify that your custom domain name resolves to your App Service app.
Note
It can take some time for your CNAME to propagate through the DNS system. You can use a service such as https://www.digwebinterface.com/ to verify that the CNAME is available.
Once domain resolution succeeds, to back to your app page in the Azure portal
From the left navigation, select Custom domains > Add hostname.
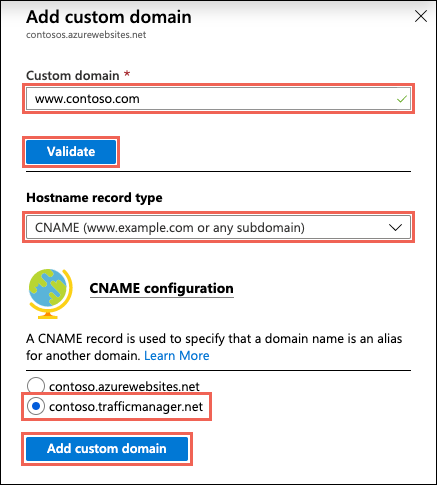
Type the custom domain name that you mapped earlier and select Validate.
Make sure that Hostname record type is set to CNAME (www.example.cn or any subdomain).
Since the App Service app is now integrated with a Traffic Manager endpoint, you should see the Traffic Manager domain name under CNAME configuration. Select it and click Add custom domain.
