Note
Access to this page requires authorization. You can try signing in or changing directories.
Access to this page requires authorization. You can try changing directories.
Overview
Web application firewalls (WAF) help secure your web applications by inspecting inbound web traffic to block SQL injections, Cross-Site Scripting, malware uploads & application DDoS and other attacks. They also inspect the responses from the back-end web servers for Data Loss Prevention (DLP). Combined with the isolation and additional scaling provided by App Service Environments, this provides an ideal environment to host business critical web applications that need to withstand malicious requests and high volume traffic. Azure provides a WAF capability with the Application Gateway. To see how to integrate your App Service Environment with an Application Gateway read the Integrate your ILB ASE with an Application Gateway document.
In addition to the Azure Application Gateway, there are multiple marketplace options like the Barracuda WAF for Azure that are available on the Azure Marketplace. The rest of this document focuses on how to integrate your App Service Environment with a Barracuda WAF device.
Note
Although this article refers to web apps, it also applies to API apps and mobile apps.
Setup
For this document, we configure the App Service Environment behind multiple load balanced instances of Barracuda WAF so that only traffic from the WAF can reach the App Service Environment and it is not accessible from the DMZ. We also have Azure Traffic Manager in front of the Barracuda WAF instances to load balance across Azure data centers and regions. A high-level diagram of the setup would look like the following image:
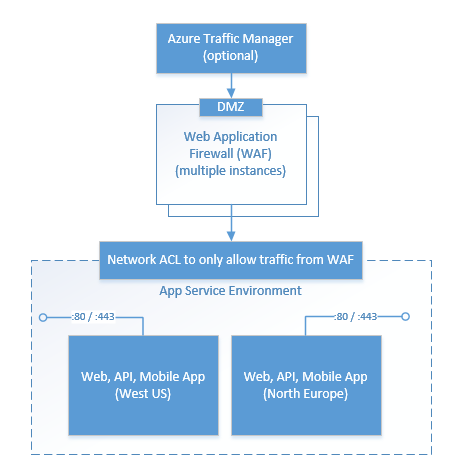
Note
With the introduction of ILB support for App Service Environment, you can configure the ASE to be inaccessible from the DMZ and only be available to the private network.
Configuring your App Service Environment
To configure an App Service Environment, refer to our documentation on the subject. Once you have an App Service Environment created, you can create Web Apps, API Apps, and Mobile Apps in this environment that will all be protected behind the WAF we configure in the next section.
Configuring your Barracuda WAF Cloud Service
Barracuda has a detailed article on deploying its WAF on a virtual machine in Azure. But because we want redundancy and not introduce a single point of failure, you want to deploy at least two WAF instance VMs into the same Cloud Service when following these instructions.
Adding Endpoints to Cloud Service
Once you have 2 or more WAF VM instances in your Cloud Service, you can use the Azure portal to add HTTP and HTTPS endpoints that are used by your application as shown in the following image:
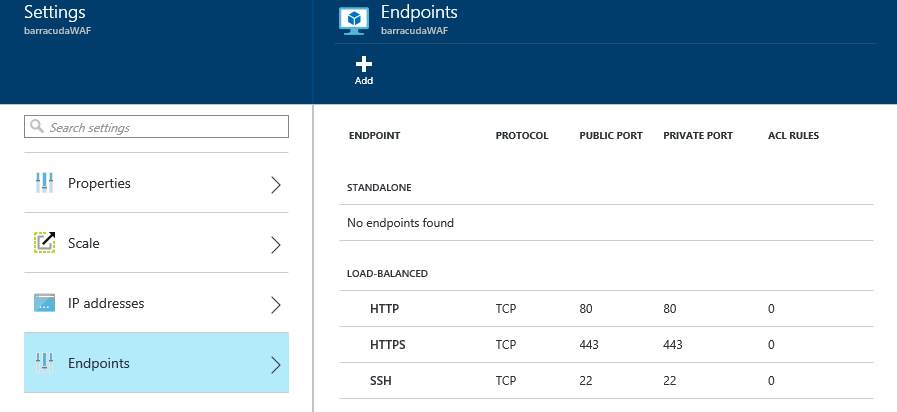
If your applications use other endpoints, make sure to add them to this list as well.
Configuring Barracuda WAF through its Management Portal
Barracuda WAF uses TCP Port 8000 for configuration through its management portal. If you have multiple instances of the WAF VMs, you need to repeat the steps here for each VM instance.
Note
Once you are done with WAF configuration, remove the TCP/8000 endpoint from all your WAF VMs to keep your WAF secure.
Add the management endpoint as shown in the following image to configure your Barracuda WAF.

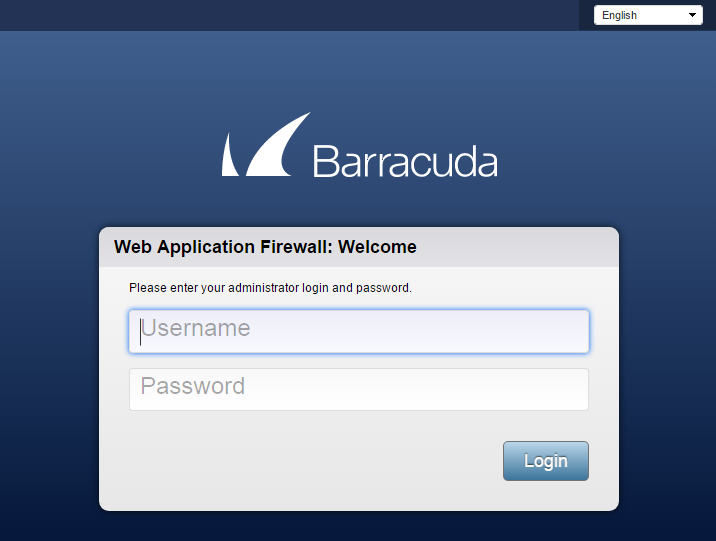
Use a browser to browse to the management endpoint on your Cloud Service. If your Cloud Service is called test.chinacloudapp.cn, you would access this endpoint by browsing to http://test.chinacloudapp.cn:8000. You should see a login page like the following image that you can log in using credentials you specified in the WAF VM setup phase.
Once you log in, you should see a dashboard like the one in the following image that presents basic statistics about the WAF protection.

Clicking on the Services tab lets you configure your WAF for services it is protecting. For more details on configuring your Barracuda WAF, see their documentation. In the following example, an App Service app serving traffic on HTTP and HTTPS has been configured.
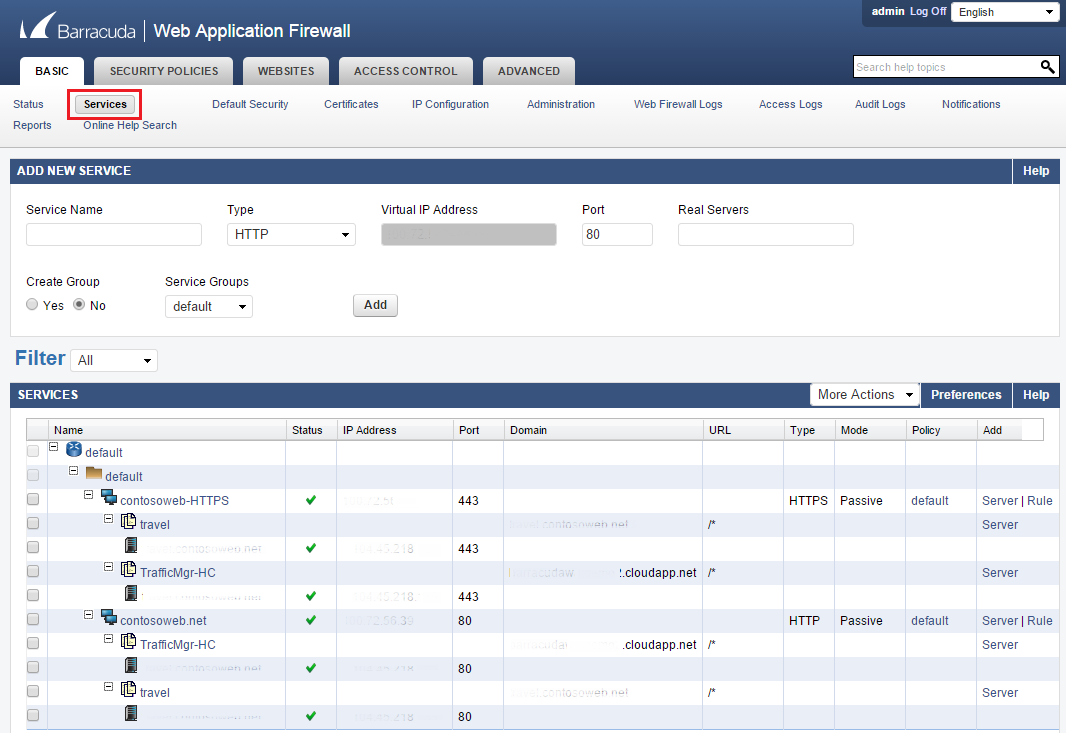
Note
Depending on how your applications are configured and what features are being used in your App Service Environment, you need to forward traffic for TCP ports other than 80 and 443, for example, if you have IP TLS setup for an App Service app.
Configuring Azure Traffic Manager (OPTIONAL)
If your application is available in multiple regions, then you would want to load balance them behind Azure Traffic Manager. To do so, you can add an endpoint in the Azure portal using the Cloud Service name for your WAF in the Traffic Manager profile as shown in the following image.
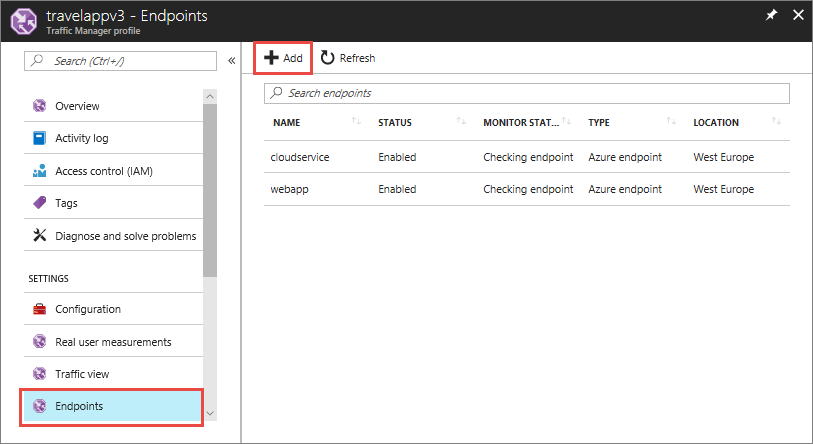
If your application requires authentication, ensure you have some resource that doesn't require any authentication for Traffic Manager to ping for the availability of your application. You can configure the URL on the Configuration page in the Azure portal as shown in the following image:

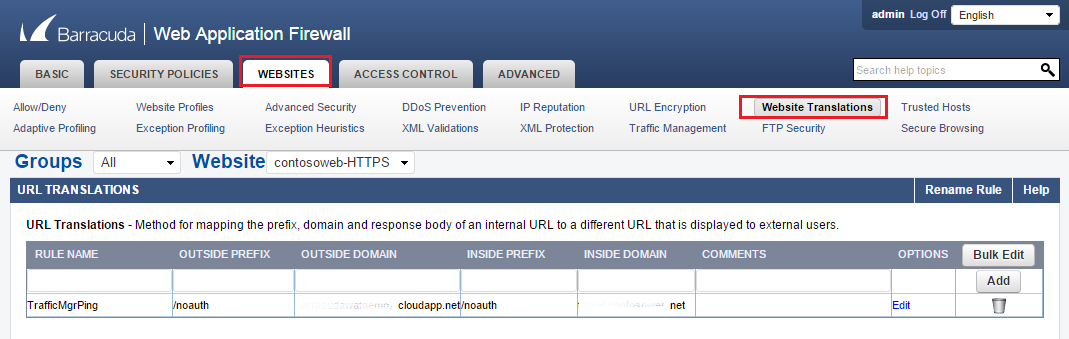
To forward the Traffic Manager pings from your WAF to your application, you need to set up Website Translations on your Barracuda WAF to forward traffic to your application as shown in the following example:
Securing Traffic to App Service Environment Using Network Security Groups (NSG)
Here's a sample Powershell command for performing this task for TCP port 80.
Get-AzureNetworkSecurityGroup -Name "RestrictChinaEastAppAccess" | Set-AzureNetworkSecurityRule -Name "ALLOW HTTP Barracuda" -Type Inbound -Priority 201 -Action Allow -SourceAddressPrefix '191.0.0.1' -SourcePortRange '*' -DestinationAddressPrefix '*' -DestinationPortRange '80' -Protocol TCP
Replace the SourceAddressPrefix with the Virtual IP Address (VIP) of your WAF's Cloud Service.
Note
The VIP of your Cloud Service changes when you delete and re-create the Cloud Service. Make sure to update the IP address in the Network Resource group once you do so.