Note
Access to this page requires authorization. You can try signing in or changing directories.
Access to this page requires authorization. You can try changing directories.
Azure App Service provides a highly scalable, self-patching web hosting service. This tutorial shows how to create a Ruby app and connect it to a PostgreSQL database. When you're finished, you'll have a Ruby on Rails app running on App Service on Linux.
In this tutorial, you learn how to:
- Create a PostgreSQL database in Azure
- Connect a Ruby on Rails app to PostgreSQL
- Deploy the app to Azure
- Update the data model and redeploy the app
- Stream diagnostic logs from Azure
- Manage the app in the Azure portal
If you don't have an Azure subscription, create a trial account before you begin.
Prerequisites
To complete this tutorial:
You can use the local Azure CLI.
If you prefer, install the Azure CLI to run CLI reference commands.
Local Azure CLI, see how to install the Azure CLI. If you're running on Windows or macOS, consider running Azure CLI in a Docker container. For more information, see How to run the Azure CLI in a Docker container.
Sign in to the Azure CLI by using the az login command. To finish the authentication process, follow the steps displayed in your terminal. For other sign-in options, see Sign in with the Azure CLI.
When you're prompted, install the Azure CLI extension on first use. For more information about extensions, see Use extensions with the Azure CLI.
Run az version to find the version and dependent libraries that are installed. To upgrade to the latest version, run az upgrade.
Prepare local Postgres
In this step, you create a database in your local Postgres server for your use in this tutorial.
Connect to local Postgres server
Open the terminal window and run
psqlto connect to your local Postgres server.sudo -u postgres psqlIf your connection is successful, your Postgres database is running. If not, make sure that your local Postgres database is started by following the steps at Downloads - PostgreSQL Core Distribution.
Type
\qto exit the Postgres client.Create a Postgres user that can create databases by running the following command, using your signed-in Linux username.
sudo -u postgres createuser -d <signed-in-user>
Create a Ruby on Rails app locally
In this step, you get a Ruby on Rails sample application, configure its database connection, and run it locally.
Clone the sample
In the terminal window,
cdto a working directory.Clone the sample repository and change to the repository root.
git clone https://github.com/Azure-Samples/rubyrails-tasks.git
cd rubyrails-tasks
Make sure the default branch is
main.git branch -m mainTip
The branch name change isn't required by App Service. However, since many repositories are changing their default branch to
main, this tutorial also shows you how to deploy a repository frommain. For more information, see Change deployment branch.Install the required packages.
bundle install --path vendor/bundle
Run the sample locally
Run the Rails migrations to create the tables the application needs. To see which tables are created in the migrations, look in the db/migrate directory in the Git repository.
rake db:create
rake db:migrate
Run the application.
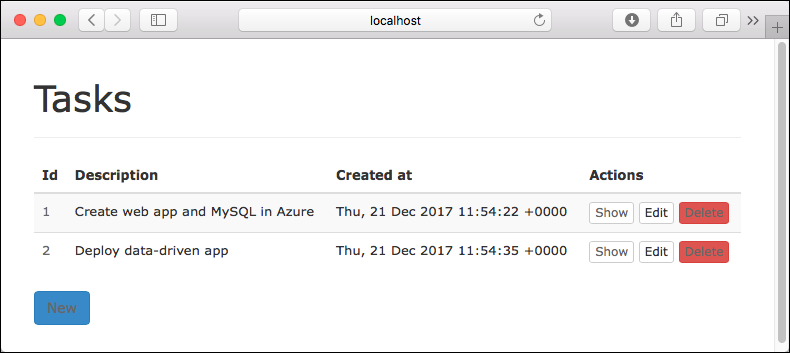
rails serverNavigate to
http://localhost:3000in a browser. Add a few tasks in the page.
To stop the Rails server, type
Ctrl + Cin the terminal.
Create Postgres in Azure
In this step, you create a Postgres database in Azure Database for PostgreSQL. Later, you configure the Ruby on Rails application to connect to this database.
Create a resource group
A resource group is a logical container into which Azure resources, such as web apps, databases, and storage accounts, are deployed and managed. For example, you can choose to delete the entire resource group in one simple step later.
In the Azure CLI, create a resource group with the az group create command. The following example creates a resource group named myResourceGroup in the China East 2 location. To see all supported locations for App Service on Linux in Basic tier, run the az appservice list-locations --sku B1 --linux-workers-enabled command.
az group create --name myResourceGroup --location "China North"
You generally create your resource group and the resources in a region near you.
When the command finishes, a JSON output shows you the resource group properties.
Create Postgres database in Azure
Install the
db-upextension with the following command:az extension add --name db-upCreate the Postgres database in Azure with the
az postgres upcommand, as shown in the following example. Replace <postgresql-name> with a unique name (the server endpoint is https://<postgresql-name>.postgres.database.azure.cn). For <admin-username> and <admin-password>, specify credentials to create an administrator user for this Postgres server.az postgres up --resource-group myResourceGroup --location chinanorth --server-name <postgresql-name> --database-name sampledb --admin-user <admin-username> --admin-password <admin-password> --ssl-enforcement EnabledThis command may take a while because it's doing the following:
- Creates a resource group called
myResourceGroup, if it doesn't exist. Every Azure resource needs to be in one of these.--resource-groupis optional. - Creates a Postgres server with the administrative user.
- Creates a
sampledbdatabase. - Allows access from your local IP address.
- Allows access from Azure services.
- Create a database user with access to the
sampledbdatabase.
You can do all the steps separately with other
az postgrescommands andpsql, butaz postgres updoes all of them in one step for you.When the command finishes, find the output lines that being with
Ran Database Query:. They show the database user that's created for you, with the usernamerootand passwordSampledb1. You'll use them later to connect your app to the database.Tip
--location <location-name>, can be set to any one of the Azure regions. You can get the regions available to your subscription with theaz account list-locationscommand. For production apps, put your database and your app in the same location.- Creates a resource group called
Connect app to Azure Postgres
In this step, you connect the Ruby on Rails application to the Postgres database you created in Azure Database for PostgreSQL.
Configure the database connection
In the repository, open config/database.yml. At the bottom of the file, replace the production variables with the following code.
production:
  <<: *default
  host: <%= ENV['DB_HOST'] %>
  database: <%= ENV['DB_DATABASE'] %>
  username: <%= ENV['DB_USERNAME'] %>
  password: <%= ENV['DB_PASSWORD'] %>
Save the changes.
Test the application locally
Back in the local terminal, set the following environment variables:
export DB_HOST=<postgres-server-name>.postgres.database.azure.cn
export DB_DATABASE=sampledb
export DB_USERNAME=root@<postgres-server-name>
export DB_PASSWORD=Sampledb1
Run Rails database migrations with the production values you just configured to create the tables in your Postgres database in Azure Database for PostgreSQL.
rake db:migrate RAILS_ENV=productionWhen running in the production environment, the Rails application needs precompiled assets. Generate the required assets with the following command:
rake assets:precompileThe Rails production environment also uses secrets to manage security. Generate a secret key.
rails secretSave the secret key to the respective variables used by the Rails production environment. For convenience, you use the same key for both variables.
export RAILS_MASTER_KEY=<output-of-rails-secret>
export SECRET_KEY_BASE=<output-of-rails-secret>
Enable the Rails production environment to serve JavaScript and CSS files.
export RAILS_SERVE_STATIC_FILES=trueRun the sample application in the production environment.
rails server -e productionNavigate to
http://localhost:3000. If the page loads without errors, the Ruby on Rails application is connecting to the Postgres database in Azure.Add a few tasks in the page.
To stop the Rails server, type
Ctrl + Cin the terminal.
Commit your changes
Run the following Git commands to commit your changes:
git add .
git commit -m "database.yml updates"
Your app is ready to be deployed.
Deploy to Azure
In this step, you deploy the Postgres-connected Rails application to Azure App Service.
Configure a deployment user
FTP and local Git can deploy to an Azure web app by using a deployment user. Once you configure your deployment user, you can use it for all your Azure deployments. Your account-level deployment username and password are different from your Azure subscription credentials.
To configure the deployment user, run the az webapp deployment user set command in Azure CLI. Replace <username> and <password> with a deployment user username and password.
- The username must be unique within Azure, and for local Git pushes, must not contain the ‘@’ symbol.
- The password must be at least eight characters long, with two of the following three elements: letters, numbers, and symbols.
az webapp deployment user set --user-name <username> --password <password>
The JSON output shows the password as null. If you get a 'Conflict'. Details: 409 error, change the username. If you get a 'Bad Request'. Details: 400 error, use a stronger password.
Record your username and password to use to deploy your web apps.
Create an App Service plan
In the Azure CLI, create an App Service plan with the az appservice plan create command.
The following example creates an App Service plan named myAppServicePlan in the Free pricing tier:
az appservice plan create --name myAppServicePlan --resource-group myResourceGroup --sku FREE --is-linux
When the App Service plan has been created, the Azure CLI shows information similar to the following example:
{
  "freeOfferExpirationTime": null,
  "geoRegion": "China North",
  "hostingEnvironmentProfile": null,
  "id": "/subscriptions/0000-0000/resourceGroups/myResourceGroup/providers/Microsoft.Web/serverfarms/myAppServicePlan",
  "kind": "linux",
  "location": "China North",
  "maximumNumberOfWorkers": 1,
  "name": "myAppServicePlan",
  < JSON data removed for brevity. >
  "targetWorkerSizeId": 0,
  "type": "Microsoft.Web/serverfarms",
  "workerTierName": null
}
Create a web app
Create a web app in the myAppServicePlan App Service plan.
In the Azure CLI, you can use the az webapp create command. In the following example, replace <app-name> with a globally unique app name (valid characters are a-z, 0-9, and -). The runtime is set to RUBY|2.6.2. To see all supported runtimes, run az webapp list-runtimes --linux.
az webapp create --resource-group myResourceGroup --plan myAppServicePlan --name <app-name> --runtime 'RUBY:2.6' --deployment-local-git
When the web app has been created, the Azure CLI shows output similar to the following example:
Local git is configured with url of 'https://<username>@<app-name>.scm.chinacloudsites.cn/<app-name>.git'
{
  "availabilityState": "Normal",
  "clientAffinityEnabled": true,
  "clientCertEnabled": false,
  "cloningInfo": null,
  "containerSize": 0,
  "dailyMemoryTimeQuota": 0,
  "defaultHostName": "<app-name>.chinacloudsites.cn",
  "deploymentLocalGitUrl": "https://<username>@<app-name>.scm.chinacloudsites.cn/<app-name>.git",
  "enabled": true,
  < JSON data removed for brevity. >
}
You've created an empty new web app, with git deployment enabled.
Note
The URL of the Git remote is shown in the deploymentLocalGitUrl property, with the format https://<username>@<app-name>.scm.chinacloudsites.cn/<app-name>.git. Save this URL as you need it later.
Configure database settings
In App Service, you set environment variables as app settings by using the az webapp config appsettings set command in the Azure CLI.
The following Azure CLI command configures the app settings DB_HOST, DB_DATABASE, DB_USERNAME, and DB_PASSWORD. Replace the placeholders <appname> and <postgres-server-name>.
az webapp config appsettings set --name <app-name> --resource-group myResourceGroup --settings DB_HOST="<postgres-server-name>.postgres.database.azure.cn" DB_DATABASE="sampledb" DB_USERNAME="root@<postgres-server-name>" DB_PASSWORD="Sampledb1"
Configure Rails environment variables
In the local terminal, generate a new secret for the Rails production environment in Azure.
rails secretIn the following Azure CLI command, replace the two <output-of-rails-secret> placeholders with the new secret key you generated in the local terminal.
az webapp config appsettings set --name <app-name> --resource-group myResourceGroup --settings RAILS_MASTER_KEY="<output-of-rails-secret>" SECRET_KEY_BASE="<output-of-rails-secret>" RAILS_SERVE_STATIC_FILES="true" ASSETS_PRECOMPILE="true"ASSETS_PRECOMPILE="true"tells the default Ruby container to precompile assets at each Git deployment. For more information, see Precompile assets and Serve static assets.
Push to Azure from Git
Since you're deploying the
mainbranch, you need to set the default deployment branch for your App Service app tomain(see Change deployment branch). In the local Shell, set theDEPLOYMENT_BRANCHapp setting with theaz webapp config appsettings setcommand.az webapp config appsettings set --name <app-name> --resource-group myResourceGroup --settings DEPLOYMENT_BRANCH='main'In the local terminal, add an Azure remote to your local Git repository.
git remote add azure <paste-copied-url-here>Push to the Azure remote to deploy the Ruby on Rails application. You are prompted for the password you supplied earlier as part of the creation of the deployment user.
git push azure mainDuring deployment, Azure App Service communicates its progress with Git.
 Counting objects: 3, done.
 Delta compression using up to 8 threads.
 Compressing objects: 100% (3/3), done.
 Writing objects: 100% (3/3), 291 bytes | 0 bytes/s, done.
 Total 3 (delta 2), reused 0 (delta 0)
 remote: Updating branch 'main'.
 remote: Updating submodules.
 remote: Preparing deployment for commit id 'a5e076db9c'.
 remote: Running custom deployment command...
 remote: Running deployment command...
 ...
 < Output has been truncated for readability >
Browse to the Azure app
Browse to http://<app-name>.chinacloudsites.cn and add a few tasks to the list.
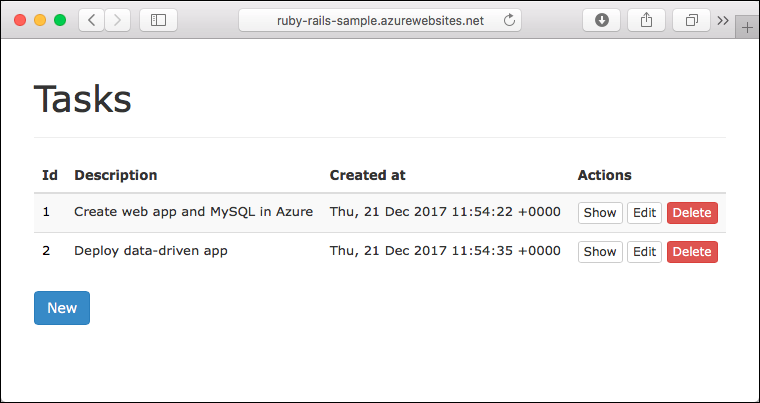
Congratulations, you're running a data-driven Ruby on Rails app in Azure App Service.
Update model locally and redeploy
In this step, you make a simple change to the task data model and the webapp, and then publish the update to Azure.
For the tasks scenario, you modify the application so that you can mark a task as complete.
Add a column
In the terminal, navigate to the root of the Git repository.
Generate a new migration that adds a boolean column called
Doneto theTaskstable:rails generate migration AddDoneToTasks Done:booleanThis command generates a new migration file in the db/migrate directory.
In the terminal, run Rails database migrations to make the change in the local database.
rake db:migrate
Update application logic
Open the app/controllers/tasks_controller.rb file. At the end of the file, find the following line:
params.require(:task).permit(:Description)Modify this line to include the new
Doneparameter.params.require(:task).permit(:Description, :Done)
Update the views
Open the app/views/tasks/_form.html.erb file, which is the Edit form.
Find the line
<%=f.error_span(:Description) %>and insert the following code directly below it:<%= f.label :Done, :class => 'control-label col-lg-2' %> <div class="col-lg-10"> <%= f.check_box :Done, :class => 'form-control' %> </div>Open the app/views/tasks/show.html.erb file, which is the single-record View page.
Find the line
<dd><%= @task.Description %></dd>and insert the following code directly below it:<dt><strong><%= model_class.human_attribute_name(:Done) %>:</strong></dt> <dd><%= check_box "task", "Done", {:checked => @task.Done, :disabled => true}%></dd>Open the app/views/tasks/index.html.erb file, which is the Index page for all records.
Find the line
<th><%= model_class.human_attribute_name(:Description) %></th>and insert the following code directly below it:<th><%= model_class.human_attribute_name(:Done) %></th>In the same file, find the line
<td><%= task.Description %></td>and insert the following code directly below it:<td><%= check_box "task", "Done", {:checked => task.Done, :disabled => true} %></td>
Test the changes locally
In the local terminal, run the Rails server.
rails serverTo see the task status change, navigate to
http://localhost:3000and add or edit items.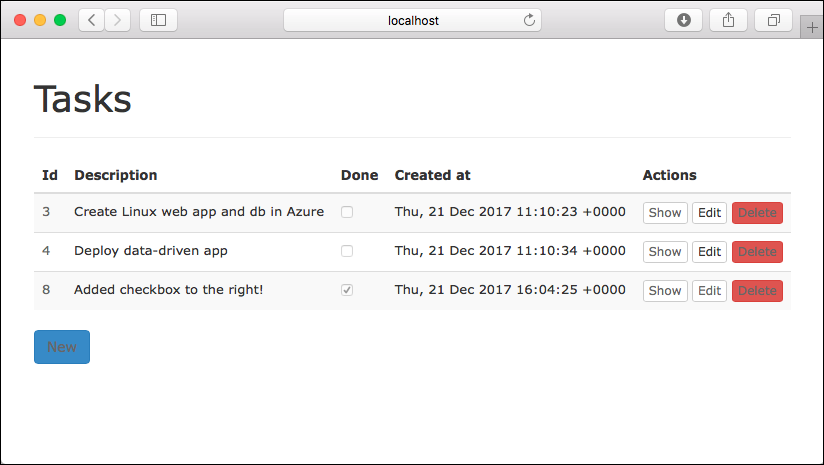
To stop the Rails server, type
Ctrl + Cin the terminal.
Publish changes to Azure
In the terminal, run Rails database migrations for the production environment to make the change in the Azure database.
rake db:migrate RAILS_ENV=productionCommit all the changes in Git, and then push the code changes to Azure.
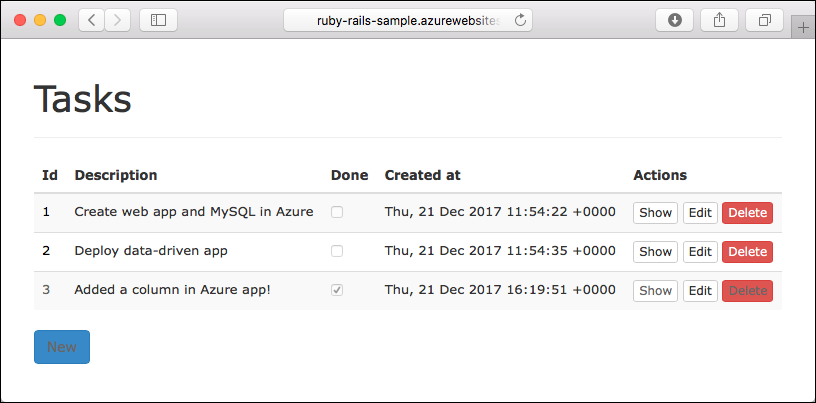
git add .
git commit -m "added complete checkbox"
git push azure main
Once the
git pushis complete, navigate to the Azure app and test the new functionality.
If you added any tasks, they are retained in the database. Updates to the data schema leave existing data intact.
Stream diagnostic logs
To access the console logs generated from inside your application code in App Service, turn on diagnostic logging by running the following command in Cloud Shell:
az webapp log config --resource-group <resource-group-name> --name <app-name> --docker-container-logging filesystem --level Verbose
Possible values for --level are Error, Warning, Info, and Verbose. Each subsequent level includes the previous level. For example, Error includes only error messages. Verbose includes all messages.
After you turn on diagnostic logging, run the following command to see the log stream:
az webapp log tail --resource-group <resource-group-name> --name <app-name>
If console logs don't appear immediately, check again in 30 seconds.
To stop log streaming at any time, select Ctrl+C.
Manage the Azure app
Go to the Azure portal to manage the app you created.
From the left menu, click App Services, and then click the name of your Azure app.
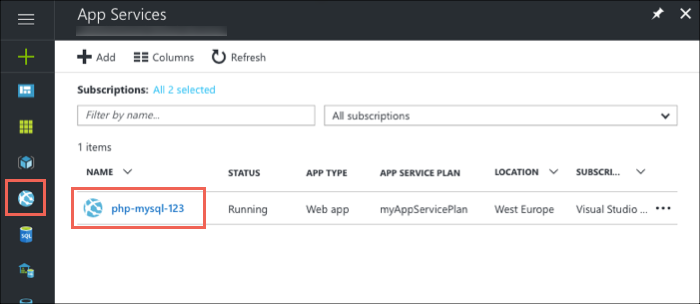
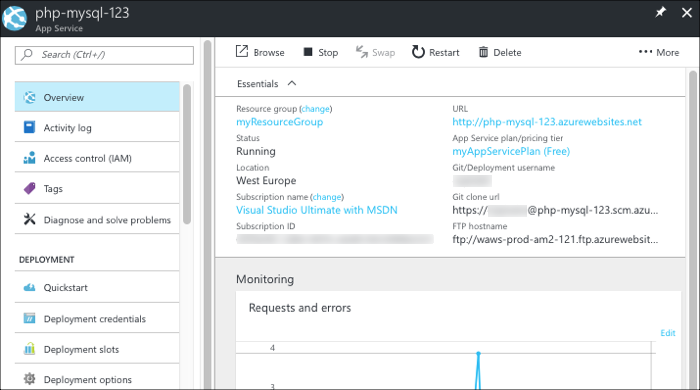
You see your app's Overview page. Here, you can perform basic management tasks like stop, start, restart, browse, and delete.
The left menu provides pages for configuring your app.
Clean up resources
In the preceding steps, you created Azure resources in a resource group. If you don't expect to need these resources in the future, delete the resource group by running the following command in the local Azure CLI:
az group delete --name myResourceGroup
This command might take a minute to run.
Next steps
In this tutorial, you learned how to:
- Create a Postgres database in Azure
- Connect a Ruby on Rails app to Postgres
- Deploy the app to Azure
- Update the data model and redeploy the app
- Stream diagnostic logs from Azure
- Manage the app in the Azure portal
Advance to the next tutorial to learn how to secure your app with a custom domain and certificate.
Or, check out other resources: