Note
Access to this page requires authorization. You can try signing in or changing directories.
Access to this page requires authorization. You can try changing directories.
Policies and policy initiatives provide a method to enable logging at scale with diagnostic settings for Azure Monitor. This article describes how to create a custom policy for Azure resources that don't have a built-in policy. To create diagnostic settings for Azure resources that have built-in policies, see Create diagnostic settings at scale by using built-in Azure policies.
Use log category groups
Log category groups contain similar types of logs. Category groups make it easy to refer to multiple logs in a single command.
The allLogs category group contains all of the logs. The audit category group includes all audit logs.
By using a category group, you can define a policy that's dynamically updated as new log categories are added to the group.
Create a custom policy definition
For resource types that don't have a built-in policy, you need to create a custom policy definition. You can create a policy manually in the Azure portal by copying an existing built-in policy and then modifying it for your resource type. Alternatively, create the policy programmatically by using a script in the PowerShell Gallery.
The script Create-AzDiagPolicy creates policy files for a particular resource type that you can install by using PowerShell or the Azure CLI. Use the following procedure to create a custom policy definition for diagnostic settings:
Ensure that you have Azure PowerShell installed.
Install the script by using the following command:
Install-Script -Name Create-AzDiagPolicyRun the script by using the parameters to specify where to send the logs. Specify a subscription and resource type at the prompt.
For example, to create a policy definition that sends logs to a Log Analytics workspace and an event hub, use the following command:
Create-AzDiagPolicy.ps1 -ExportLA -ExportEH -ExportDir ".\PolicyFiles"Alternatively, you can specify a subscription and resource type in the command. For example, to create a policy definition that sends logs to a Log Analytics workspace and an event hub for SQL Server databases, use the following command:
Create-AzDiagPolicy.ps1 -SubscriptionID <subscription id> -ResourceType Microsoft.Sql/servers/databases -ExportLA -ExportEH -ExportDir ".\PolicyFiles"The script creates separate folders for each policy definition. Each folder contains three files:
azurepolicy.json,azurepolicy.rules.json, andazurepolicy.parameters.json. If you want to create the policy manually in the Azure portal, you can copy and paste the contents ofazurepolicy.jsonbecause it includes the entire policy definition. Use the other two files with PowerShell or the Azure CLI to create the policy definition from a command line.The following examples show how to install the policy definition from both PowerShell and the Azure CLI. Each example includes metadata to specify a category of
Monitoringto group the new policy definition with the built-in policy definitions.New-AzPolicyDefinition -name "Deploy Diagnostic Settings for SQL Server database to Log Analytics workspace" -policy .\Apply-Diag-Settings-LA-Microsoft.Sql-servers-databases\azurepolicy.rules.json -parameter .\Apply-Diag-Settings-LA-Microsoft.Sql-servers-databases\azurepolicy.parameters.json -mode All -Metadata '{"category":"Monitoring"}'az policy definition create --name 'deploy-diag-setting-sql-database--workspace' --display-name 'Deploy Diagnostic Settings for SQL Server database to Log Analytics workspace' --rules 'Apply-Diag-Settings-LA-Microsoft.Sql-servers-databases\azurepolicy.rules.json' --params 'Apply-Diag-Settings-LA-Microsoft.Sql-servers-databases\azurepolicy.parameters.json' --subscription 'AzureMonitor_Docs' --mode All
Create an initiative
Rather than create an assignment for each policy definition, a common strategy is to create an initiative that includes the policy definitions to create diagnostic settings for each Azure service. Create an assignment between the initiative and a management group, subscription, or resource group, depending on how you manage your environment. This strategy offers the following benefits:
- Create a single assignment for the initiative instead of multiple assignments for each resource type. Use the same initiative for multiple monitoring groups, subscriptions, or resource groups.
- Modify the initiative when you need to add a new resource type or destination. For example, your initial requirements might be to send data only to a Log Analytics workspace, but later you want to add an event hub. Modify the initiative instead of creating new assignments.
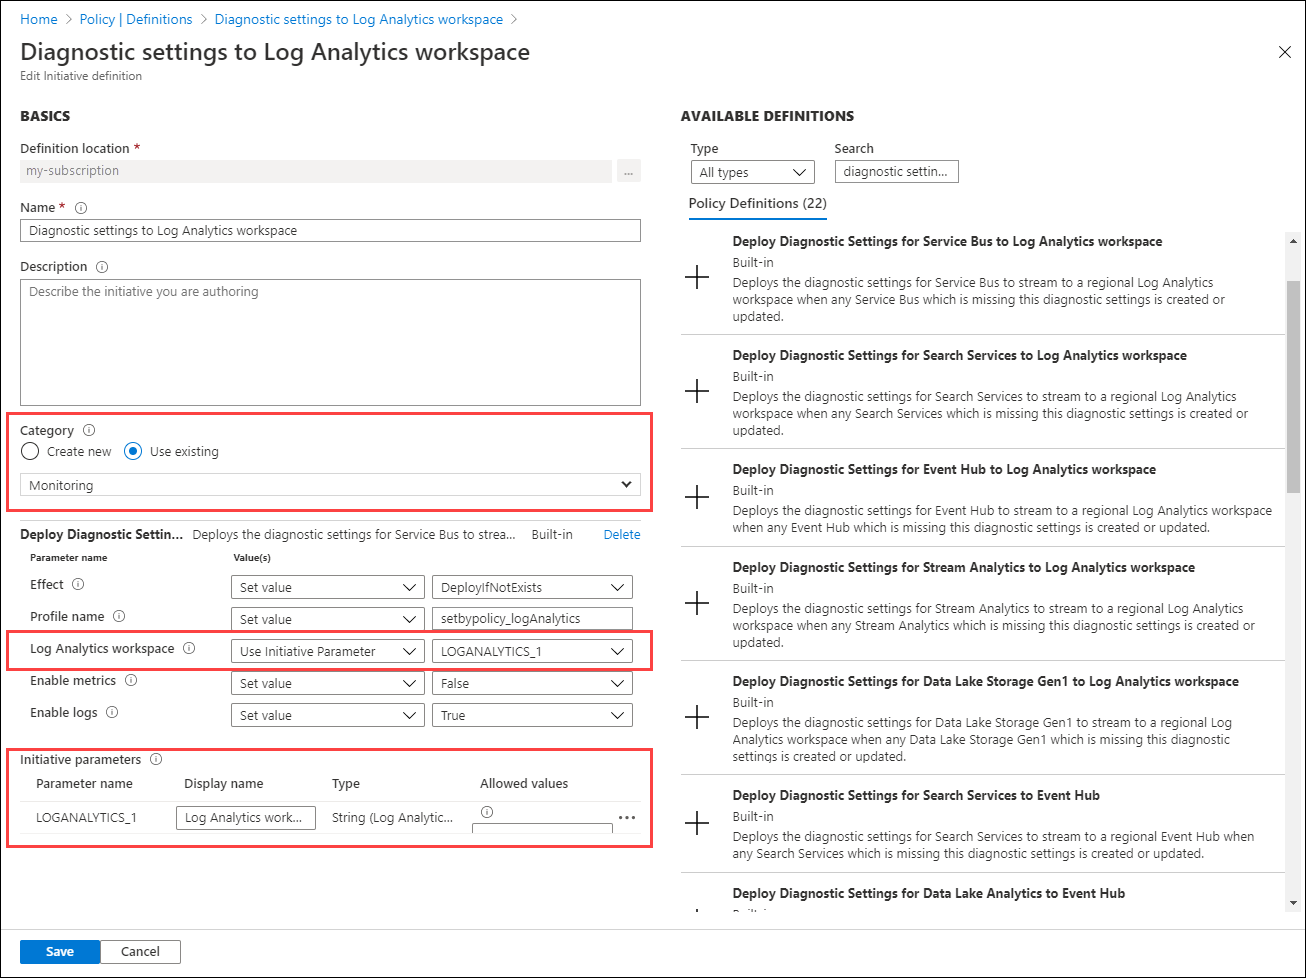
For details on creating an initiative, see Create and assign an initiative definition. Consider the following recommendations:
- Set Category to Monitoring to group it with related built-in and custom policy definitions.
- Instead of specifying the details for the Log Analytics workspace and the event hub for policy definitions included in the initiative, use a common initiative parameter. This parameter allows you to specify a common value for all policy definitions and change that value if necessary.
Assign the initiative
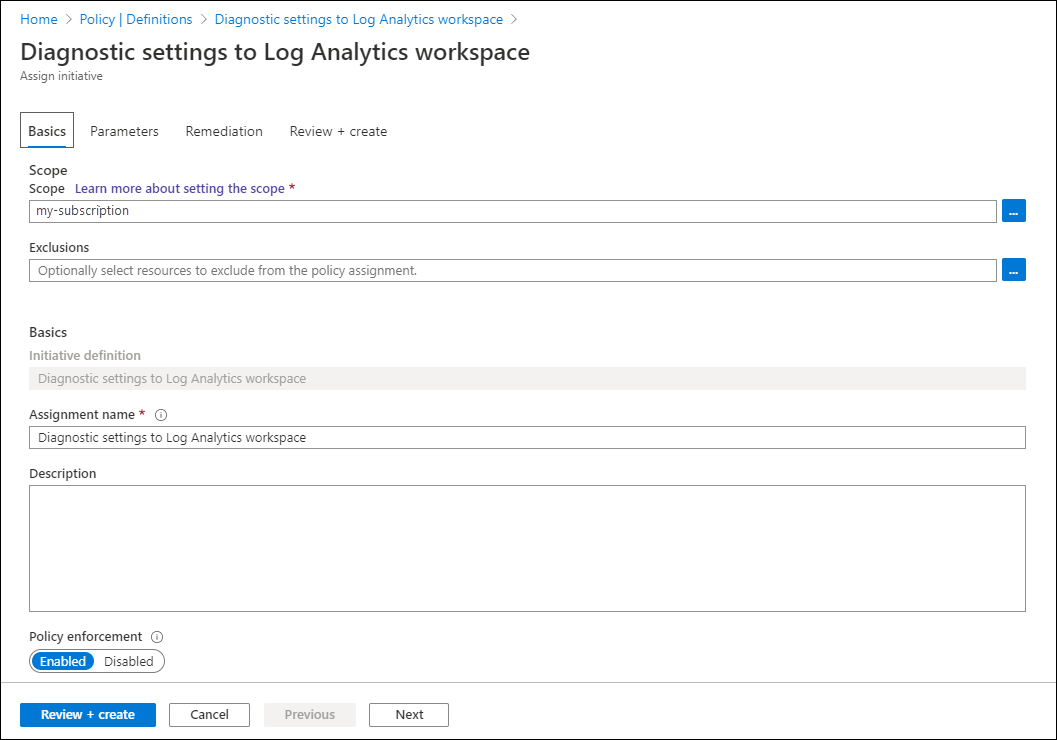
Assign the initiative to an Azure management group, subscription, or resource group, depending on the scope of your resources to monitor. A management group is useful for scoping policy, especially if your organization has multiple subscriptions.
By using initiative parameters, you can specify the workspace or any other details once for all of the policy definitions in the initiative.
Create a remediation task
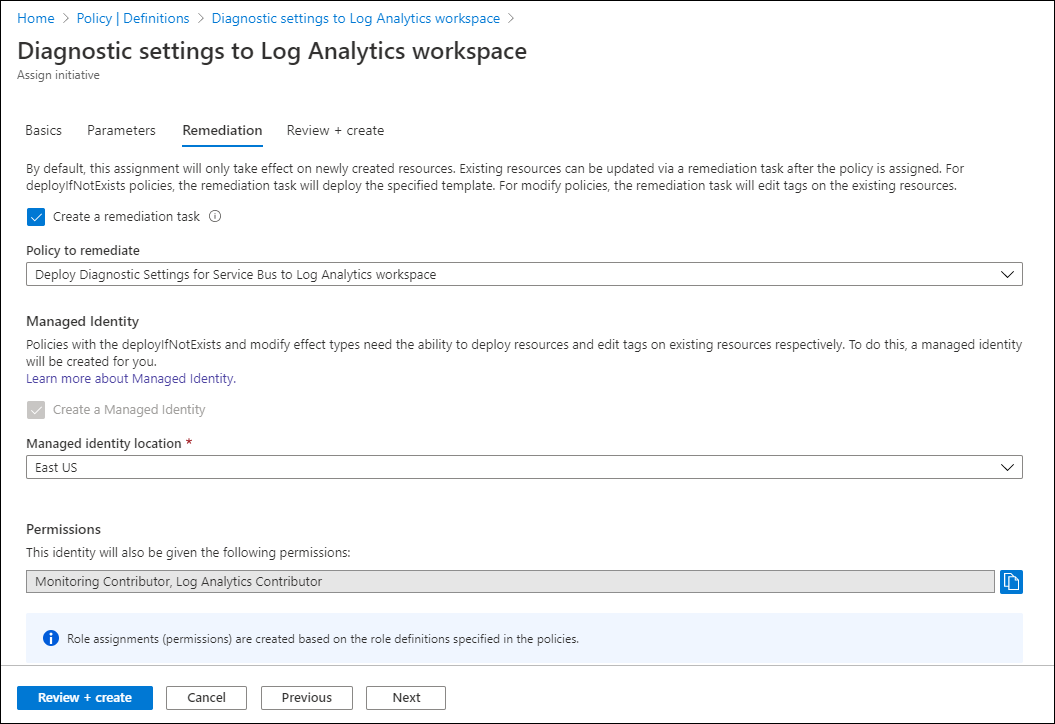
The initiative is applied to each virtual machine as it's created. A remediation task deploys the policy definitions in the initiative to existing resources, so you can create diagnostic settings for any resources that were already created.
When you create the assignment by using the Azure portal, you have the option of creating a remediation task at the same time. For details on the remediation, see Remediate noncompliant resources with Azure Policy.


