Note
Access to this page requires authorization. You can try signing in or changing directories.
Access to this page requires authorization. You can try changing directories.
Azure enables you to create and manage support requests, also known as support tickets. You can create and manage requests in the Azure portal, which is covered in this article. You can also create and manage requests programmatically, using the Azure support ticket REST API, or by using Azure CLI .
Azure provides unlimited support for subscription management, which includes billing, quota adjustments, and account transfers. For technical support, you need a support plan. For more information, see Compare support plans.
Getting started
You can open support requests in the Azure portal from the Azure portal menu, the global header, or the resource menu for a service. Before you can file a support request, you must have appropriate permissions.
Azure role-based access control
You must have the appropriate access to a subscription in order to create a support request for it. This means you must have the Owner, Contributor, or Support Request Contributor role, or a custom role with Microsoft.Support/*, at the subscription level.
To create a support request without a subscription, for example a Microsoft Entra scenario, you must be an Admin.
Important
If a support request requires investigation into multiple subscriptions, you must have the required access for each subscription involved (Owner, Contributor, Reader, Support Request Contributor, or a custom role with the Microsoft.Support/supportTickets/read permission).
Go to Help + support from the global header
To start a support request from anywhere in the Azure portal:
Select the ? in the global header, then select Help + support.
Select Web Submission via 21Vianet portal.
Open a support request from a resource menu
To start a support request in the context of the resource you're currently working with:
From the resource menu, in the Help section, select New Support Request.
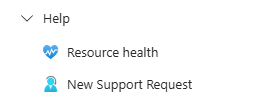
When you start the support request process from a resource, some options are pre-selected for you, based on that resource.
Create a support request
When you create a new support request, you'll need to provide some information to help us understand the problem. This information is gathered in a few separate sections. In most cases, information you provided earlier will be prefilled for you. You can make any changes and enter additional details as needed.
Problem description
The Problem description section is the first step of the support request process. Details you provided earlier will be prefilled in this section, but you can make changes if needed. If you change the issue type, the previous information might not be saved.
You may need to provide additional information related to the issue type you select. If you select Technical, specify the service that your issue relates to. Depending on the service, you might see options for Problem type and Problem subtype. Be sure to select the service (and problem type/subtype if applicable) that is most related to your issue. Selecting an unrelated service may result in delays in addressing your support request.
Important
In most cases, you'll need to specify a subscription. Be sure to select the subscription where you are experiencing the problem. The support engineer assigned to your case will only be able to access resources in the subscription you specify. The access requirement serves as a point of confirmation that the support engineer is sharing information to the right audience, which is a key factor for ensuring the security and privacy of customer data. For details on how Azure treats customer data, see Data Privacy in the Trusted Cloud.
If the issue applies to multiple subscriptions, you can mention additional subscriptions in your description later. However, the support engineer will only be able to work on subscriptions to which you have access. If you don't have the required access for a subscription, we won't be able to work on it as part of your request.
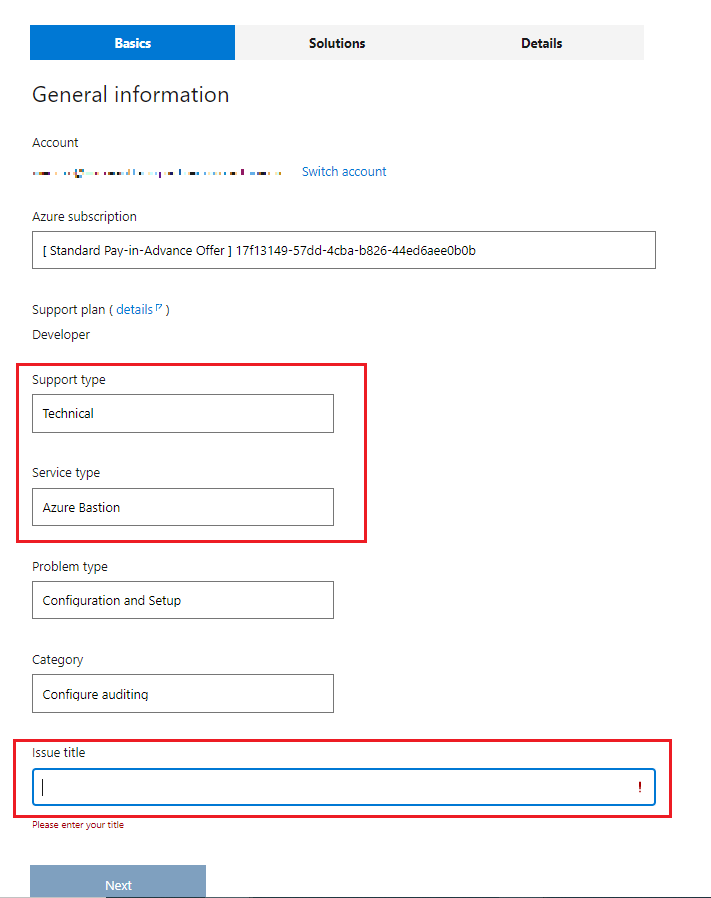
After you provide all of the requested information, select Next.
Recommended solution
Based on the information you provided, we provide some recommended solutions that might be able to fix the problem. In some cases, we may even run a quick diagnostic check. These solutions are written by Azure engineers to solve most common problems.
If you're still unable to resolve the issue, continue creating your support request by selecting Next.
Additional details
Next, we collect additional details about the problem. Providing thorough and detailed information in this step helps us route your support request to the right engineer.
- If possible, tell us when the problem started and any steps to reproduce it. You can upload a file, such as a log file or output from diagnostics.
- After we have all the information about the problem, choose how to get support. In the Support method section of Details, select the severity of impact. The maximum severity level depends on your support plan.
Provide your preferred contact method, a good time to contact you, and your support language.
Next, complete the Contact info section so we know how to contact you.
Review + create
Before you create your request, review all of the details that you'll send to support. You can select Previous to return to any tab if you want to make changes. When you're satisfied that the support request is complete, select Create.
A support engineer will contact you using the method you indicated. For information about initial response times, see Support scope and responsiveness.
Next steps
Follow these links to learn more:
- Get help from your peers in the Azure Q&A question page
- Learn more in Azure Support FAQ