Note
Access to this page requires authorization. You can try signing in or changing directories.
Access to this page requires authorization. You can try changing directories.
In this tutorial series, you've created a Bicep file to deploy an Azure storage account. In the next two tutorials, you add an App Service plan and a website. Instead of creating templates from scratch, you learn how to export JSON templates from the Azure portal and how to use sample templates from the Azure Quickstart templates. You customize those templates for your use. This tutorial focuses on exporting templates, and customizing the result for your Bicep file. It takes about 14 minutes to complete.
Note
This article contains Bicep examples. Bicep is currently in preview. For more information, see Project Bicep.
Prerequisites
We recommend that you complete the tutorial about outputs, but it's not required.
You must have Visual Studio Code with the Bicep extension, and either Azure PowerShell or Azure CLI. For more information, see Bicep tools.
Review Bicep file
At the end of the previous tutorial, your Bicep file had the following contents:
@minLength(3)
@maxLength(11)
param storagePrefix string

@allowed([
  'Standard_LRS'
  'Standard_GRS'
  'Standard_RAGRS'
  'Premium_LRS'
])
param storageSKU string = 'Standard_LRS'

param location string = resourceGroup().location

var uniqueStorageName = '${storagePrefix}${uniqueString(resourceGroup().id)}'

resource stg 'Microsoft.Storage/storageAccounts@2019-04-01' = {
  name: uniqueStorageName
  location: location
  sku: {
    name: storageSKU
  }
  kind: 'StorageV2'
  properties: {
    supportsHttpsTrafficOnly: true
  }
}

output storageEndpoint object = stg.properties.primaryEndpoints
This Bicep file works well for deploying storage accounts, but you might want to add more resources to it. You can export a JSON template from an existing resource to quickly get the JSON for that resource. And then convert the JSON to Bicep before you can add it to your Bicep file.
Create App Service plan
Sign in to the Azure portal.
Select Create a resource.
In Search the Marketplace, enter App Service plan, and then select App Service plan. Don't select App Service plan (classic)
Select Create.
Enter:
- Subscription: select your Azure subscription.
- Resource Group: Select Create new and then specify a name. Provide a different resource group name than the one you have been using in this tutorial series.
- Name: enter a name for the App service plan.
- Operating System: select Linux.
- Region: select an Azure location. For example, China North.
- Pricing tier: to save costs, change the SKU to Basic B1 (under Dev/Test).
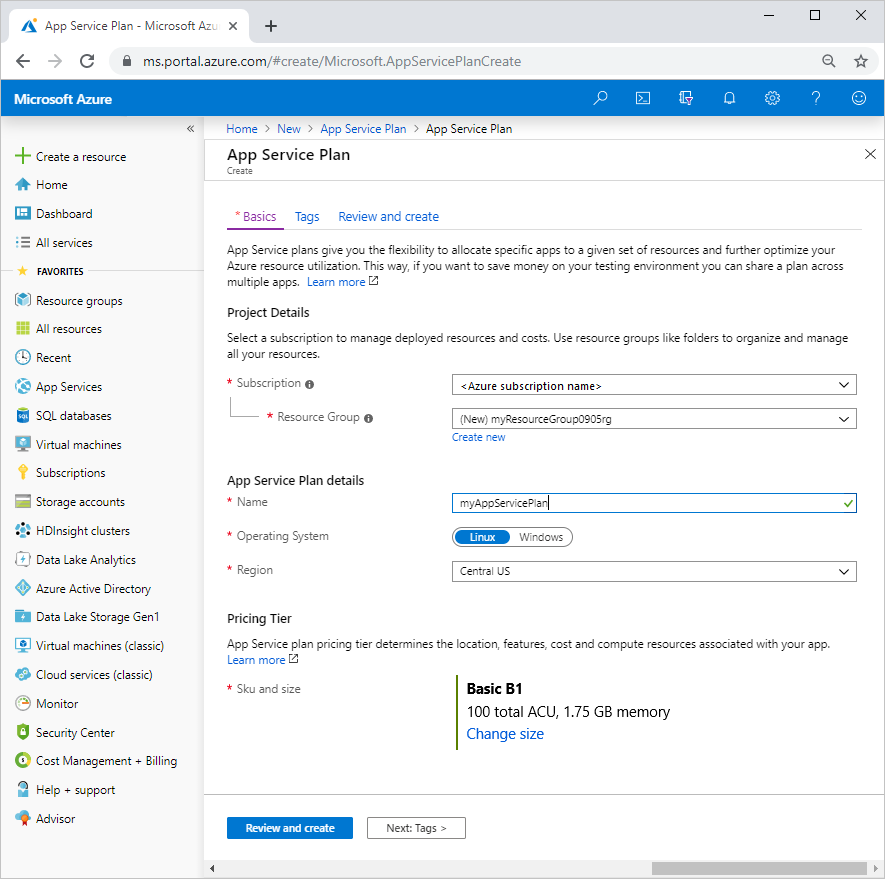
Select Review and create.
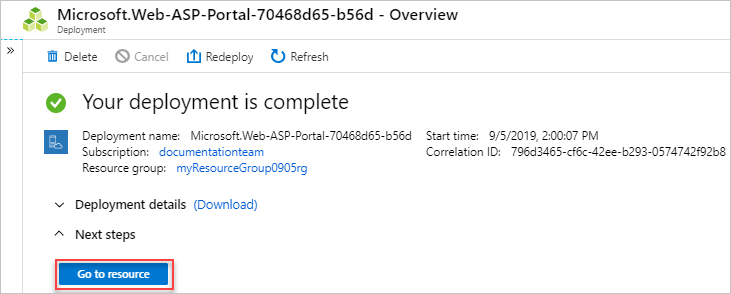
Select Create. It takes a few moments to create the resource.
Export template
Currently, the Azure portal only supports exporting JSON templates. There are tools you can use to decompile JSON templates to Bicep files.
Select Go to resource.
Select Export template.
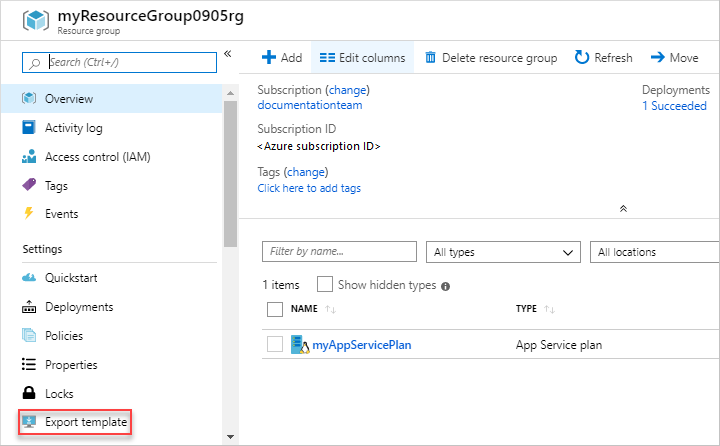
The export template feature takes the current state of a resource and generates a template to deploy it. Exporting a template can be a helpful way of quickly getting the JSON you need to deploy a resource.
The
Microsoft.Web/serverfarmsdefinition and the parameter definition are the parts that you need.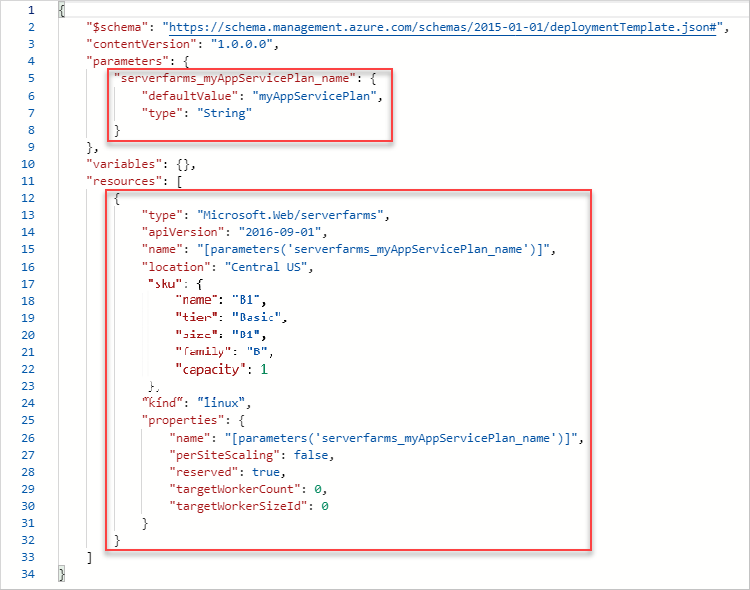
Important
Typically, the exported template is more verbose than you might want when creating a template. For example, the SKU object in the exported template has five properties. This template works, but you could just use the
nameproperty. You can start with the exported template, and then modify it as you like to fit your requirements.Select Download. The downloaded zip file contains a template.json and a parameters.json. Unzip the files.
Browse to https://bicepdemo.z22.web.core.chinacloudapi.cn/, select Decompile, and then open template.json. You get the template in Bicep.
Revise existing Bicep file
The decomplied exported template gives you most of the Bicep you need, but you need to customize it for your Bicep file. Pay particular attention to differences in parameters and variables between your Bicep file and the exported Bicep file. Obviously, the export process doesn't know the parameters and variables that you've already defined in your Bicep file.
The following example shows the additions to your Bicep file. It contains the exported code plus some changes. First, it changes the name of the parameter to match your naming convention. Second, it uses your location parameter for the location of the app service plan. Third, it removes some of the properties where the default value is fine.
Copy the whole file and replace your Bicep file with its contents.
@minLength(3)
@maxLength(11)
param storagePrefix string

@allowed([
  'Standard_LRS'
  'Standard_GRS'
  'Standard_RAGRS'
  'Premium_LRS'
])
param storageSKU string = 'Standard_LRS'

param location string = resourceGroup().location
param appServicePlanName string = 'exampleplan'

var uniqueStorageName = '${storagePrefix}${uniqueString(resourceGroup().id)}'

resource stg 'Microsoft.Storage/storageAccounts@2019-04-01' = {
  name: uniqueStorageName
  location: location
  sku: {
    name: storageSKU
  }
  kind: 'StorageV2'
  properties: {
    supportsHttpsTrafficOnly: true
  }
}

resource appPlan 'Microsoft.Web/serverfarms@2016-09-01' = {
  name: appServicePlanName
  location: location
  sku: {
    name: 'B1'
    tier: 'Basic'
    size: 'B1'
    family: 'B'
    capacity: 1
  }
  kind: 'linux'
  properties: {
    perSiteScaling: false
    reserved: true
    targetWorkerCount: 0
    targetWorkerSizeId: 0
  }
}

output storageEndpoint object = stg.properties.primaryEndpoints
Deploy Bicep file
Use either Azure CLI or Azure PowerShell to deploy a Bicep file.
If you haven't created the resource group, see Create resource group. The example assumes you've set the bicepFile variable to the path to the Bicep file, as shown in the first tutorial.
To run this deployment cmdlet, you must have the latest version of Azure PowerShell.
New-AzResourceGroupDeployment `
  -Name addappserviceplan `
  -ResourceGroupName myResourceGroup `
  -TemplateFile $bicepFile `
  -storagePrefix "store" `
  -storageSKU Standard_LRS
Note
If the deployment failed, use the verbose switch to get information about the resources being created. Use the debug switch to get more information for debugging.
Verify deployment
You can verify the deployment by exploring the resource group from the Azure portal.
- Sign in to the Azure portal.
- From the left menu, select Resource groups.
- Select the resource group you deployed to.
- The resource group contains a storage account and an App Service plan.
Clean up resources
If you're moving on to the next tutorial, you don't need to delete the resource group.
If you're stopping now, you might want to clean up the resources you deployed by deleting the resource group.
- From the Azure portal, select Resource group from the left menu.
- Enter the resource group name in the Filter by name field.
- Select the resource group name.
- Select Delete resource group from the top menu.
Next steps
You learned how to export a JSON template from the Azure portal, how to convert the JSON template to a Bicep file, and how to use the exported template for your Bicep development. You can also use the Azure Quickstart templates to simplify Bicep development.