Note
Access to this page requires authorization. You can try signing in or changing directories.
Access to this page requires authorization. You can try changing directories.
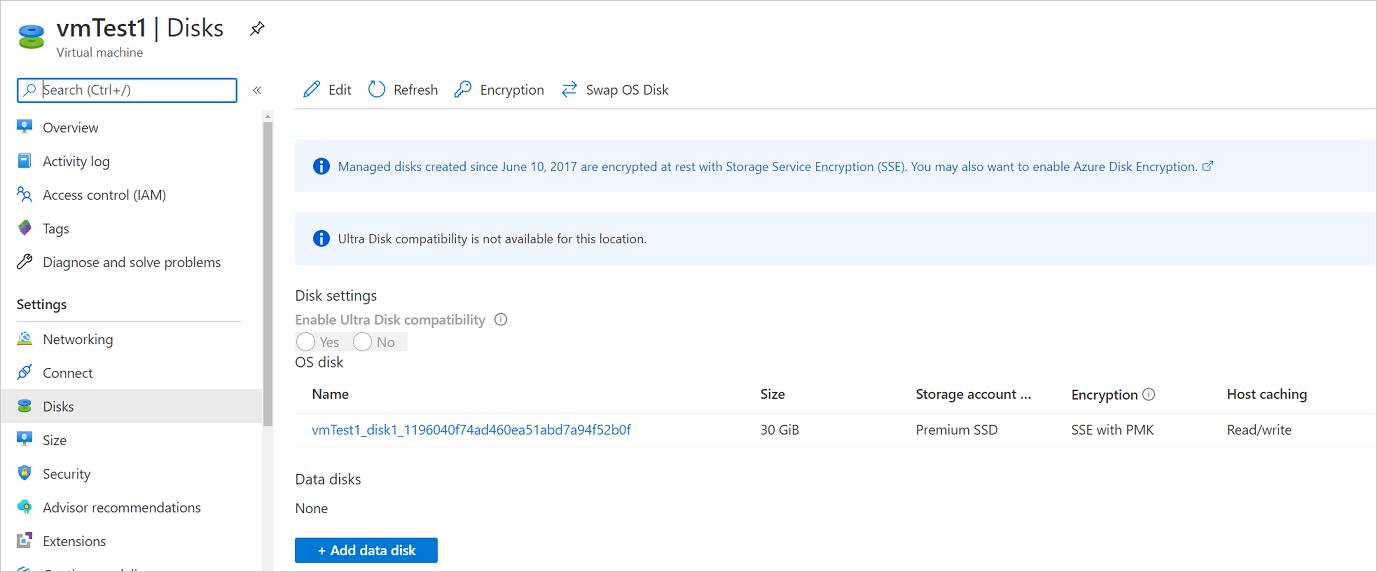
This article describes how to back up and restore Windows or Linux Azure virtual machines (VMs) with encrypted disks by using Azure Backup. For more information, see Encryption of Azure VM backups.
Supported scenarios for backup and restore of encrypted Azure VMs
This section describes the supported scenarios for backup and restore of encrypted Azure VMs.
Encryption by using platform-managed keys
By default, all the disks in your VMs are automatically encrypted at rest by using platform-managed keys (PMKs) that use Storage Service Encryption (SSE). You can back up these VMs by using Azure Backup without any specific actions required to support encryption on your end. For more information about encryption with platform-managed keys, see Back up and restore encrypted Azure VMs.
Encryption by using customer-managed keys
When you encrypt disks with customer-managed keys (CMKs), the key used for encrypting the disks is stored in Azure Key Vault, which you manage. SSE by using CMKs differs from Azure Disk Encryption (ADE). ADE uses the encryption tools of the OS. SSE encrypts data in the storage service, which enables you to use any OS or images for your VMs.
You don't need to perform any explicit actions for backup or restore of VMs that use CMKs for encrypting their disks. The backup data for these VMs stored in the vault is encrypted with the same methods as the encryption used on the vault.
For more information about encryption of managed disks with CMKs, see Server-side encryption of Azure disk storage.
Encryption support by using ADE
Azure Backup supports backup of managed Azure VMs that have their OS/data disks encrypted with ADE. ADE uses Azure BitLocker for encryption of Windows VMs, and the dm-crypt feature for Linux VMs. ADE integrates with Azure Key Vault to manage disk-encryption keys and secrets. You can also use Key Vault key encryption keys (KEKs) to add an extra layer of security. KEKs encrypt secrets before writing them to Key Vault.
Azure Backup can back up and restore managed Azure VMs by using ADE with and without the Microsoft Entra app, as summarized in the following table.
| VM disk type | ADE (BEK/dm-crypt) | ADE and KEK |
|---|---|---|
| Unmanaged | No | No |
| Managed | Yes | Yes |
Limitations
Before you back up or restore encrypted Azure VMs, review the following limitations:
- Backup of Azure VMs that use unmanaged disks isn't supported.
- You can back up and restore ADE-encrypted VMs within the same subscription.
- You can encrypt VMs only by using standalone keys. Any key that's a part of a certificate used to encrypt a VM isn't currently supported.
- You can restore data to a secondary region. Azure Backup supports cross-region restore of encrypted Azure VMs to the Azure paired regions. For more information, see Support matrix.
- You can recover ADE-encrypted VMs at the file or folder level. You need to recover the entire VM to restore files and folders.
- You can't use the replace existing VM option for ADE-encrypted VMs when you restore a VM. This option is supported only for unencrypted managed disks.
Before you start
Before you start, follow these steps:
- Make sure that you have one or more Windows or Linux VMs with ADE enabled.
- Review the support matrix for Azure VM backup.
- Create a Recovery Services vault if you don't have one.
- If you enable encryption for VMs that are already enabled for backup, provide Azure Backup with permissions to access the key vault so that backups can continue without disruption. Learn more about assigning these permissions.
In some circumstances, you might also need to install the VM agent on the VM.
Azure Backup backs up Azure VMs by installing an extension to the Azure VM agent that runs on the machine. If your VM was created from an Azure Marketplace image, the agent is installed and running. If you create a custom VM or you migrate an on-premises machine, you might need to install the agent manually.
Configure a backup policy
To configure a backup policy, follow these steps:
If you don't have a Recovery Services backup vault, follow these instructions to create one.
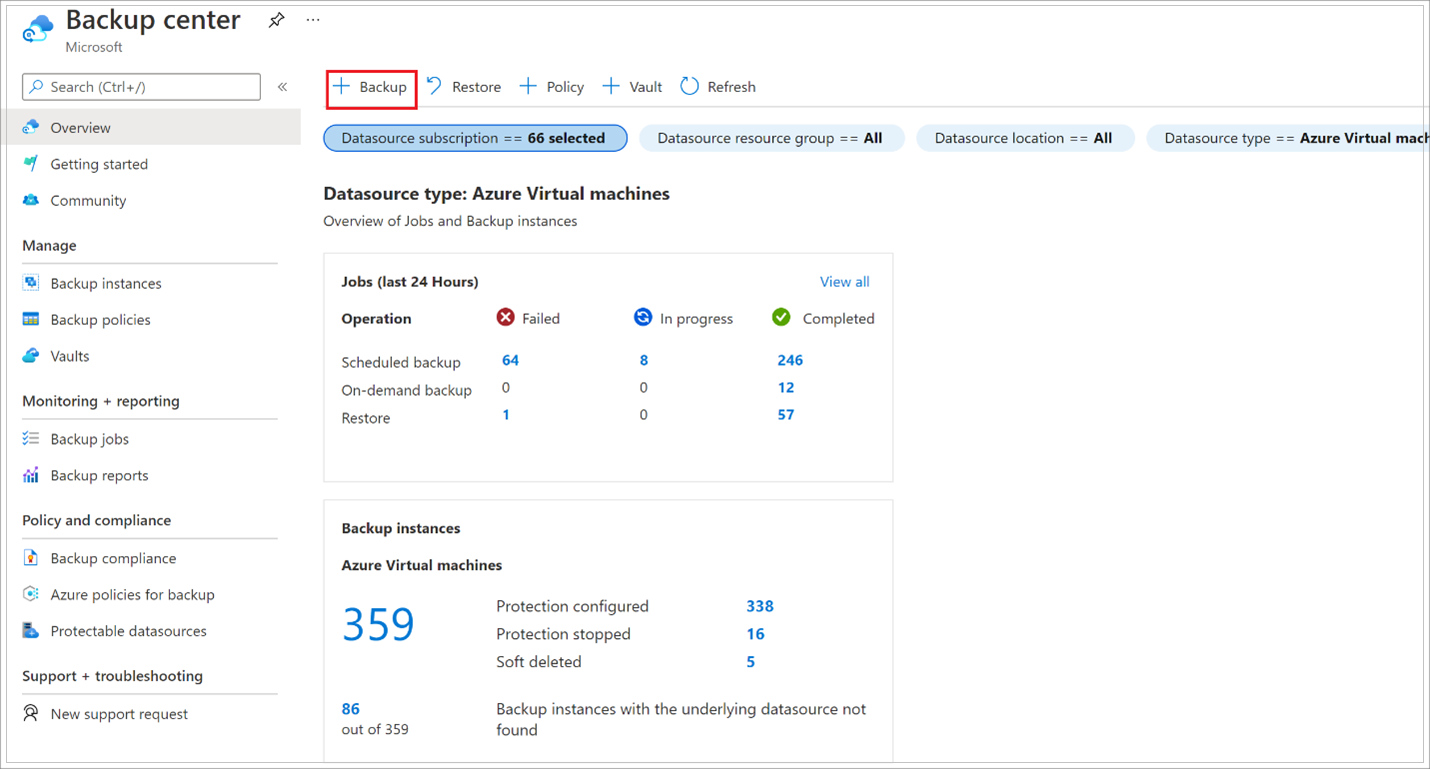
Go to Backup center, and on the Overview tab, select + Backup.
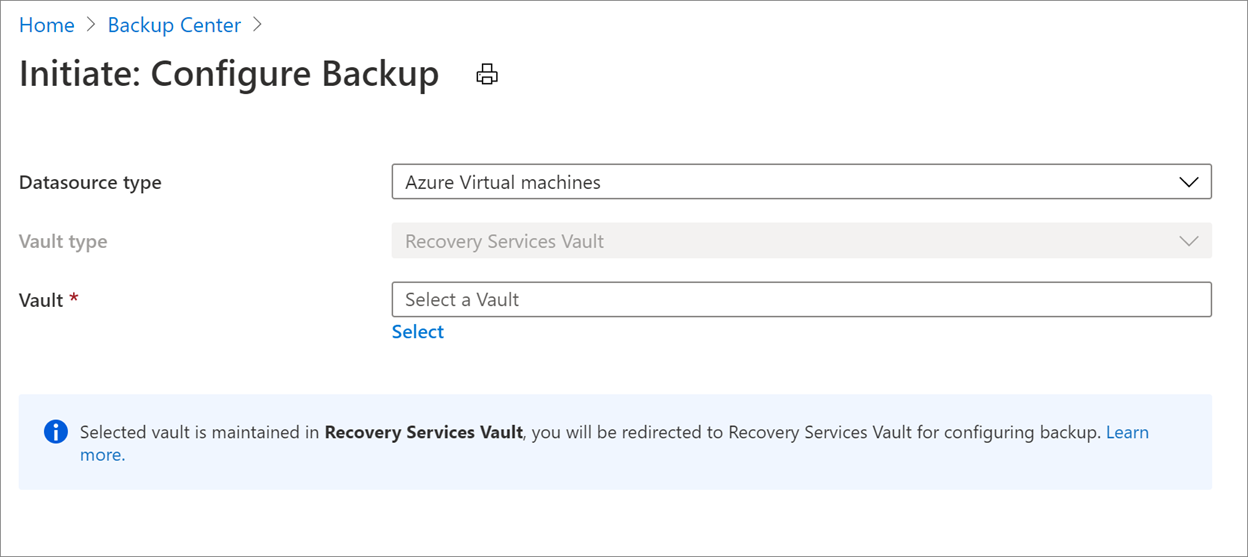
On the Start: Configure Backup pane, for Datasource type, select Azure Virtual machines, and select the vault that you created. Then select Continue.
Select the policy that you want to associate with the vault, and then select OK.
- A backup policy specifies when backups are taken and how long they're stored.
- The details of the default policy are listed on the dropdown menu.
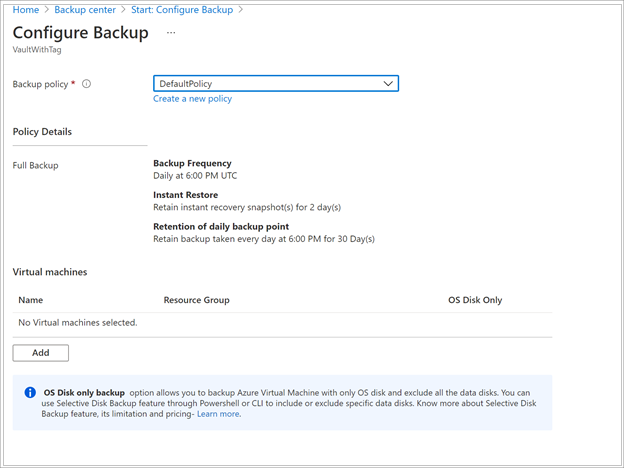
If you don't want to use the default policy, select Create New, and create a custom policy.
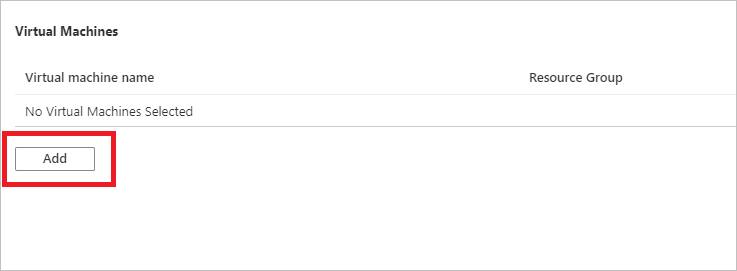
Under Virtual Machines, select Add.
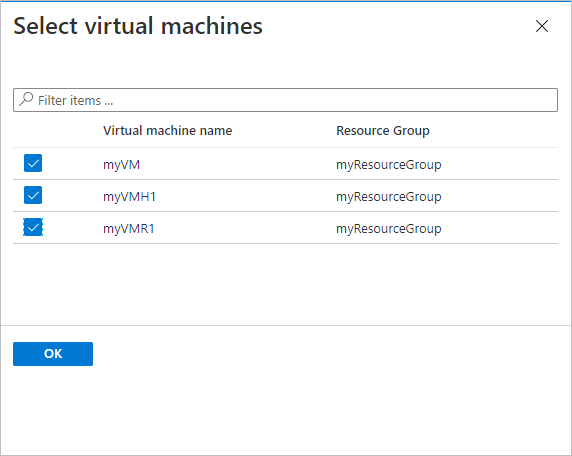
Choose the encrypted VMs that you want to back up by using the select policy, and select OK.
If you're using Key Vault, on the vault page, you see a message that Azure Backup needs read-only access to the keys and secrets in the key vault:
If you receive this message, no action is required:

If you receive this message, set permissions as described in the following procedure:

Select Enable Backup to deploy the backup policy in the vault and enable backup for the selected VMs.
Back up ADE-encrypted VMs with RBAC-enabled key vaults
To enable backups for ADE-encrypted VMs by using key vaults that are enabled by Azure role-based access control (RBAC), assign the Key Vault Administrator role to the Backup Management Service Microsoft Entra app by adding a role assignment on Access control for the key vault.
VM backup operations use the Backup Management Service app instead of the Recovery Services vault's managed identity to access the key vault. You must grant the necessary key vault permissions to this app for backups to function properly.

Learn about the available roles. The Key Vault Administrator role allows permission to get, list, and back up both the secret and the key.
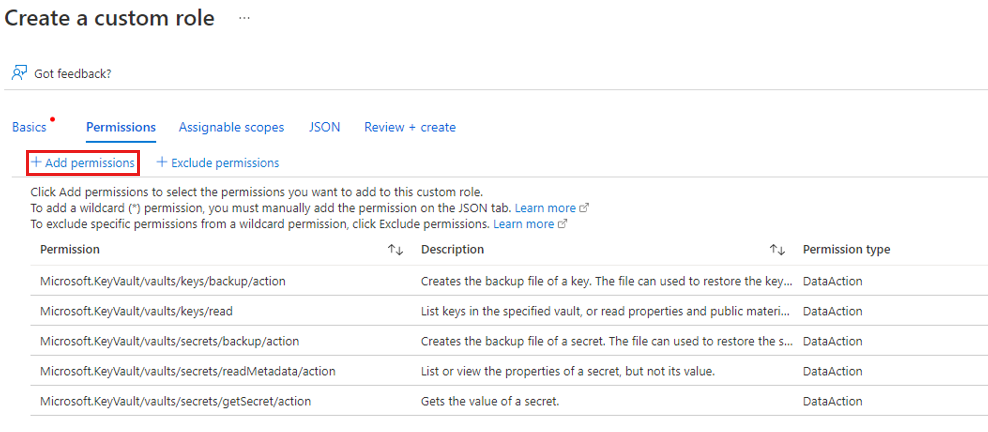
For Azure RBAC-enabled key vaults, you can create a custom role with the following set of permissions. Learn how to create a custom role.
| Action | Description |
|---|---|
Microsoft.KeyVault/vaults/keys/backup/action |
Creates the backup file of a key. |
Microsoft.KeyVault/vaults/secrets/backup/action |
Creates the backup file of a secret. |
Microsoft.KeyVault/vaults/secrets/getSecret/action |
Gets the value of a secret. |
Microsoft.KeyVault/vaults/keys/read |
Lists keys in the specified vault or reads properties and public materials. |
Microsoft.KeyVault/vaults/secrets/readMetadata/action |
Lists or views the properties of a secret, but not its values. |
"permissions": [
            {
                "actions": [],
                "notActions": [],
                "dataActions": [
                    "Microsoft.KeyVault/vaults/keys/backup/action",
                    "Microsoft.KeyVault/vaults/secrets/backup/action",
                    "Microsoft.KeyVault/vaults/secrets/getSecret/action",
                    "Microsoft.KeyVault/vaults/keys/read",
                    "Microsoft.KeyVault/vaults/secrets/readMetadata/action"
                ],
                "notDataActions": []
            }
        ]
Trigger a backup job
The initial backup runs according to the schedule, but you can also run it immediately:
Go to Backup center and select the Backup Instances menu item.
For Datasource type, select Azure Virtual machines. Then search for the VM that you configured for backup.
Right-click the relevant row or select More (…), and then select Backup Now.
On Backup Now, use the calendar control to select the last day that the recovery point should be retained. Then select OK.
Monitor the portal notifications.
To monitor the job progress, go to Backup center > Backup Jobs and filter the list for jobs that are in progress. Depending on the size of your VM, creating the initial backup might take a while.
Provide permissions
Azure Backup needs read-only access to back up the keys and secrets, along with the associated VMs.
- Your key vault is associated with the Microsoft Entra tenant of the Azure subscription. If you're a member user, Azure Backup acquires access to the key vault without further action.
- If you're a guest user, you must provide permissions for Azure Backup to access the key vault. You need to have access to key vaults to configure Azure Backup for encrypted VMs.
To provide Azure RBAC permissions on a key vault, see Enable RBAC permissions on a key vault.
To set permissions:
In the Azure portal, select All services, and search for Key vaults.
Select the key vault associated with the encrypted VM that you're backing up.
Tip
To identify a VM's associated key vault, use the following PowerShell command. Substitute your resource group name and VM name:
Get-AzVm -ResourceGroupName "MyResourceGroup001" -VMName "VM001" -StatusLook for the key vault name in this line:
SecretUrl : https://<keyVaultName>.vault.azure.cnSelect Access policies > Add Access Policy.
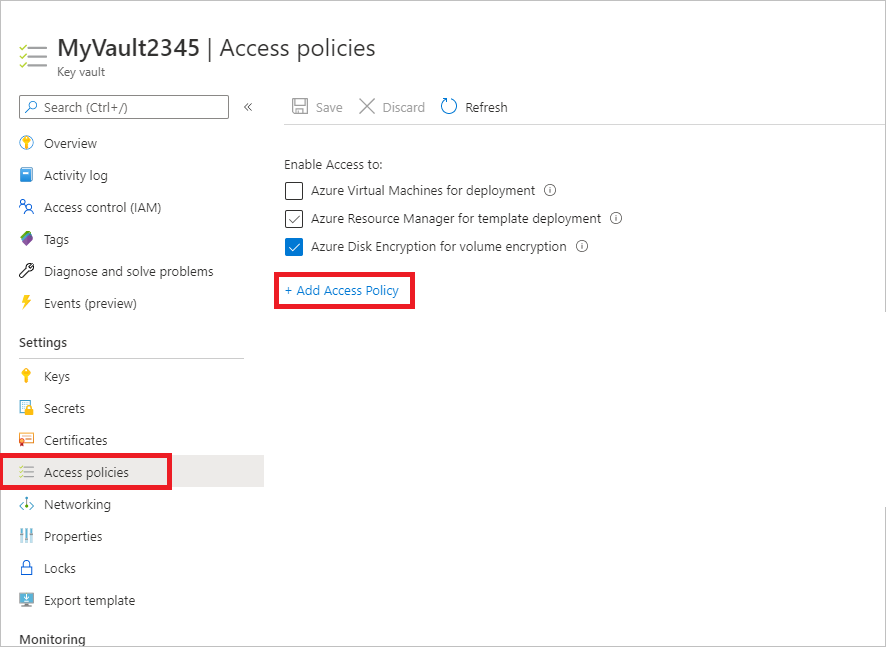
For Add access policy > Configure from template (optional), select Azure Backup.
- The required permissions are prefilled for Key permissions and Secret permissions.
- If your VM is encrypted by using BEK only, remove the selection for Key permissions because you need permissions only for secrets.
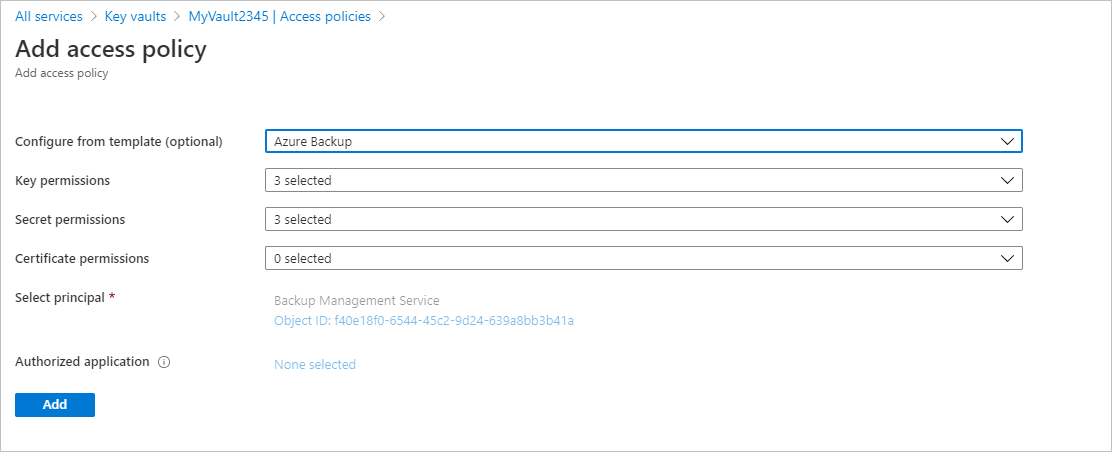
Select Add to add Backup Management Service under Current Access Policies.
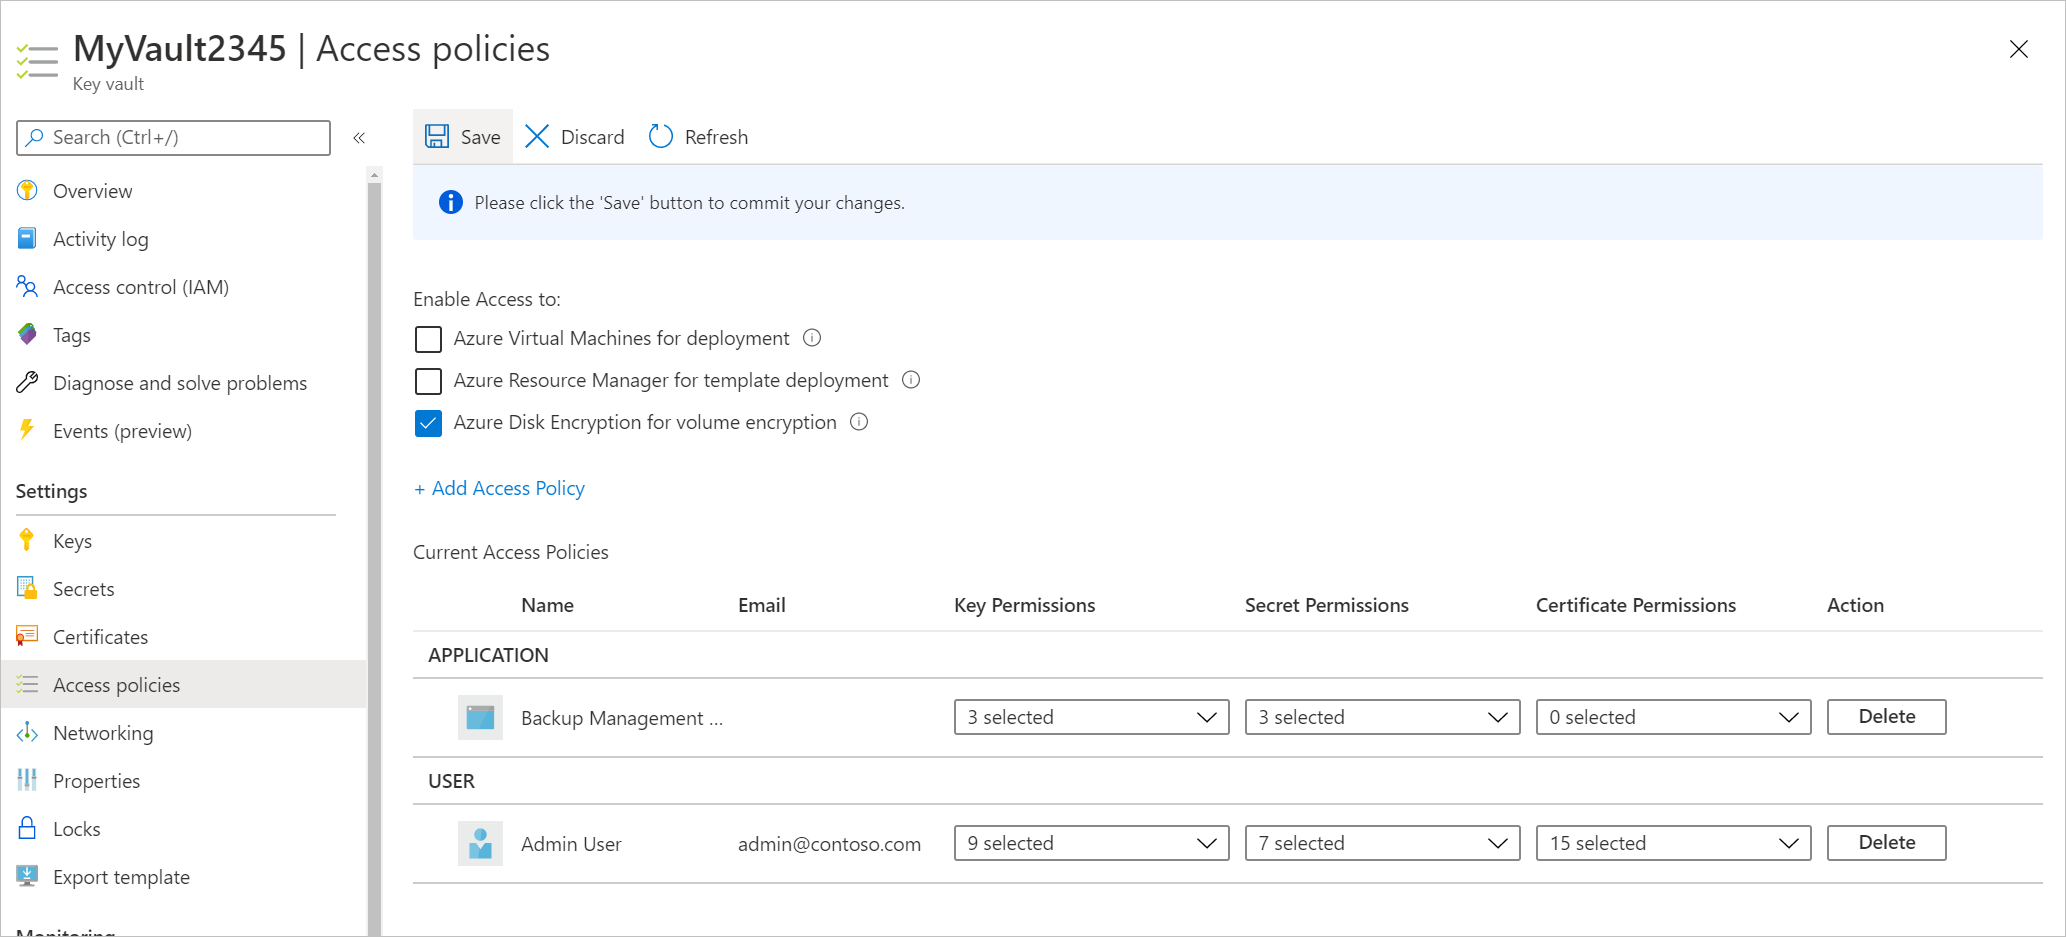
Select Save to provide Azure Backup with the permissions.
You can also set the access policy by using PowerShell or the Azure CLI.
Related content
If you run into any issues, review these articles:
- Common errors when backing up and restoring encrypted Azure VMs.
- Azure VM agent/backup extension issues.
- Restore Key Vault key and secret for encrypted VMs by using Azure Backup.