Note
Access to this page requires authorization. You can try signing in or changing directories.
Access to this page requires authorization. You can try changing directories.
This article describes how to create automated tasks to receive periodic reports via email.
Using the Email Report feature available in Backup Reports, you can create automated tasks to receive periodic reports via email. This feature works by deploying a logic app in your Azure environment that queries data from your selected Log Analytics (LA) workspaces, based on the inputs that you provide. Learn more about Logic apps and their pricing.
Getting Started
To configure email tasks via Backup Reports, perform the following steps:
Go to Backup Center > Backup Reports and click on the Email Report tab.
Create a task by specifying the following information:
- Task Details - The name of the logic app to be created, and the subscription, resource group, and location in which it should be created. Note that the logic app can query data across multiple subscriptions, resource groups, and locations (as selected in the Report Filters section), but is created in the context of a single subscription, resource group and location.
- Data To Export - The tab which you wish to export. You can either create a single task app per tab, or email all tabs using a single task, by selecting the All Tabs option.
- Email options: The email frequency, recipient email ID(s), and the email subject.
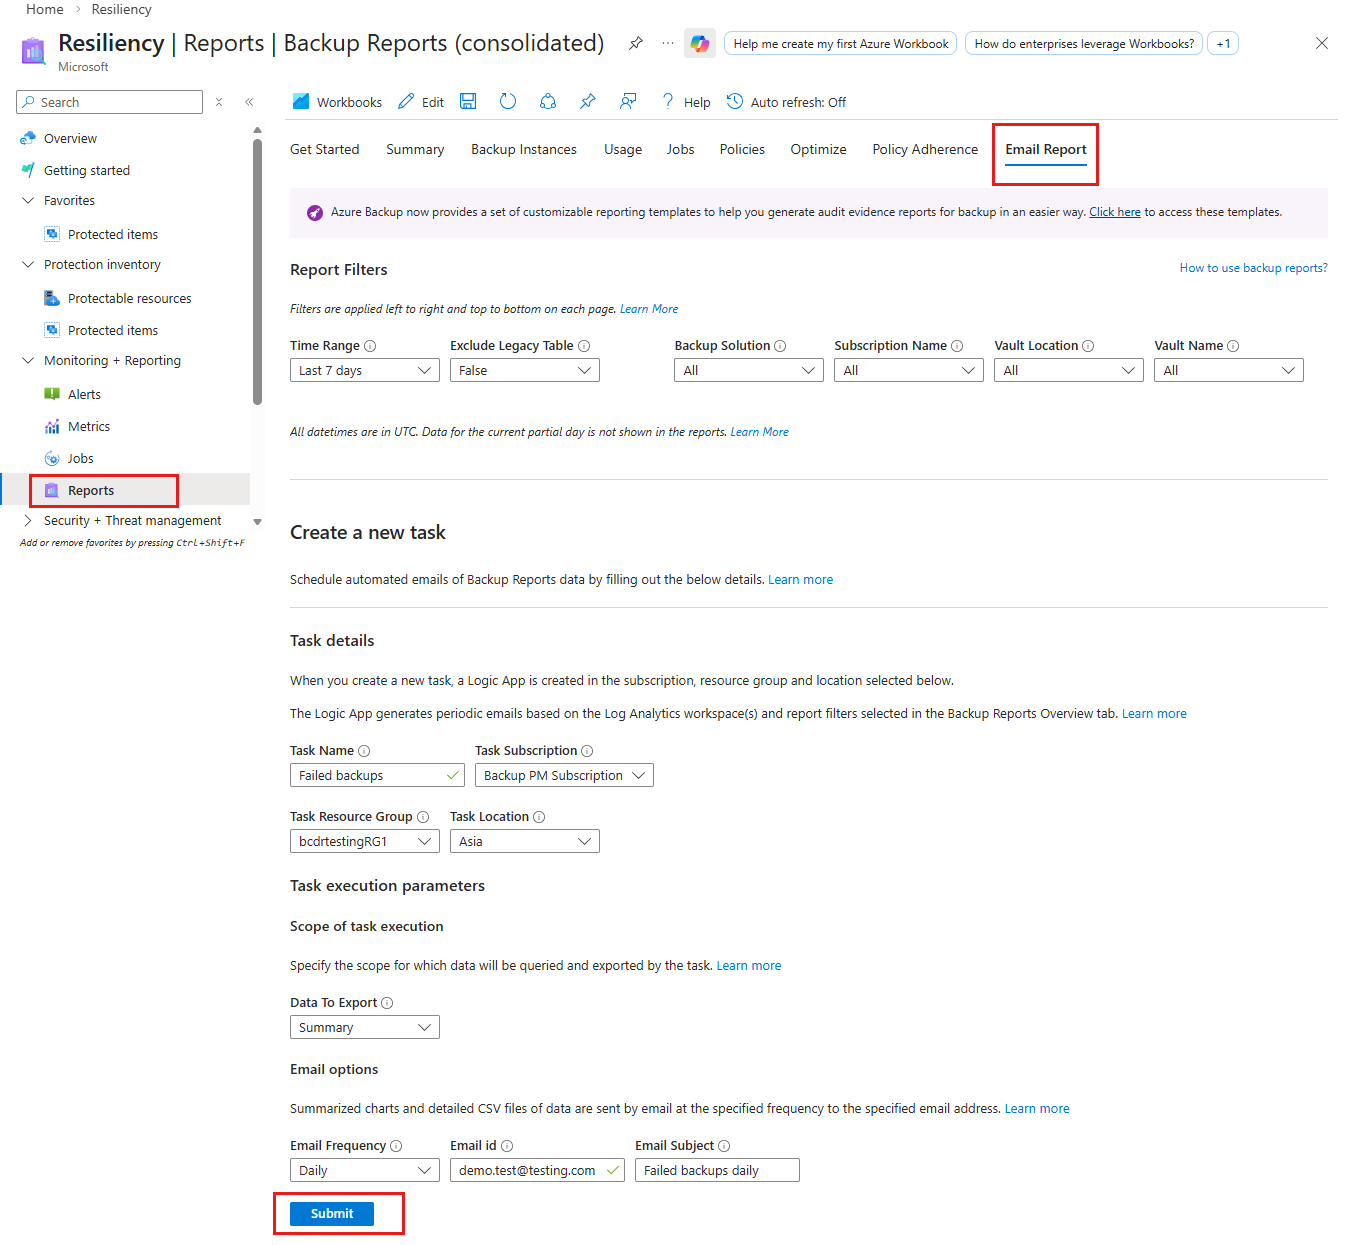
After you click Submit and Confirm, the logic app will get created. The logic app and the associated API connections are created with the tag UsedByBackupReports: true for easy discoverability. You'll need to perform a one-time authorization step for the logic app to run successfully, as described in the section below.

Note
Support for Backup vault workloads (Azure Blobs, Azure Disks) is added to the logic app templates in April 2023. So, if you've deployed these logic apps on an earlier date, you'll have to redeploy these using the above steps if you want to see data for Backup vault workloads in your email reports.
Authorize connections to Azure Monitor Logs and Office 365
The logic app uses the azuremonitorlogs connector for querying the LA workspace(s) and uses the Office365 Outlook connector for sending emails. You'll need to perform a one-time authorization for these two connectors.
To perform the authorization, follow the steps below:
Go to Logic Apps in the Azure portal.
Search for the name of the logic app you've created and go to the resource.
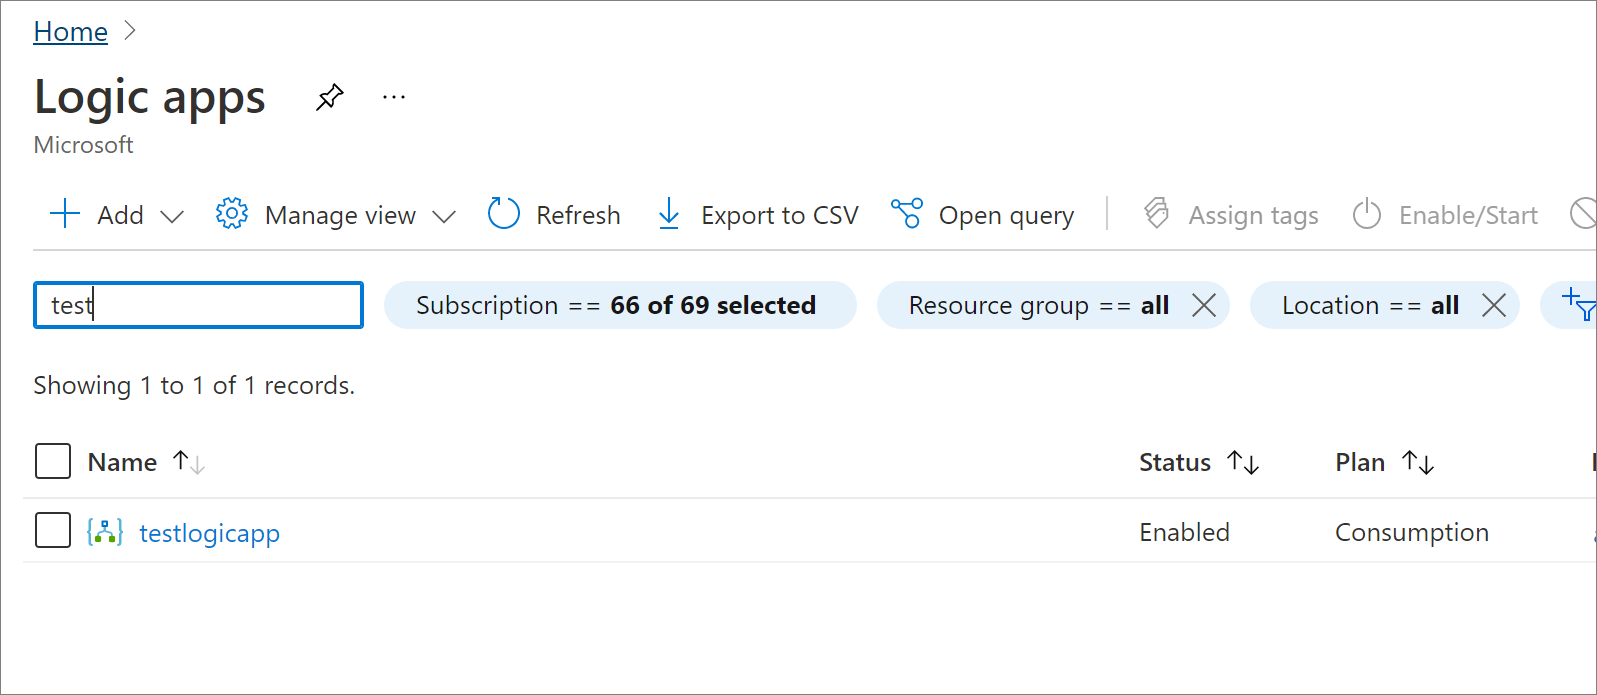
Select the API connections menu item.
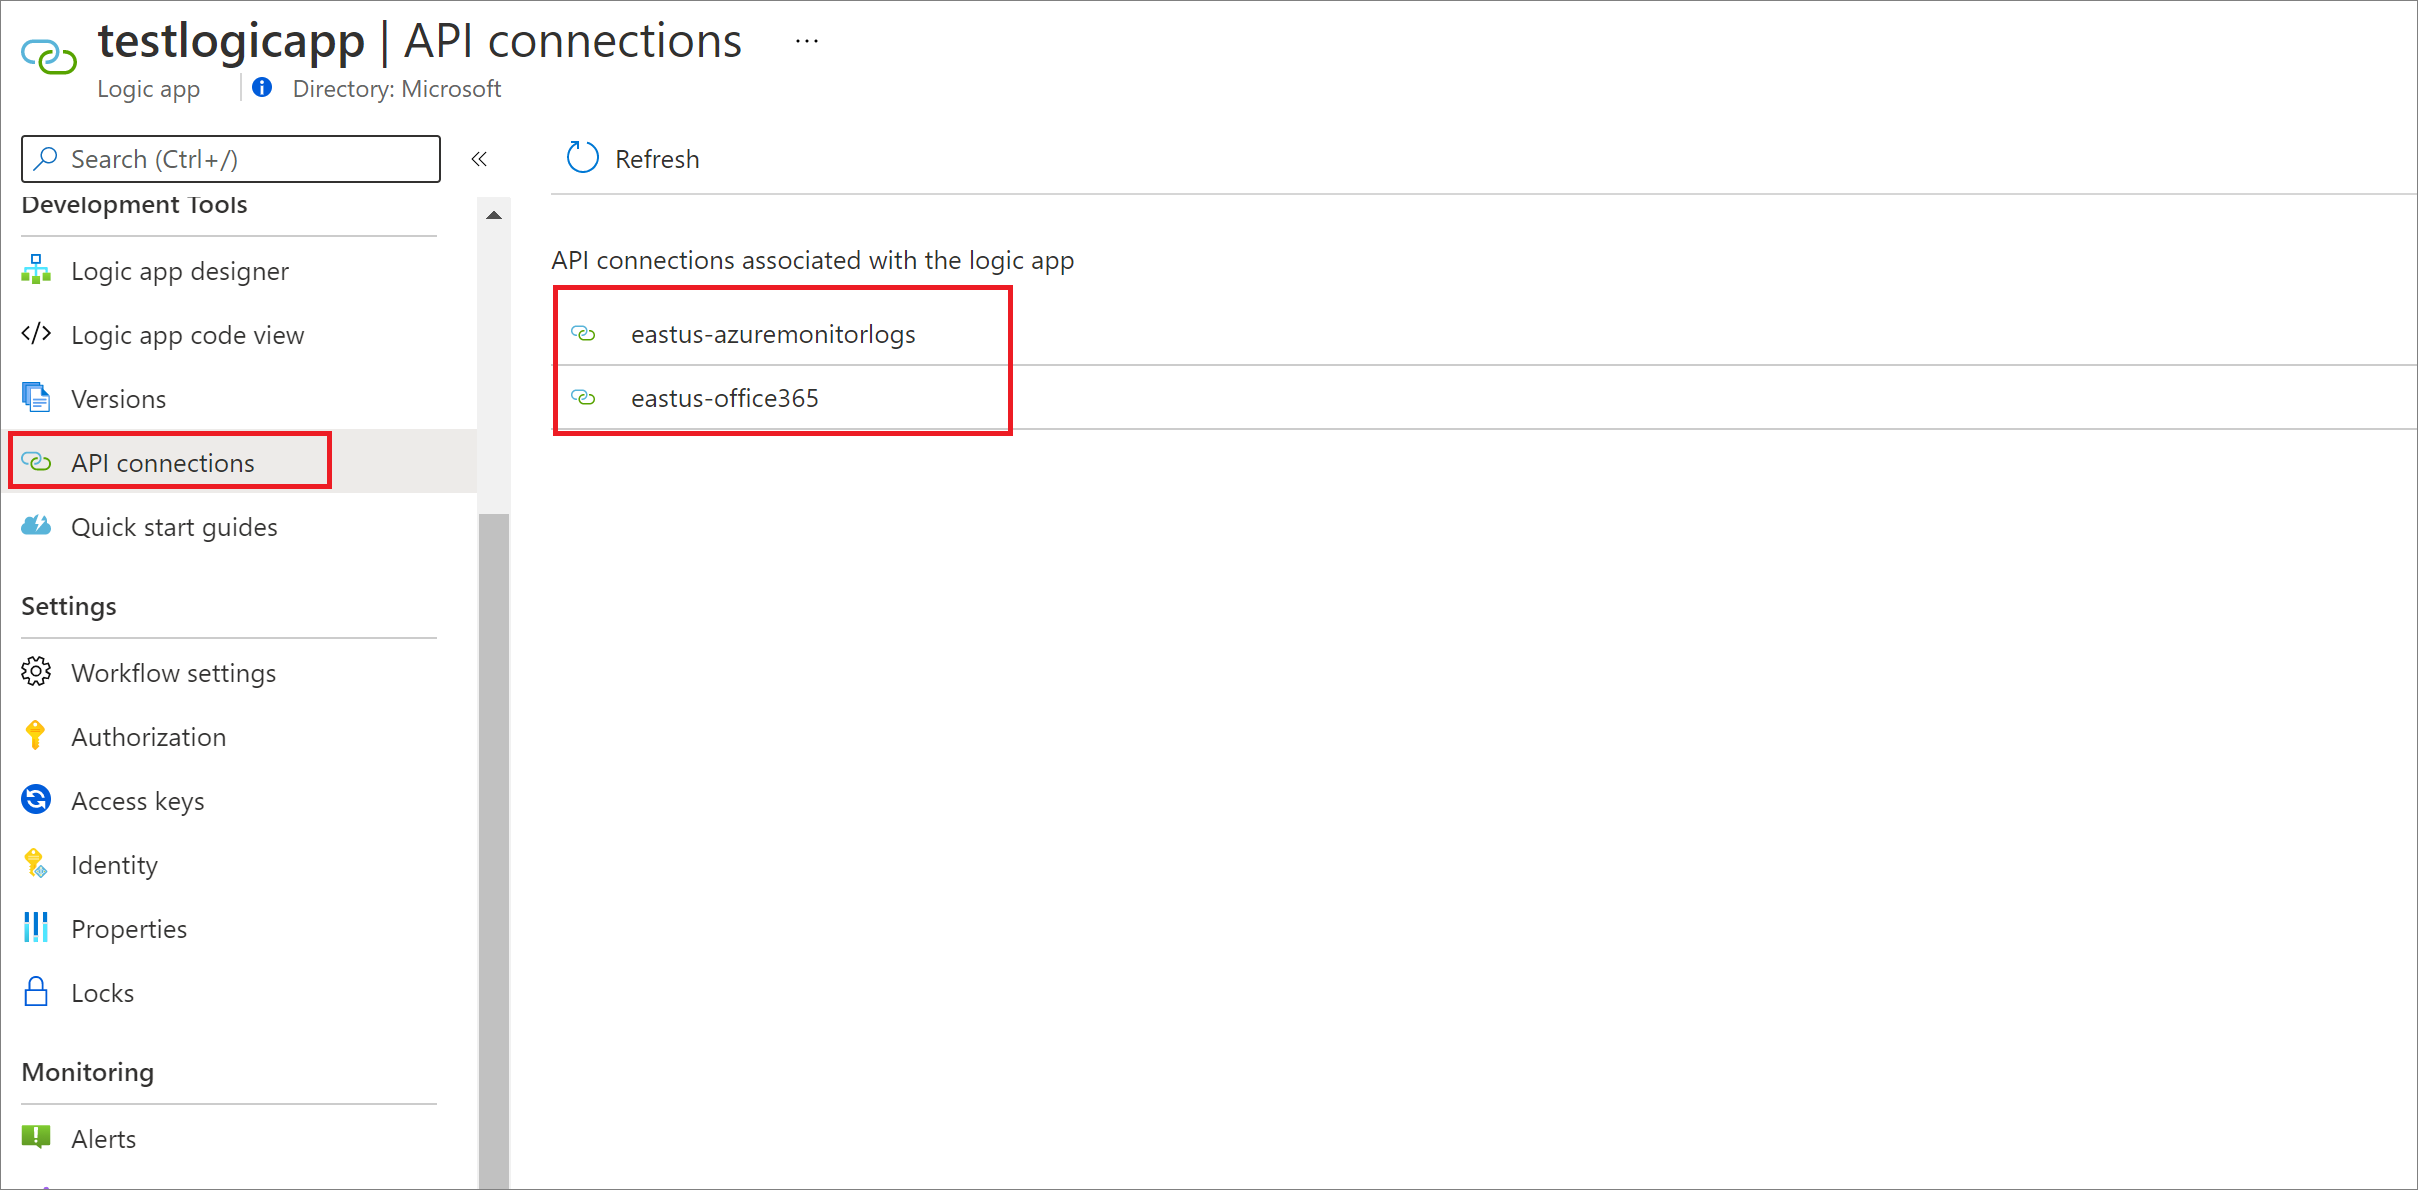
You'll see two connections with the format
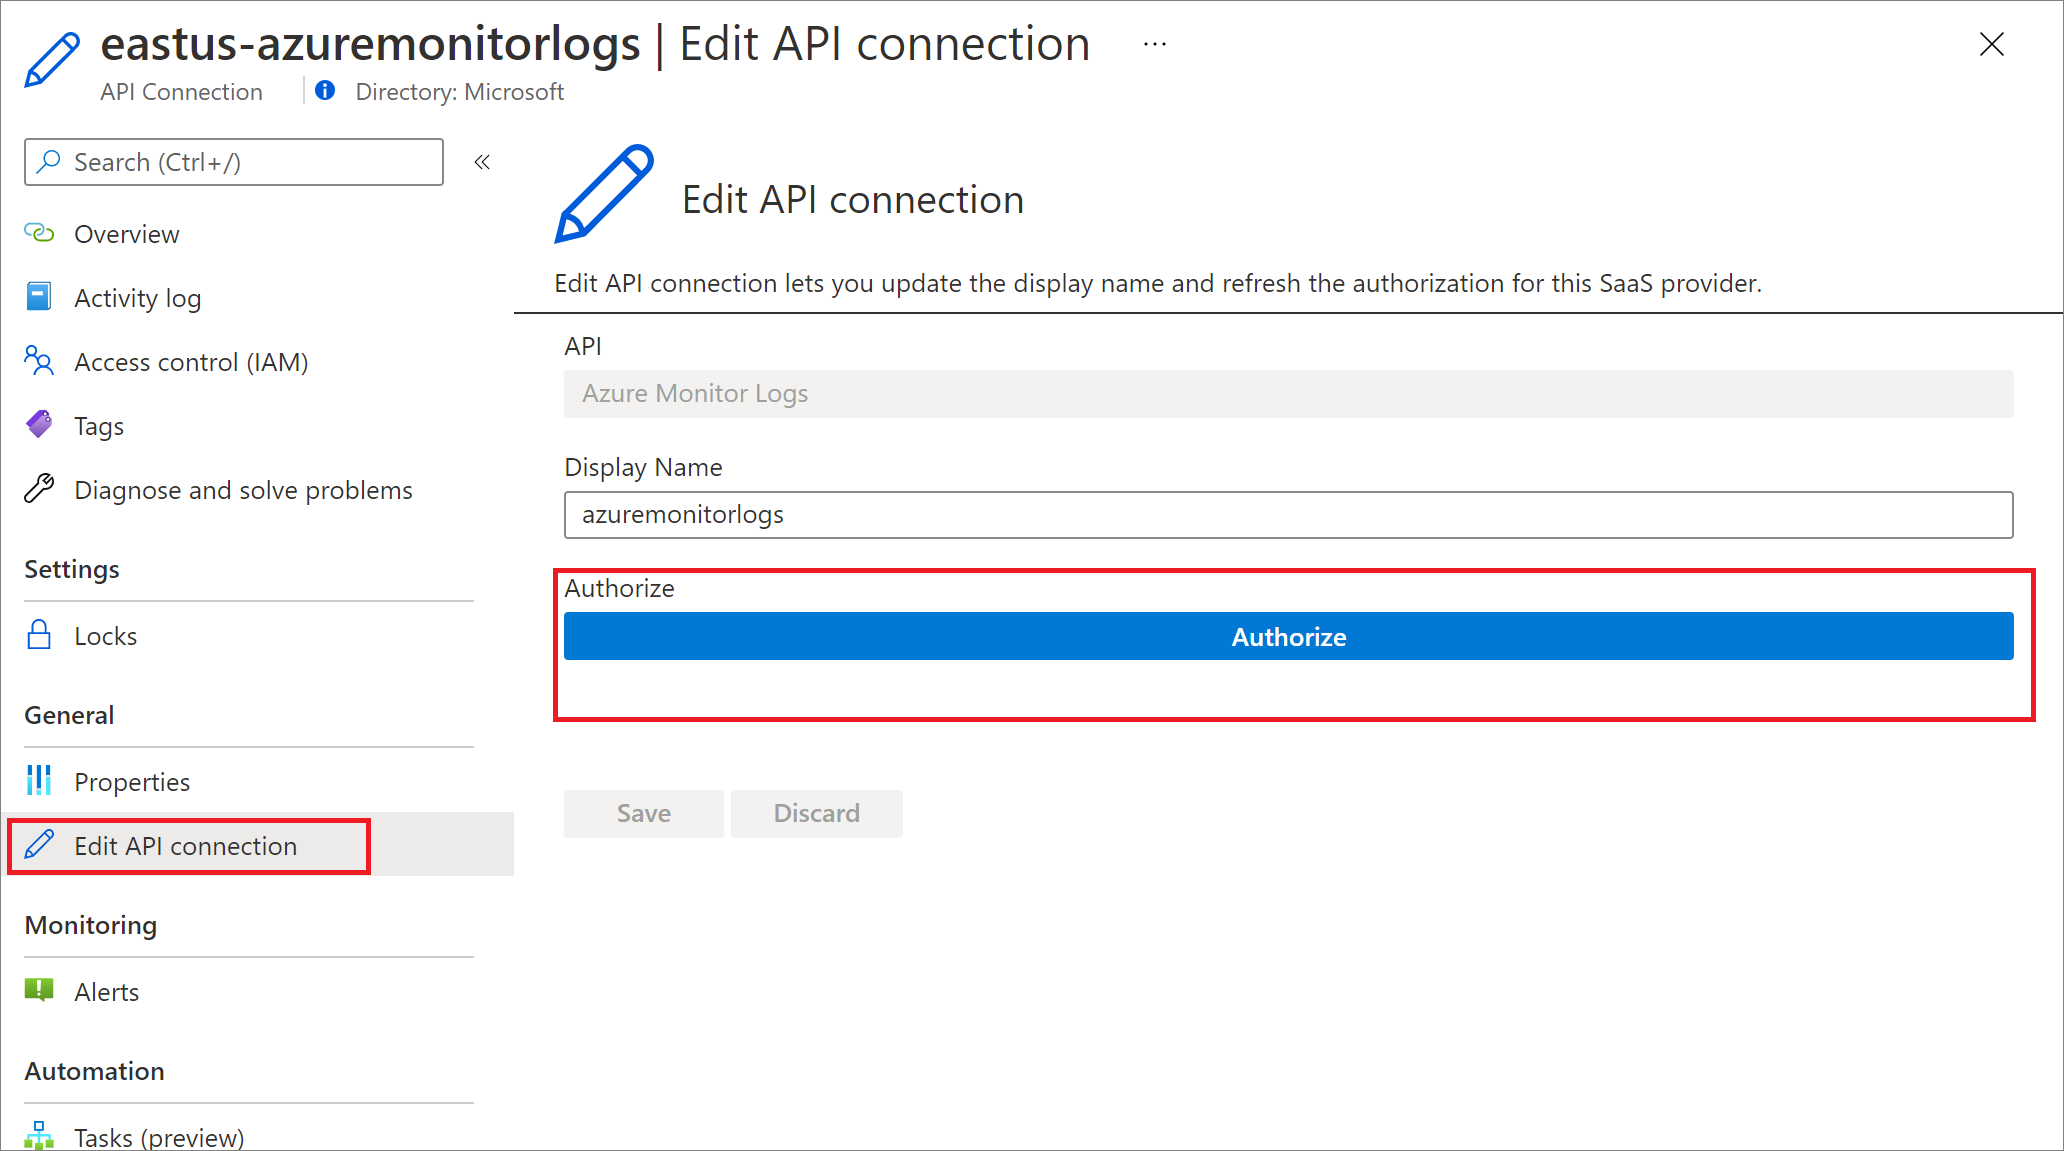
<location>-azuremonitorlogsand<location>-office365- that is, chinanorth-azuremonitorlogs and chinanorth-office365.Go to each of these connections and select the Edit API connection menu item. In the screen that appears, select Authorize, and save the connection once authorization is complete.
To test whether the logic app works after authorization, you can go back to the logic app, open Overview and select Run Trigger in the top pane, to test whether an email is being generated successfully.


Note
The sender account associated with the email is the same as the account that is used to authorize the Office 365 connection during configuration of the email report. To change the sender, you need to use a different account to authorize the connection.
Contents of the email
- All the charts and graphs shown in the portal are available as inline content in the email. Learn more about the information shown in Backup Reports.
- The grids shown in the portal are available as *.csv attachments in the email.
- The data shown in the email uses the report-level filters selected by the user in the report, at the time of creating the email task.
- Tab-level filters such as Backup Instance Name, Policy Name and so on, aren't applied. The only exception to this is the Retention Optimizations grid in the Optimize tab, where the filters for Daily, Weekly, Monthly and Yearly RP retention are applied.
- The time range and aggregation type (for charts) are based on the user’s time range selection in the reports. For example, if the time range selection is last 60 days (translating to weekly aggregation type), and email frequency is daily, the recipient will receive an email every day with charts spanning data taken over the last 60-day period, with data aggregated at a weekly level.
Troubleshoot issues
If you aren't receiving emails as expected even after successful deployment of the logic app, you can follow the steps below to troubleshoot the configuration:
Scenario 1: Receiving neither a successful email nor an error email
This issue could be occurring because the Outlook API connector isn't authorized. To authorize the connection, follow the authorization steps provided above.
This issue could also be occurring if you've specified an incorrect email recipient while creating the logic app. To verify that the email recipient has been specified correctly, you can go to the logic app in the Azure portal, open the Logic App designer, and select email step to see whether the correct email IDs are being used.
Scenario 2: Receiving an error email that says that the logic app failed to execute to completion
To troubleshoot this issue:
- Go to the logic app in the Azure portal.
- At the bottom of the Overview screen, you'll see a Runs History section. You can open on the latest run and view which steps in the workflow failed. Some possible causes could be:
- Azure Monitor Logs Connector has not been not authorized: To fix this issue, follow the authorization steps as provided above.
- Error in the LA query: In case you have customized the logic app with your own queries, an error in any of the LA queries might be causing the logic app to fail. You can select the relevant step and view the error which is causing the query to run incorrectly.
Scenario 3: Error in authorizing Microsoft 365 API connection
When attempting to authorize the Microsoft 365 API connection, you might see an error of the form Test connection failed. Error 'REST API isn't yet supported for this mailbox. This error can occur for sandbox (test) accounts or for accounts that are on a dedicated (on-premises) mail server.
This error can occur if the mailbox is on a dedicated Microsoft Exchange Server and isn't a valid Office 365 mailbox. Learn more
To get a valid Office 365 mailbox, submit a request to your Exchange administrator to migrate the mailbox account. Users who don't have administrator permissions can't migrate accounts. For information on how to migrate the mailbox account, see How to migrate mailbox data by using the Exchange Admin Center in Office 365.
Scenario 4: Error in authorizing Azure Monitor Logs connection
When attempting to authorize the Azure Monitor logs connection, you might see an InvalidAuthenticationTokenTenant error. This generally happens when you're logged in to a different tenant at the time of authorizing the connection to Azure Monitor logs. You need to log in to the same tenant as the tenant where the Log Analytics workspace exists to complete the authorization successfully.
To ensure you're logged in to the right tenant, you can open portal.azure.cn/< tenant-id-of-workspace > in the browser and perform the authorization. To find the tenant ID, go to Azure Activity Directory -> Overview -> Manage Tenants.
If the issues persist, contact Microsoft support.
Pricing for Email Reports
Email reports are free. However, you incur charges for the Log Analytics workspace and Logic Apps that you use to configure and deliver email notifications. These charges apply as per the respective pricing models.
The following examples illustrate the cost estimation for using Email Reports:
- Cost of actions: Cost of the action type (varies by the report you configure for email) x Count of actions × 30 days (a month).
- Cost of standard connectors: Cost of connector x Count of connectors x 30 days (a month).
- Cost of data retention (calculation for 7 days): 7 days × data volume per run in MB (determine the volume by running the workflow once and noting emitted storage metrics) × storage cost for each unit × 30 days (a month).