Note
Access to this page requires authorization. You can try signing in or changing directories.
Access to this page requires authorization. You can try changing directories.
APPLIES TO:
![]() MongoDB
MongoDB
Important
Are you looking for a database solution for high-scale scenarios with a 99.999% availability service level agreement (SLA), instant autoscale, and automatic failover across multiple regions? Consider Azure Cosmos DB for NoSQL.
To connect to an Azure Cosmos DB's API for MongoDB using Studio 3T, you must:
- Download and install Studio 3T.
- Have your Azure Cosmos DB account's connection string information.
Create the connection in Studio 3T
To add your Azure Cosmos DB account to the Studio 3T connection manager, use the following steps:
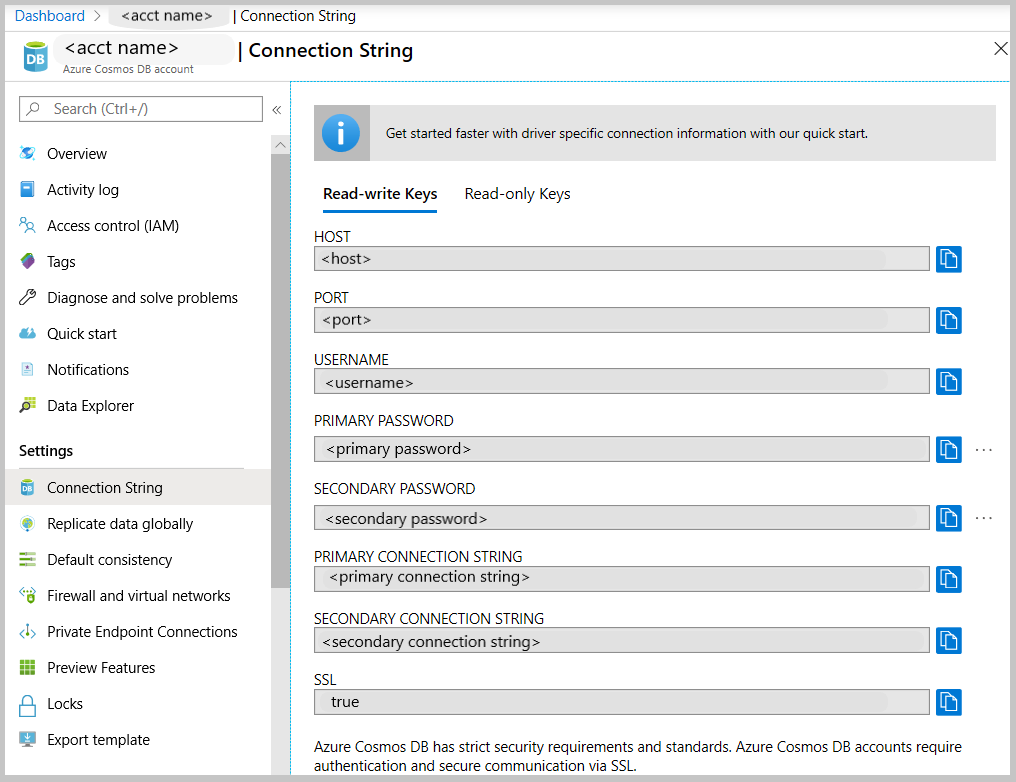
Retrieve the connection information for your Azure Cosmos DB's API for MongoDB account using the instructions in the Connect a MongoDB application to Azure Cosmos DB article.
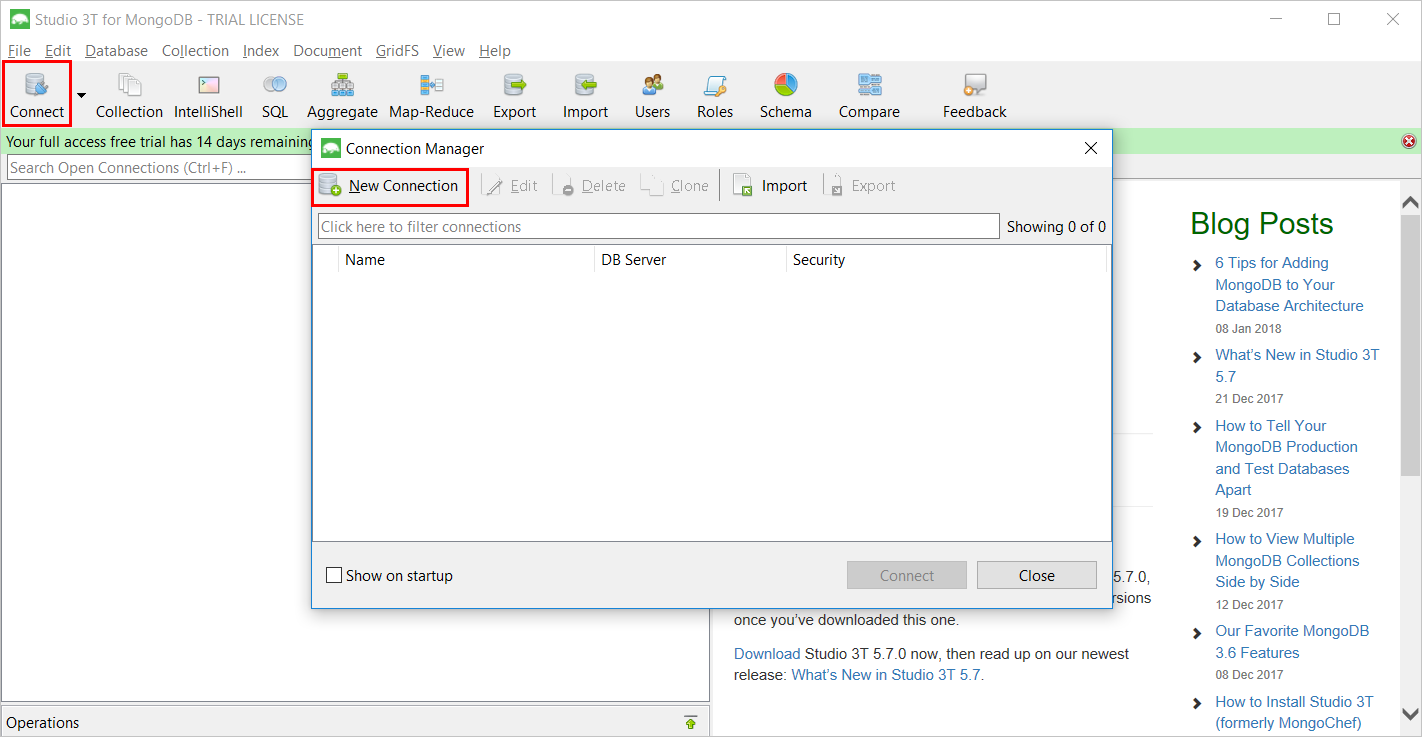
Click Connect to open the Connection Manager, then click New Connection
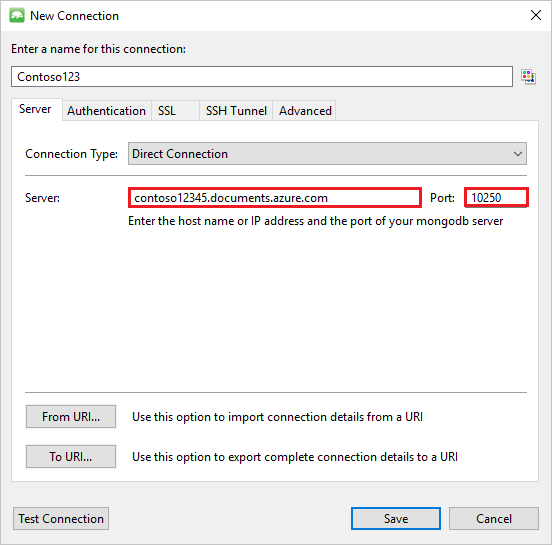
In the New Connection window, on the Server tab, enter the HOST (FQDN) of the Azure Cosmos DB account and the PORT.
In the New Connection window, on the Authentication tab, choose Authentication Mode Basic (MONGODB-CR or SCRAM-SHA-1) and enter the USERNAME and PASSWORD. Accept the default authentication db (admin) or provide your own value.

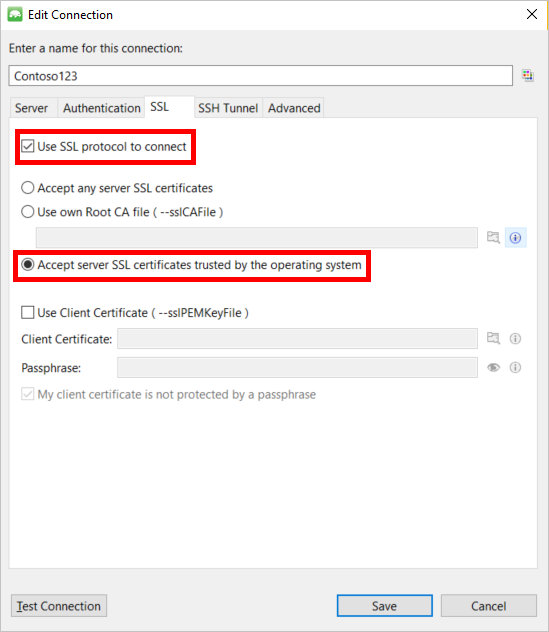
In the New Connection window, on the SSL tab, check the Use SSL protocol to connect check box and the Accept server self-signed SSL certificates radio button.
Click the Test Connection button to validate the connection information, click OK to return to the New Connection window, and then click Save.

Use Studio 3T to create a database, collection, and documents
To create a database, collection, and documents using Studio 3T, perform the following steps:
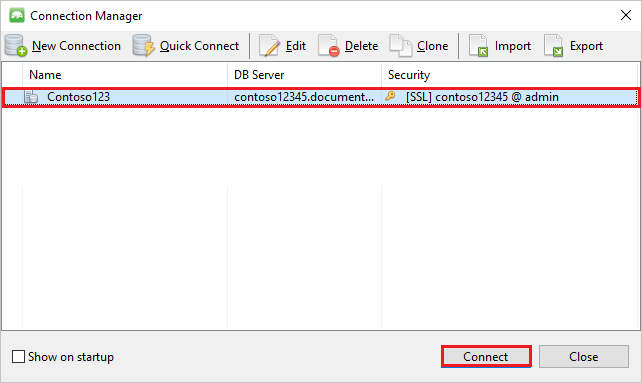
In Connection Manager, highlight the connection and click Connect.
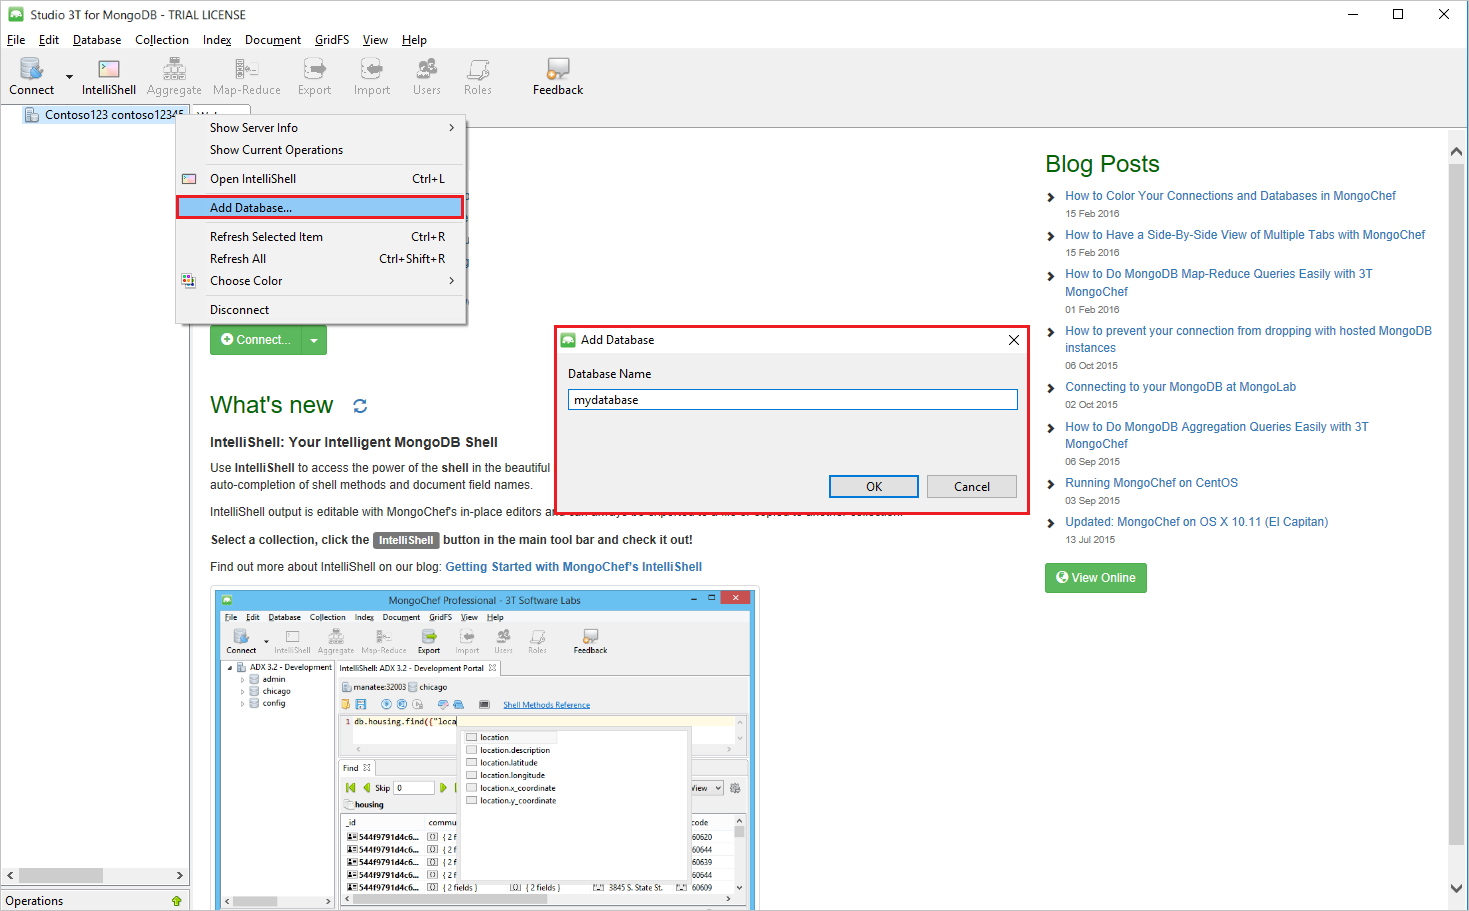
Right-click the host and choose Add Database. Provide a database name and click OK.
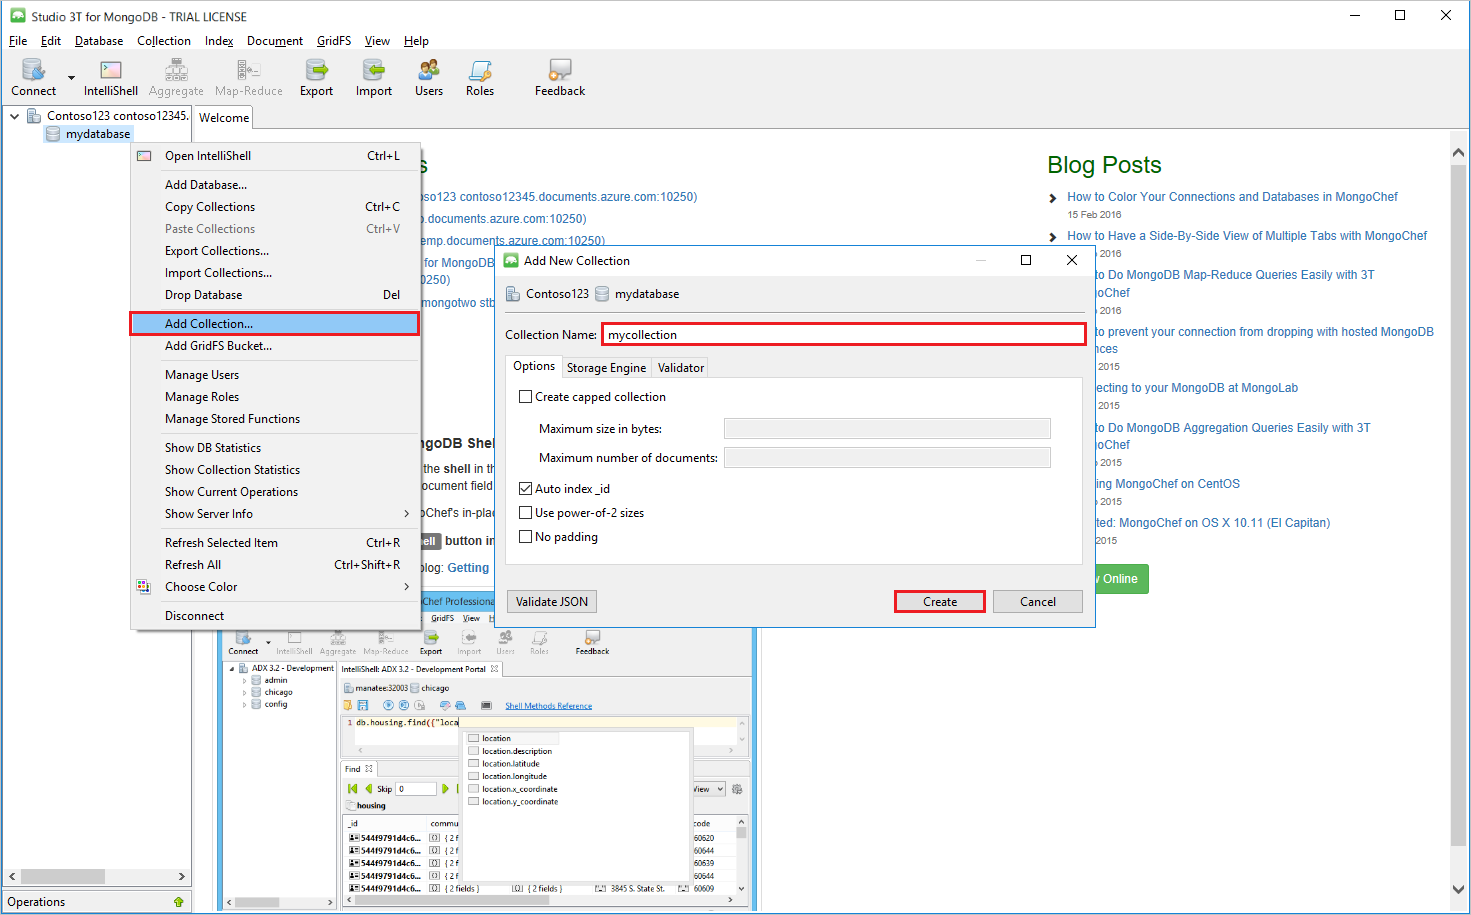
Right-click the database and choose Add Collection. Provide a collection name and click Create.
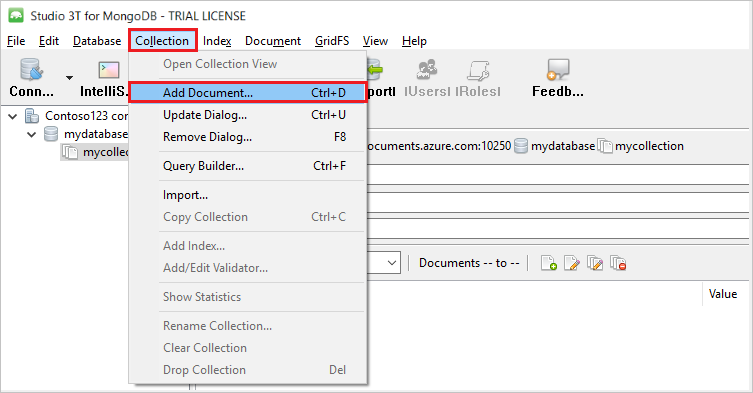
Click the Collection menu item, then click Add Document.
In the Add Document dialog, paste the following and then click Add Document.
{
    "_id": "AndersenFamily",
    "lastName": "Andersen",
    "parents": [
        { "firstName": "Thomas" },
        { "firstName": "Mary Kay"}
    ],
    "children": [
        {
            "firstName": "Henriette Thaulow", "gender": "female", "grade": 5,
            "pets": [{ "givenName": "Fluffy" }]
        }
    ],
    "address": { "state": "WA", "county": "King", "city": "seattle" },
    "isRegistered": true
}
Add another document, this time with the following content:
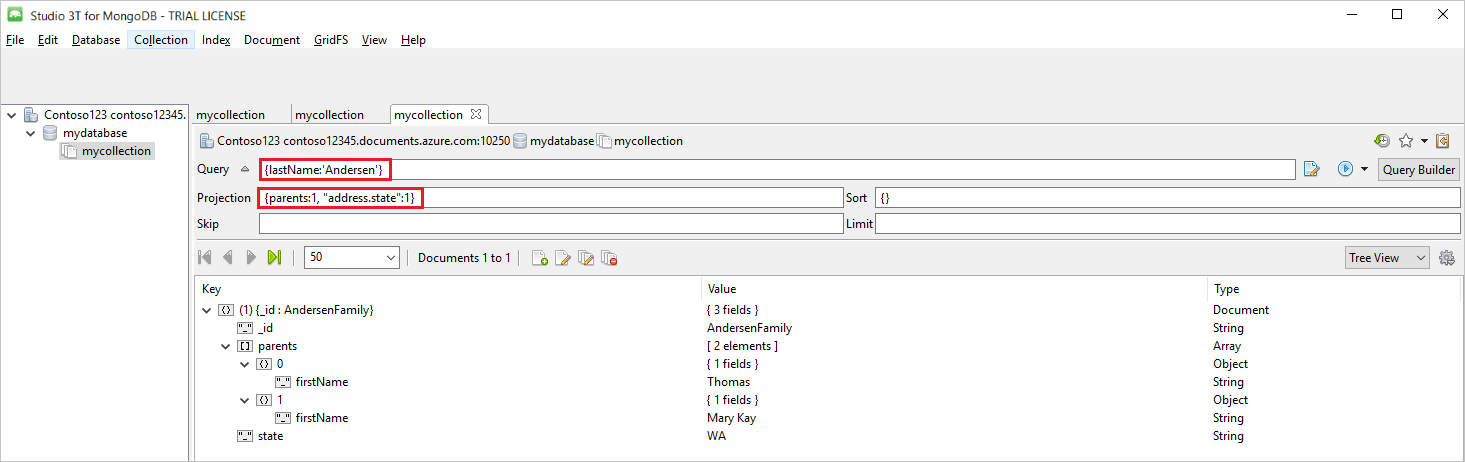
{
    "_id": "WakefieldFamily",
    "parents": [
        { "familyName": "Wakefield", "givenName": "Robin" },
        { "familyName": "Miller", "givenName": "Ben" }
    ],
    "children": [
        {
            "familyName": "Merriam",
            "givenName": "Jesse",
            "gender": "female", "grade": 1,
            "pets": [
                { "givenName": "Goofy" },
                { "givenName": "Shadow" }
            ]
        },
        {
            "familyName": "Miller",
            "givenName": "Lisa",
            "gender": "female",
            "grade": 8 }
    ],
    "address": { "state": "NY", "county": "Manhattan", "city": "NY" },
    "isRegistered": false
}
Execute a sample query. For example, search for families with the last name 'Andersen' and return the parents and state fields.
Next steps
- Learn how to use Robo 3T with Azure Cosmos DB's API for MongoDB.
- Explore MongoDB samples with Azure Cosmos DB's API for MongoDB.
- Trying to do capacity planning for a migration to Azure Cosmos DB? You can use information about your existing database cluster for capacity planning.
- If all you know is the number of vcores and servers in your existing database cluster, read about estimating request units using vCores or vCPUs
- If you know typical request rates for your current database workload, read about estimating request units using Azure Cosmos DB capacity planner