Note
Access to this page requires authorization. You can try signing in or changing directories.
Access to this page requires authorization. You can try changing directories.
Note
For Spring Boot applications, we recommend using Azure Spring Apps. However, you can still use Azure Kubernetes Service as a destination. See Java Workload Destination Guidance for advice.
In this tutorial, you set up and deploy a Spring Boot application that exposes REST APIs to perform CRUD operations on data in Azure Cosmos DB (API for NoSQL account). You package the application as Docker image, push it to Azure Container Registry, deploy to Azure Kubernetes Service and test the application.
Prerequisites
An Azure account with an active subscription. Create a trial subscription.
Java Development Kit (JDK) 8. Point your
JAVA_HOMEenvironment variable to the path where the JDK is installed.Azure CLI to create Azure services.
Docker to manage images and containers.
curl to invoke REST APIs exposed the applications.
Create Azure services
In this section, you create Azure services required for this tutorial.
- Azure Cosmos DB
- Azure Container Registry
- Azure Kubernetes Service
Create a resource group for the Azure resources used in this tutorial
Sign in to your Azure account using Azure CLI:
az loginChoose your Azure Subscription:
az account set -s <enter subscription ID>Create a resource group.
az group create --name=cosmosdb-springboot-aks-rg --location=chinaeastNote
Replace
cosmosdb-springboot-aks-rgwith a unique name for your resource group.
Create an Azure Cosmos DB for NoSQL database account
Use this command to create an Azure Cosmos DB for NoSQL database account using the Azure CLI.
az cosmosdb create --name <enter account name> --resource-group <enter resource group name>
Create a private Azure Container Registry using the Azure CLI
Note
Replace cosmosdbspringbootregistry with a unique name for your registry.
az acr create --resource-group cosmosdb-springboot-aks-rg --location chinaeast \
    --name cosmosdbspringbootregistry --sku Basic
Create a Kubernetes cluster on Azure using the Azure CLI
The following command creates a Kubernetes cluster in the cosmosdb-springboot-aks-rg resource group, with cosmosdb-springboot-aks as the cluster name, with Azure Container Registry (ACR)
cosmosdbspringbootregistryattached:az aks create \ --resource-group cosmosdb-springboot-aks-rg \ --name cosmosdb-springboot-aks \ --node-count 1 \ --generate-ssh-keys \ --attach-acr cosmosdbspringbootregistry \ --dns-name-prefix=cosmosdb-springboot-aks-appNote
This command might take a while to complete.
If you don't have
kubectlinstalled, you can do so using the Azure CLI.az aks install-cliGet access credentials for the Azure Kubernetes Service cluster.
az aks get-credentials --resource-group=cosmosdb-springboot-aks-rg --name=cosmosdb-springboot-aks

kubectl get nodes
Build the application
Clone the application and change into the right directory.
git clone https://github.com/Azure-Samples/cosmosdb-springboot-aks.git

cd cosmosdb-springboot-aks
Use
Mavento build the application. At the end of this step, you should have the application JAR file created in thetargetfolder../mvnw install
Run the application locally
If you intend to run the application on Azure Kubernetes Service, skip this section and move on to Push Docker image to Azure Container Registry
Before you run the application, update the
application.propertiesfile with the details of your Azure Cosmos DB account.azure.cosmos.uri=https://<enter Azure Cosmos DB db account name>.cosmos.azure.cn:443/ azure.cosmos.key=<enter Azure Cosmos DB db primary key> azure.cosmos.database=<enter Azure Cosmos DB db database name> azure.cosmos.populateQueryMetrics=falseNote
The database and container (called
users) are created automatically once you start the application.Run the application locally.
java -jar target/*.jar
Push Docker image to Azure Container Registry
Build the Docker image
docker build -t cosmosdbspringbootregistry.azurecr.cn/spring-cosmos-app:v1 .Note
Replace
cosmosdbspringbootregistrywith the name of your Azure Container RegistryLog into Azure Container Registry.
az acr login -n cosmosdbspringbootregistryPush image to Azure Container Registry and list it.
docker push cosmosdbspringbootregistry.azurecr.cn/spring-cosmos-app:v1

az acr repository list --name cosmosdbspringbootregistry --output table
Deploy application to Azure Kubernetes Service
Edit the
Secretinapp.yamlwith the details of your Azure Cosmos DB setup.... apiVersion: v1 kind: Secret metadata: name: app-config type: Opaque stringData: application.properties: | azure.cosmos.uri=https://<enter Azure Cosmos DB db account name>.cosmos.azure.cn:443/ azure.cosmos.key=<enter Azure Cosmos DB db primary key> azure.cosmos.database=<enter Azure Cosmos DB db database name> azure.cosmos.populateQueryMetrics=false ...Note
The database and a container (
users) are created automatically once you start the application.Deploy to Kubernetes and wait for the
Podto transition toRunningstate:kubectl apply -f deploy/app.yaml kubectl get pods -l=app=spring-cosmos-app -wNote
You can check application logs using:
kubectl logs -f $(kubectl get pods -l=app=spring-cosmos-app -o=jsonpath='{.items[0].metadata.name}') -c spring-cosmos-app
Access the application
If the application is running in Kubernetes and you want to access it locally over port 8080, run this command:
kubectl port-forward svc/spring-cosmos-app-internal 8080:8080
Test the application by invoking the REST endpoints. You can also navigate to the Data Explorer menu of the Azure Cosmos DB account in the Azure portal and access the users container to confirm the result of the operations.
Create new users
curl -i -X POST -H "Content-Type: application/json" -d '{"email":"john.doe@foobar.com", "firstName": "John", "lastName": "Doe", "city": "NYC"}' http://localhost:8080/users

curl -i -X POST -H "Content-Type: application/json" -d '{"email":"mr.jim@foobar.com", "firstName": "mr", "lastName": "jim", "city": "Seattle"}' http://localhost:8080/users
If successful, you should get an HTTP
201response.Update a user
curl -i -X POST -H "Content-Type: application/json" -d '{"email":"john.doe@foobar.com", "firstName": "John", "lastName": "Doe", "city": "Dallas"}' http://localhost:8080/usersList all users
curl -i http://localhost:8080/usersGet an existing user
curl -i http://localhost:8080/users/john.doe@foobar.comYou should get back a JSON payload with the user details. For example:
{
  "email": "john.doe@foobar.com",
  "firstName": "John",
  "lastName": "Doe",
  "city": "Dallas"
}
Try to get a user that doesn't exist
curl -i http://localhost:8080/users/not.there@foobar.comYou should receive an HTTP
404response.Replace a user
curl -i -X PUT -H "Content-Type: application/json" -d '{"email":"john.doe@foobar.com", "firstName": "john", "lastName": "doe","city": "New Jersey"}' http://localhost:8080/users/Try to replace user that doesn't exist
curl -i -X PUT -H "Content-Type: application/json" -d '{"email":"not.there@foobar.com", "firstName": "john", "lastName": "doe","city": "New Jersey"}' http://localhost:8080/users/You should receive an HTTP
404response.Delete a user
curl -i -X DELETE http://localhost:8080/users/mr.jim@foobar.comDelete a user that doesn't exist
curl -X DELETE http://localhost:8080/users/go.nuts@foobar.comYou should receive an HTTP
404response.
Access the application using a public IP address (optional)
Creating a Service of type LoadBalancer in Azure Kubernetes Service results in an Azure Load Balancer getting provisioned. You can then access the application using its public IP address.
Create a Kubernetes Service of type
LoadBalancerNote
This step creates an Azure Load Balancer with a public IP address.
kubectl apply -f deploy/load-balancer-service.yamlWait for the Azure Load Balancer to get created. Until then, the
EXTERNAL-IPfor the Kubernetes Service remains in<pending>state.kubectl get service spring-cosmos-app -w NAME TYPE CLUSTER-IP EXTERNAL-IP PORT(S) AGE spring-cosmos-app LoadBalancer 10.0.68.83 <pending> 8080:31523/TCP 6sNote
CLUSTER-IPvalue might differ in your caseOnce Azure Load Balancer creation completes, the
EXTERNAL-IPis available.NAME TYPE CLUSTER-IP EXTERNAL-IP PORT(S) AGE spring-cosmos-app LoadBalancer 10.0.68.83 20.81.108.180 8080:31523/TCP 18sNote
EXTERNAL-IPvalue might differ in your caseUse the public IP address
Terminate the
kubectl watchprocess and repeat the previouscurlcommands with the public IP address along with port8080. For example, to list all users:curl -i http://20.81.108.180:8080/usersNote
Replace
20.81.108.180with the public IP address for your environment
Kubernetes resources for the application
Here are some of the key points related to the Kubernetes resources for this application:
The Spring Boot application is a Kubernetes
Deploymentbased on the Docker image in Azure Container RegistryAzure Cosmos DB configuration is mounted in
application.propertiesat path/configinside the container.This mount is made possible using a Kubernetes
Volumethat in turn refers to a Kubernetes Secret, which was created along with the application. You can run this command to confirm that this file is present within the application container:kubectl exec -it $(kubectl get pods -l=app=spring-cosmos-app -o=jsonpath='{.items[0].metadata.name}') -c spring-cosmos-app -- cat /config/application.propertiesLiveness and Readiness probes configuration for this application refer to the HTTP endpoints that are made available by Spring Boot Actuator when a Spring Boot application is deployed to a Kubernetes environment -
/actuator/health/livenessand/actuator/health/readiness.A ClusterIP Service can be created to access the REST endpoints of the Spring Boot application internally within the Kubernetes cluster.
A LoadBalancer Service can be created to access the application via a public IP address.
Clean up resources
When you're done with your app and Azure Cosmos DB account, you can delete the Azure resources you created so you don't incur more charges. To delete the resources:
In the Azure portal Search bar, search for and select Resource groups.
From the list, select the resource group you created for this quickstart.
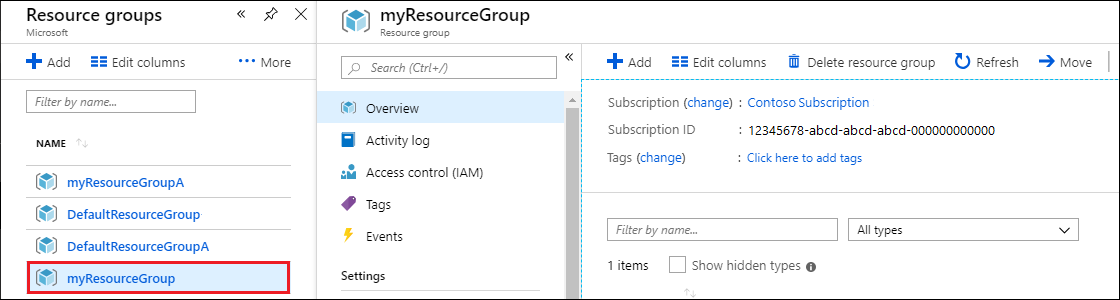
On the resource group Overview page, select Delete resource group.
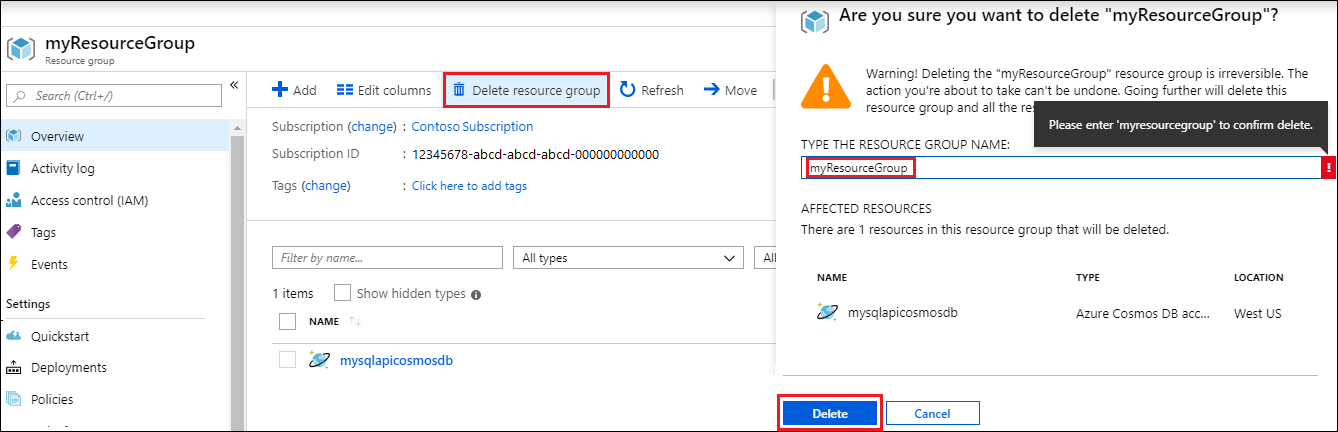
In the next window, enter the name of the resource group to delete, and then select Delete.