Note
Access to this page requires authorization. You can try signing in or changing directories.
Access to this page requires authorization. You can try changing directories.
This article helps you create an Enterprise Agreement (EA) subscription for yourself or for someone else in your current Microsoft Entra directory/tenant. You can create another subscription to avoid hitting subscription quota limits, to create separate environments for security, or to isolate data for compliance reasons.
If you want to create subscriptions for Microsoft Customer Agreements, see Create a Microsoft Customer Agreement subscription. If you're a Microsoft Partner and you want to create a subscription for a customer, see Create a subscription for a partner's customer. Or, if you have a Microsoft Online Service Program (MOSP) billing account, also called pay-as-you-go, you can create subscriptions starting in the Azure portal.
Note
You can't provision Azure resources such as subscriptions, virtual machines, Azure web apps, or Azure functions in a Microsoft Entra B2B or Azure AD B2C tenant. You must create those resources in your Microsoft Entra tenant.
To learn more about billing accounts and identify your billing account type, see View billing accounts in Azure portal.
Permission required to create Azure subscriptions
You need the following permissions to create subscriptions for an EA:
- An Enterprise Administrator can create a new subscription under any active enrollment account.
- Account Owner role on the Enterprise Agreement enrollment.
For more information, see Understand Azure Enterprise Agreement administrative roles in Azure.
Create an EA subscription
A user with Enterprise Administrator or Account Owner permissions can use the following steps to create a new EA subscription.
Note
If you want to create an Enterprise Dev/Test subscription, an enterprise administrator must enable account owners to create them. Otherwise, the option to create them isn't available. To enable the dev/test offer for an enrollment, see Enable the enterprise dev/test offer.
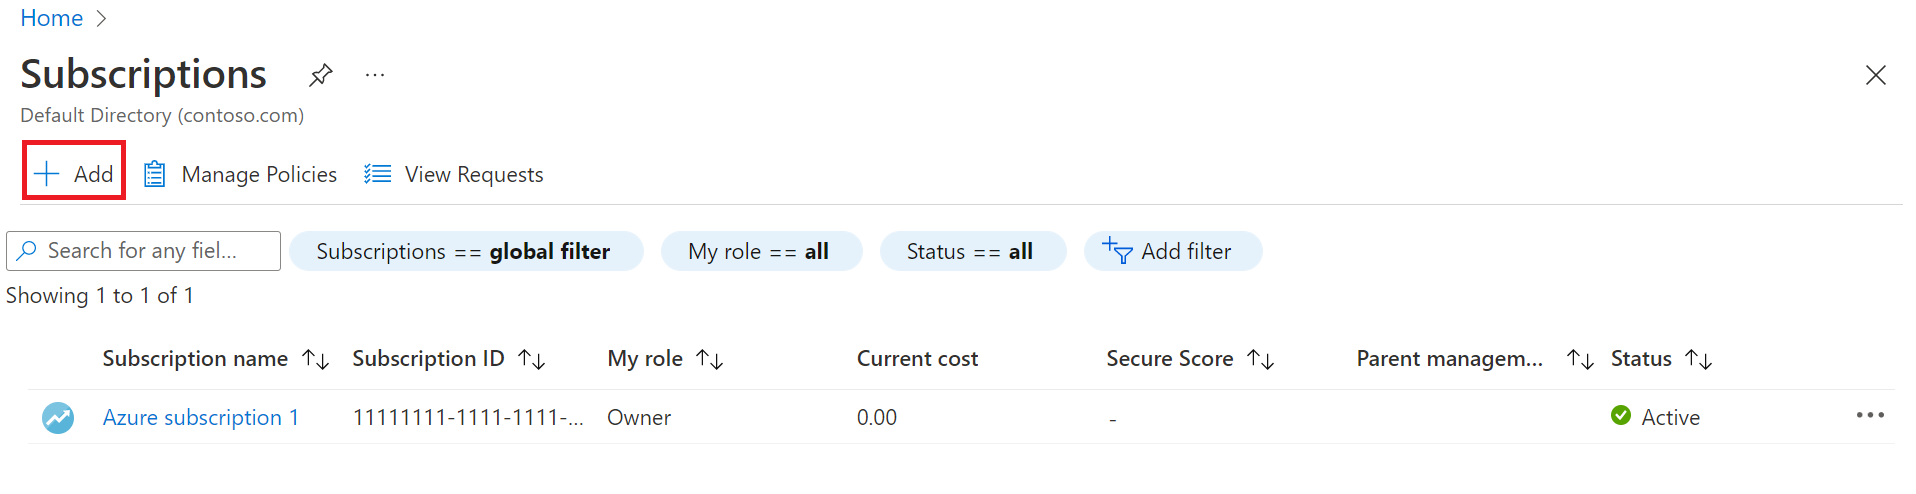
- Sign in to the Azure portal.
- Navigate to Subscriptions and then select Add.
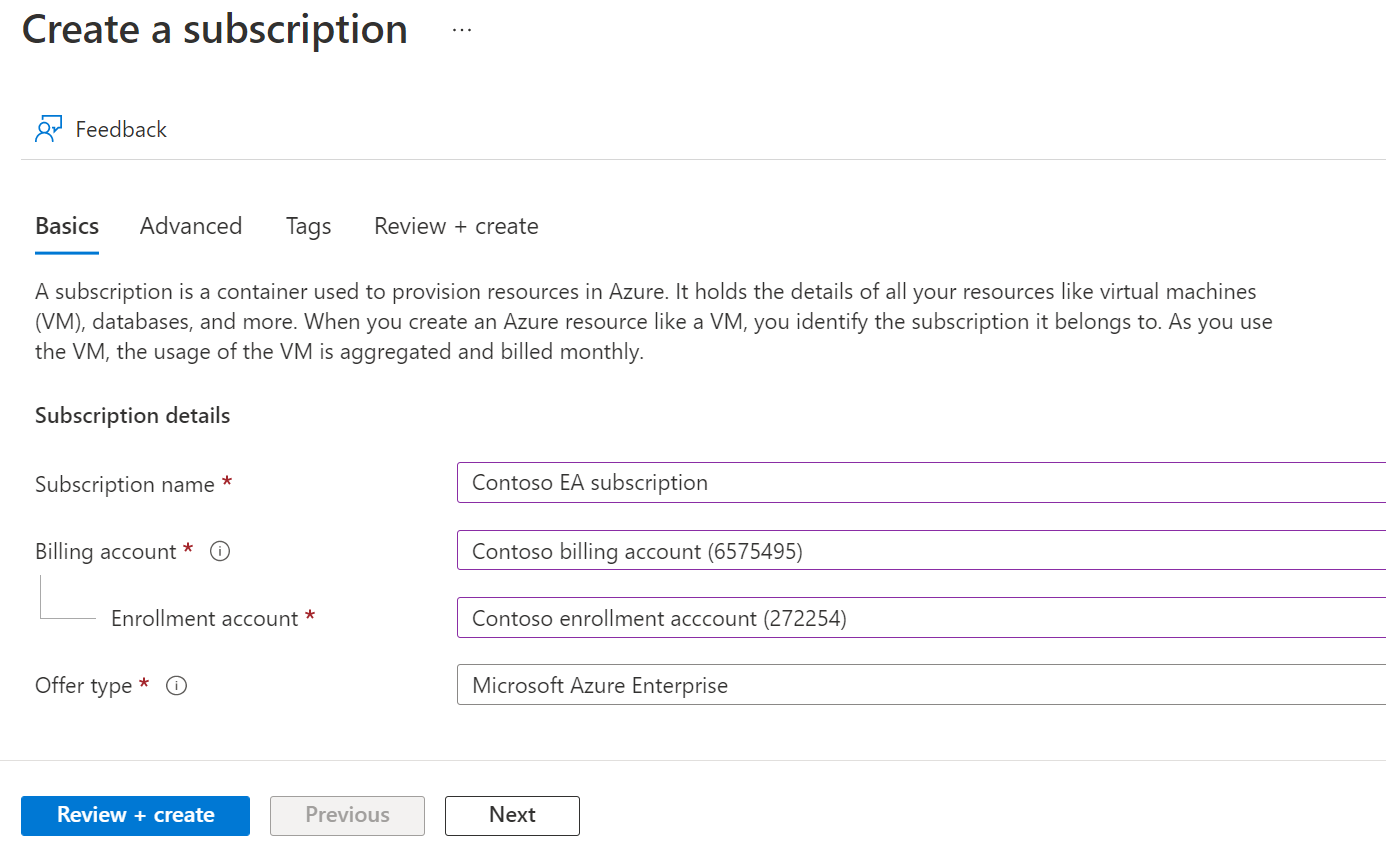
- On the Create a subscription page, on the Basics tab, type a Subscription name.
- Select the Billing account where the new subscription gets created.
- Select the Enrollment account where the subscription gets created.
- Select an Offer type, select Enterprise Dev/Test if the subscription is for development or testing workloads. Otherwise, select Azure Enterprise.
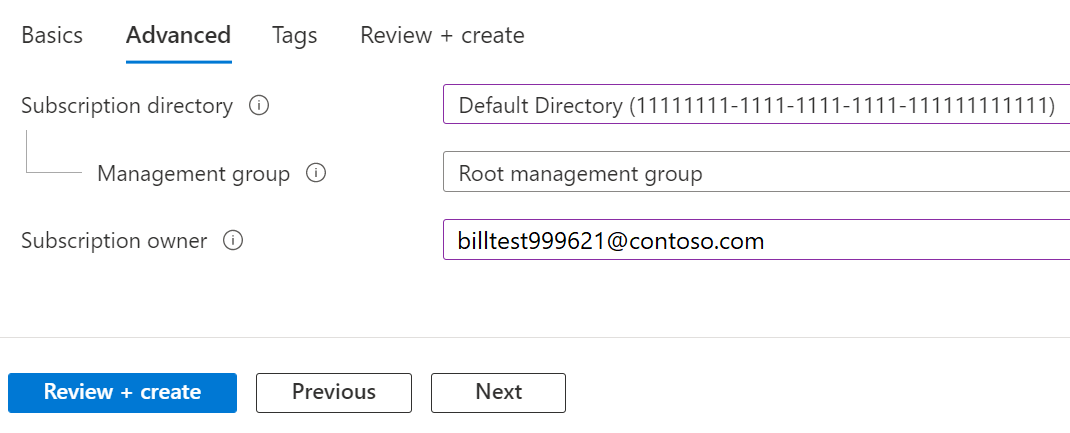
- Select the Advanced tab.
- Select your Subscription directory. It's the Microsoft Entra ID where the new subscription gets created.
- Select a Management group. It's the Microsoft Entra management group that the new subscription is associated with. You can only select management groups in the current directory.
- Select more or more Subscription owners. You can select only users or service principals in the selected subscription directory. You can't select guest directory users. If you select a service principal, enter its App ID.
- Select the Tags tab.
- Enter tag pairs for Name and Value.

- Select Review + create. You should see a message stating
Validation passed. - Verify that the subscription information is correct, then select Create. You get a notification that the subscription is getting created.


After the new subscription is created, the account owner can see it in on the Subscriptions page.
View the new subscription
When you created the subscription, Azure created a notification stating Successfully created the subscription. The notification also had a link to Go to subscription, which allows you to view the new subscription. If you missed the notification, you can view select the bell symbol in the upper-right corner of the portal to view the notification that has the link to Go to subscription. Select the link to view the new subscription.
Here's an example of the notification:

Or, if you're already on the Subscriptions page, you can refresh your browser's view to see the new subscription.
Create subscription in other tenant and view transfer requests
A user with the following permission can create subscriptions in their customer's directory if they're allowed or exempted with subscription policy. For more information, see Setting subscription policy.
- Enterprise Administrator
- Account Owner
When you try to create a subscription for someone in a directory outside of the current directory (such as a customer's tenant), a subscription creation request is created. You specify the subscription directory and subscription owner details on the Advanced tab when creating the subscription. The subscription owner must accept the subscription ownership request before the subscription is created. The subscription owner is the customer in the target tenant where the subscription is being provisioned.

When the request is created, the subscription owner (the customer) is sent an email letting them know that they need to accept subscription ownership. The email contains a link used to accept ownership in the Azure portal. The customer must accept the request within seven days. If not accepted within seven days, the request expires. The person that created the request can also manually send their customer the ownership URL to accept the subscription.
After the request is created, it's visible in the Azure portal at Subscriptions > View Requests by the following people:
- The tenant global administrator of the source tenant where the subscription provisioning request is made.
- The user who made the subscription creation request for the subscription being provisioned in the other tenant.
- The user who made the request to provision the subscription in a different tenant than where they make the Subscription � Alias REST API call instead of the Azure portal.
The subscription owner in the request who resides in the target tenant doesn't see this subscription creation request on the View requests page. Instead, they receive an email with the link to accept ownership of the subscription in the target tenant.

Anyone with access to view the request can view its details. In the request details, the Accept ownership URL is visible. You can copy it to manually share it with the subscription owner in the target tenant for subscription ownership acceptance.
Can't view subscription
If you created a subscription but can't find it in the Subscriptions list view, a view filter might be applied.
To clear the filter and view all subscriptions:
- In the Azure portal, navigate to Subscriptions.
- At the top of the list, select the Subscriptions filter item.
- At the top of the subscriptions filter box, select All. At the bottom of the subscriptions filter box, clear Show only subscriptions selected in the global subscriptions filter.
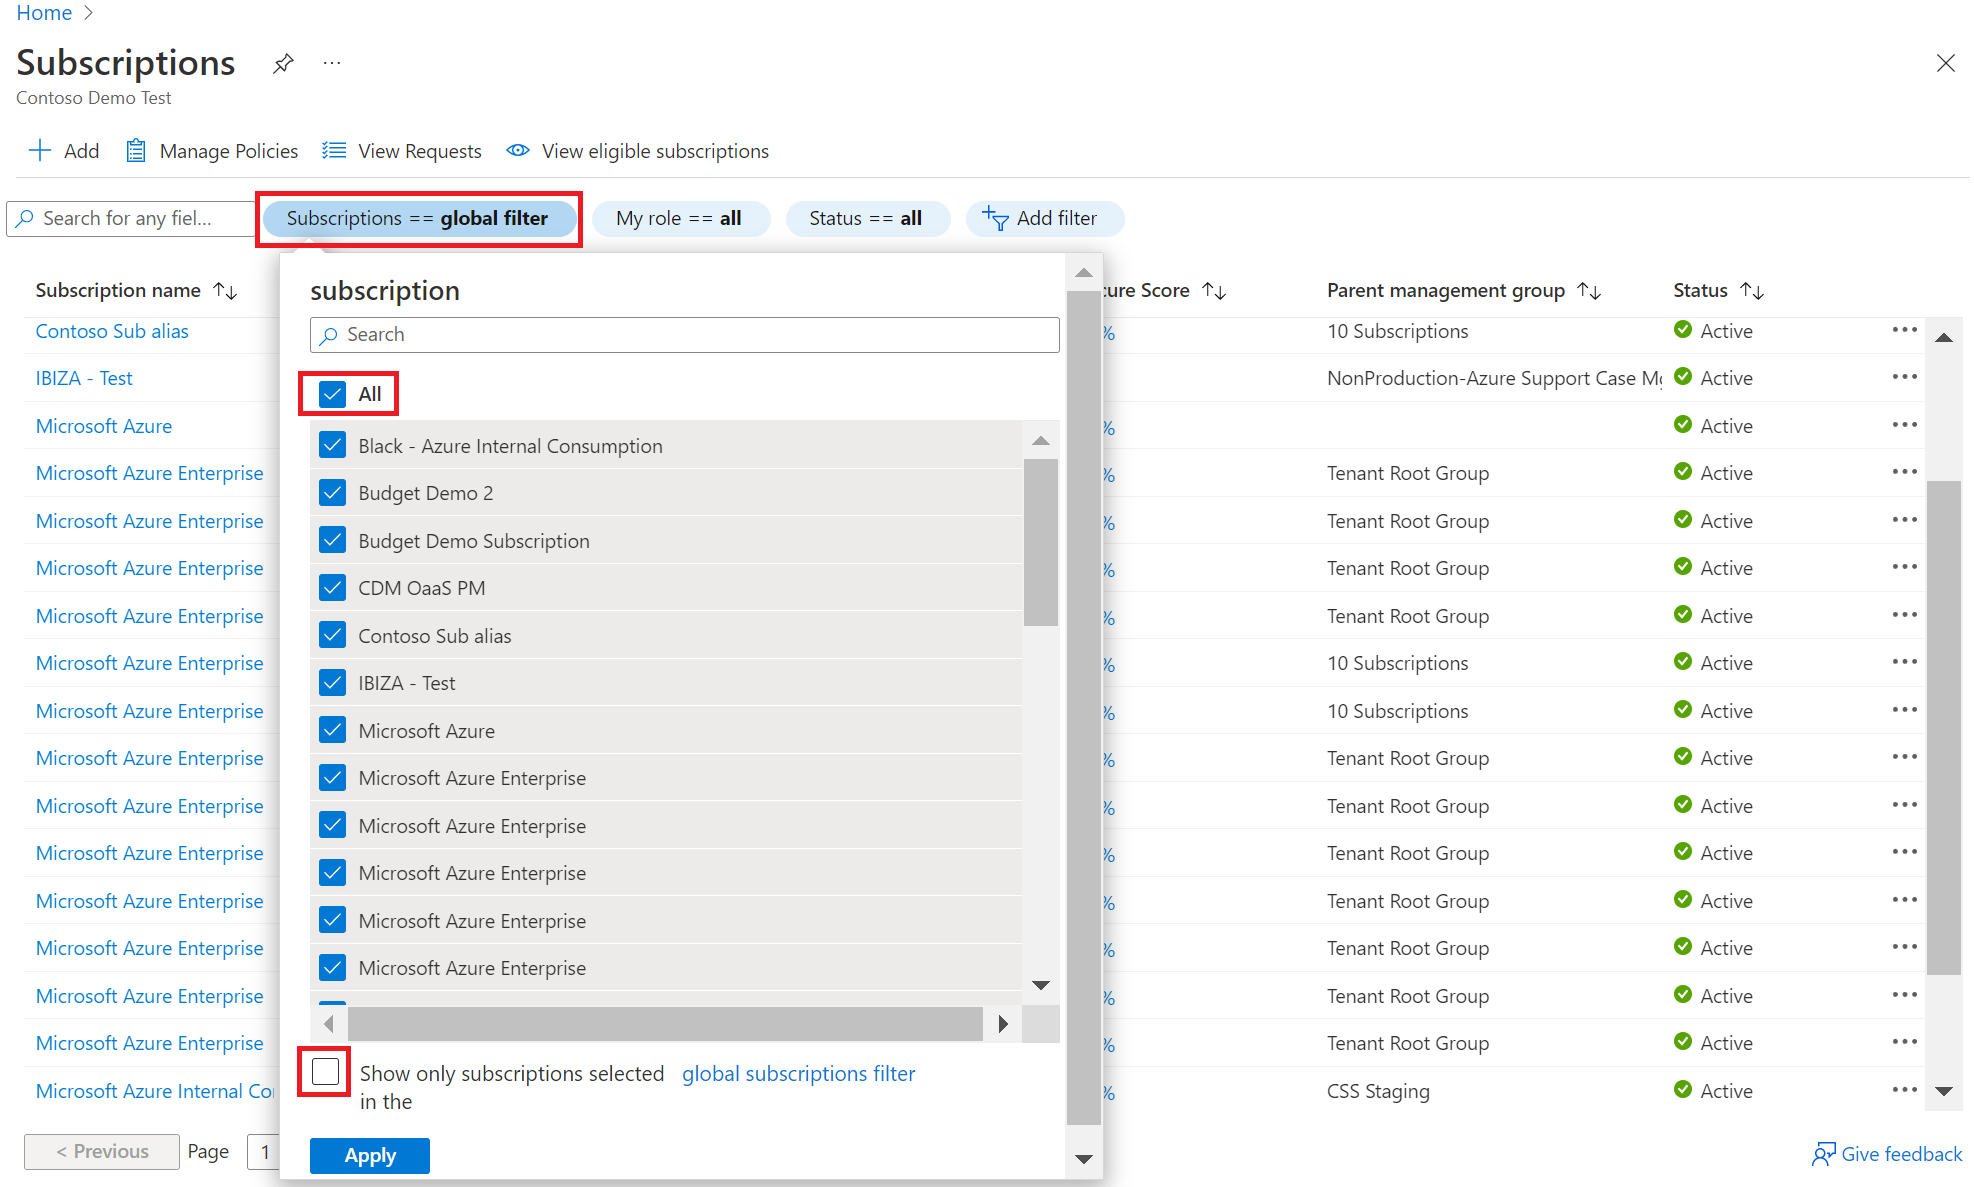
- Select Apply to close the box and refresh the list of subscriptions.

Create an Azure subscription programmatically
You can also create subscriptions programmatically. For more information, see Create Azure subscriptions programmatically.
Need help? Contact us.
If you have questions or need help, create a support request.