Note
Access to this page requires authorization. You can try signing in or changing directories.
Access to this page requires authorization. You can try changing directories.
This is the last tutorial of the series: Deploy Azure Data Box Disk. In this tutorial, you will learn about:
- Verify data upload to Azure
- Erasure of data from Data Box Disk
Prerequisites
Before you begin, make sure that you have completed the Tutorial: Return Azure Data Box Disk.
Verify data upload to Azure
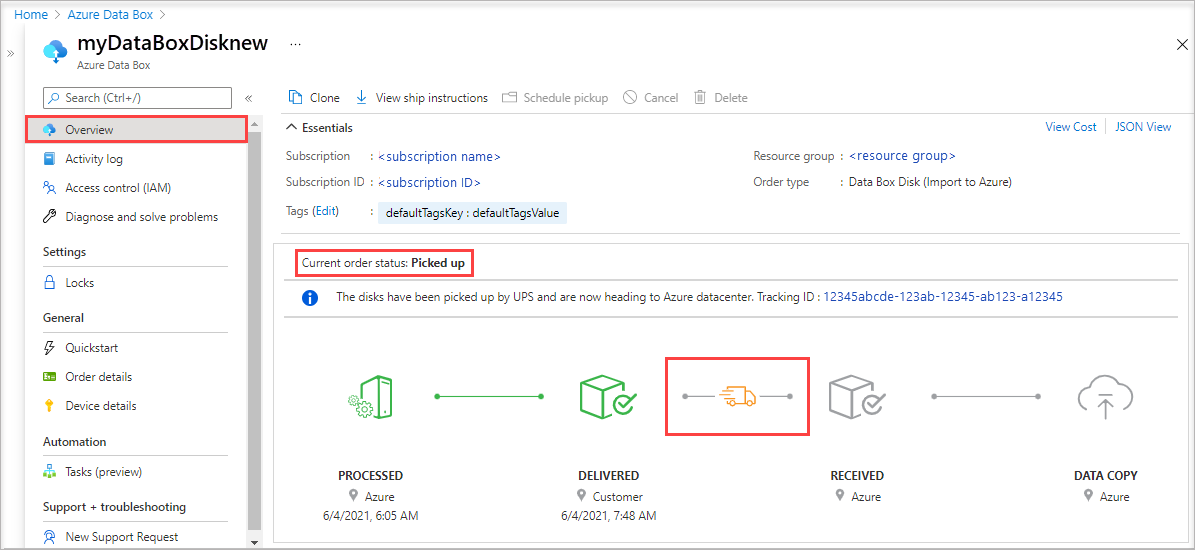
Once the disks are picked up by your carrier, the order status in the portal updates to Picked up. A tracking ID is also displayed.
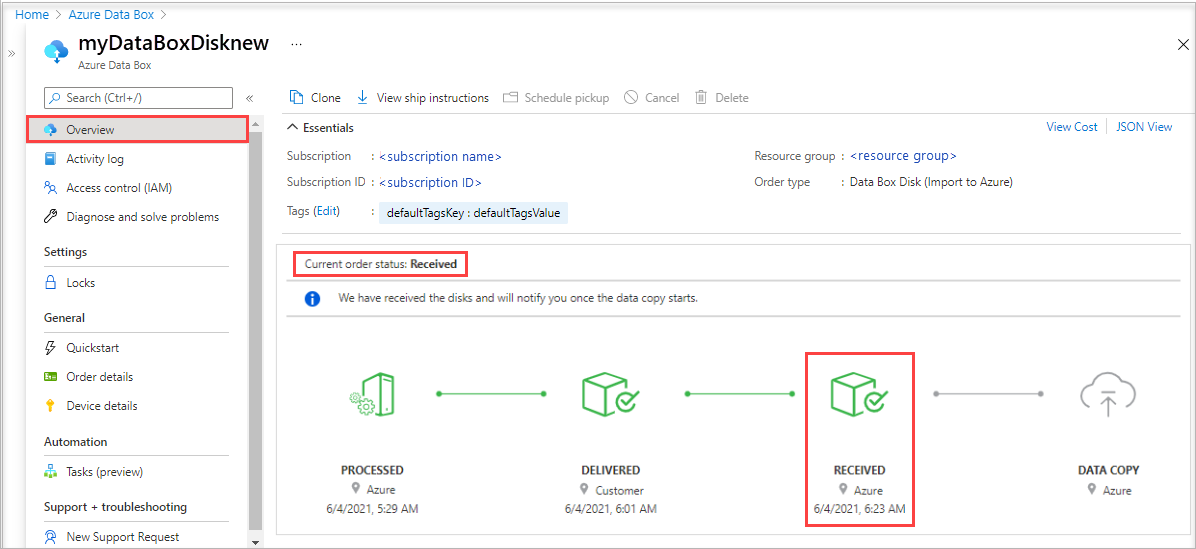
When Azure receives and scans the disk, job status is updated to Received.
The data automatically gets copied once the disks are connected to a server in the Azure datacenter. Depending upon the data size, the copy operation may take a few hours to days to complete. You can monitor the copy job progress in the portal.
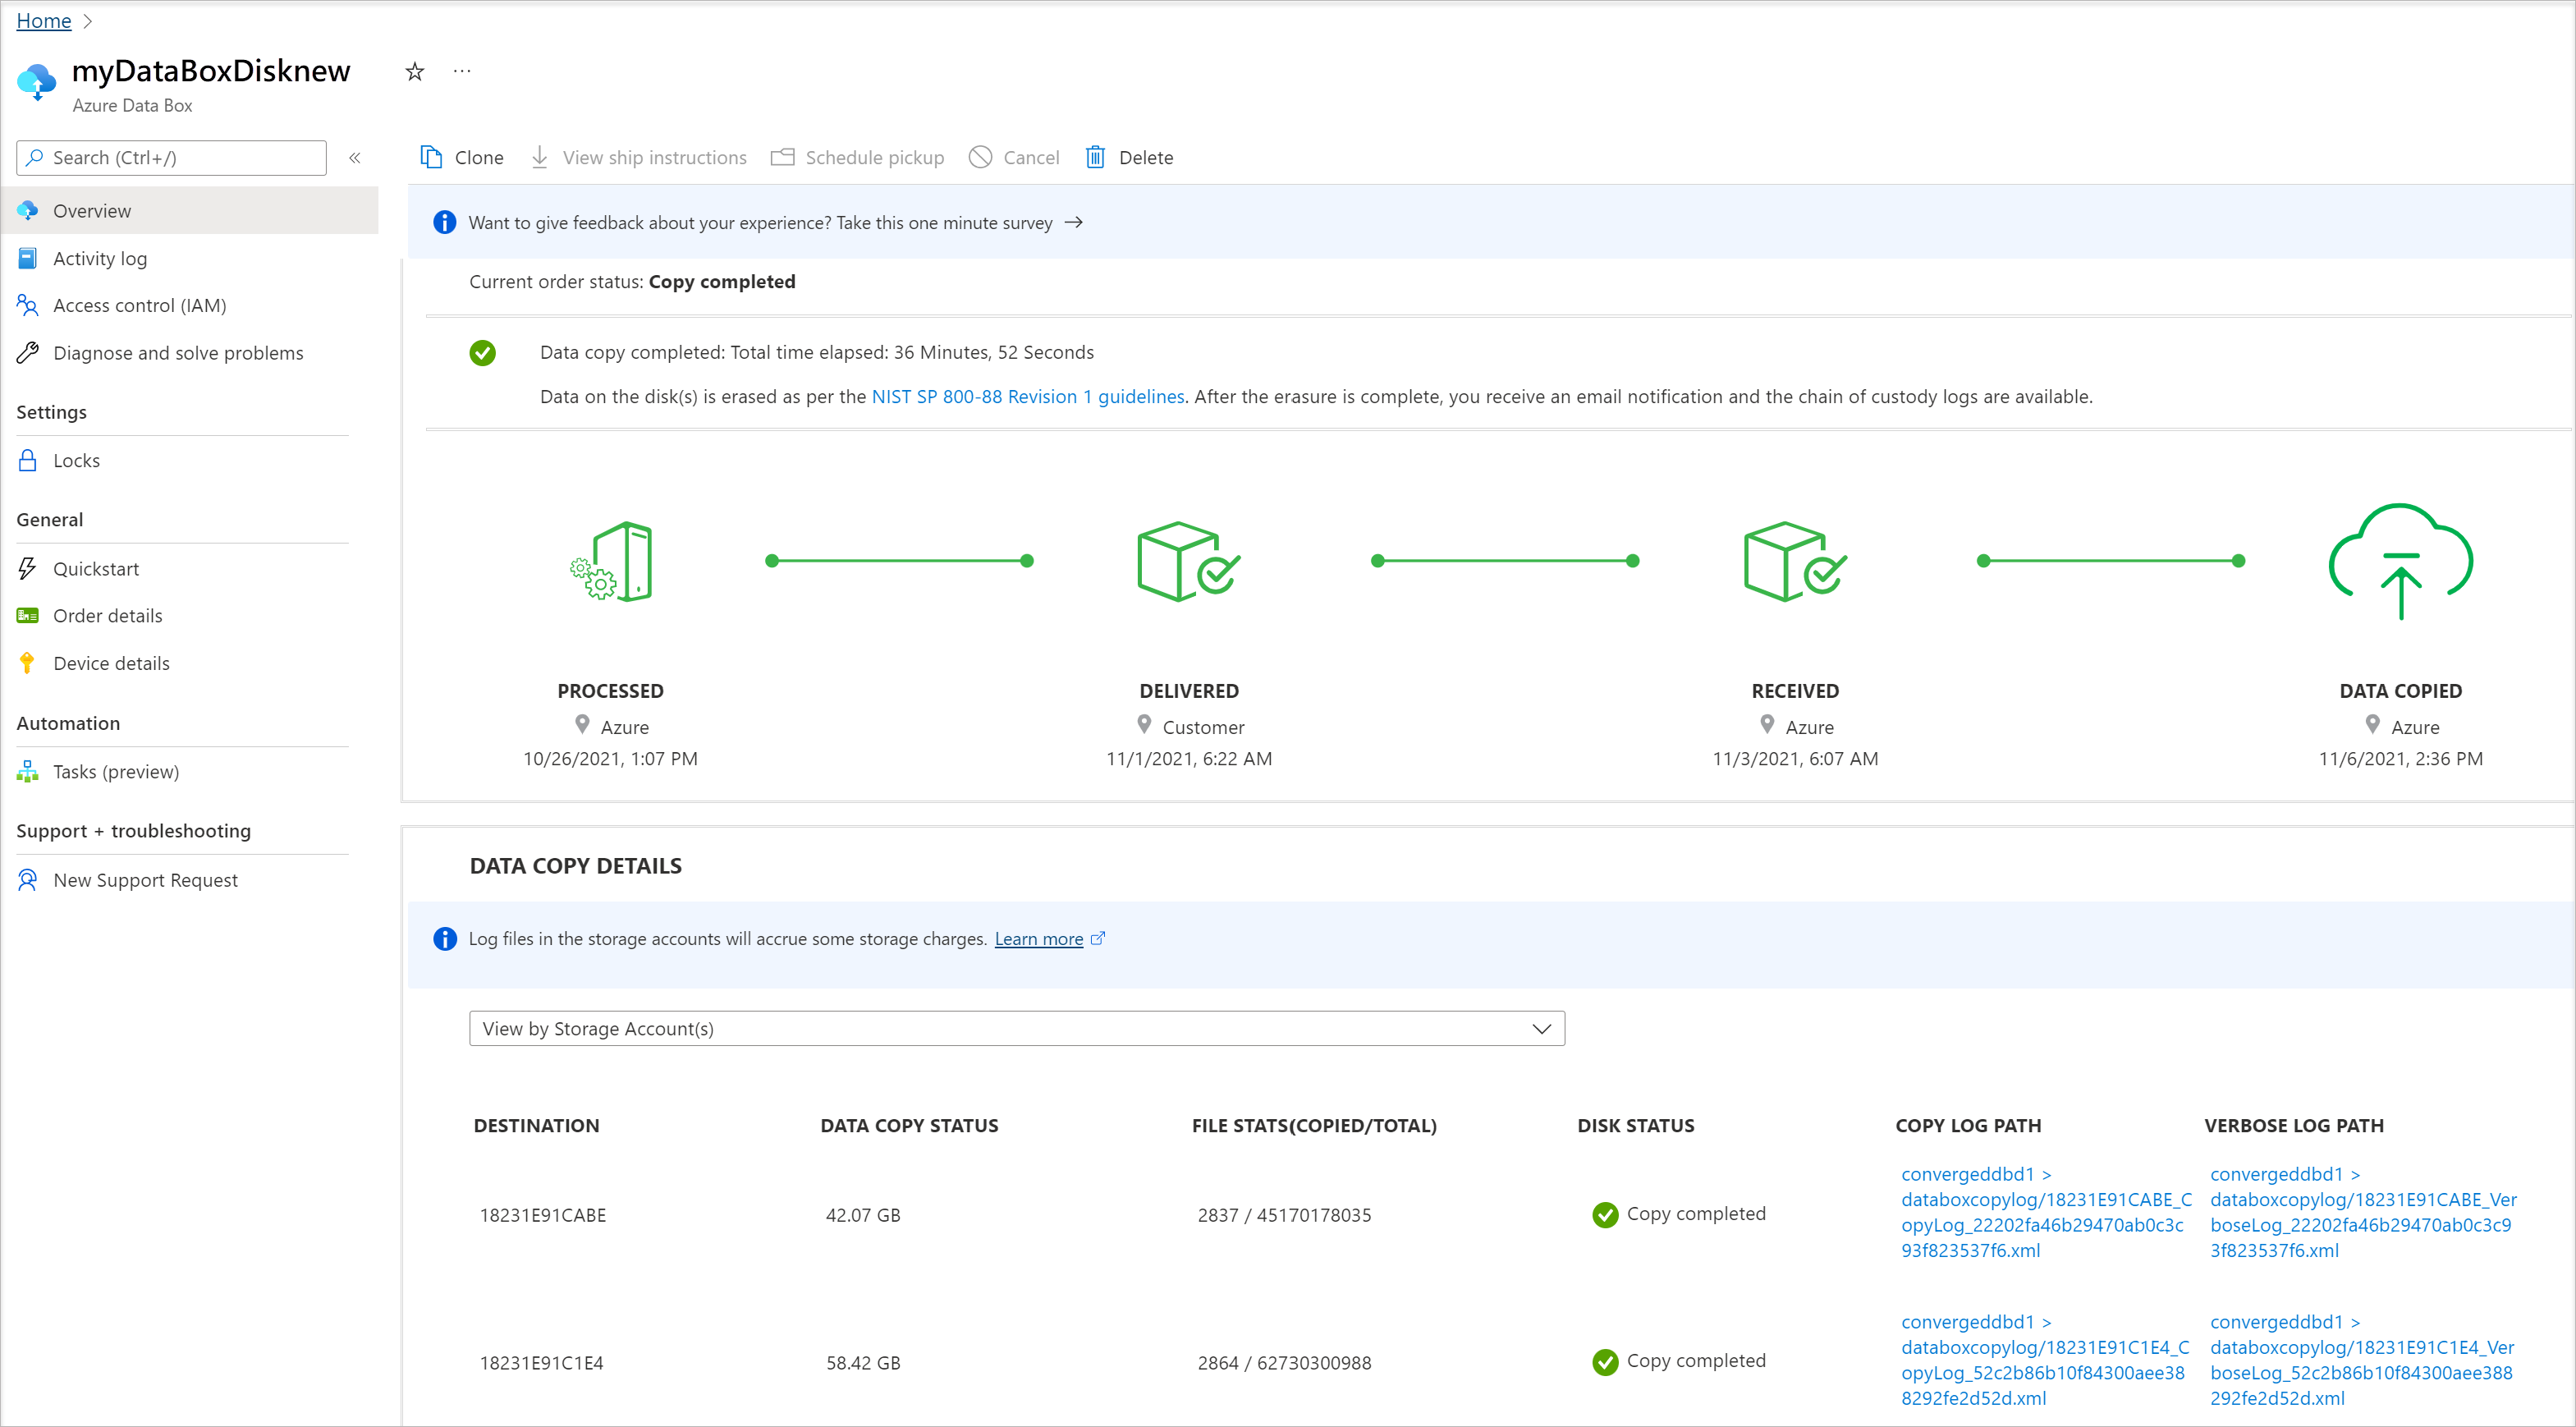
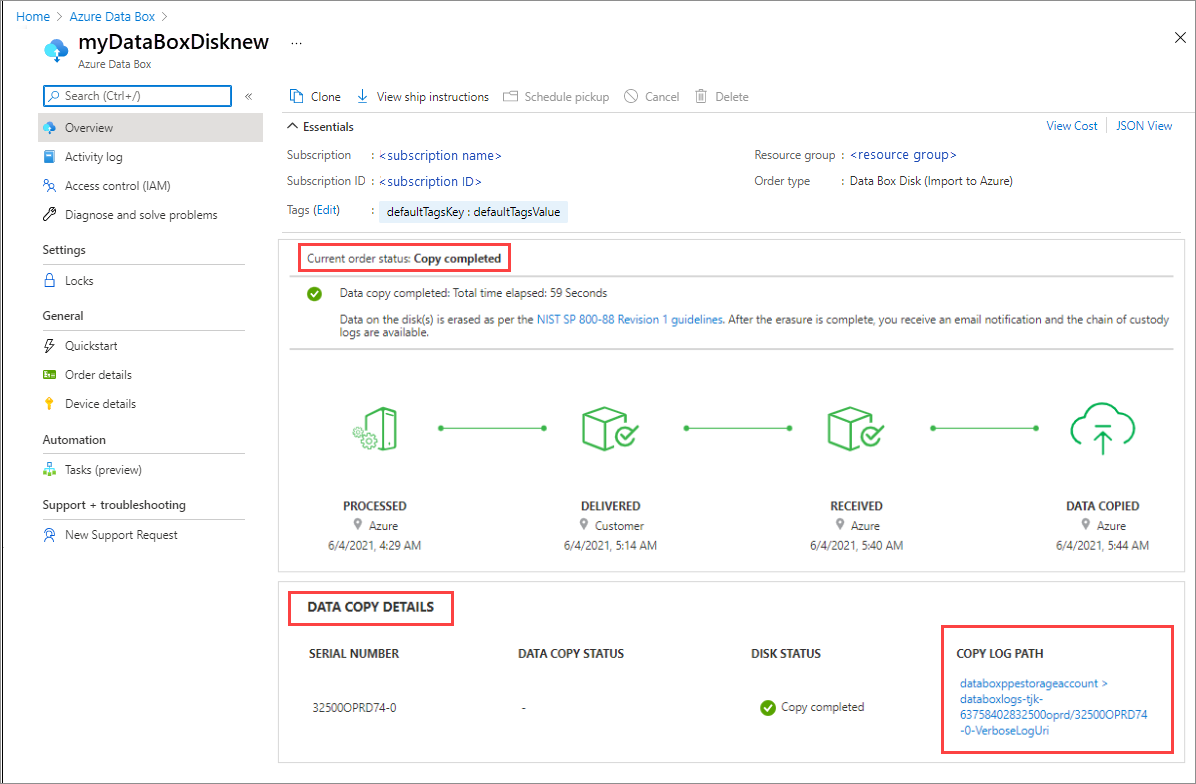
Once the copy is complete, order status updates to Completed. The DATA COPY DETAILS show the path to the copy log, which reports any errors during the data copy.
As of March 2022, you can choose View by Storage Account(s) or View by Managed Disk(s) to display the data copy details.
If you have an order from before March 2022, the data copy details will be shown as below:
If the copy completes with errors, see troubleshoot upload errors.
Verify that your data is in the storage account(s) before you delete it from the source. Your data can be in:
Your Azure Storage account(s). When you copy the data to Data Box, depending on the type, the data is uploaded to one of the following paths in your Azure Storage account.
For block blobs and page blobs:
https://<storage_account_name>.blob.core.chinacloudapi.cn/<containername>/files/a.txtFor Azure Files:
https://<storage_account_name>.file.core.chinacloudapi.cn/<sharename>/files/a.txtAlternatively, you can go to your Azure storage account in Azure portal and navigate from there.
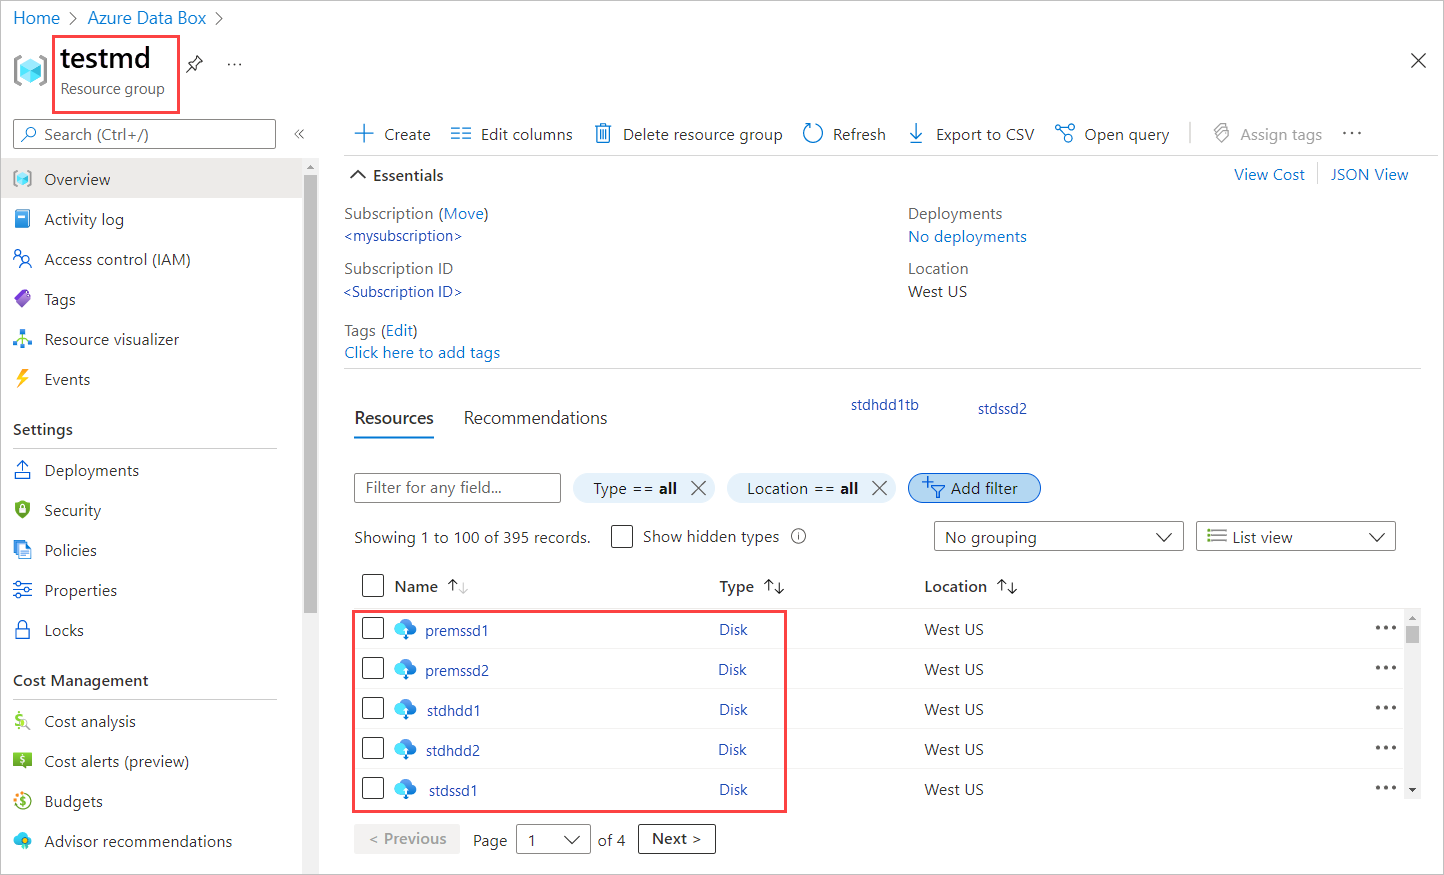
Your managed disk resource group(s). When creating managed disks, the VHDs are uploaded as page blobs and then converted to managed disks. The managed disks are attached to the resource groups specified at the time of order creation.
If your copy to managed disks in Azure was successful, you can go to the Order details in the Azure portal and make a note of the resource group specified for managed disks.
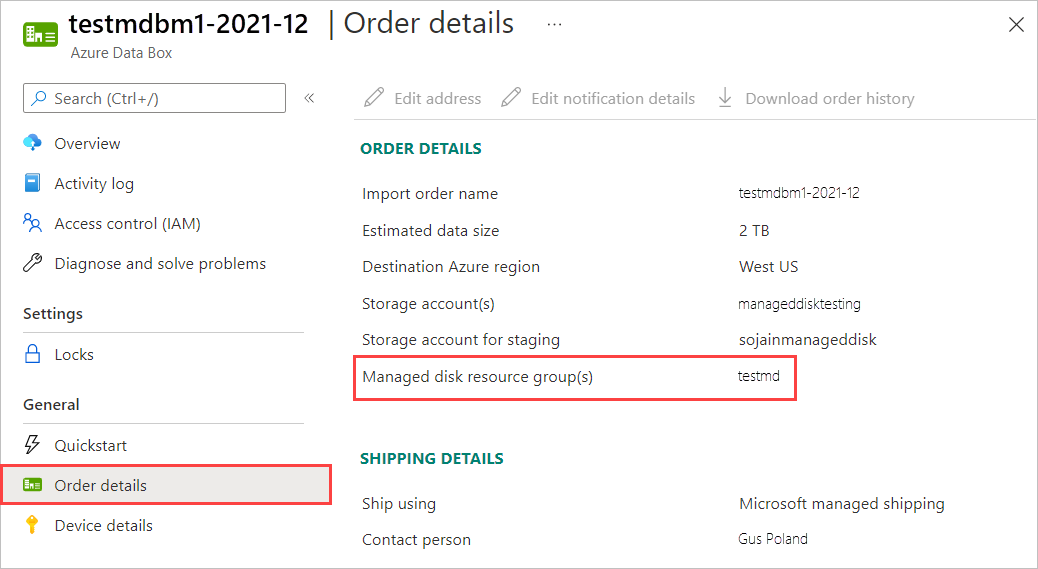
Go to the noted resource group, and locate your managed disks.
Note
If a page blob isn't successfully converted to a managed disk during a data copy, it stays in the storage account and you're charged for storage.
If you copied a VHDX, or a dynamic/differencing VHD, then the VHDX/VHD is uploaded to the staging storage account as a block blob. Go to your staging Storage account > Blobs and then select the appropriate container - StandardSSD, StandardHDD, or PremiumSSD. The VHDX/VHDs should show up as block blobs in your staging storage account.
Verify data upload to Azure
After the data is uploaded to Azure, verify that your data is in the storage account(s) before you delete it from the source. Your data can be in:
Your Azure Storage account(s). When you copy the data to Data Box, depending on the type, the data is uploaded to one of the following paths in your Azure Storage account.
For block blobs and page blobs:
https://<storage_account_name>.blob.core.chinacloudapi.cn/<containername>/files/a.txtFor Azure Files:
https://<storage_account_name>.file.core.chinacloudapi.cn/<sharename>/files/a.txt
Your managed disk resource group(s). When creating managed disks, the VHDs are uploaded as page blobs and then converted to managed disks. The managed disks are attached to the resource groups specified at the time of order creation.
To verify that the data has uploaded into Azure, take the following steps:
Go to the storage account associated with your disk order.
Go to Blob service > Browse blobs. The list of containers is presented. Corresponding to the subfolder that you created under BlockBlob and PageBlob folders, containers with the same name are created in your storage account. If the folder names do not conform to Azure naming conventions, then the data upload to Azure will fail.
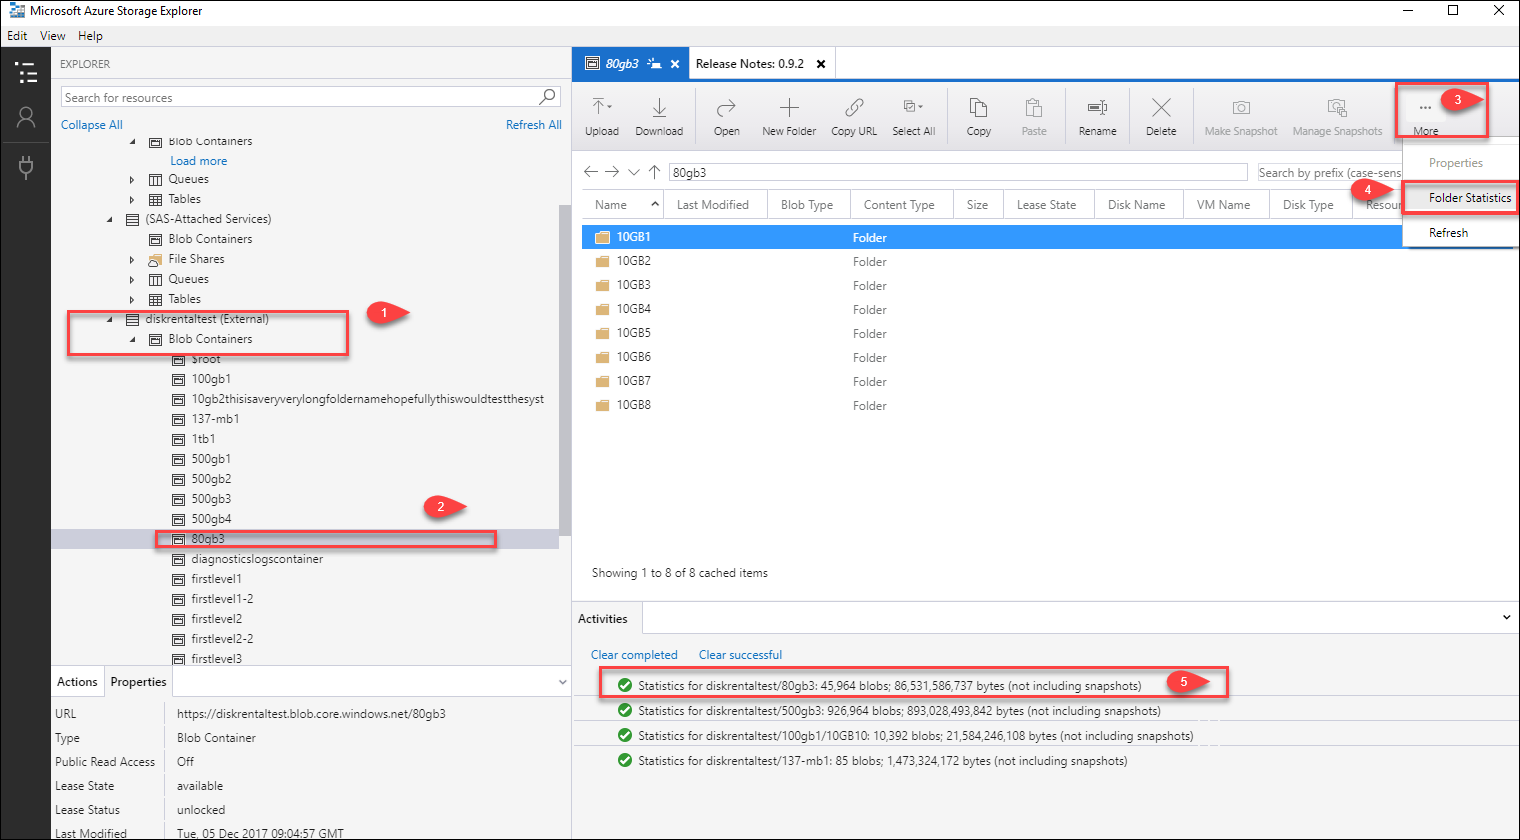
To verify that the entire dataset has loaded, use Azure Storage Explorer. Attach the storage account corresponding to the Data Box Disk order and then look at the list of blob containers. Select a container, click …More and then click Folder statistics. In the Activities pane, the statistics for that folder including the number of blobs and the total blob size is displayed. The total blob size in bytes should match the size of the dataset.
Erasure of data from Data Box Disk
Once the upload to Azure is complete, the Data Box Disk service erases the data on its disks as per the NIST SP 800-88 standard.
Next steps
In this tutorial, you learned about Azure Data Box Disk topics such as:
- Verify data upload to Azure
- Erasure of data from Data Box Disk
Advance to the next how-to to learn how to manage Data Box Disk via the Azure portal.
