Note
Access to this page requires authorization. You can try signing in or changing directories.
Access to this page requires authorization. You can try changing directories.
You can migrate your on-premises or other cloud services MySQL Server to Azure Database for MySQL - Flexible Server by using Azure Database Migration Service (DMS), a fully managed service designed to enable seamless migrations from multiple database sources to Azure data platforms. In this tutorial, we perform an online migration of a sample database from an on-premises MySQL server to an Azure Database for MySQL - Flexible Server (both running version 5.7) using a DMS Replicate Changes migration activity.
Running a Replicate changes Migration, with our offline scenario with "Enable Transactional Consistency" enables businesses to migrate their databases to Azure while the databases remain operational. In other words, migrations can be completed with minimum downtime for critical applications, limiting the impact on service level availability and inconvenience to their end customers.
In this tutorial, you'll learn how to:
- Create a MySQL Replicate Changes migration project in DMS.
- Run the Replicate Changes migration.
- Monitor the migration.
- Perform post-migration steps.
Prerequisites
To complete this tutorial, you need to:
Use the MySQL command line tool of your choice to determine whether log_bin is enabled on the source server. The Binlog isn't always turned on by default, so verify that it's enabled before starting the migration. To determine whether log_bin is enabled on the source server, run the command: SHOW VARIABLES LIKE 'log_bin'.
Ensure that the user has
REPLICATION_APPLIERorBINLOG_ADMINpermission on target server for applying the bin log.Ensure that the user has
REPLICATION REPLICApermission on the target server.Ensure that the user has
REPLICATION CLIENTandREPLICATION REPLICApermission on the source server for reading and applying the bin log.Run an offline migration scenario with "Enable Transactional Consistency" to get the bin log file and position.

If you're targeting a replicate changes migration, configure the binlog_expire_logs_seconds parameter on the source server to ensure that binlog files aren't purged before the replica commits the changes. We recommend at least two days, to begin with. After a successful cutover, the value can be reset.

Limitations
As you prepare for the migration, be sure to consider the following limitations.
When performing a replicate changes migration, the name of the database on the target server must be the same as the name on the source server.
Support is limited to the ROW binlog format.
DDL changes replication is supported only when you have selected the option for Replicate data definition and administration statements for selected objects on DMS UI. The replication feature supports replicating data definition and administration statements that occur after the initial load and are logged in the binary log to the target.
Renaming databases or tables isn't supported when replicating changes.
Create a Replicate Changes migration project
To create a Replicate Changes migration project, perform the following steps.
In the Azure portal, select All services, search for Azure Database Migration Service, and then select Azure Database Migration Services.
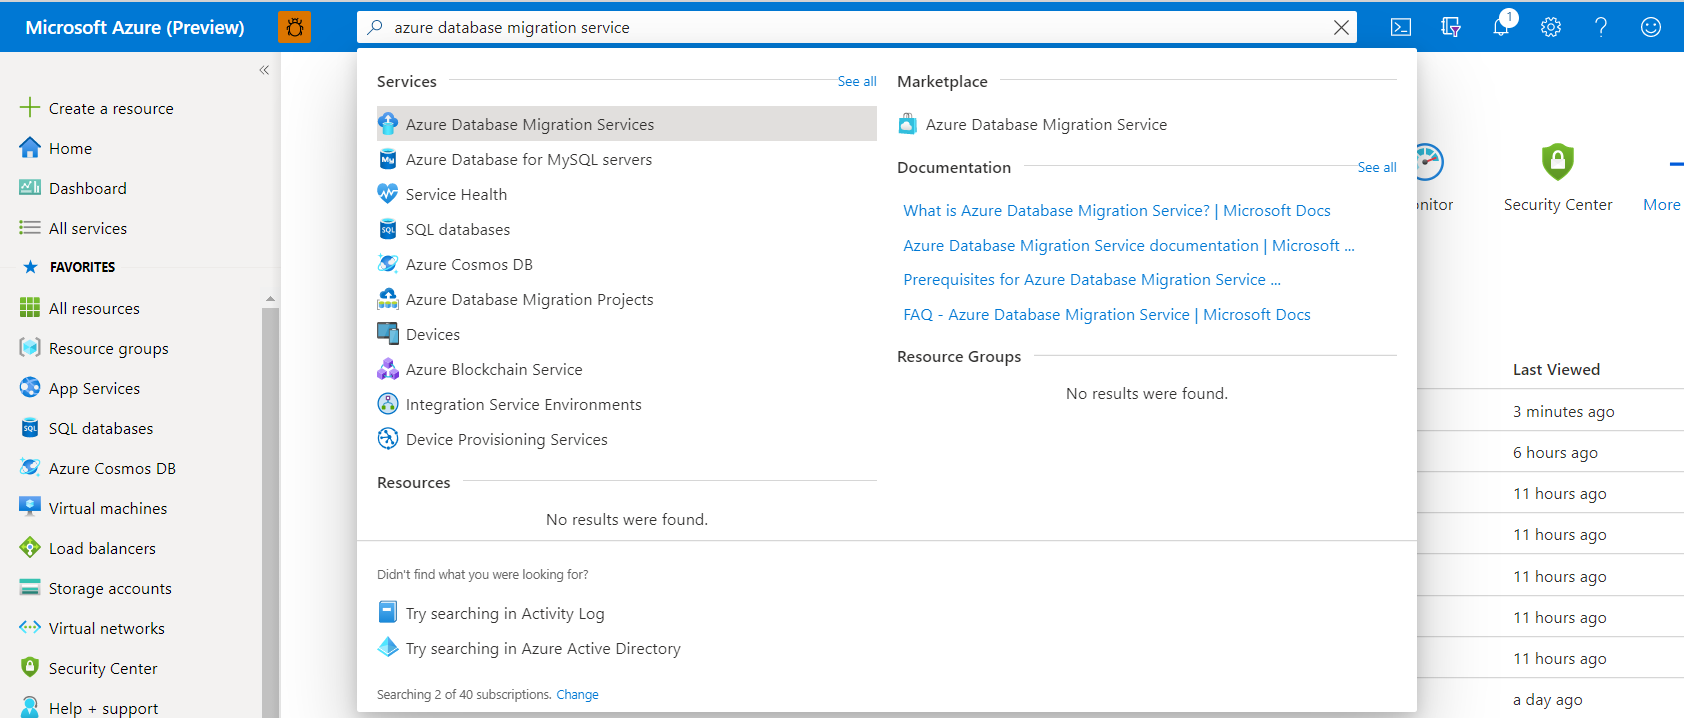
In the search results, select the DMS instance that you created for running the preliminary offline migration, and then select + New Migration Project.

On the New migration project page, specify a name for the project, in the Source server type selection box, select MySQL, in the Target server type selection box, select Azure Database For MySQL - Flexible Server, in the Migration activity type selection box, select Replicate changes, and then select Create and run activity.


Configure the migration project
To configure your DMS migration project, perform the following steps.
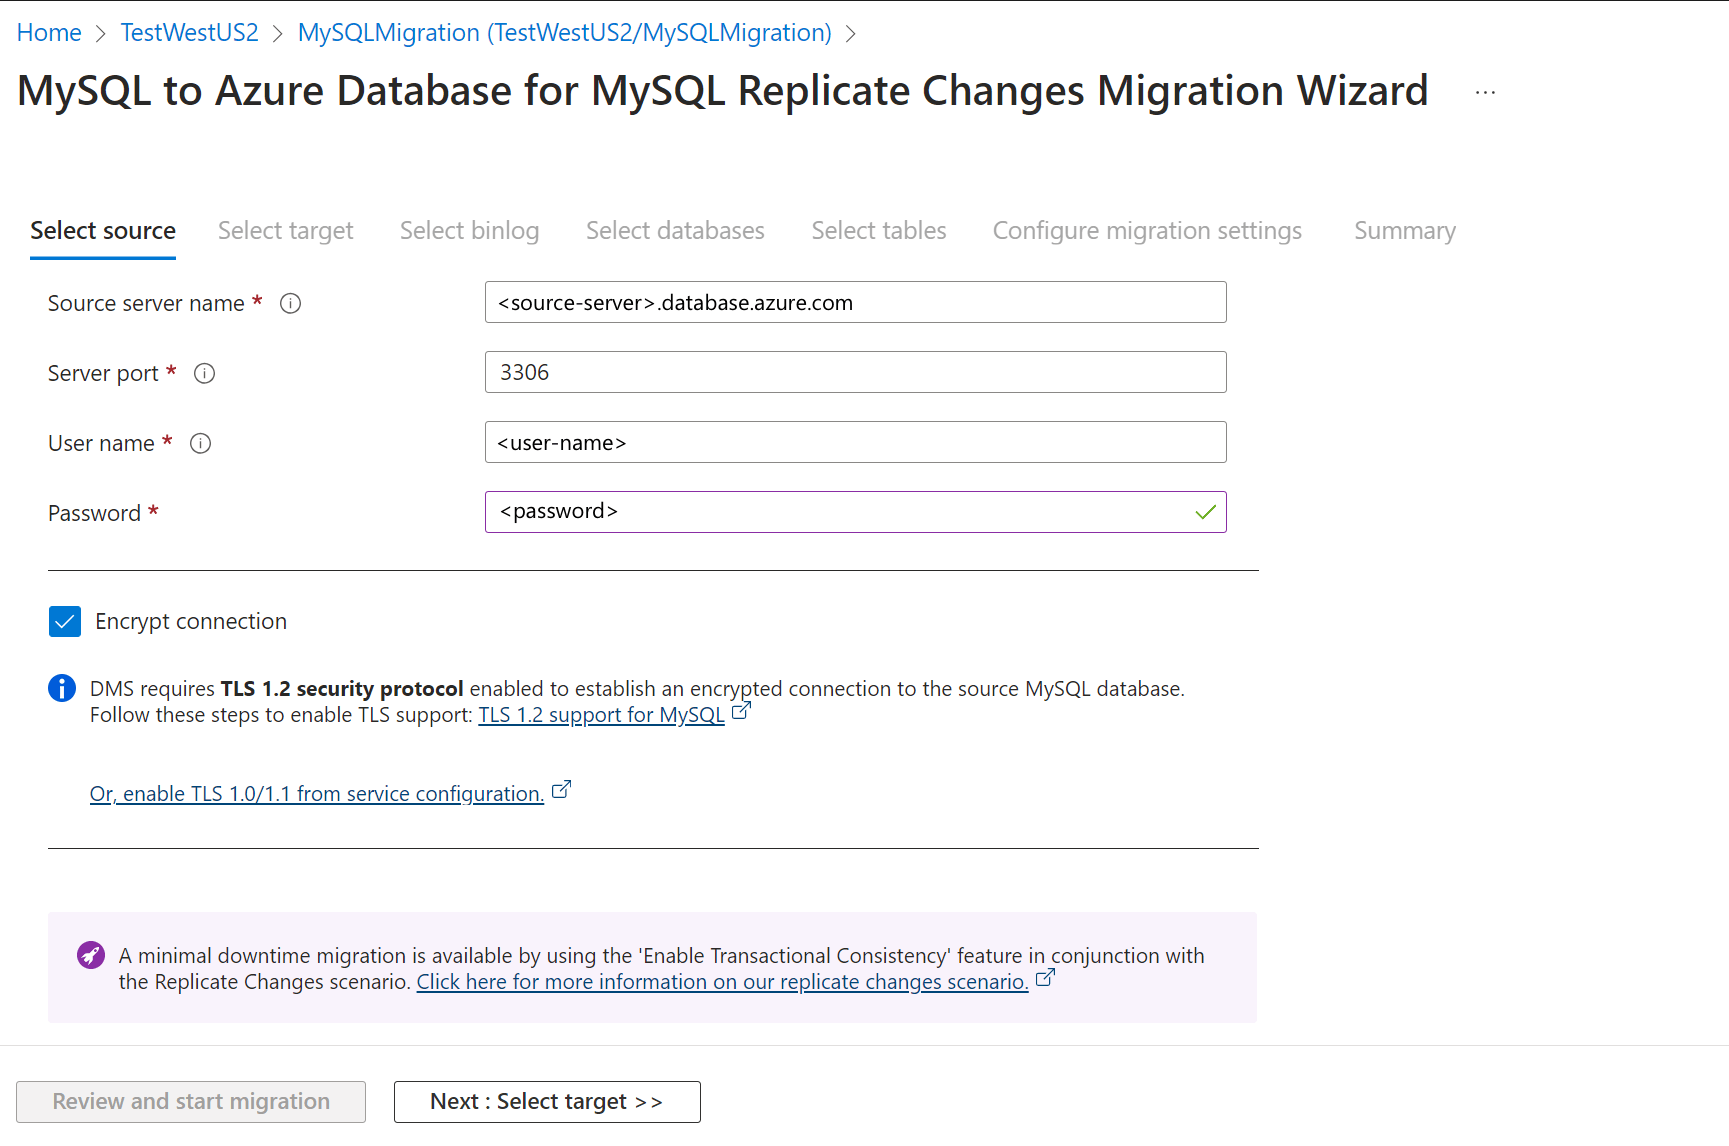
On the Select source screen, input the source server name, server port, username, and password to your source server.
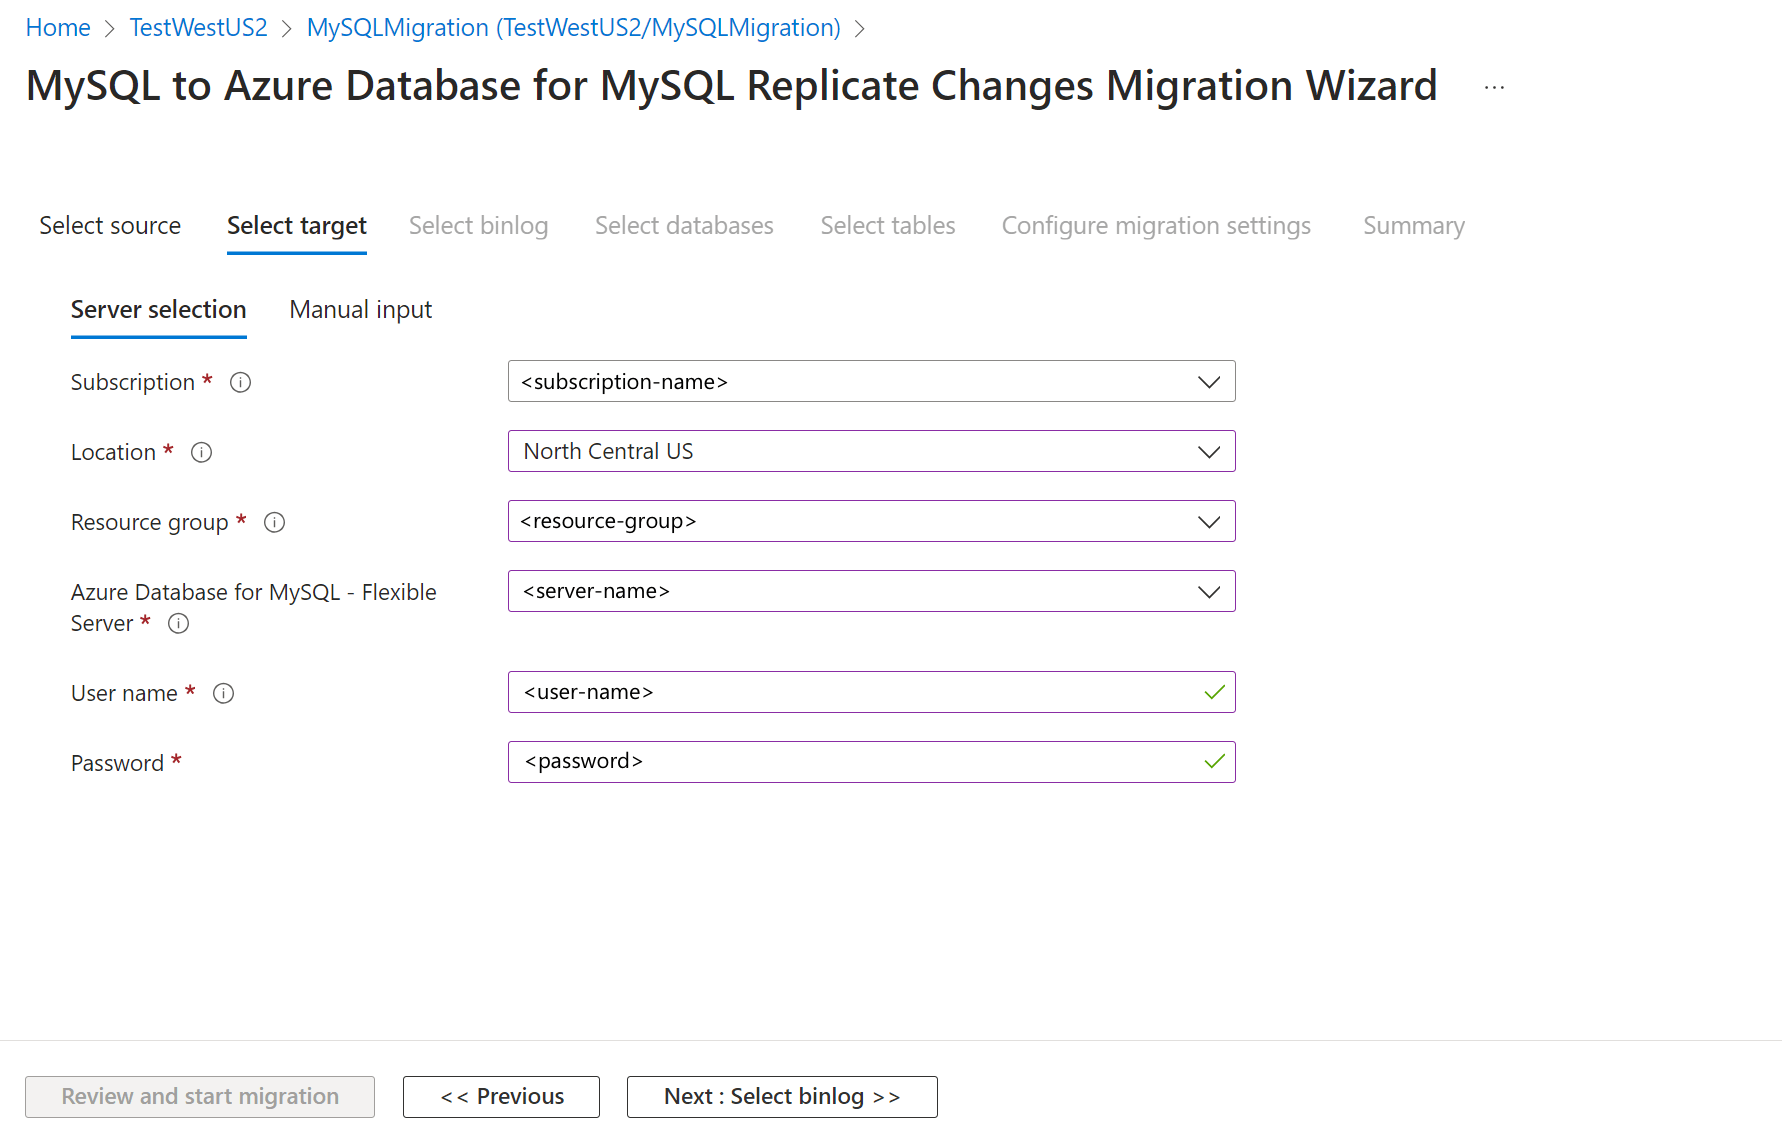
Select Next: Select target >>, and then, on the Select target screen, locate the target server based on the subscription, location, and resource group. The user name is auto populated, then provide the password for the target flexible server.
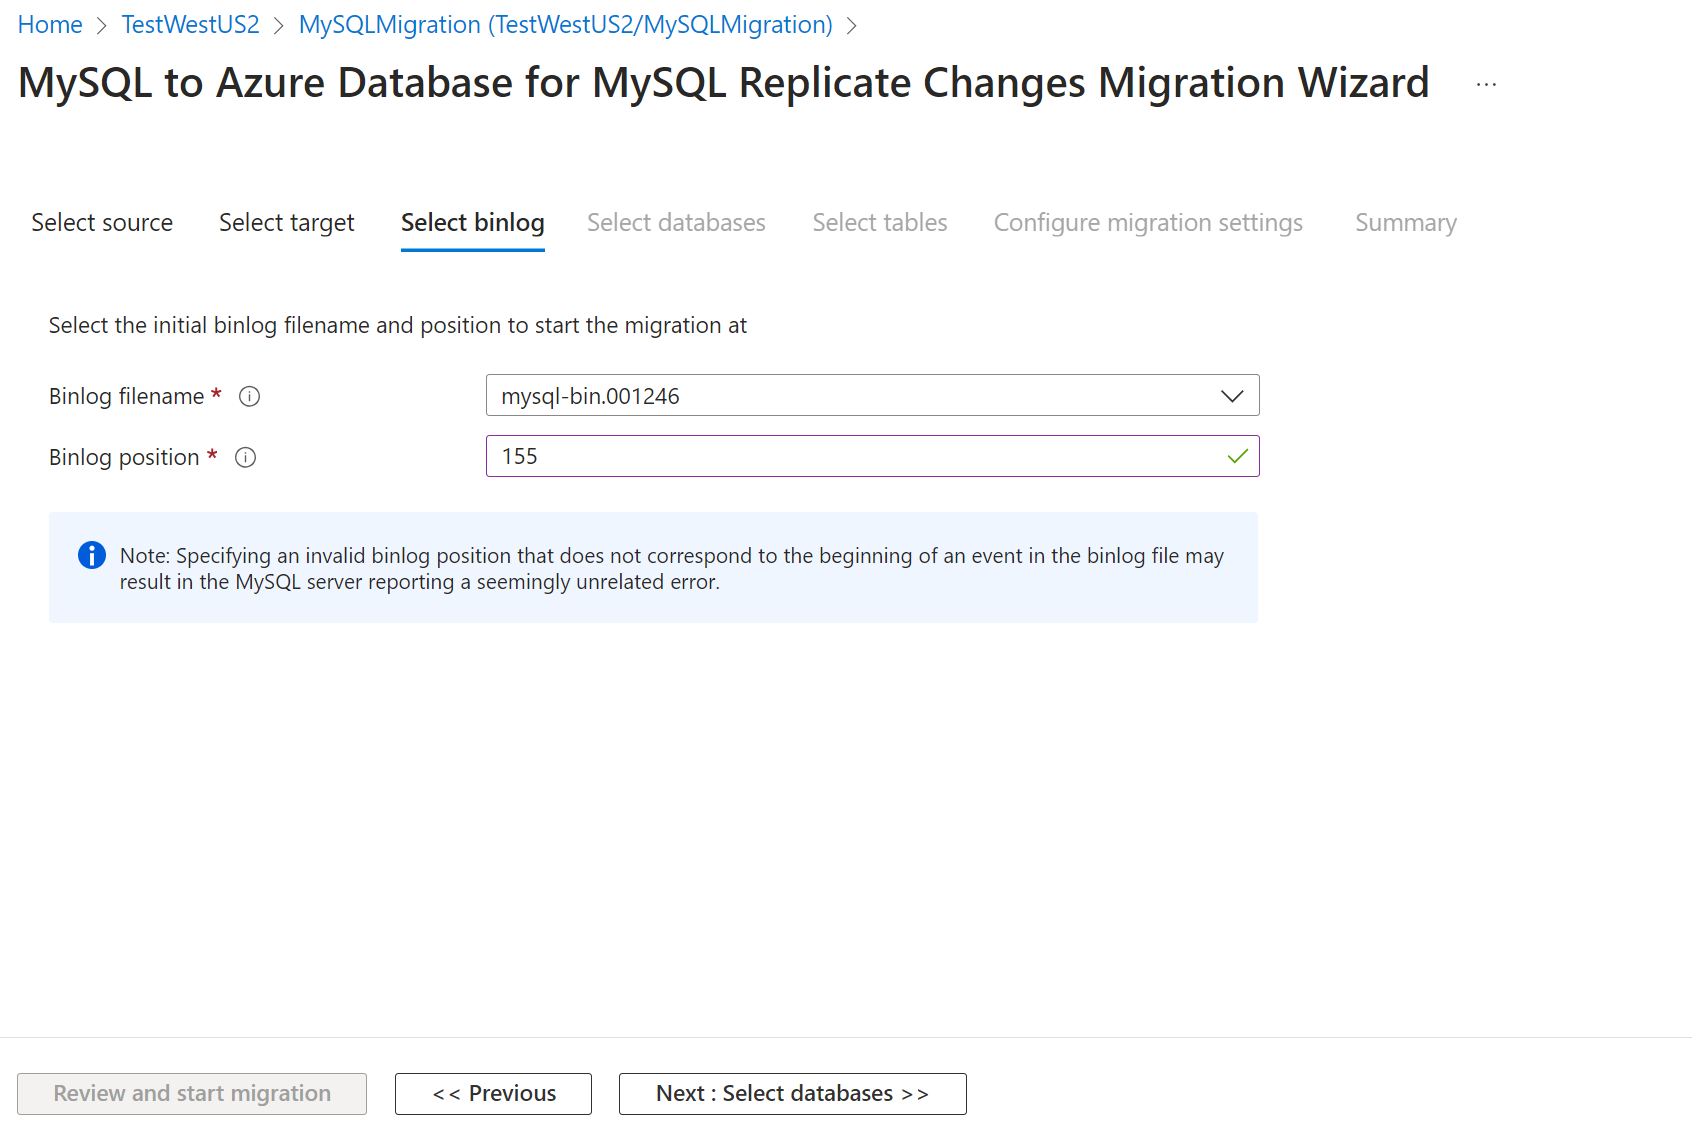
Select Next: Select binlog >>, and then, on the Select binlog screen, input the binlog file name and binlog position as captured in the earlier run of offline migration scenario.
Select Next: Select databases >>, and then, on the Select databases tab, select the server database objects that you want to migrate.
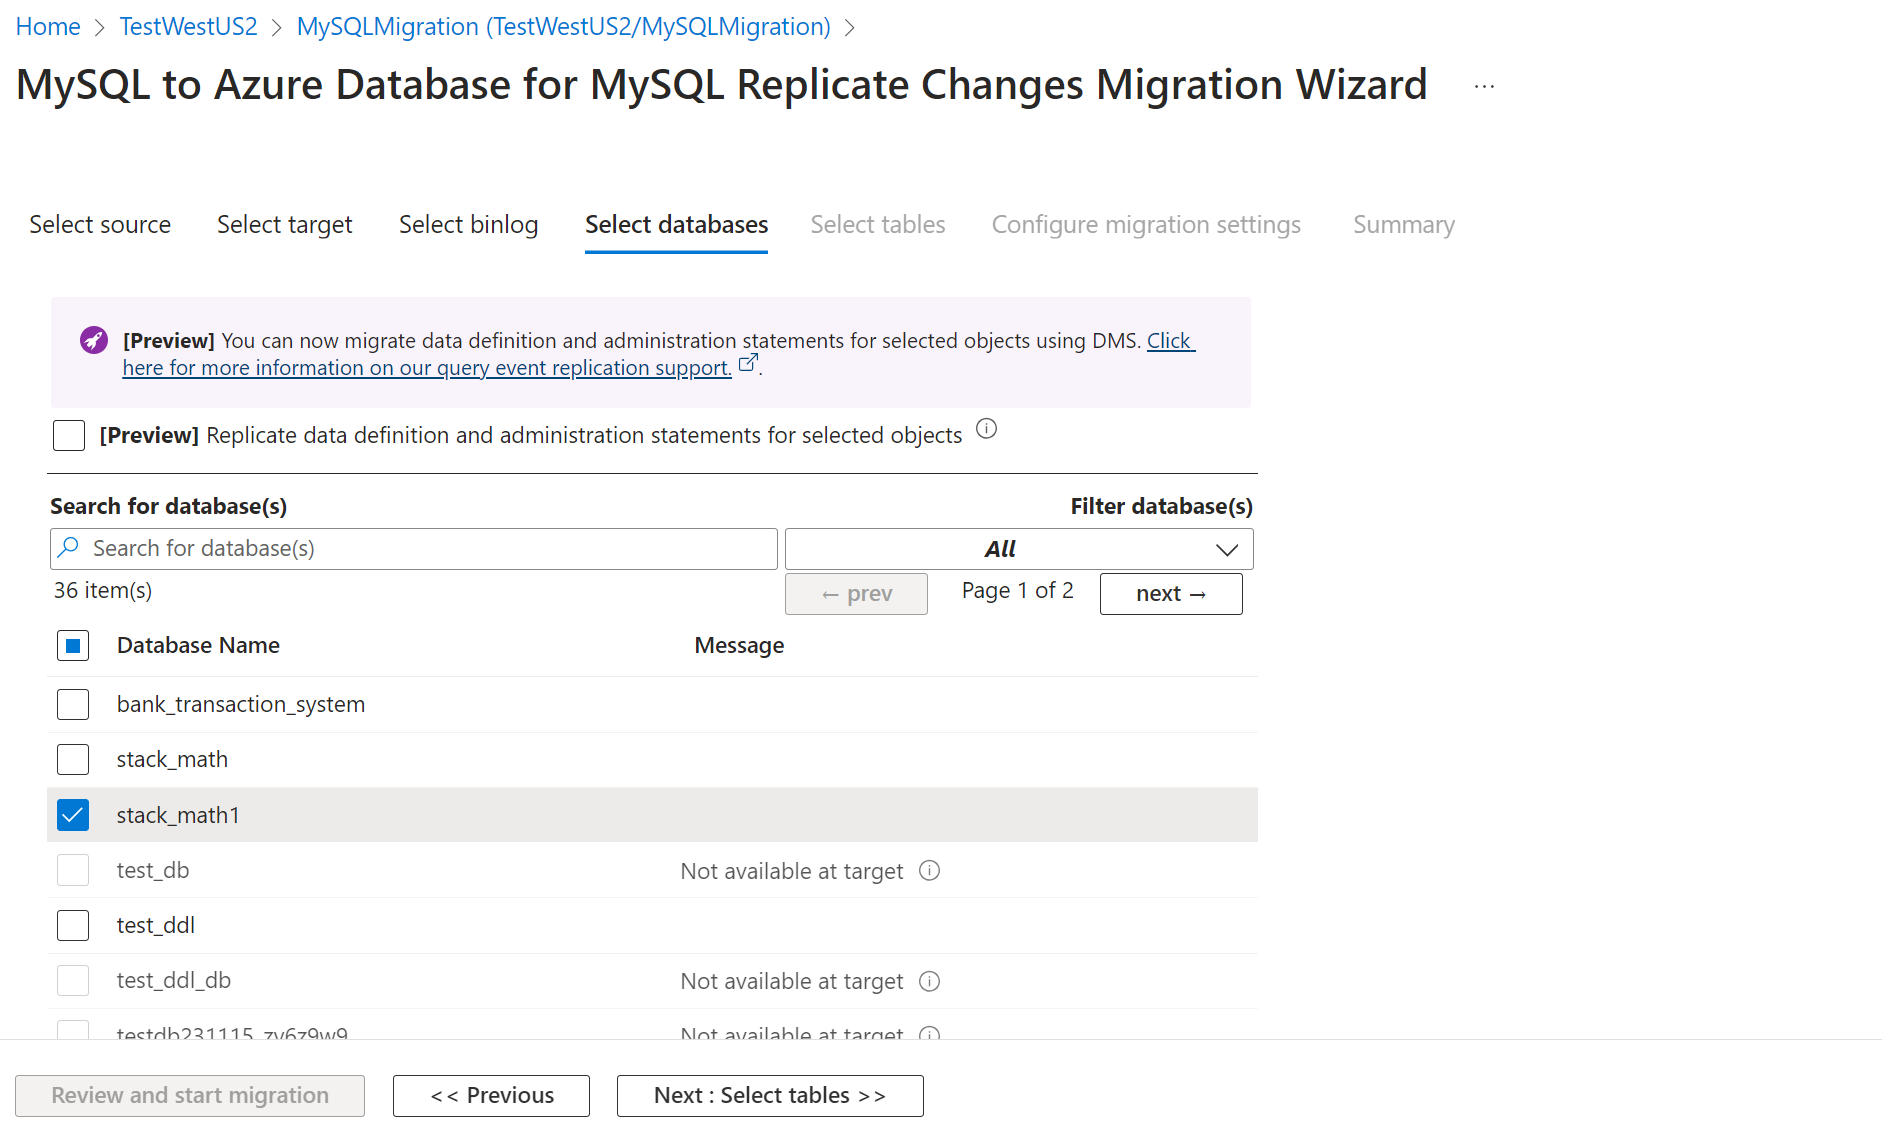
Select Next: Select tables >> to navigate to the Select tables tab. Select all tables to be migrated.

After configuring for schema migration, select Review and start migration.
You only need to navigate to the Configure migration settings tab if you're trying to troubleshoot failing migrations.
On the Summary tab, in the Activity name text box, specify a name for the migration activity, and then review the summary to ensure that the source and target details match what you previously specified.

Select Start migration.
The migration activity window appears, and the Status of the activity is Initializing. The Status changes to Running when the table migrations start.
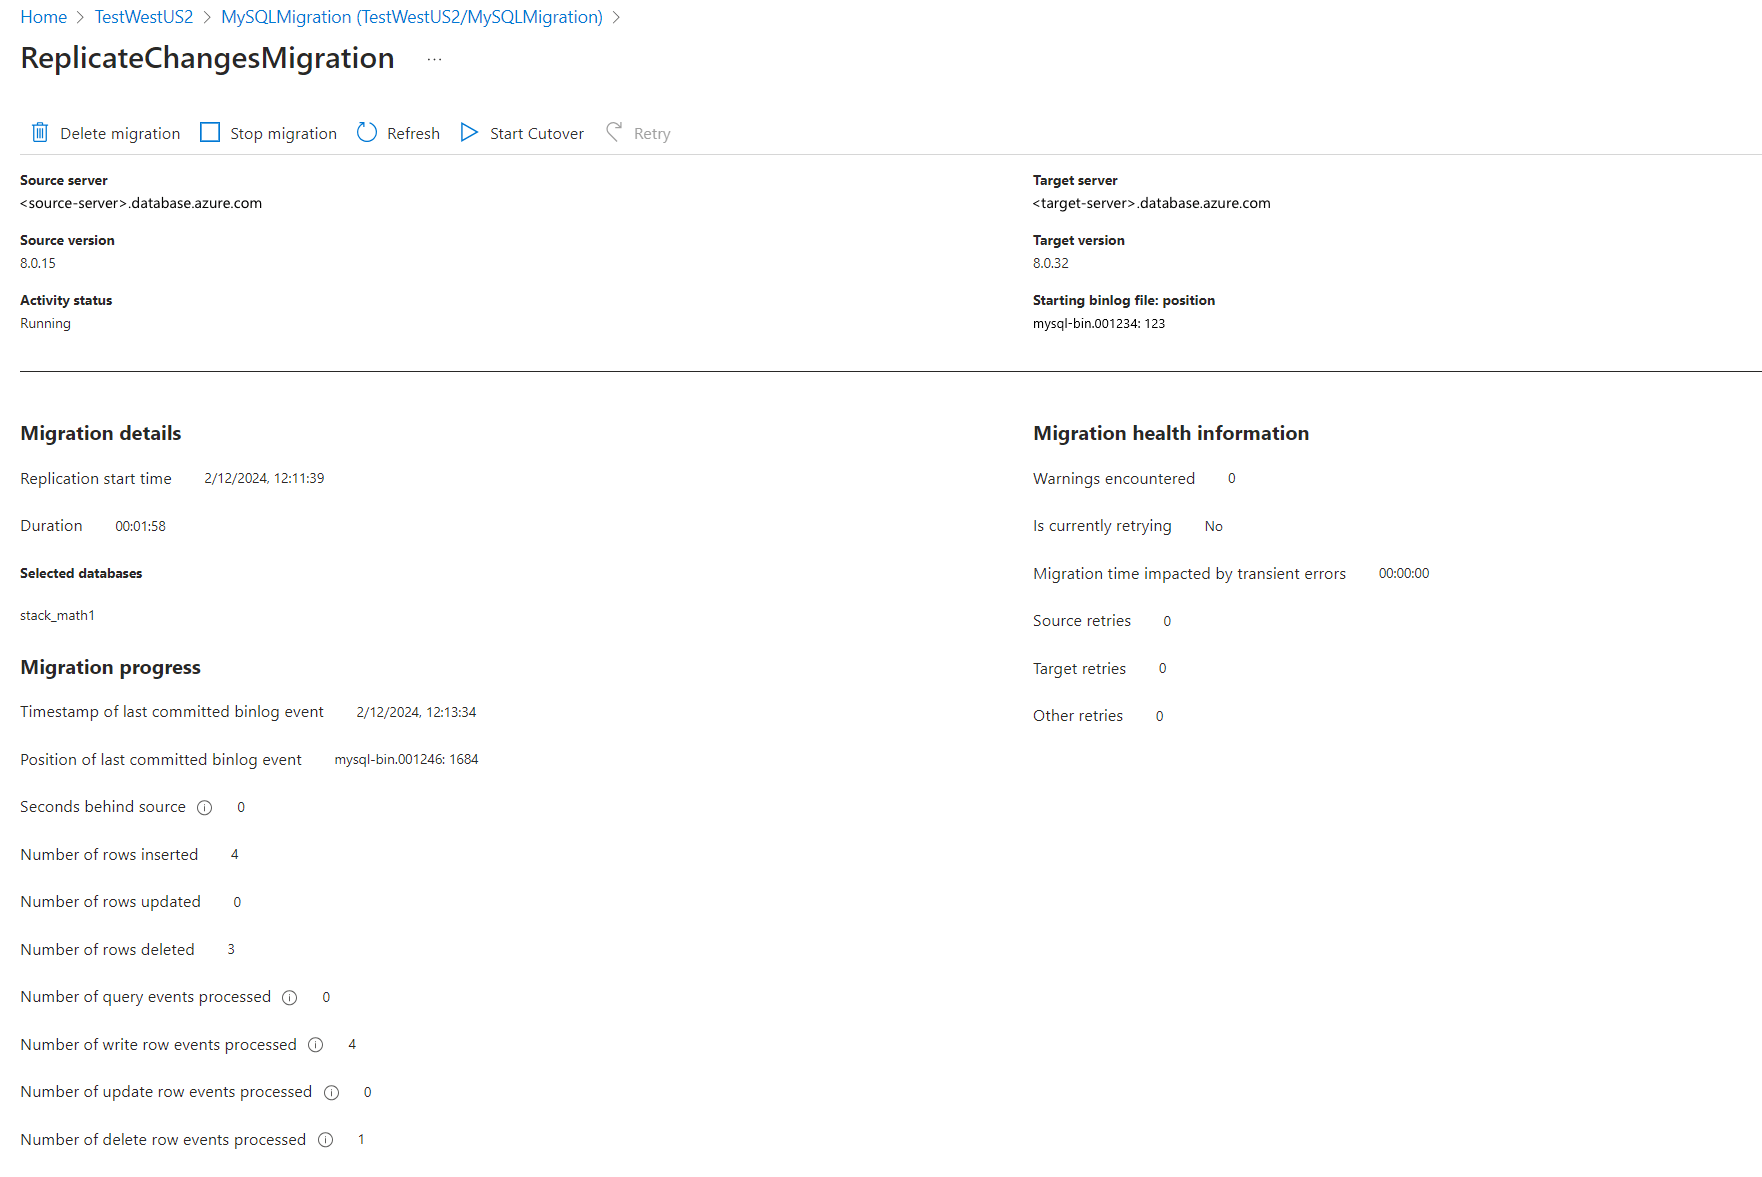


Monitor the migration
Monitor the Seconds behind source and as soon as it nears 0, proceed to start cutover by navigating to the Start Cutover menu tab at the top of the migration activity screen.
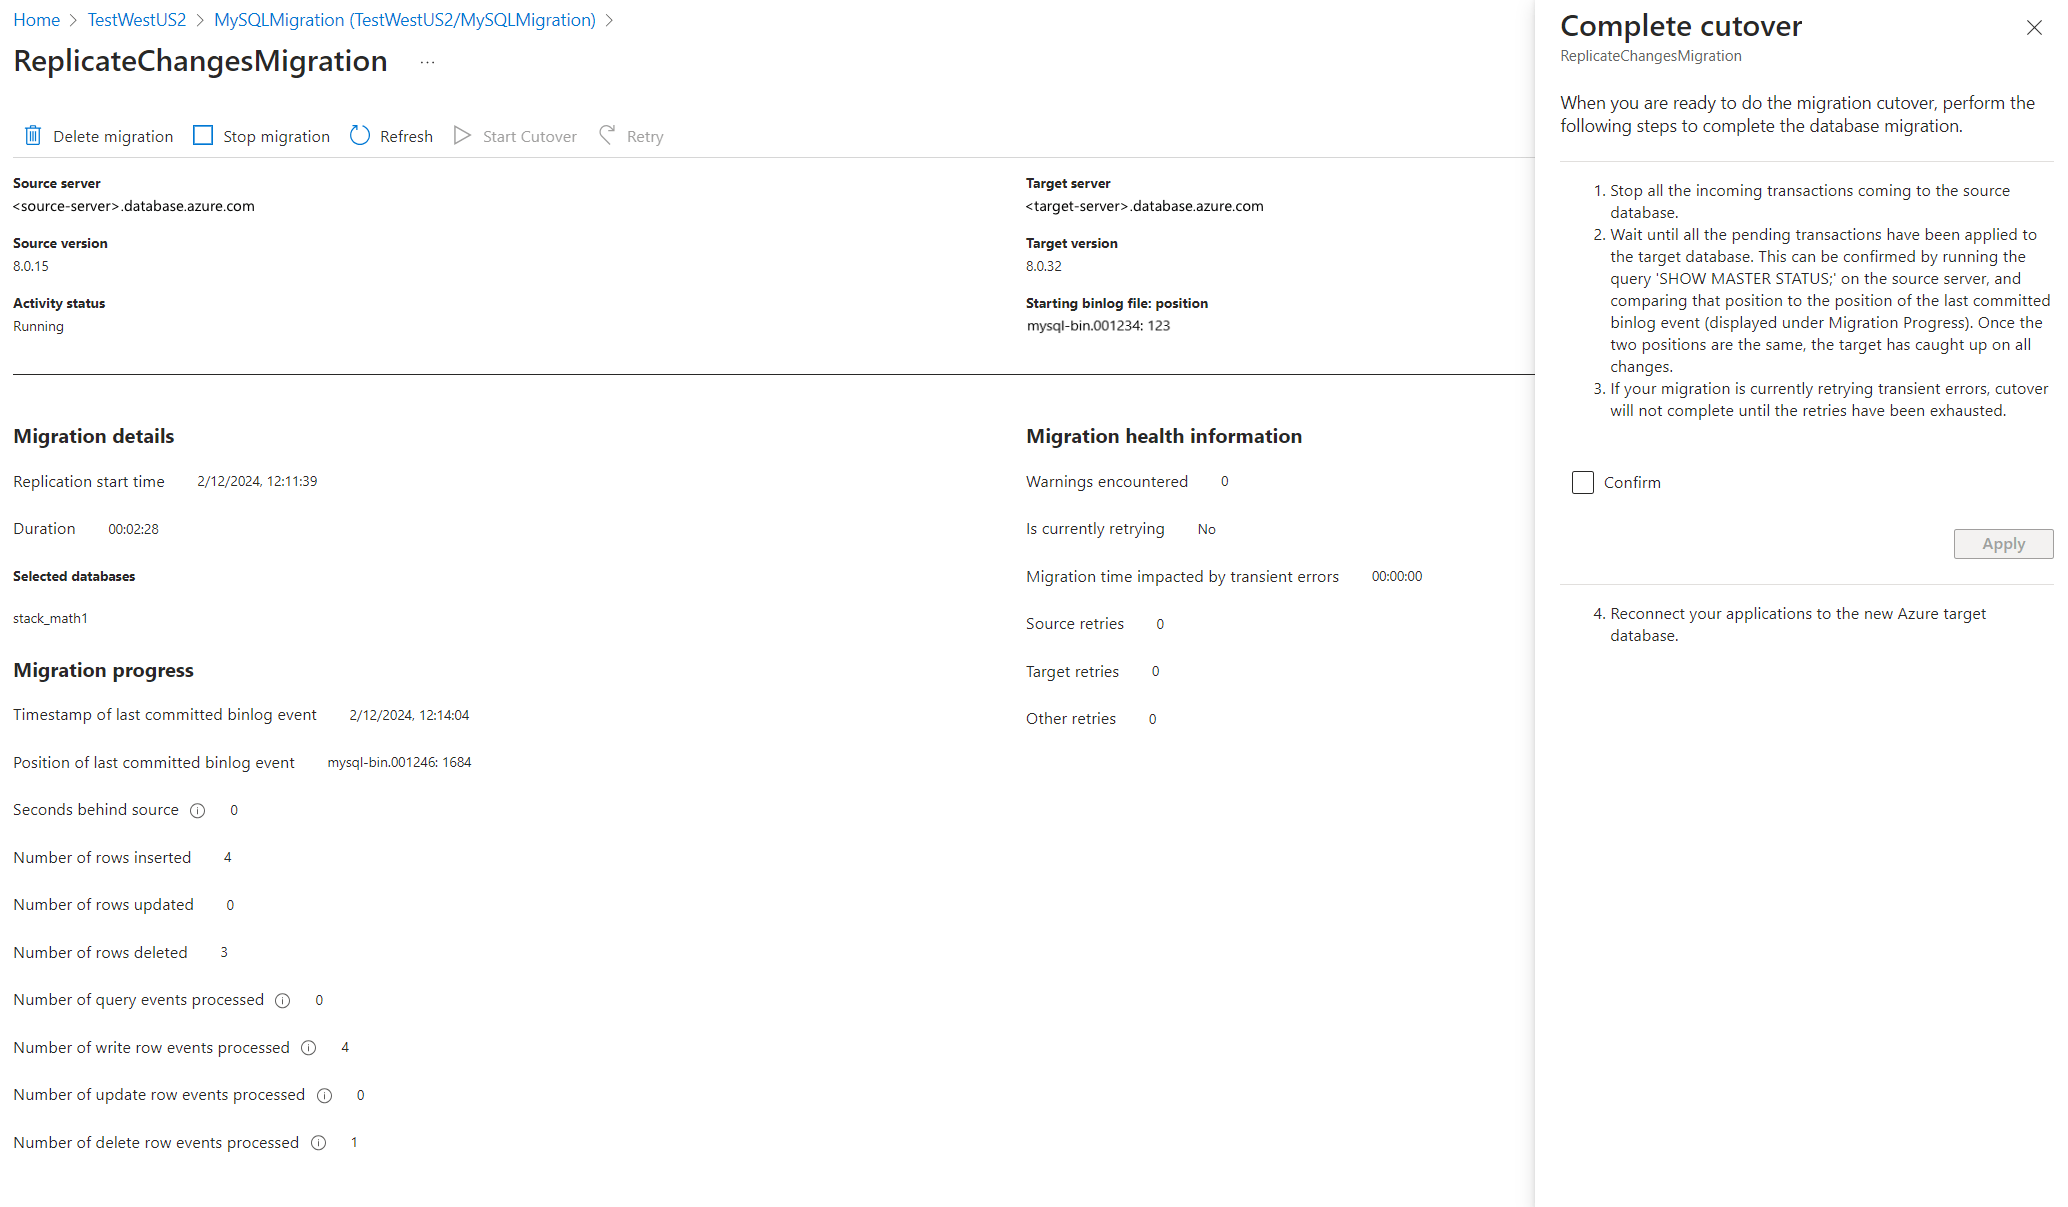
Follow the steps in the cutover window before you're ready to perform a cutover. After completing all steps, select Confirm, and then select Apply.
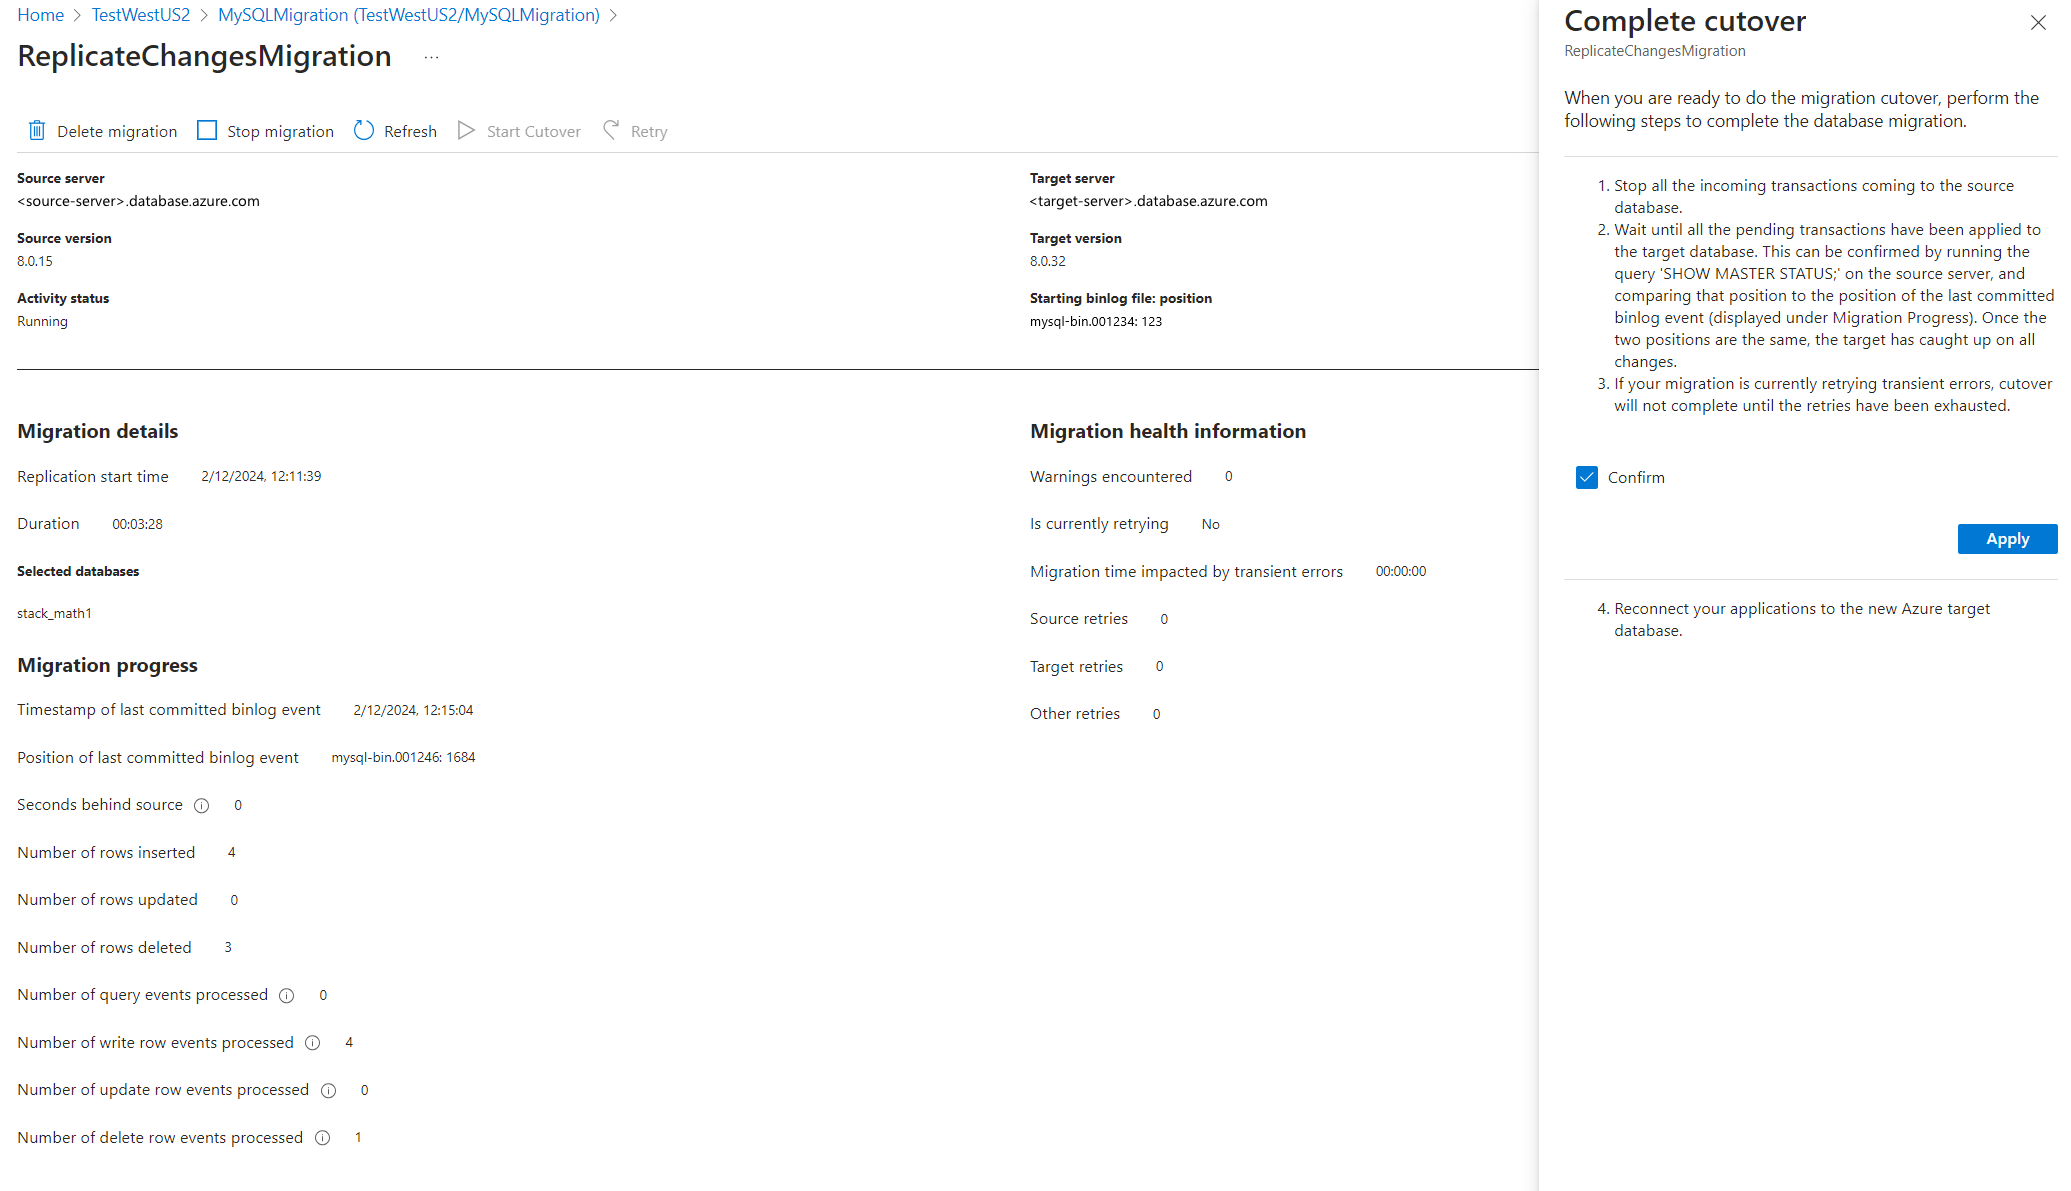


Once the cutover is completed, you're all set to perform post migration validations and steps.

Perform post-migration activities
When the migration has finished, be sure to complete the following post-migration activities.
Perform sanity testing of the application against the target database to certify the migration.
Update the connection string to point to the new flexible server.
Delete the source server after you have ensured application continuity.
To clean up the DMS resources, perform the following steps:
- In the Azure portal, select All services, search for Azure Database Migration Service, and then select Azure Database Migration Services.
- Select your migration service instance from the search results, and then select Delete service.
- In the confirmation dialog box, in the TYPE THE DATABASE MIGRATION SERVICE NAME textbox, specify the name of the instance, and then select Delete.
Migration best practices
When performing a migration, be sure to consider the following best practices.
As part of discovery and assessment, take the server SKU, CPU usage, storage, database sizes, and extensions usage as some of the critical data to help with migrations.
Perform test migrations before migrating for production:
- Test migrations are important for ensuring that you cover all aspects of the database migration, including application testing. The best practice is to begin by running a migration entirely for testing purposes. After a newly started migration enters the Replicate Data Changes phase with minimal lag, only use your Flexible Server target for running test workloads. Use that target for testing the application to ensure expected performance and results. If you're migrating to a higher MySQL version, test for application compatibility.
- After testing is completed, you can migrate the production databases. At this point, you need to finalize the day and time of production migration. Ideally, there's low application use at this time. All stakeholders who need to be involved should be available and ready. The production migration requires close monitoring. For an online migration, the replication must be completed before you perform the cutover, to prevent data loss.
Redirect all dependent applications to access the new primary database and make the source server read-only. Then, open the applications for production usage.
After the application starts running on the target flexible server, monitor the database performance closely to see if performance tuning is required.