Note
Access to this page requires authorization. You can try signing in or changing directories.
Access to this page requires authorization. You can try changing directories.
Note
We recommend that you use the Azure Az PowerShell module to interact with Azure. See Install Azure PowerShell to get started. To learn how to migrate to the Az PowerShell module, see Migrate Azure PowerShell from AzureRM to Az.
In this quickstart, you create your first DNS zone and record using Azure PowerShell. You can also perform these steps using the Azure portal or the Azure CLI.
A DNS zone is used to host the DNS records for a particular domain. To start hosting your domain in Azure DNS, you need to create a DNS zone for that domain name. Each DNS record for your domain is then created inside this DNS zone. Finally, to publish your DNS zone to the Internet, you need to configure the name servers for the domain. Each of these steps is described in this article.

Azure DNS also supports creating private domains. For step-by-step instructions about how create your first private DNS zone and record, see Get started with Azure DNS private zones using PowerShell.
Prerequisites
- An Azure account with an active subscription. Create a trial account.
- Azure PowerShell installed locally
Create the resource group
Before you create the DNS zone, create a resource group to contain the DNS zone:
New-AzResourceGroup -name MyResourceGroup -location "chinaeast2"
Create a DNS zone
A DNS zone is created by using the New-AzDnsZone cmdlet. The following example creates a DNS zone called contoso.xyz in the resource group called MyResourceGroup. Use the example to create a DNS zone, substituting the values for your own.
New-AzDnsZone -Name contoso.xyz -ResourceGroupName MyResourceGroup
Create a DNS record
Create record sets by using the New-AzDnsRecordSet cmdlet. The following example creates a record with the relative name www in the DNS Zone contoso.xyz, in resource group MyResourceGroup. The fully qualified name of the record set is www.contoso.xyz. The record type is A, with IP address 10.10.10.10, and the TTL is 3600 seconds.
New-AzDnsRecordSet -Name www -RecordType A -ZoneName contoso.xyz -ResourceGroupName MyResourceGroup -Ttl 3600 -DnsRecords (New-AzDnsRecordConfig -IPv4Address "10.10.10.10")
View records
To list the DNS records in your zone, use:
Get-AzDnsRecordSet -ZoneName contoso.xyz -ResourceGroupName MyResourceGroup
Test the name resolution
Now that you have a test DNS zone with a test 'A' record, you can test the name resolution with a tool called nslookup.
To test DNS name resolution:
Run the following cmdlet to get the list of name servers for your zone:
Get-AzDnsRecordSet -ZoneName contoso.xyz -ResourceGroupName MyResourceGroup -RecordType nsCopy one of the name server names from the output of the previous step.
Open a command prompt, and run the following command:
nslookup www.contoso.xyz <name server name>For example:
nslookup www.contoso.xyz ns1-08.azure-dns.cn.You should see something like the following screen:
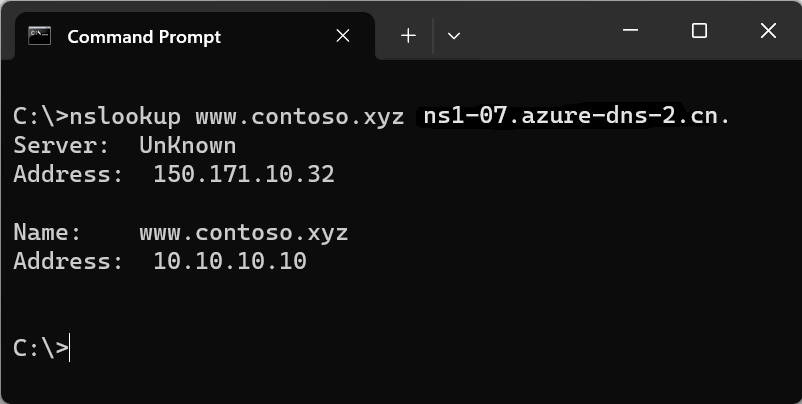
The host name www.contoso.xyz resolves to 10.10.10.10, just as you configured it. This result verifies that name resolution is working correctly.
Clean up resources
When no longer needed, you can delete all resources created in this quickstart by deleting the resource group:
Remove-AzResourceGroup -Name MyResourceGroup
Next steps
Now that your first DNS zone and record is created using Azure PowerShell, you can create records for a web app in a custom domain.