Note
Access to this page requires authorization. You can try signing in or changing directories.
Access to this page requires authorization. You can try changing directories.
In this how-to guide, you learn how to register an application in Microsoft Entra ID. This process is essential for establishing a trust relationship between your application and the Microsoft identity platform. By completing this quickstart, you enable identity and access management (IAM) for your app, allowing it to securely interact with Microsoft services and APIs.
Prerequisites
- An Azure account that has an active subscription. Create an account.
- The Azure account must be at least a Application Developer.
- A workforce tenant. You can use your Default Directory for this quickstart.
Register an application
Registering your application in Microsoft Entra establishes a trust relationship between your app and the Microsoft identity platform. The trust is unidirectional. Your app trusts the Microsoft identity platform, and not the other way around. Once created, the application object can't be moved between different tenants.
Follow these steps to create the app registration:
Sign in to the Microsoft Entra admin center as at least an Application Developer.
If you have access to multiple tenants, use the Settings icon
 in the top menu to switch to the tenant in which you want to register the application.
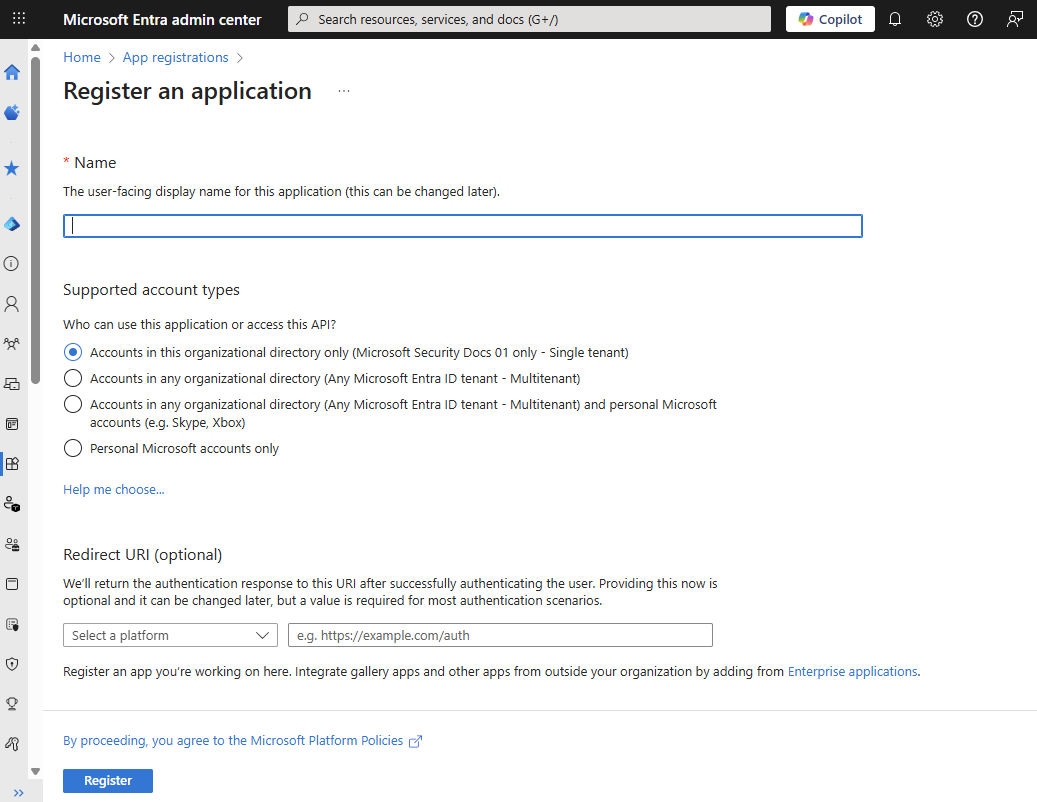
Browse to Entra ID > App registrations and select New registration.
Enter a meaningful Name for your app, for example identity-client-app. App users can see this name, and it can be changed at any time. You can have multiple app registrations with the same name.
Under Supported account types, specify who can use the application. We recommend you select Accounts in this organizational directory only for most applications. Refer to the table for more information on each option.
Supported account types Description Accounts in this organizational directory only For single-tenant apps for use only by users (or guests) in your tenant. Accounts in any organizational directory For multitenant apps and you want users in any Microsoft Entra tenant to be able to use your application. Ideal for software-as-a-service (SaaS) applications that you intend to provide to multiple organizations. Select Register to complete the app registration.
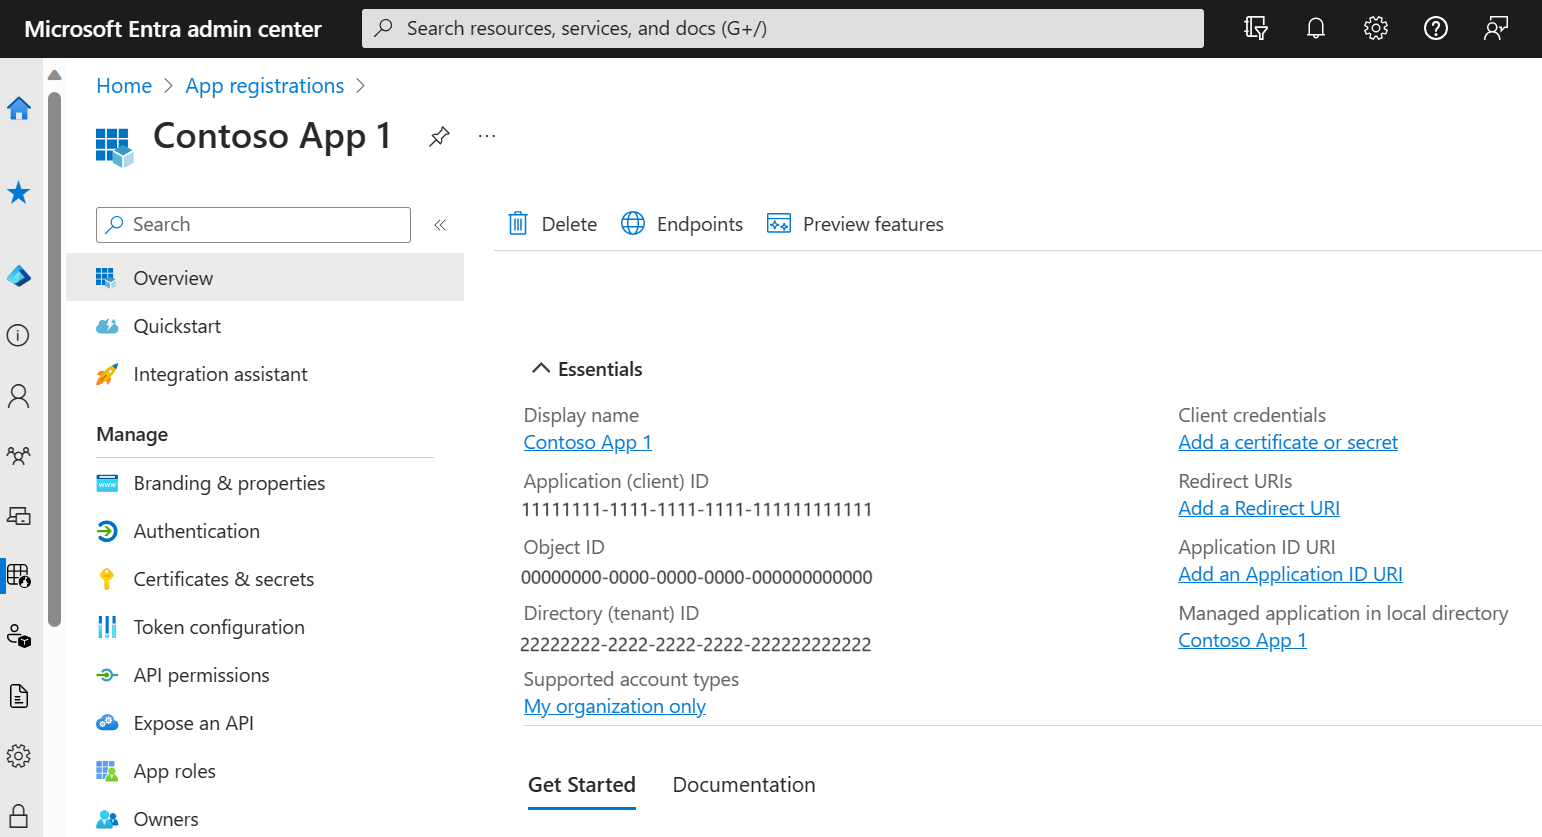
The application's Overview page is displayed. Record the Application (client) ID, which uniquely identifies your application and is used in your application's code as part of validating the security tokens it receives from the Microsoft identity platform.
Important
New app registrations are hidden to users by default. When you're ready for users to see the app on their My Apps page you can enable it. To enable the app, in the Microsoft Entra admin center navigate to Entra ID > Enterprise apps and select the app. Then on the Properties page, set Visible to users? to Yes.

