Note
Access to this page requires authorization. You can try signing in or changing directories.
Access to this page requires authorization. You can try changing directories.
This article describes how to move the Microsoft Entra Connect database from the local SQL Server Express server to a computer running remote SQL Server. You can use the steps described in this article to accomplish this task.
About the scenario
In this scenario, Microsoft Entra Connect version 1.1.819.0 is installed on a single Windows Server 2016 domain controller. Microsoft Entra Connect is using the built-in SQL Server 2012 Express Edition for its database. The database will be moved to a SQL Server 2017 server.
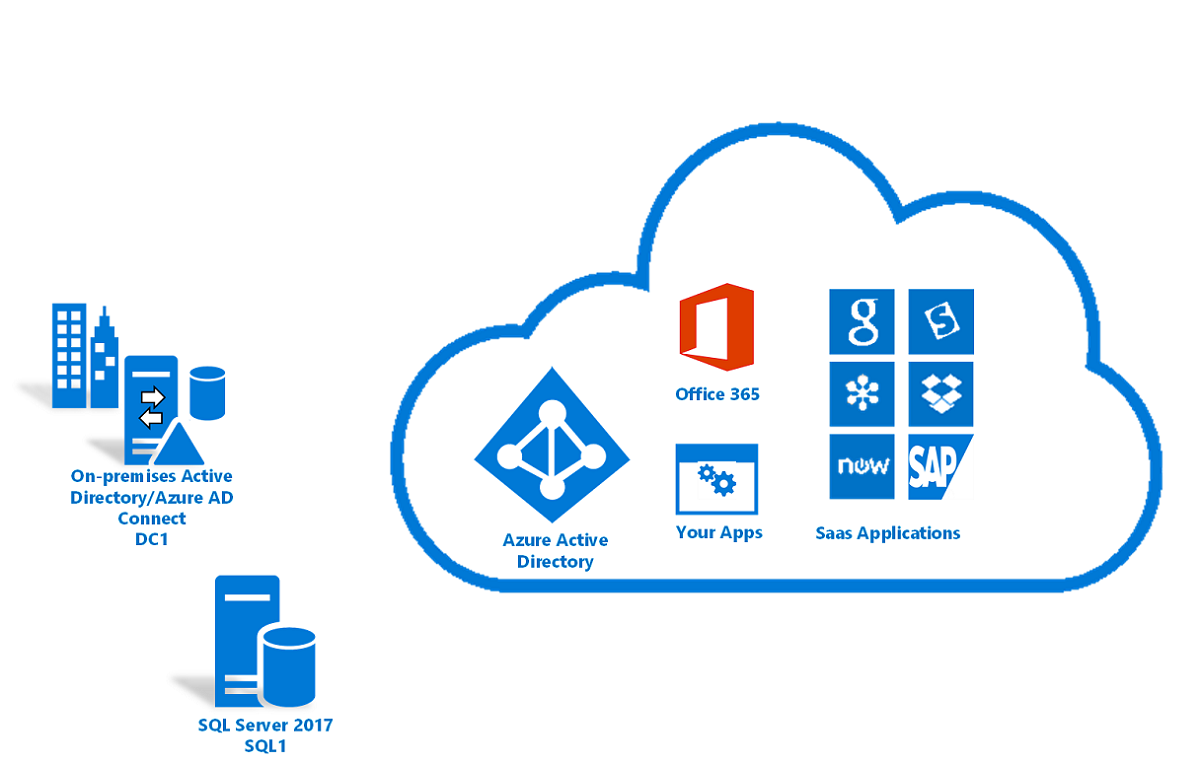
Move the Microsoft Entra Connect database
Use the following steps to move the Microsoft Entra Connect database to a computer running remote SQL Server:
On the Microsoft Entra Connect server, go to Services and stop the Microsoft Entra ID Sync service.
Go to the %ProgramFiles%\Azure AD Sync\Data folder and copy the ADSync.mdf and ADSync_log.ldf files to the computer running remote SQL Server.
Restart the Microsoft Entra ID Sync service on the Microsoft Entra Connect server.
Uninstall Microsoft Entra Connect by going to Control Panel > Programs > Programs and Features. Select Microsoft Entra Connect, and then select Uninstall.
On the computer running remote SQL Server, open SQL Server Management Studio.
Right-click Databases and select Attach.
In Attach Databases, select Add and go to the ADSync.mdf file. Select OK.
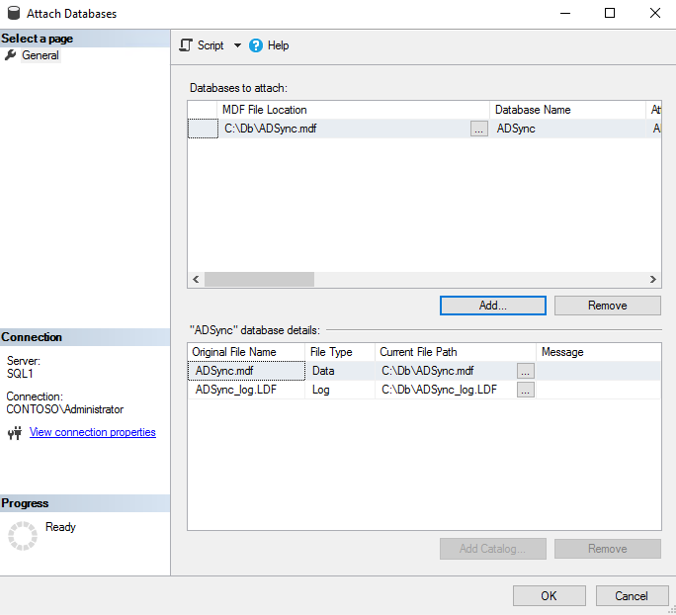
When the database is attached, go back to the Microsoft Entra Connect server and install Microsoft Entra Connect.
When the MSI installation is finished, the Microsoft Entra Connect wizard starts in express settings mode. Select the Exit icon to close the page.
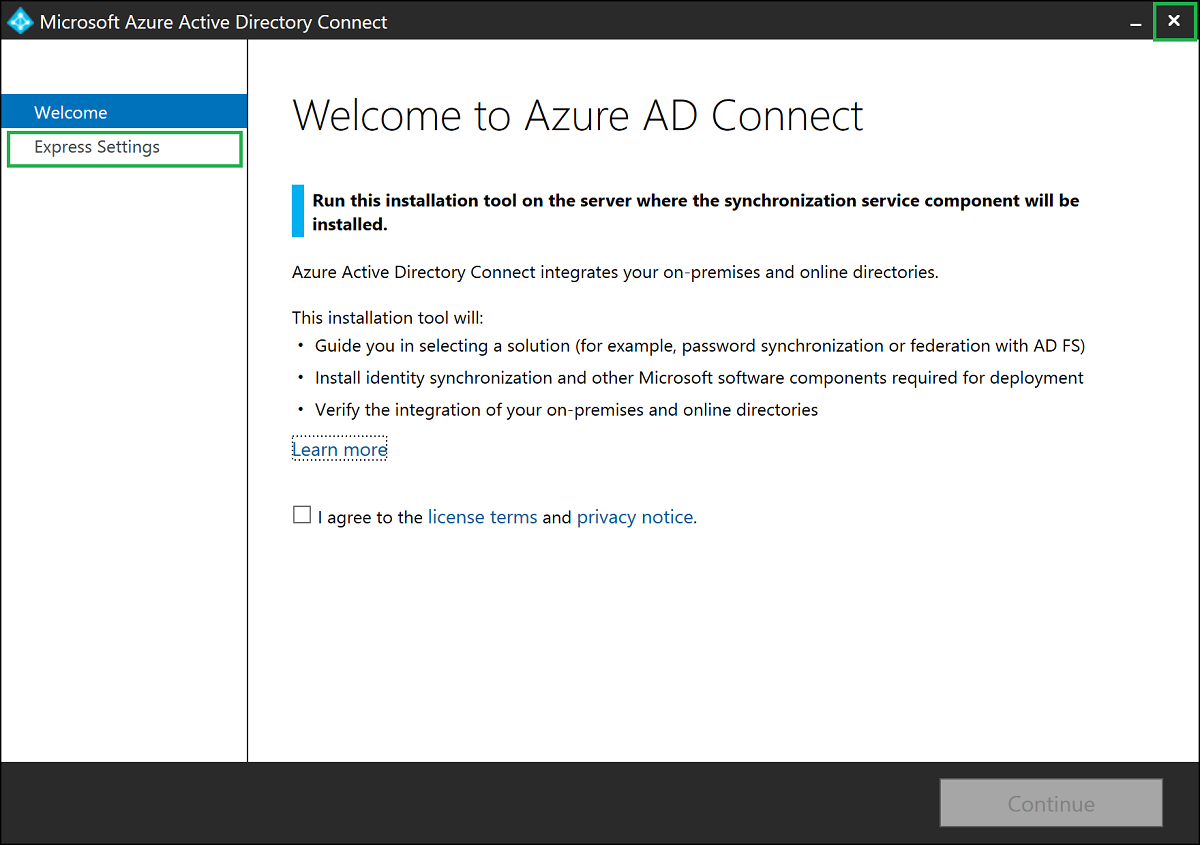
Open a new Command Prompt window or PowerShell session. Go to the folder <drive>\program files\Azure AD Connect. Run the command
.\AzureADConnect.exe /useexistingdatabaseto start the Microsoft Entra Connect wizard in Use existing database setup mode.
In Welcome to Microsoft Entra Connect, review and agree to the license terms and privacy notice, and then select Continue.
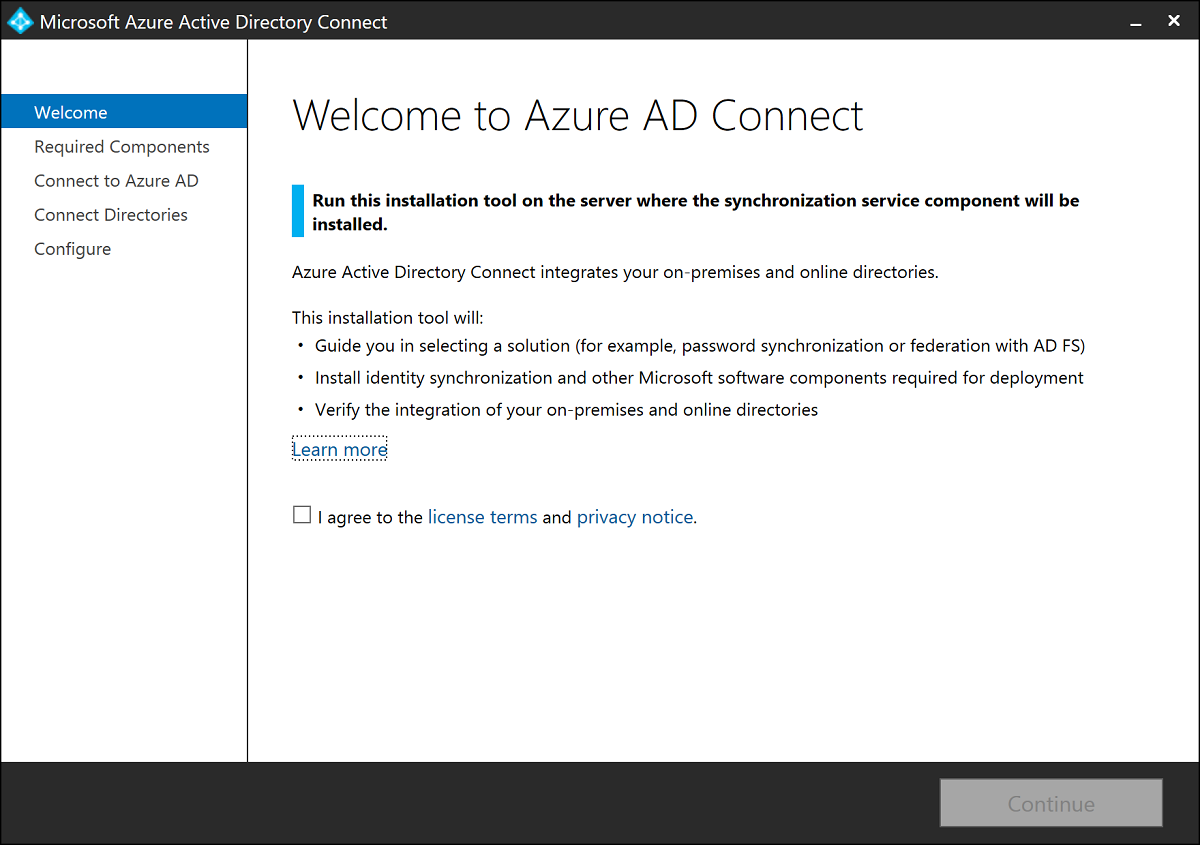
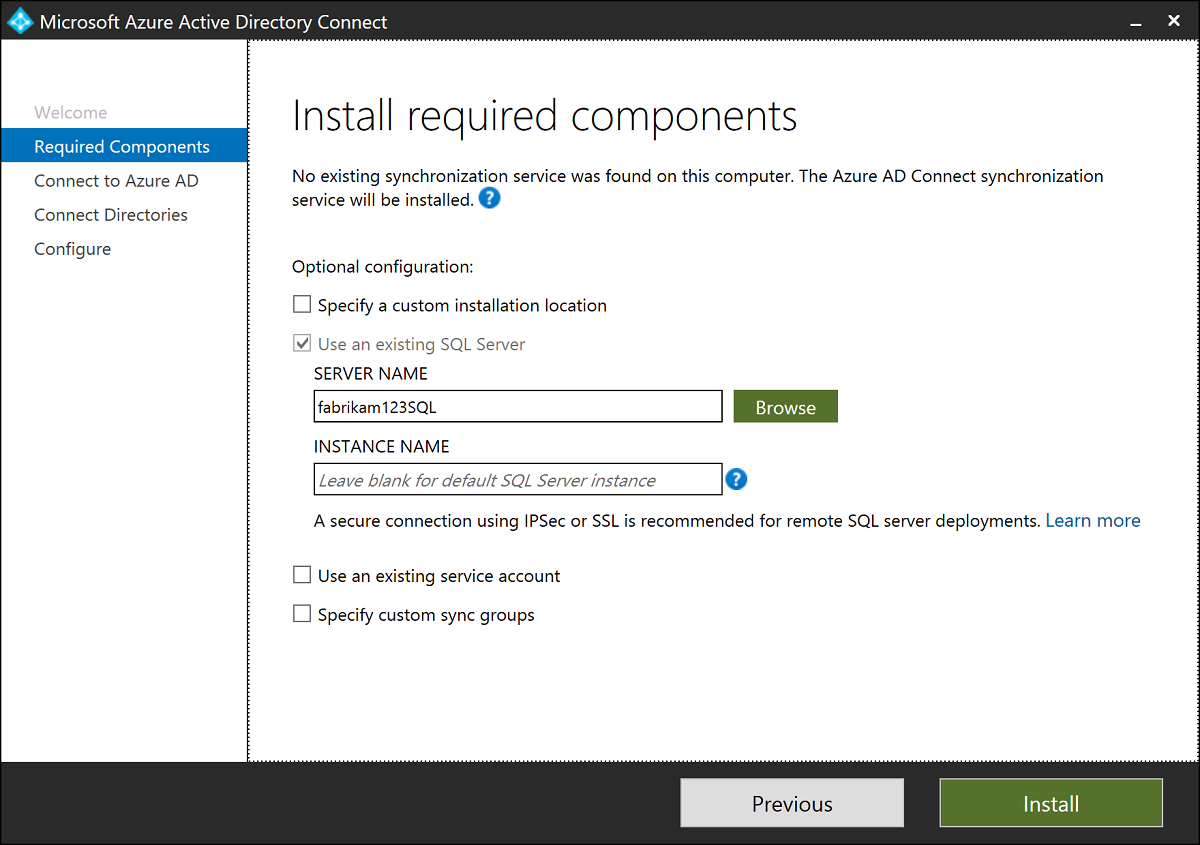
In Install required components, the Use an existing SQL Server option is enabled. Specify the name of the SQL Server instance that's hosting the ADSync database. If the SQL engine instance that's used to host the ADSync database isn't the default instance in SQL Server, you must specify the name of the SQL engine instance.
Also, if SQL browsing isn't enabled, you must specify the SQL engine instance port number. For example:
In Connect to Microsoft Entra ID, you must provide the credentials of a Hybrid Identity Administrator for your directory in Microsoft Entra ID.
We recommend that you use an account in the default
partner.onmschina.cndomain. This account is used only to create a service account in Microsoft Entra ID. The account isn't used after the wizard is finished.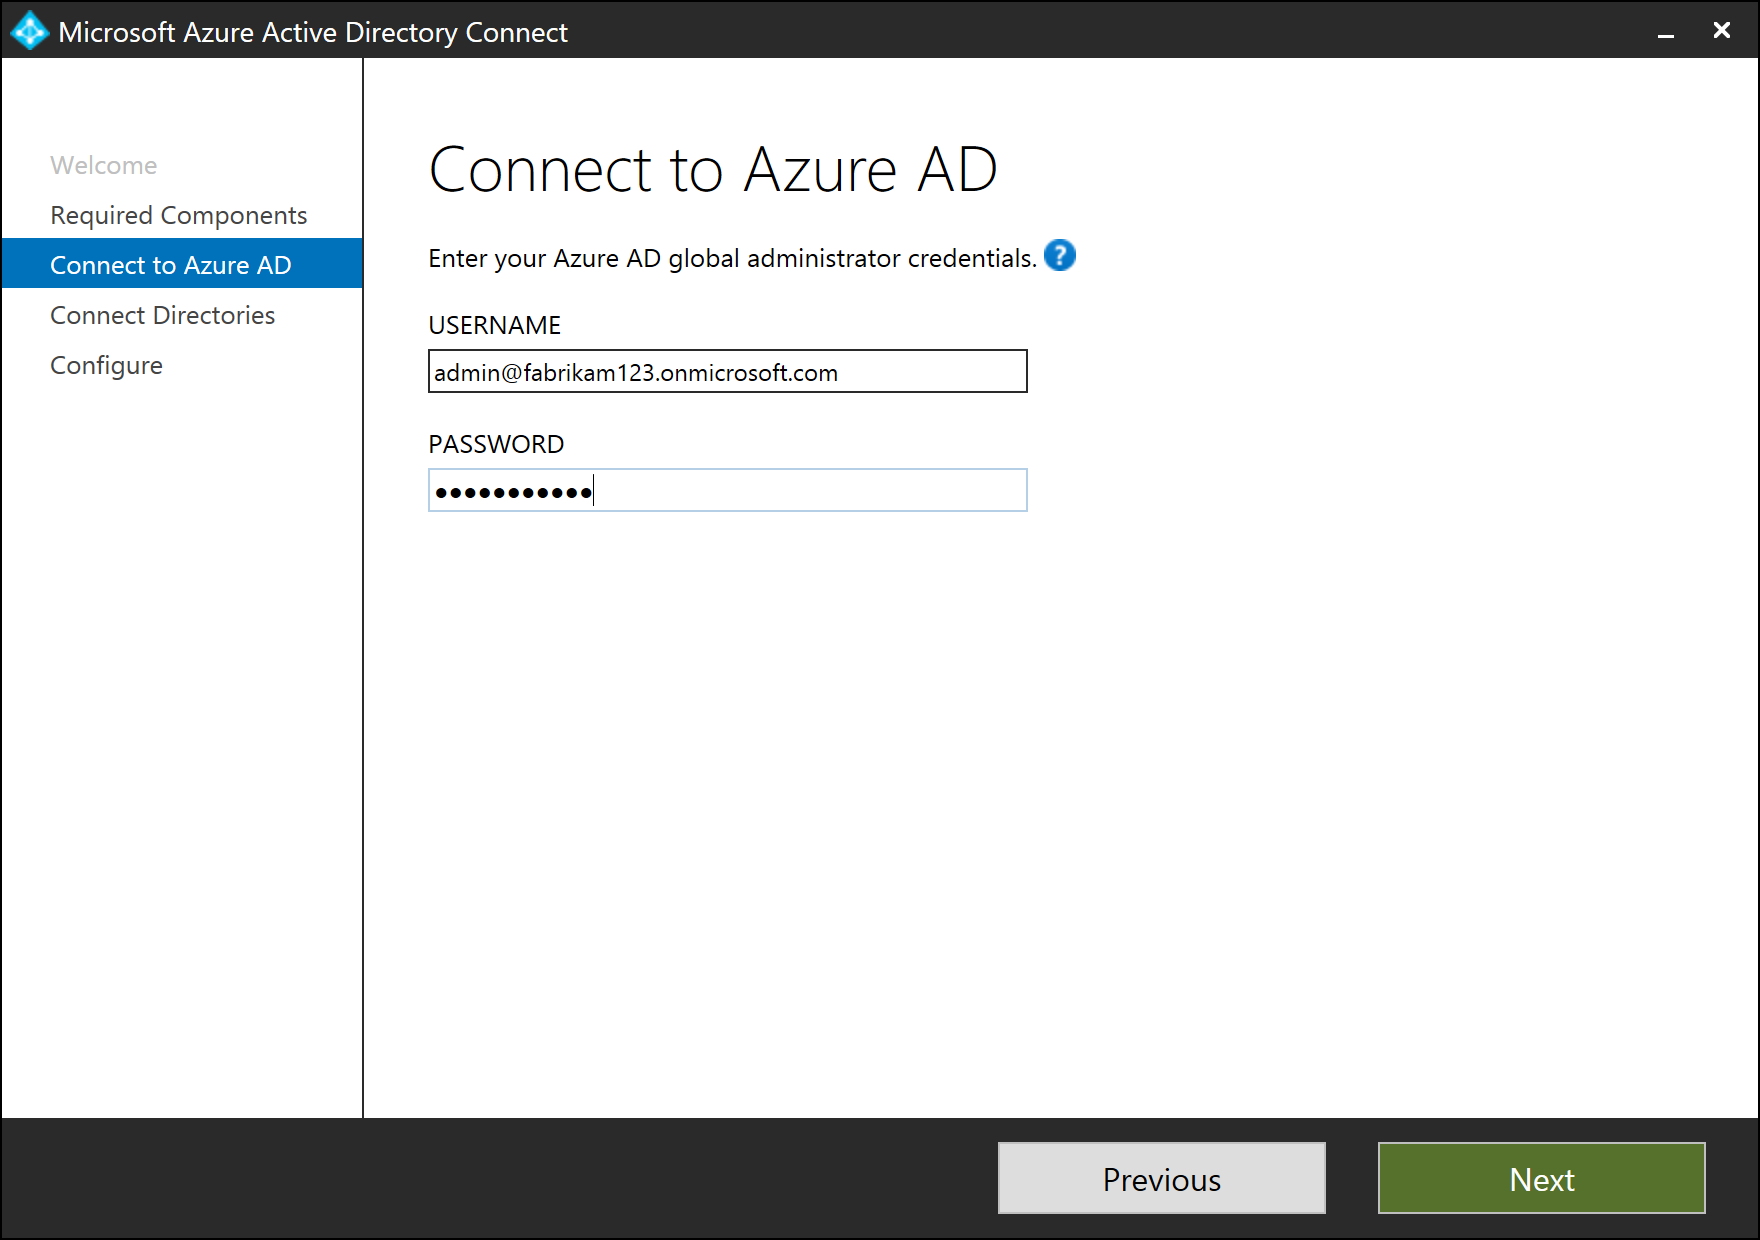
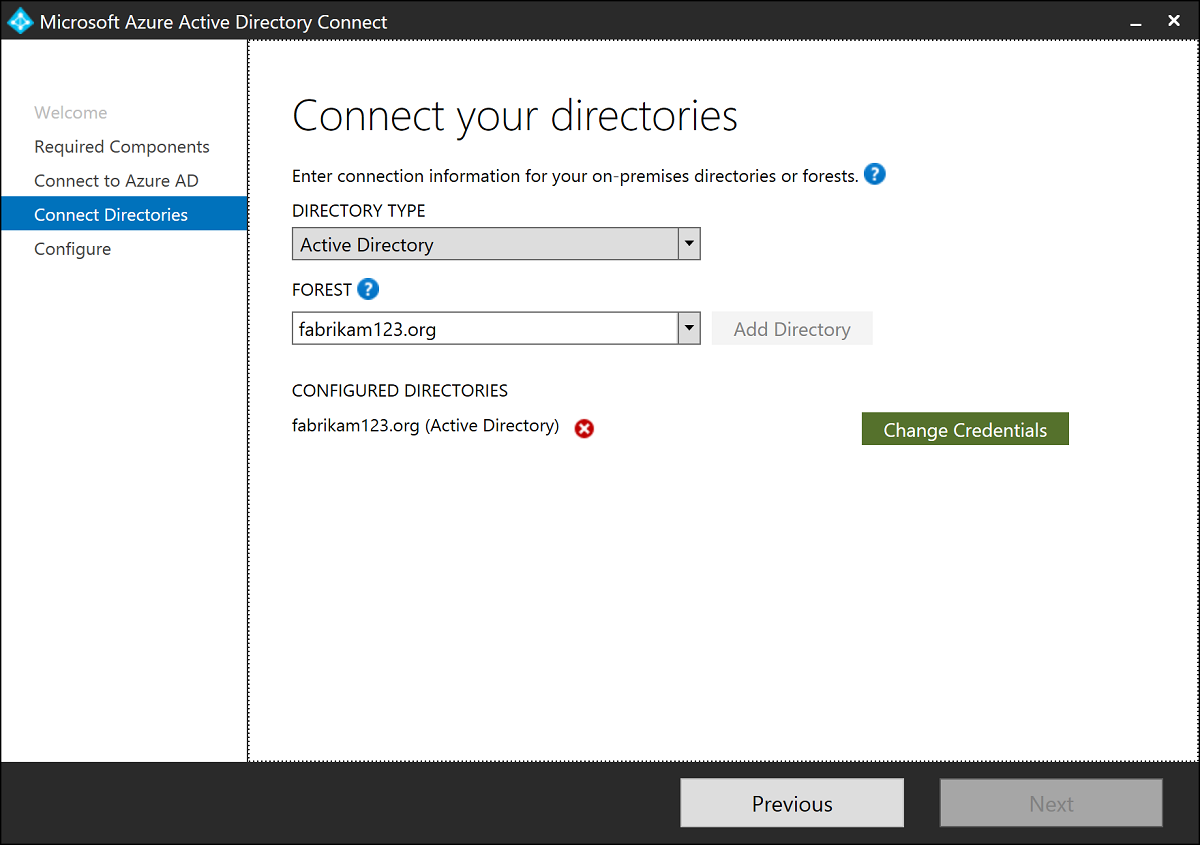
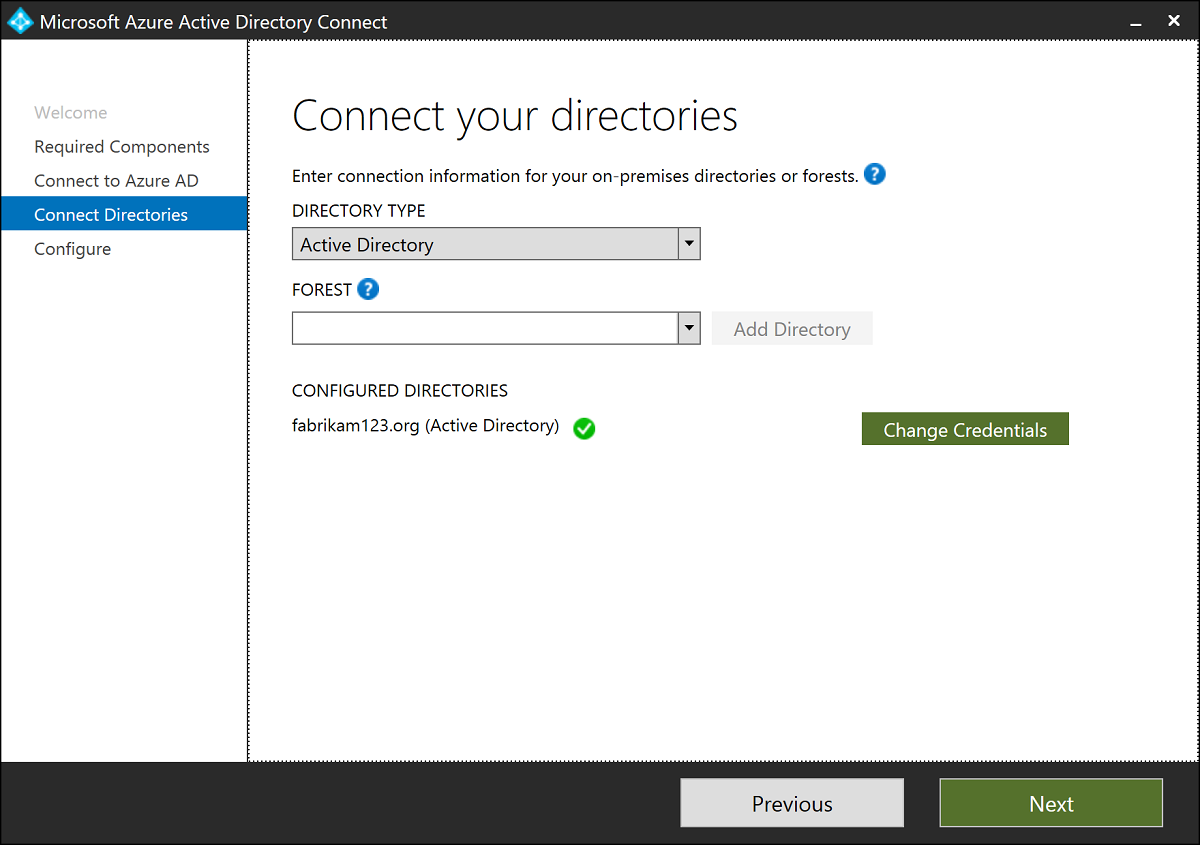
In Connect your directories, the existing Windows Server Active Directory (Windows Server AD) forest that's configured for directory sync is listed with a red X icon beside it. To sync changes from Windows Server AD, an Active Directory Domain Services (AD DS) account is required. Select Change Credentials to specify the AD DS account for the Windows Server AD forest.
The Microsoft Entra Connect wizard can't retrieve the credentials of the AD DS account that are stored in the ADSync database because the credentials are encrypted. The credentials can be decrypted only by the earlier instance of the Microsoft Entra Connect server.
In the dialog, choose one of the following options:
Enter the credentials for an Enterprise Admin and let Microsoft Entra Connect create the AD DS account for you.
Create the AD DS account yourself and enter its credentials in Microsoft Entra Connect.
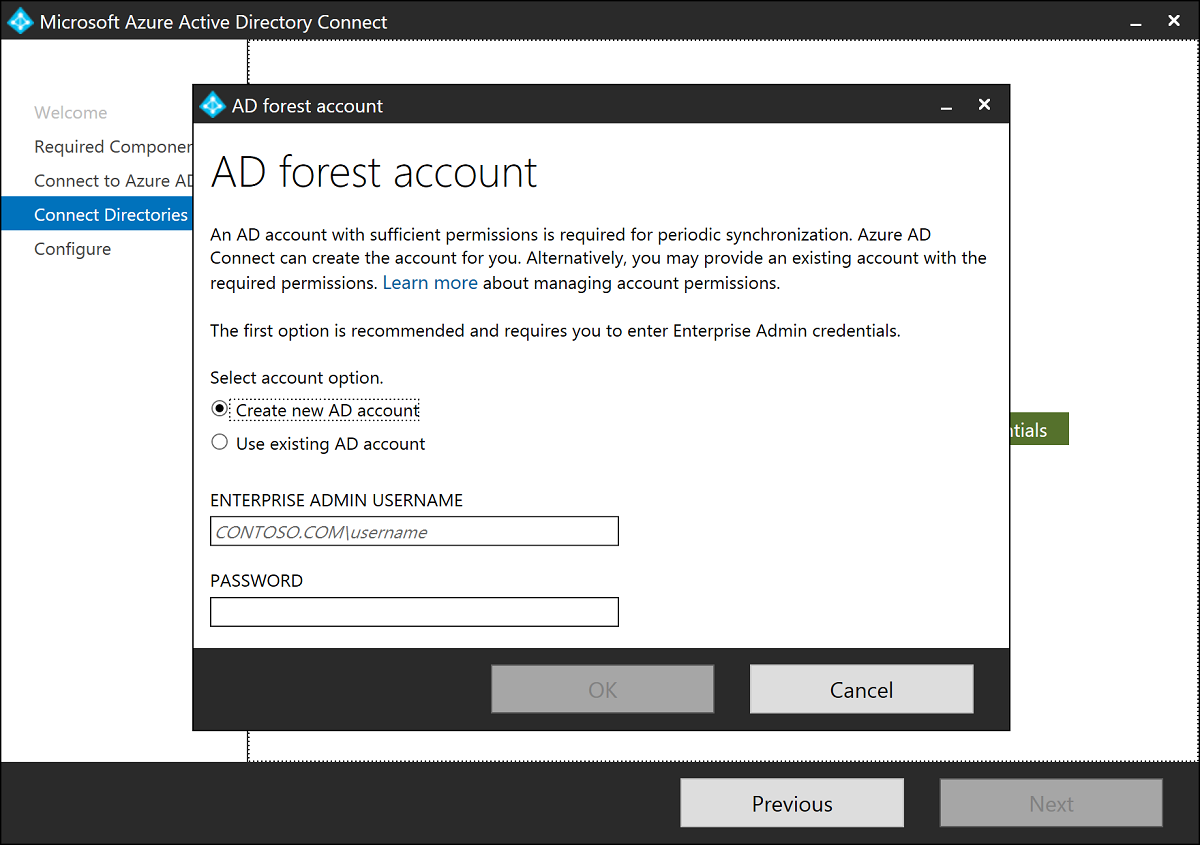
After you select an option and enter the credentials, select OK.
After the credentials are entered, the red X icon is replaced with a green checkmark icon. Select Next.
In Ready to configure, select Install.
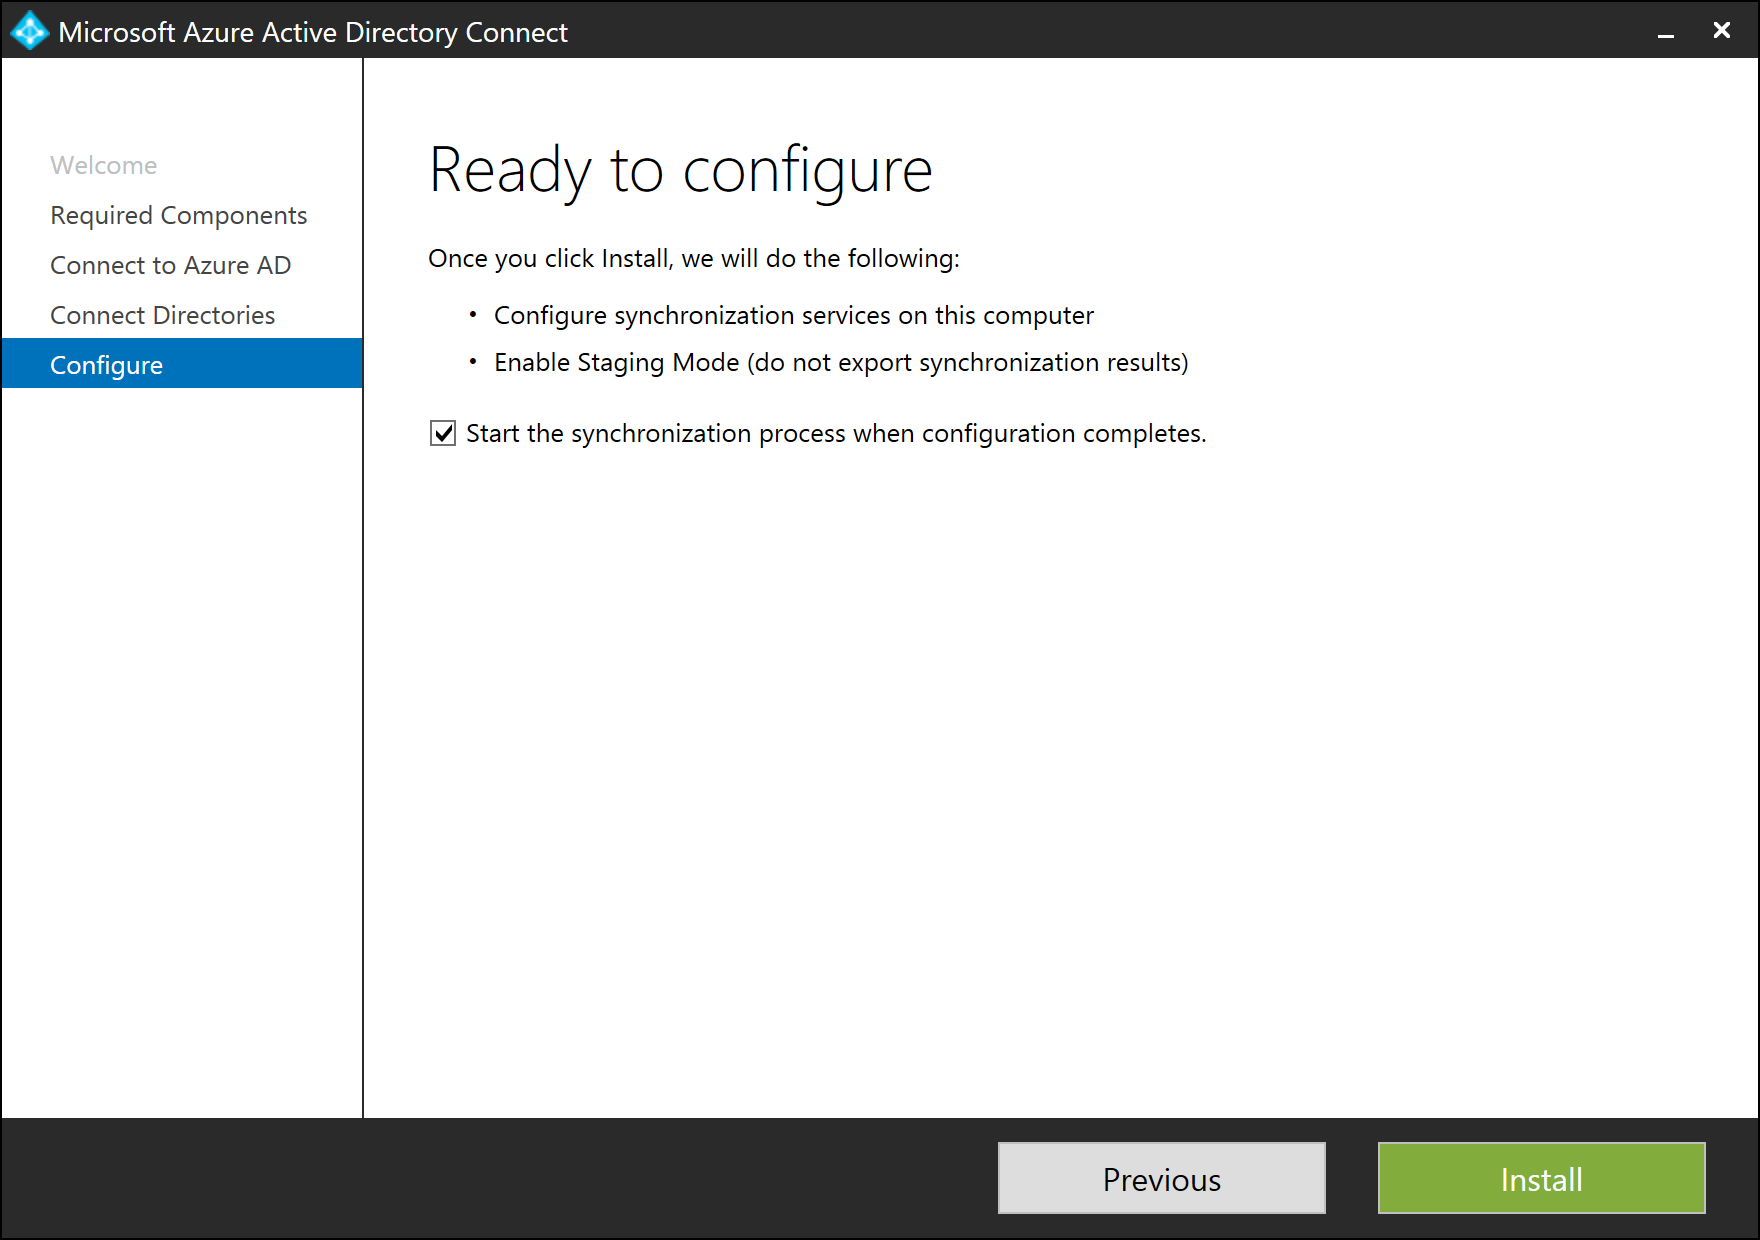
When installation is finished, the Microsoft Entra Connect server is automatically enabled for staging mode. We recommend that you review the server configuration and pending exports for unexpected changes before you disable staging mode.
Next steps
- Learn more about integrating your on-premises identities with Microsoft Entra ID.
- Get more information about installing Microsoft Entra Connect by using an existing ADSync database.
- Learn how to install Microsoft Entra Connect by using SQL delegated administrator permissions.