Note
Access to this page requires authorization. You can try signing in or changing directories.
Access to this page requires authorization. You can try changing directories.
Protected actions in Microsoft Entra ID are permissions that have been assigned Conditional Access polices that are enforced when a user attempts to perform an action. This article describes how to add, test, or remove protected actions.
Note
You should perform these steps in the following sequence to ensure that protected actions are properly configured and enforced. If you don't follow this order, you might get unexpected behavior, such as getting repeated requests to reauthenticate.
Prerequisites
To add or remove protected actions, you must have:
- Microsoft Entra ID P1 or P2 license
- Conditional Access Administrator or Security Administrator role
Step 1: Configure Conditional Access policy
Protected actions use a Conditional Access authentication context, so you must configure an authentication context and add it to a Conditional Access policy. If you already have a policy with an authentication context, you can skip to the next section.
Sign in to the Azure portal.
Select Microsoft Entra ID > Security > Conditional Access > Authentication context > Authentication context.
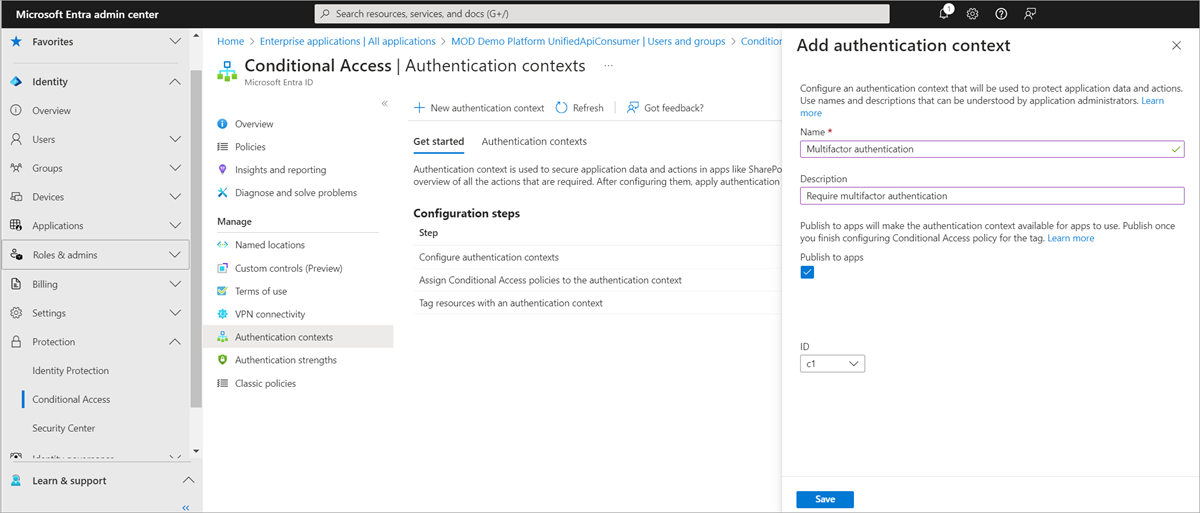
Select New authentication context to open the Add authentication context pane.
Enter a name and description and then select Save.
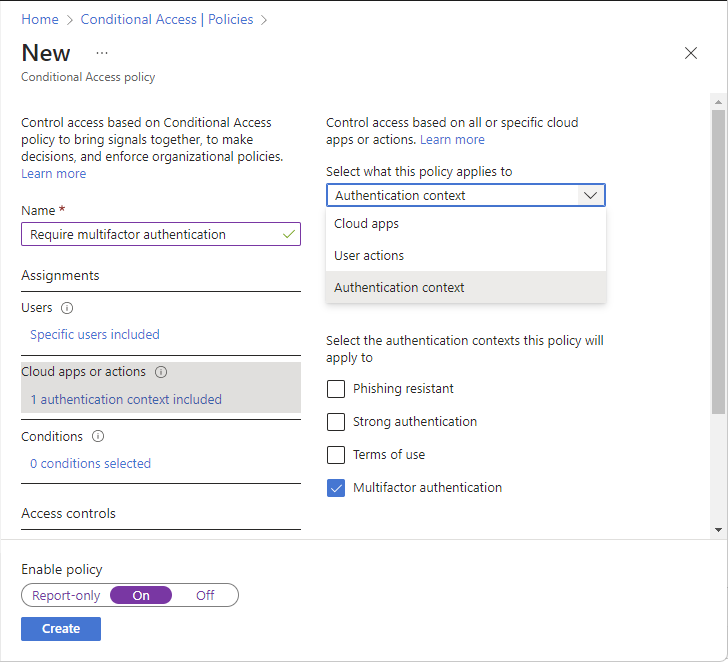
Select Policies > New policy to create a new policy.
Create a new policy and select your authentication context.
For more information, see Conditional Access: Cloud apps, actions, and authentication context.
Step 2: Add protected actions
To add protection actions, assign a Conditional Access policy to one or more permissions using a Conditional Access authentication context.
Select Microsoft Entra ID > Security > Conditional Access > Policies.
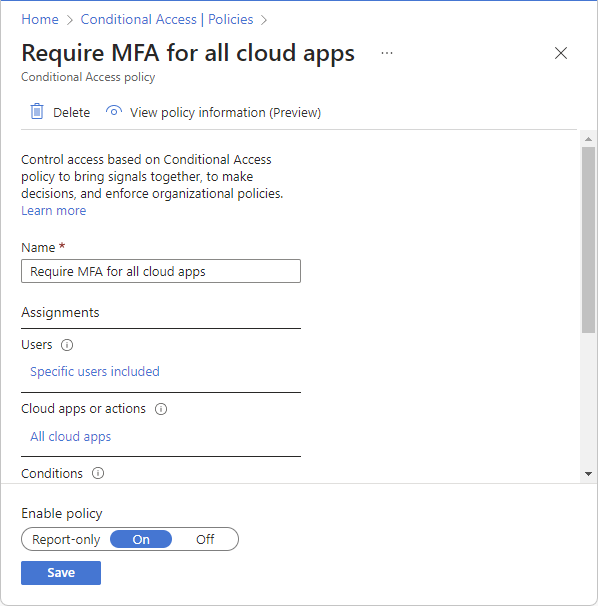
Make sure the state of the Conditional Access policy that you plan to use with your protected action is set to On and not Off or Report-only.
Select Entra ID > Roles & admins > Protected actions.
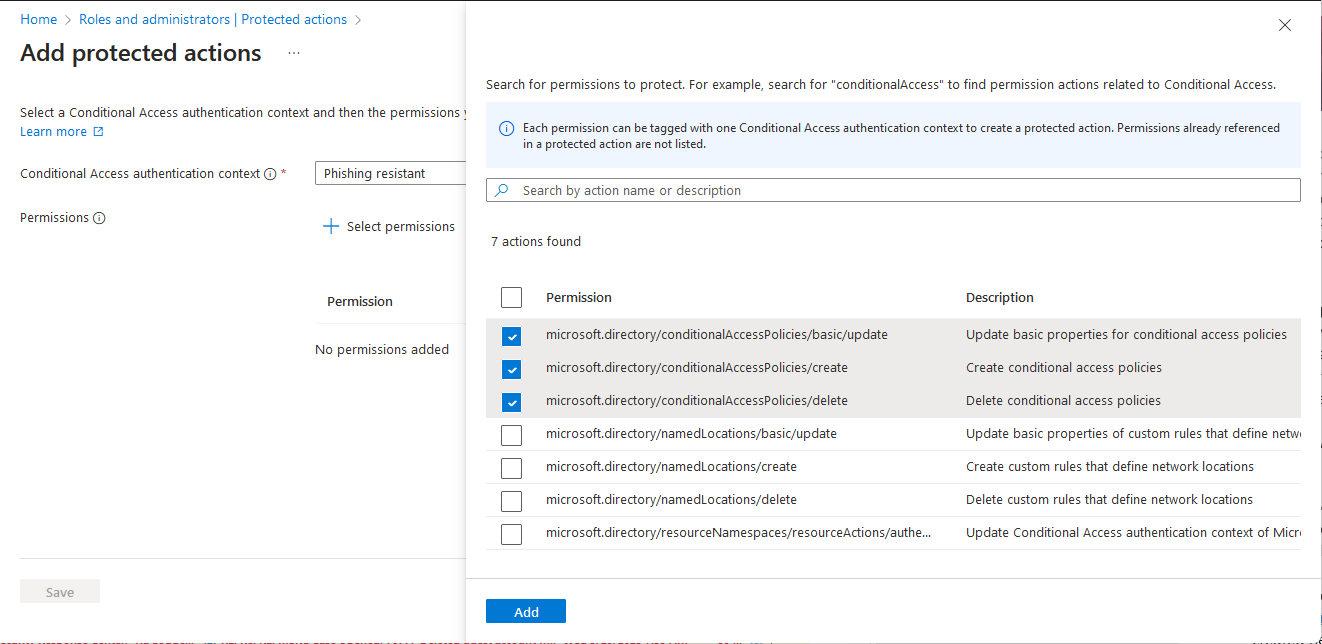
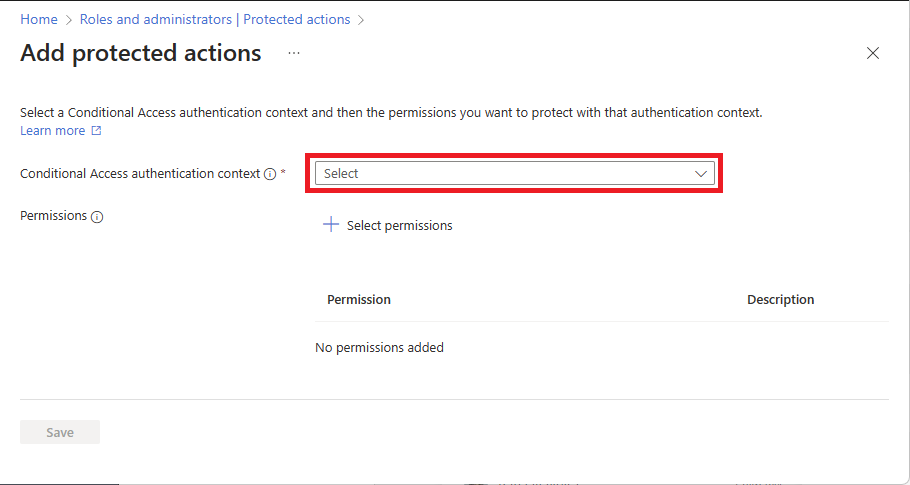
Select Add protected actions to add a new protected action.
If Add protected actions is disabled, make sure you're assigned the Conditional Access Administrator or Security Administrator role. For more information, see Troubleshoot protected actions.
Select a configured Conditional Access authentication context.
Select Select permissions and select the permissions to protect with Conditional Access.
Select Add.
When finished, select Save.
The new protected actions appear in the list of protected actions
Step 3: Test protected actions
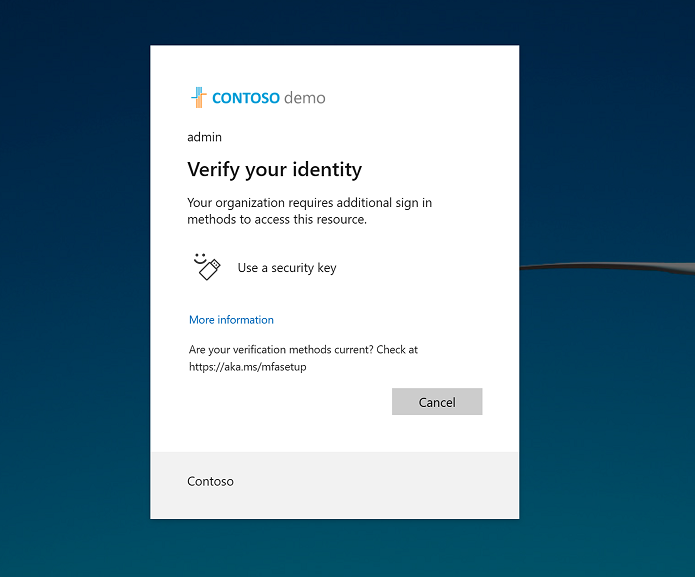
When a user performs a protected action, they'll need to satisfy Conditional Access policy requirements. This section shows the experience for a user being prompted to satisfy a policy. In this example, the user is required to authenticate with a FIDO security key before they can update Conditional Access policies.
Sign in to the Azure portal as a user that must satisfy the policy.
Select Microsoft Entra ID > Security > Conditional Access.
Select a Conditional Access policy to view it.
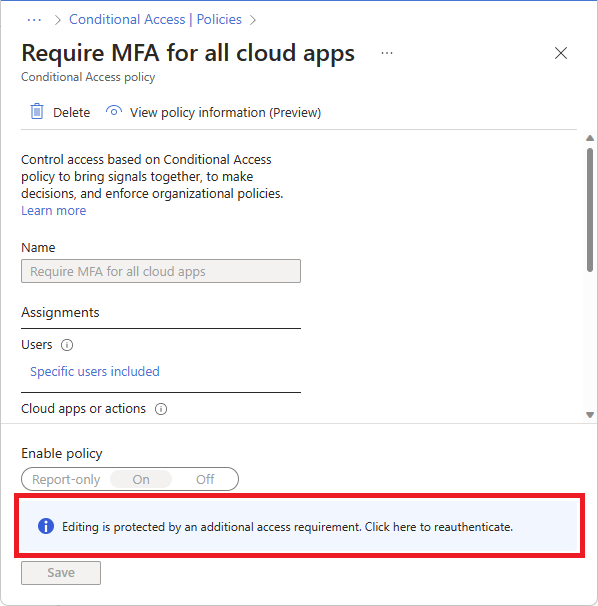
Policy editing is disabled because the authentication requirements haven't been satisfied. At the bottom of the page is the following note:
Editing is protected by an additional access requirement. Click here to reauthenticate.
Select Click here to reauthenticate.
Complete the authentication requirements when the browser is redirected to the Microsoft Entra sign-in page.
After completing the authentication requirements, the policy can be edited.
Edit the policy and save changes.
Remove protected actions
To remove protection actions, unassign Conditional Access policy requirements from a permission.
Select Entra ID > Roles & admins > Protected actions.
Find and select the permission Conditional Access policy to unassign.
On the toolbar, select Remove.
After you remove the protected action, the permission won't have a Conditional Access requirement. A new Conditional Access policy can be assigned to the permission.
Microsoft Graph
Add protected actions
Protected actions are added by assigning an authentication context value to a permission. Authentication context values that are available in the tenant can be discovered by calling the authenticationContextClassReference API.
Authentication context can be assigned to a permission using the unifiedRbacResourceAction API beta endpoint:
https://microsoftgraph.chinacloudapi.cn/beta/roleManagement/directory/resourceNamespaces/microsoft.directory/resourceActions/
The following example shows how to get the authentication context ID that was set on the microsoft.directory/conditionalAccessPolicies/delete permission.
GET https://microsoftgraph.chinacloudapi.cn/beta/roleManagement/directory/resourceNamespaces/microsoft.directory/resourceActions/microsoft.directory-conditionalAccessPolicies-delete-delete?$select=authenticationContextId,isAuthenticationContextSettable
Resource actions with the property isAuthenticationContextSettable set to true support authentication context. Resource actions with the value of the property authenticationContextId is the authentication context ID that has been assigned to the action.
To view the isAuthenticationContextSettable and authenticationContextId properties, they must be included in the select statement when making the request to the resource action API.
Troubleshoot protected actions
Symptom - No authentication context values can be selected
When attempting to select a Conditional Access authentication context, there are no values available to select.
Cause
No Conditional Access authentication context values have been enabled in the tenant.
Solution
Enable authentication context for the tenant by adding a new authentication context. Ensure Publish to apps is checked, so the value is available to be selected. For more information, see Authentication context.
Symptom - Policy isn't getting triggered
In some cases, after a protected action has been added, users may not be prompted as expected. For example, if policy requires multifactor authentication, a user may not see a sign-in prompt.
Cause 1
The user hasn't been assigned to the Conditional Access policies used for protected action.
Solution 1
Use Conditional Access What If tool to check if the user has been assigned policy. When using the tool, select the user and the authentication context that was used with the protected action. Select What If and verify the expected policy is listed in the Policies that will apply table. If the policy doesn't apply, check the policy user assignment condition, and add the user.
Cause 2
The user has previously satisfied policy. For example, the completed multifactor authentication earlier in the same session.
Solution 2
Check the Microsoft Entra sign-in events to troubleshoot. The sign-in events include details about the session, including if the user has already completed multifactor authentication. When troubleshooting with the sign-in logs, it's also helpful to check the policy details page, to confirm an authentication context was requested.
Symptom - Policy is never satisfied
When you attempt to perform the requirements for the Conditional Access policy, the policy is never satisfied and you keep getting requested to reauthenticate.
Cause
The Conditional Access policy wasn't created or the policy state is Off or Report-only.
Solution
Create the Conditional Access policy if it doesn't exist or and set the state to On.
If you aren't able to access the Conditional Access page because of the protected action and repeated requests to reauthenticate, use the following link to open the Conditional Access page.
Symptom - No access to add protected actions
When signed in you don't have permissions to add or remove protected actions.
Cause
You don't have permission to manage protected actions.
Solution
Make sure you're assigned the Conditional Access Administrator or Security Administrator role.
Symptom - Error returned using PowerShell to perform a protected action
When using PowerShell to perform a protected action, an error is returned and there's no prompt to satisfy Conditional Access policy.
Cause
Microsoft Graph PowerShell supports step-up authentication, which is required to allow policy prompts. Azure PowerShell isn't supported for step-up authentication.
Solution
Make sure you're using Microsoft Graph PowerShell.
