Note
Access to this page requires authorization. You can try signing in or changing directories.
Access to this page requires authorization. You can try changing directories.
In Microsoft Entra ID, part of Microsoft Entra, you can automatically add or remove users to security groups or Microsoft 365 groups, so you don't always have to do it manually. Whenever any properties of a user or device change, Microsoft Entra ID evaluates all rules for dynamic membership groups in your Microsoft Entra organization to see if the change should add or remove members.
In this tutorial, you learn how to:
- Create an automatically populated group of guest users from a partner company
- Assign licenses to the group for the partner-specific features for guest users to access
- Bonus: secure the All users group by removing guest users so that, for example, you can give your member users access to internal-only sites
If you don't have an Azure subscription, create a Trial before you begin.
Prerequisites
This feature requires one Microsoft Entra ID P1 or P2 license for the administrator of the organization. If you don't have one, in Microsoft Entra ID, select Licenses > Products > Try/Buy.
You're not required to assign licenses to the users for them to be members in dynamic membership groups. You only need the minimum number of available Microsoft Entra ID P1 licenses in the organization to cover all such users.
To create a group of guest users
First, you create a group for your guest users who all are from a single partner company. They need special licensing, so it's often more efficient to create a group for this purpose.
Sign in to the Microsoft Entra admin center as at least a Groups Administrator.
Select Microsoft Entra ID.
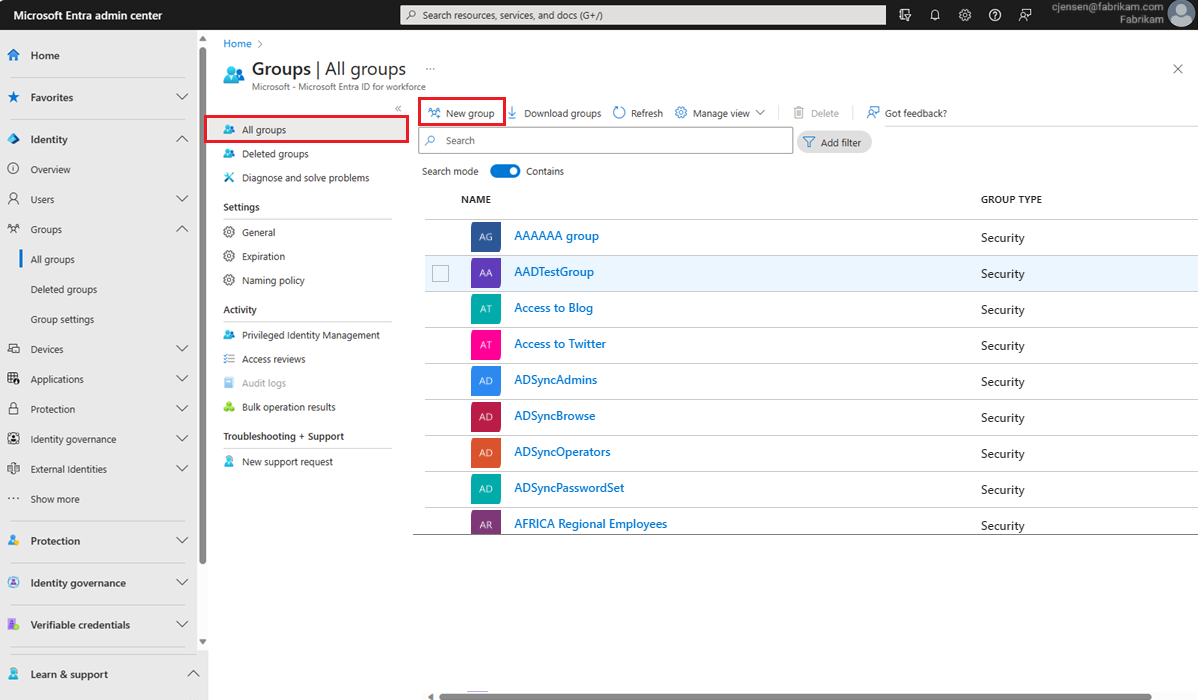
Select Groups > All groups > New group.

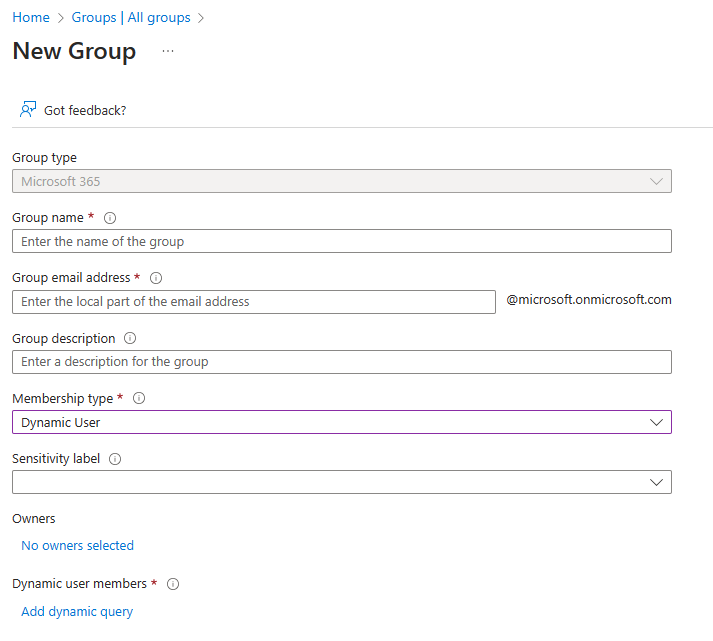
On the New Group pane:
- Enter a Guest users name, email address, and description for the group.
- Change Membership type to Dynamic User.

Select No owners selected and on the Add Owners pane, scroll to locate the desired owners. Select on the name to add owners to the group.
Select Select to save the owners and close the Add Owners pane.
Select Add dynamic query in the Dynamic user members box.
On the Dynamic membership rules pane:
- In the Property field, select on the existing value and select userType.
- Verify that the Operator field has Equals selected.
- Select the Value field and enter Guest.
- Select the Add Expression hyperlink to add another line.
- In the And/Or field, select And.
- In the Property field, select companyName.
- Verify that the Operator field has Equals selected.
- In the Value field, enter Contoso.
- Select Get custom extension properties to enter an application ID to retrieve all available custom extension properties for creating a rule.
- When you're done, select Save to close Dynamic membership rules.
To finish and create the group, select Create on the Group pane.
Assign licenses
Now that you have your new group, you can apply the licenses that these partner users need.
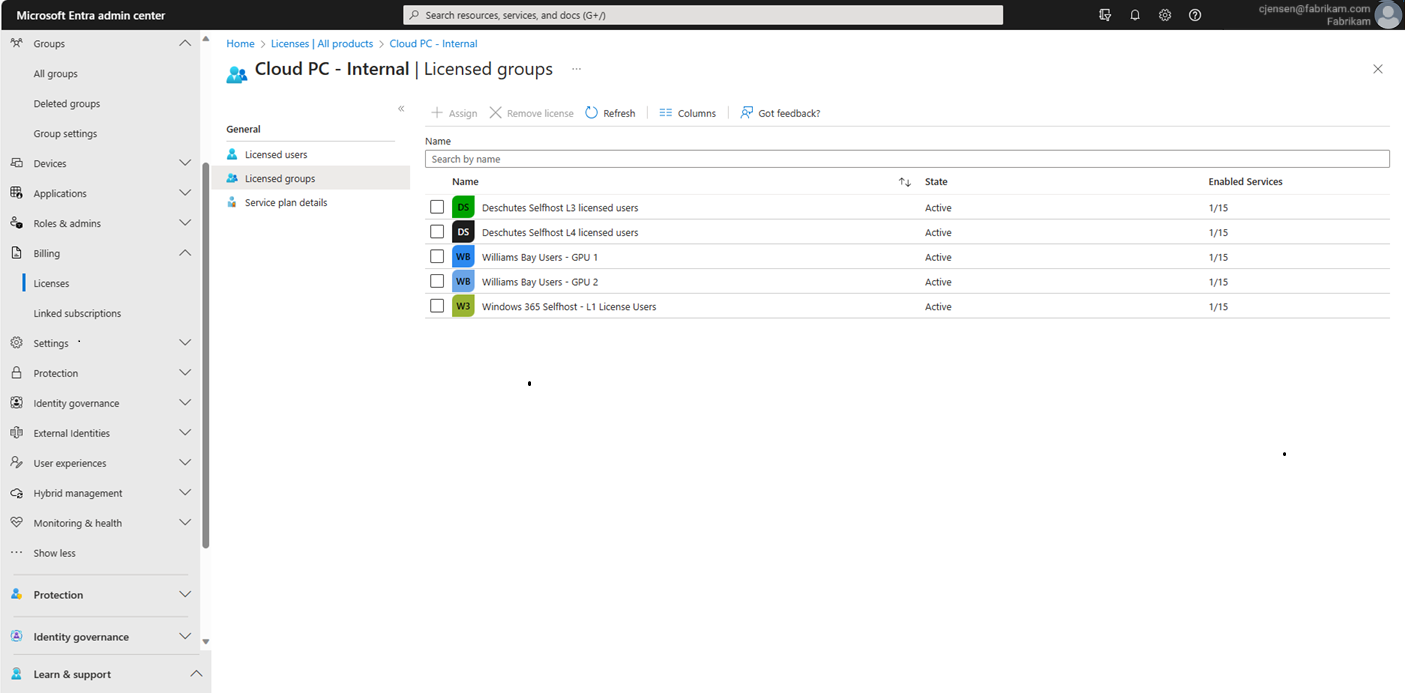
In the Microsoft Entra admin center browse to Billing > Licenses > All products, select one or more licenses, and then select Licensed groups.

Search for the group name that you want to add, and then select Assign.
Assignment options allow you to turn on or off the service plans included the licenses that you selected. When you make a change, be sure to select OK to save your changes.
To complete the assignment, on the Assign license pane, select Assign at the bottom of the pane.
Remove guests from All users group
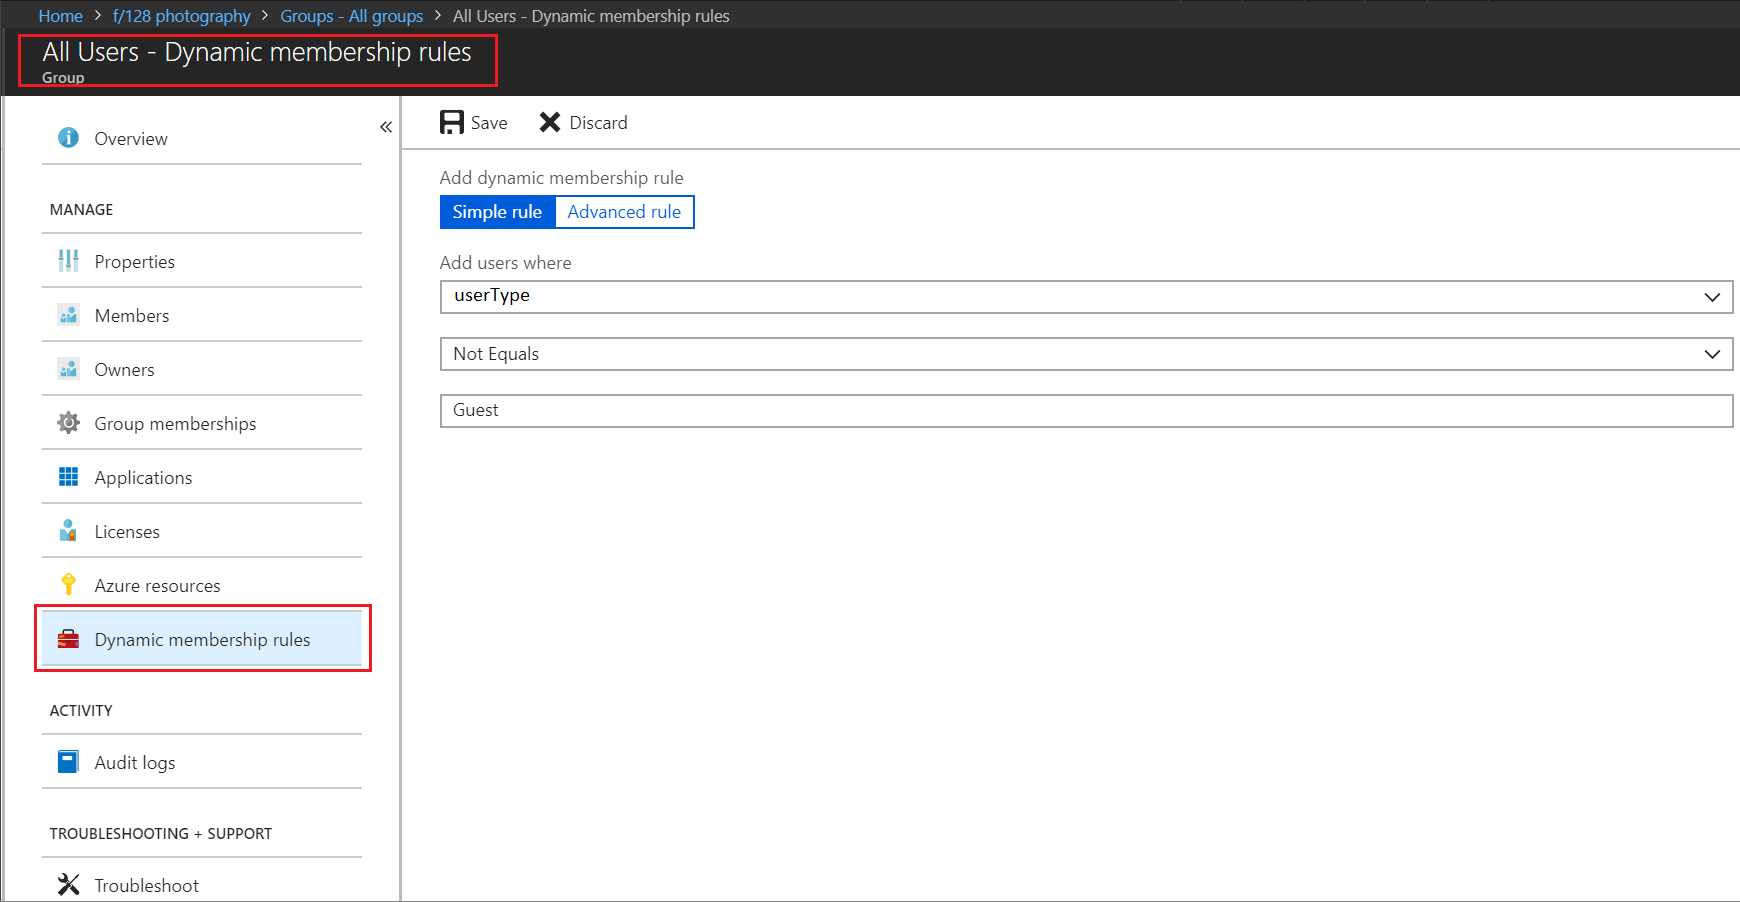
Perhaps your ultimate administrative plan is to assign all of your guest users to their own groups by company. You can also now change the All users group so that you can limit it to include users in your organization. Then you can use it to assign apps and licenses that are specific to your home organization.

Clean up resources
To remove the guest users group
- Sign in to the Microsoft Entra admin center as at least a Groups Administrator.
- Browse to Groups > All groups.
- Select the Guest users group, select the ellipsis (...), and then select Delete. When you delete the group, any assigned licenses are removed.
To restore the All Users group
- Select Entra ID > Groups > All groups. Select the name of the All users group to open the group.
- Select Dynamic membership rules, clear all the text in the rule, and select Save.