Note
Access to this page requires authorization. You can try signing in or changing directories.
Access to this page requires authorization. You can try changing directories.
In this quickstart, you use the Azure portal to enable capturing of events to Azure Storage or Azure Data Lake Storage Gen 2. Event Hubs Capture automatically delivers streaming data in Event Hubs to a storage account of your choice.
You can configure capture settings when creating an event hub or for an existing event hub. For conceptual information on this feature, see Event Hubs Capture overview.
Prerequisites
- An Azure subscription. If you don't have one, create a trial subscription before you begin.
- If you're new to Azure Event Hubs, read through Event Hubs overview and Event Hubs features.
Important
Event Hubs only supports Premium Storage account with Block Blob support.
Enable Capture when you create an event hub
If you don't have an Event Hubs namespace to work with, create a namespace by following steps from the article: Create an Event Hubs namespace. Make sure that you select Standard or higher pricing tier. The basic tier doesn't support the Capture feature.
To create an event hub within the namespace, follow these steps:
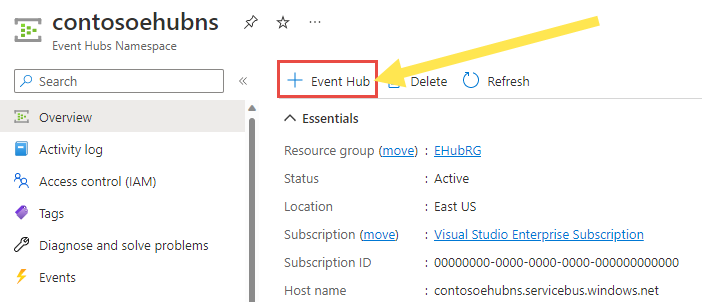
On the Overview page for your namespace, select + Event hub on the command bar.
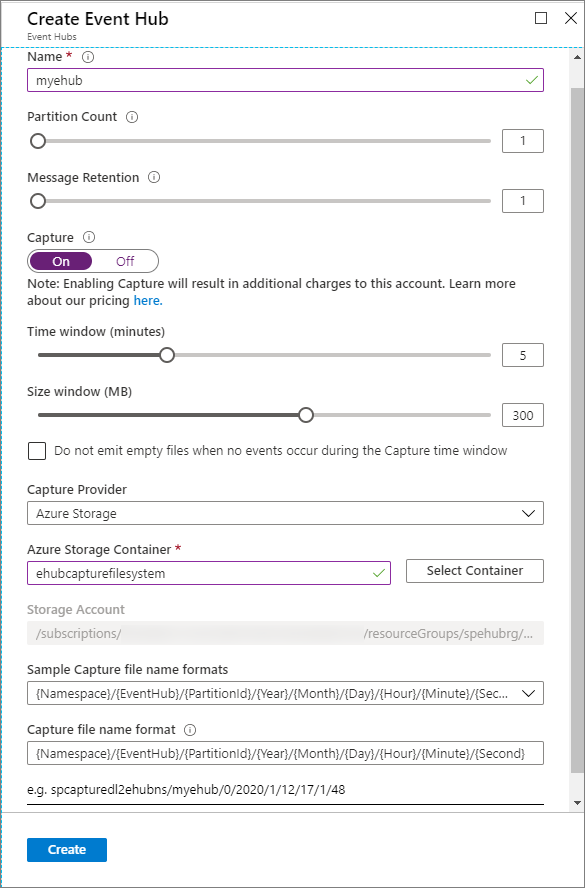
On the Create event hub page, type a name for your event hub, and then select Next: Capture at the bottom of the page.
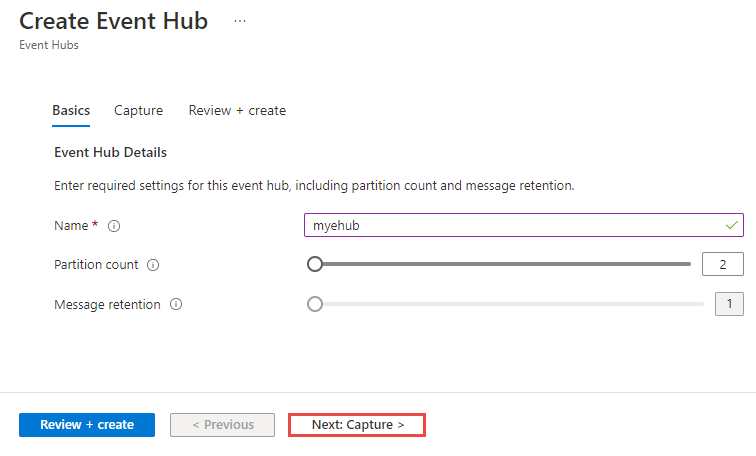
On the Capture tab, select On for Capture.
Drag the slider to set the Time window in minutes. The default time window is 5 minutes. The minimum value is 1 and the maximum is 15.
Drag the slider to set the Size window (MB). The default value is 300 MB. The minimum value is 10 MB and the maximum value is 500 MB.
Specify whether you want Event Hubs to emit empty files when no events occur during the Capture time window.

See one of the following sections based on the type of storage you want to use to store captured files.
Capture data to Azure Storage
For Capture Provider, select Azure Storage Account (default).
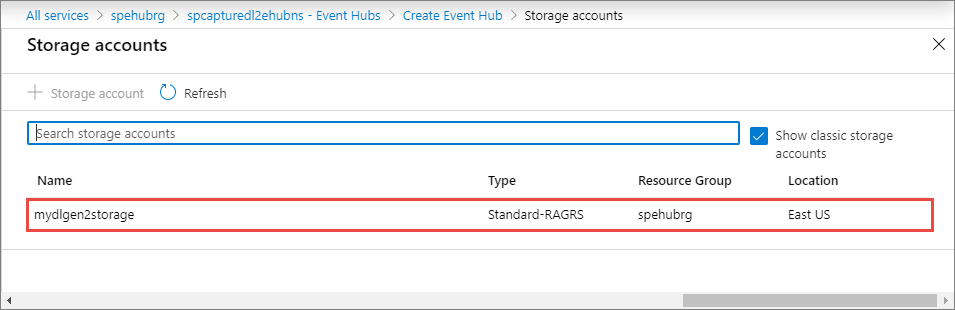
For Azure Storage Container, choose the Select the container link.

On the Storage accounts page, select the storage account that you want to use to capture data.
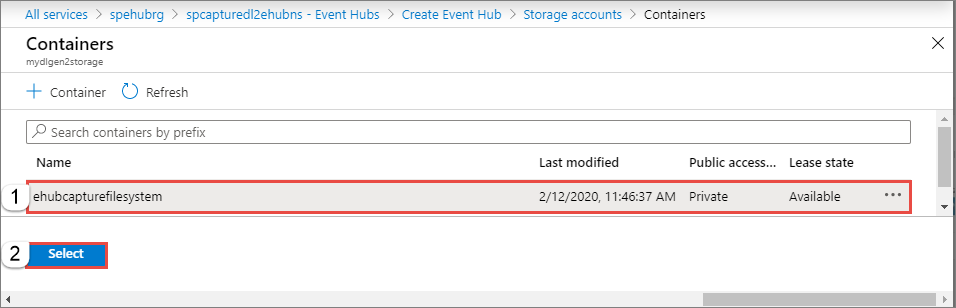
On the Containers page, select the container where you want to store captured files, and then choose Select.
Because Event Hubs Capture uses service-to-service authentication with storage, you don't need to specify a storage connection string. The resource picker selects the resource URI for your storage account automatically. If you use Azure Resource Manager, you must supply this URI explicitly as a string.
On the Create event hub page, confirm that the selected container shows up.
For Capture file name format, specify format for the captured file names.
Select Review + create at the bottom of the page.
On the Review + create page, review settings, and select Create to create the event hub.
Note
If public access is disabled on the storage account, allow trusted services, which include Azure Event Hubs, to access the storage account. For details and step-by-step instructions, see this article.
Capture data to Azure Data Lake Storage Gen 2
Follow the Create a storage account article to create an Azure Storage account. Set Hierarchical namespace to Enabled on the Advanced tab to make it an Azure Data Lake Storage Gen 2 account. The Azure Storage account must be in the same subscription as the event hub.
Select Azure Storage as the capture provider. To use Azure Data Lake Storage Gen2, select Azure Storage.
For Azure Storage Container, choose the Select the container link.
Select the Azure Data Lake Storage Gen 2 account from the list.
Select the container (file system in Data Lake Storage Gen 2), and then choose Select at the bottom of the page.
For Capture file name format, specify format for the captured file names.
Select Review + create at the bottom of the page.
On the Review + create page, review settings, and select Create to create the event hub.
Note
The container you create in an Azure Data Lake Storage Gen 2 using this user interface (UI) appears under File systems in Storage Explorer. Similarly, the file system you create in a Data Lake Storage Gen 2 account shows up as a container in this UI.
Configure Capture for an existing event hub
You can configure Capture on existing event hubs that are in Event Hubs namespaces. To enable Capture on an existing event hub, or to change your Capture settings, follow these steps:
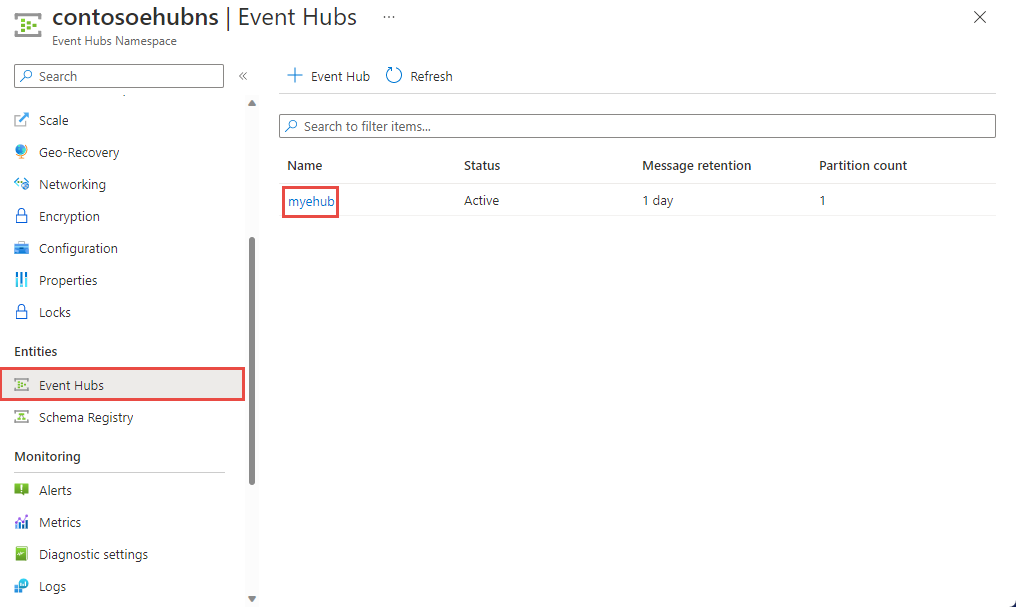
On the home page for your namespace, select Event Hubs under Entities in the left menu.
Select the event hub for which you want to configure the Capture feature.
On the Event Hubs Instance page, select Capture in the left menu.

On the Capture page, select Avro for Output event serialization format. The Parquet format is supported only via Azure Stream Analytics integration.
Select On for Capture.
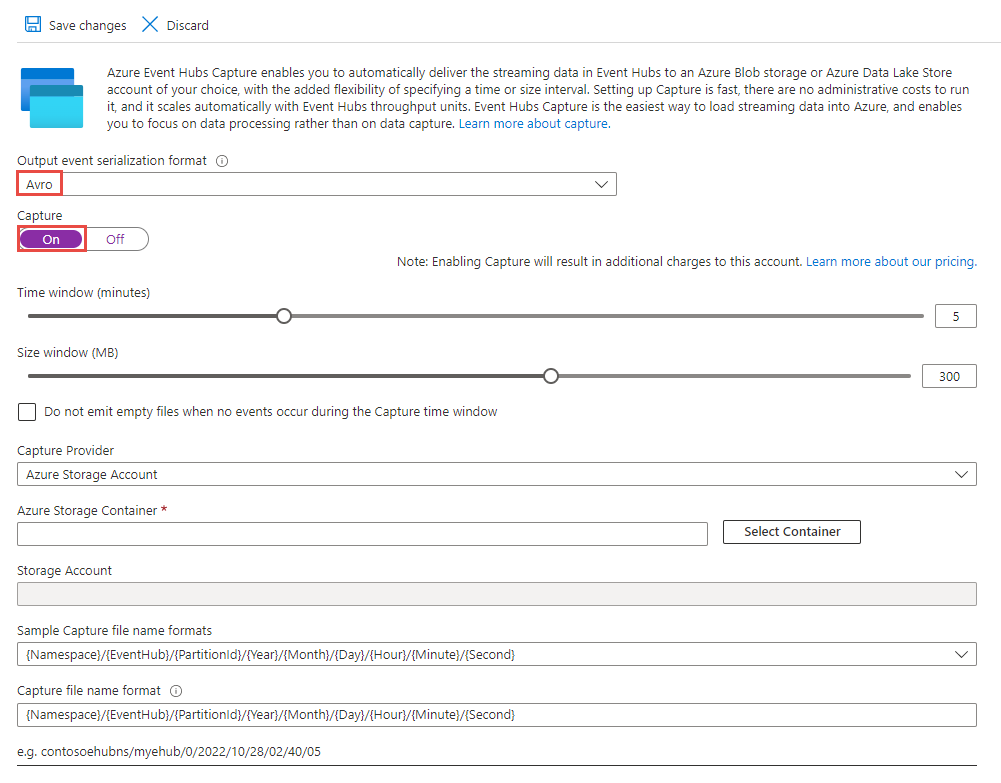
To configure other settings, see the sections:
Related content
You can use a system-assigned or a user-assigned managed identity when capturing event data. First, you enable a managed identity for a namespace, grant the identity an appropriate role on the target storage for capturing events, and then configure the event hub to capture events using the managed identity. For more information, see the following articles: