Note
Access to this page requires authorization. You can try signing in or changing directories.
Access to this page requires authorization. You can try changing directories.
This quickstart shows you how to create an ExpressRoute circuit in three different resiliency types: Maximum Resiliency, High Resiliency, and Standard Resiliency. You'll learn how to check the status, update, delete, or deprovision a circuit using the Azure portal.

Prerequisites
- An Azure account with an active subscription. Create a trial subscription.
- Review the prerequisites and workflows before you begin configuration.
Create and provision an ExpressRoute circuit
Sign in to the Azure portal
From a browser, sign in to the Azure portal and sign in with your Azure account.
Create a new ExpressRoute circuit
Important
Your ExpressRoute circuit is billed from the moment a service key is issued. Ensure that you perform this operation when the connectivity provider is ready to provision the circuit.
On the Azure portal menu, select + Create a resource. Search for ExpressRoute and then select Create.
Select the Subscription and Resource group for the circuit. Then select the type of Resiliency for your setup.
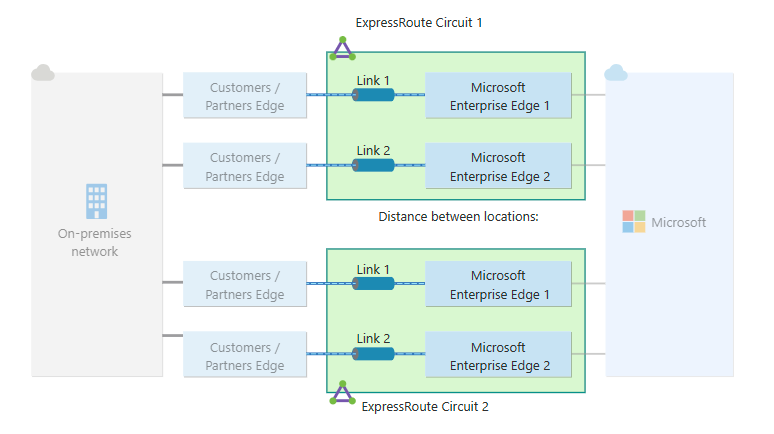
Maximum Resiliency (Recommended) - Provides the highest level of resiliency for your ExpressRoute connection. It provides two ExpressRoute circuits with local redundancy in two different ExpressRoute edge locations.
Note
Maximum Resiliency provides maximum protection against location wide outages and connectivity failures in an ExpressRoute location. This option is strongly recommended for all critical and production workloads.
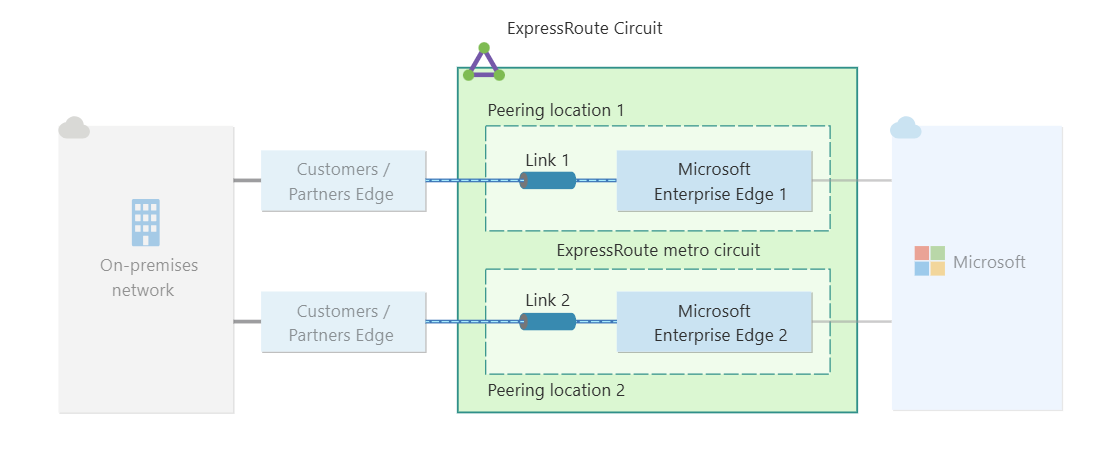
High Resiliency - Provides resiliency against location wide outages through a single ExpressRoute circuit across two locations in a metropolitan area.
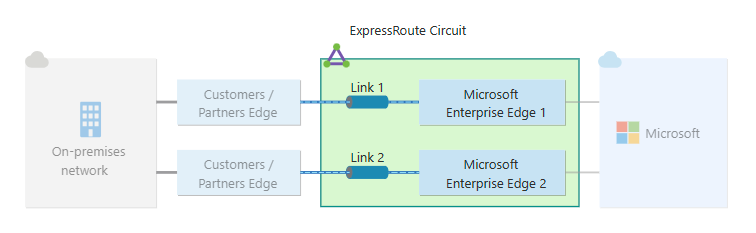
Standard Resiliency - This option provides a single ExpressRoute circuit with local redundancy at a single ExpressRoute location.
Note
Standard Resiliency doesn't provide protection against location wide outages. This option is suitable for non-critical and non-production workloads.
Enter or select the following information for the respective resiliency type.
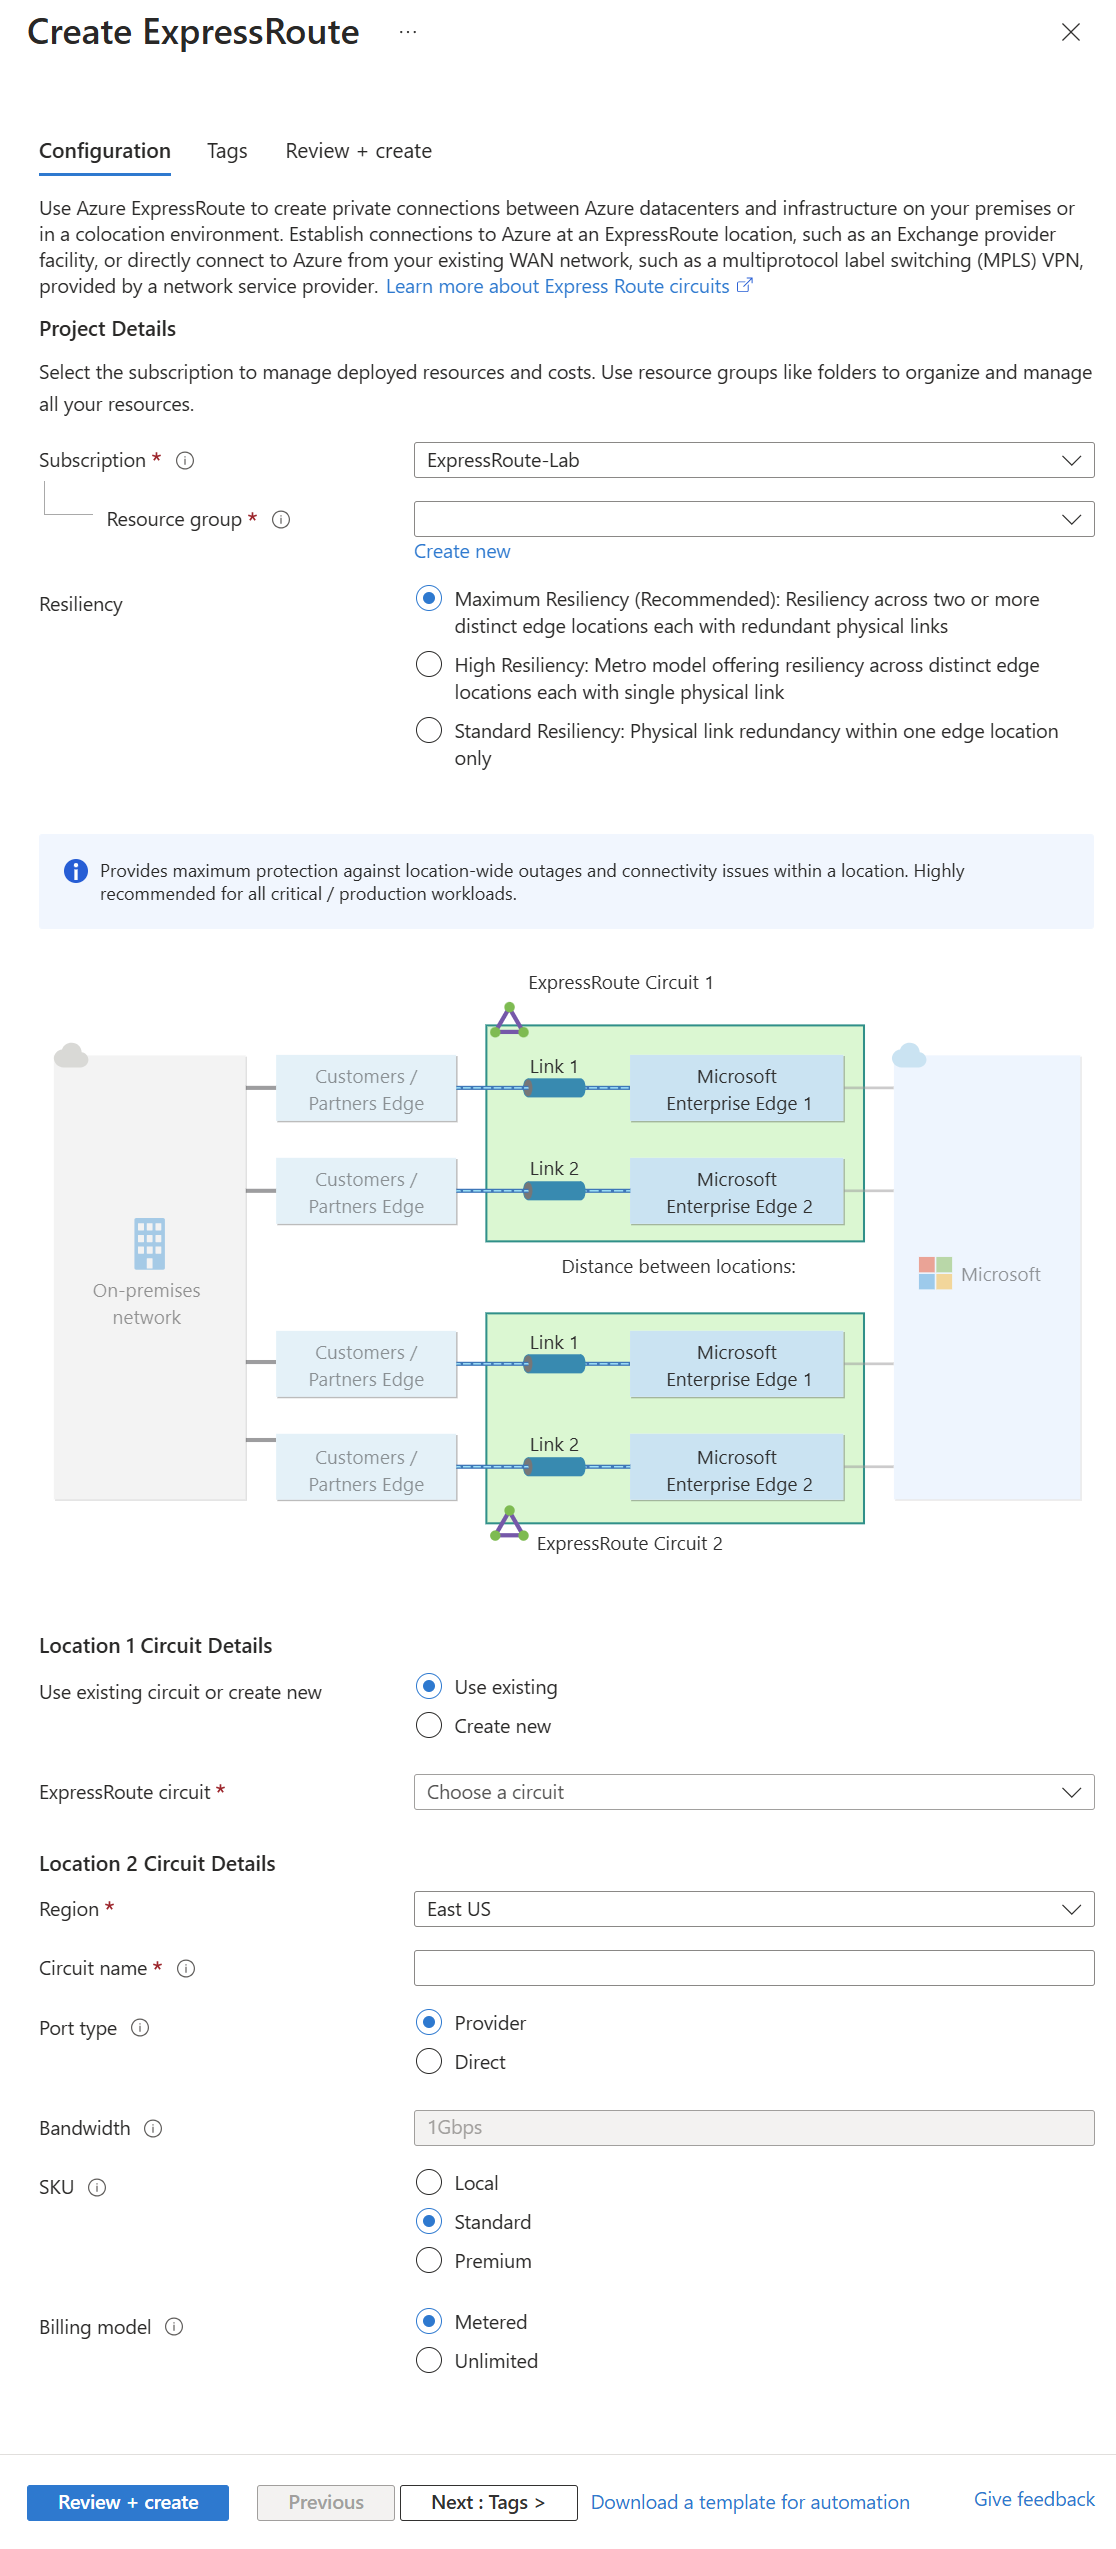
Maximum Resiliency
Setting Value Use existing circuit or create new You can augment resiliency of an existing standard circuit by selecting Use existing circuit and selecting an existing circuit for the first location. If you select an existing circuit, you only need to configure the second circuit. If you select Create new, enter information for both ExpressRoute circuit. Region Select the region closest to the peering location of the circuit. Circuit name Enter the name for the ExpressRoute circuit. Port type Select whether you're connecting with a service provider or directly to Azure's global network at a peering location. Peering Location (Provider port type) Select the physical location where you're peering with Microsoft. Provider (Provider port type) Select the internet service provider who you are requesting your service from. ExpressRoute Direct resource (Direct port type) Select the ExpressRoute Direct resource that you want to use. Bandwidth Select the bandwidth for the ExpressRoute circuit. SKU Select between **Standard, and Premium SKU. The SKU determines the connectivity scope of your ExpressRoute circuit. For more information, see What are the differences between circuit SKU?. Billing model Select the billing model for the outbound data charge. You can select between Metered for a metered data plan and Unlimited for an unlimited data plan. For more information, see ExpressRoute pricing details. Important
- The peering location indicates the physical location where you're peering with Microsoft. This field isn't linked to Region property, which refers to the location of the Azure Network Resource Provider. While they're not related, it's good practice to select a Network Resource Provider closest to the peering location of the ExpressRoute circuit.
- You can't change from the Unlimited to Metered billing model.
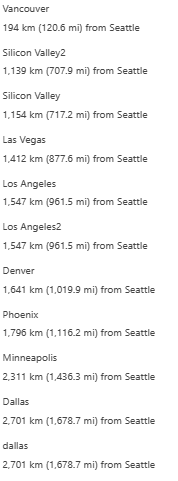
Complete the same information for the second ExpressRoute circuit. When selecting an ExpressRoute location for the second circuit, you're provided with distances information from the first ExpressRoute location. This information can help you decide the second ExpressRoute location.
High Resiliency
For high resiliency, select one of the supported ExpressRoute Metro service providers and the corresponding Peering location.
Standard Resiliency
For standard resiliency, you only need to enter information for one ExpressRoute circuit.
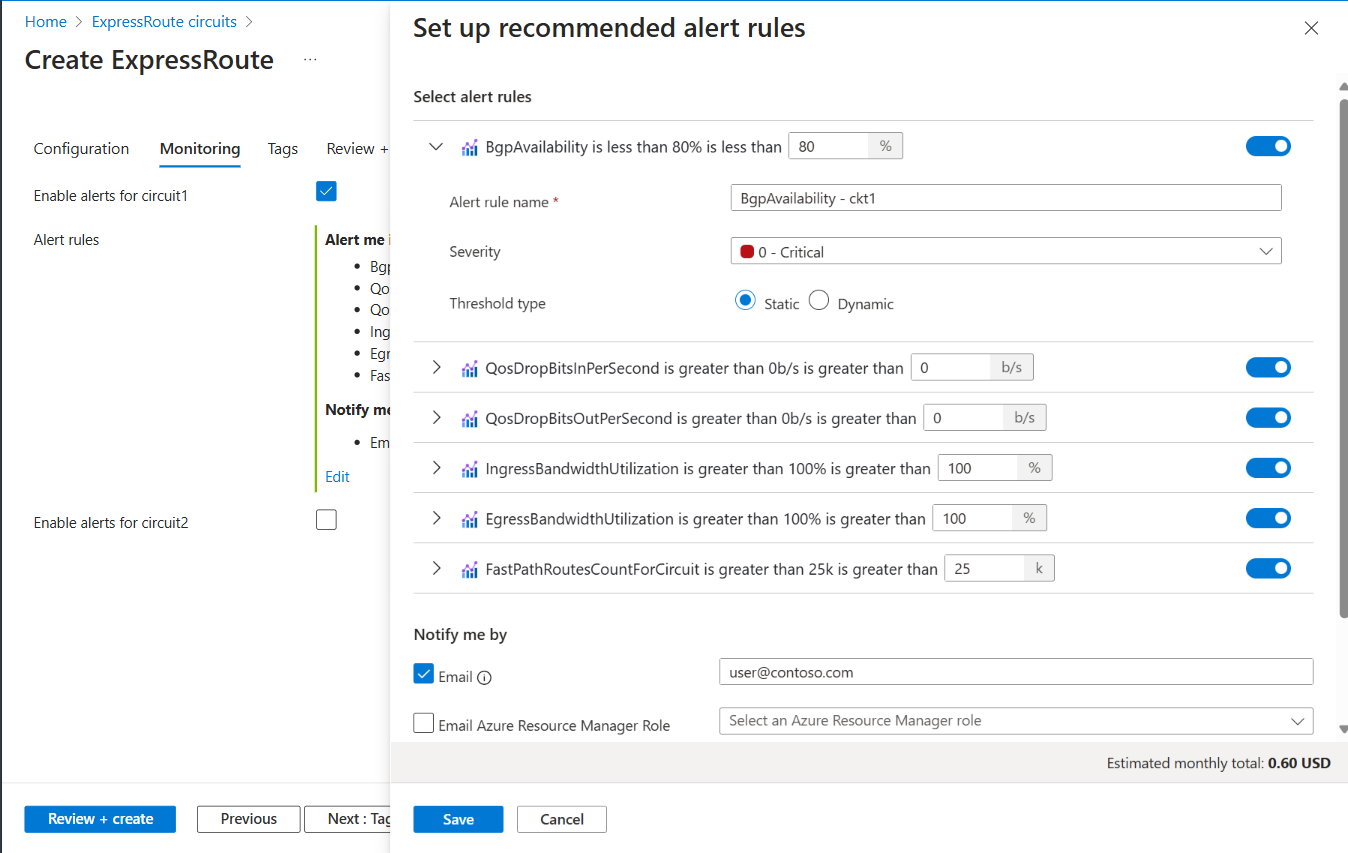
Go to the Monitoring tab and select the circuit(s) for which you want to enable alerts. This action automatically sets up the recommended alert rules for your new ExpressRoute circuit(s).
Select Review + create and then select Create to deploy the ExpressRoute circuit.
View the circuits and properties
View all the circuits
You can view all the circuits that you created by searching for ExpressRoute circuits in the search box at the top of the portal.
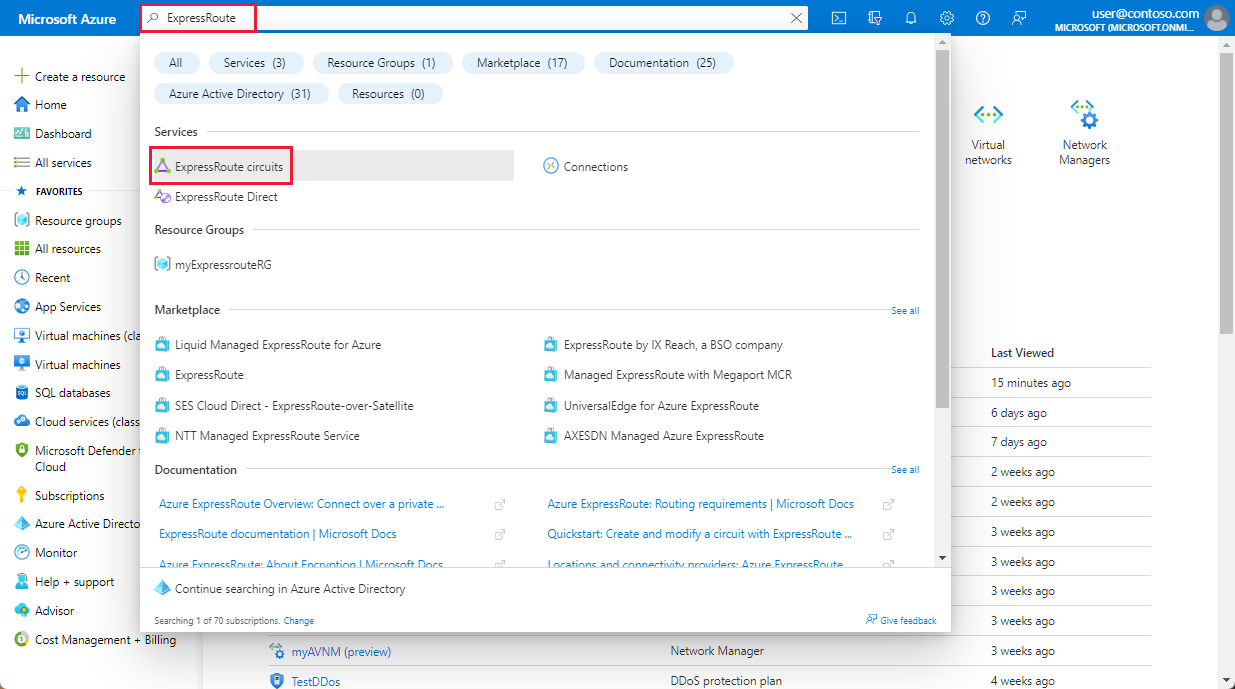
All Expressroute circuits created in the subscription appear here.
View the properties
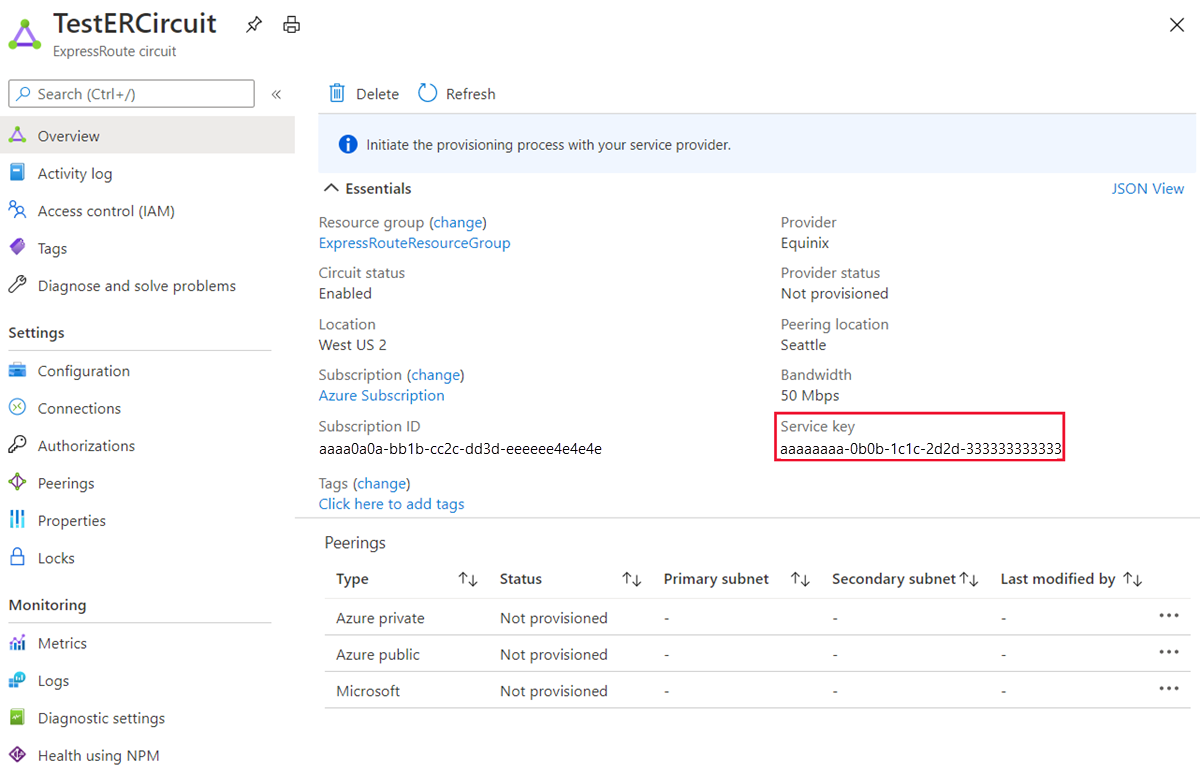
You can view the properties of the circuit by selecting it. On the Overview page for your circuit, you find the Service Key. Provide the service key to your service provider to complete the provisioning process. The service key is unique to your circuit.
Send the service key to your connectivity provider for provisioning
On this page, Provider status gives you the current state of provisioning on the service-provider side. Circuit status provides you with the state on the Azure side. For more information about circuit provisioning states, see the Workflows article.
When you create a new ExpressRoute circuit, the circuit is in the following state:
Provider status: Not provisioned
Circuit status: Enabled
The circuit changes to the following state when the connectivity provider is currently enabling it for you:
Provider status: Provisioning
Circuit status: Enabled
To use the ExpressRoute circuit, it must be in the following state:
Provider status: Provisioned
Circuit status: Enabled
Periodically check the status and the state of the circuit key
You can view the properties of a circuit that you're interested in by selecting it. Check the Provider status and ensure that it has moved to Provisioned before you continue.
Create your routing configuration
For step-by-step instructions, refer to the ExpressRoute circuit routing configuration article to create and modify circuit peerings.
Important
These instructions only apply to circuits that are created with service providers that offer layer 2 connectivity services. If you're using a service provider that offers managed layer 3 services (typically an IP VPN, like MPLS), your connectivity provider configures and manages routing for you.
Link a virtual network to an ExpressRoute circuit
Next, link a virtual network to your ExpressRoute circuit. Use the Linking virtual networks to ExpressRoute circuits article when you work with the Resource Manager deployment model.
Getting the status of an ExpressRoute circuit
You can view the status of a circuit by selecting it and viewing the Overview page.
Modifying an ExpressRoute circuit
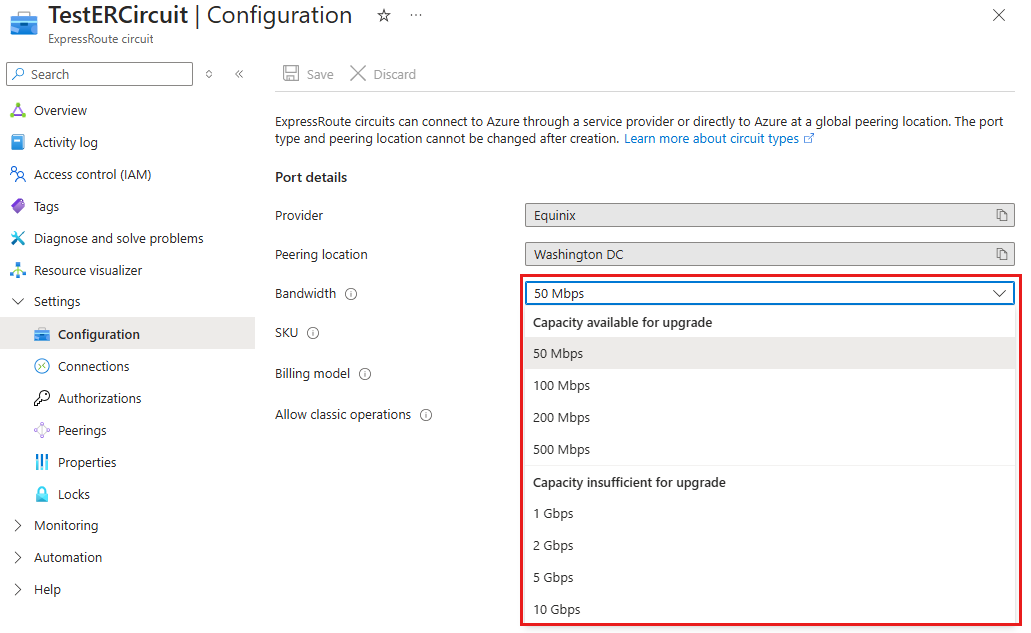
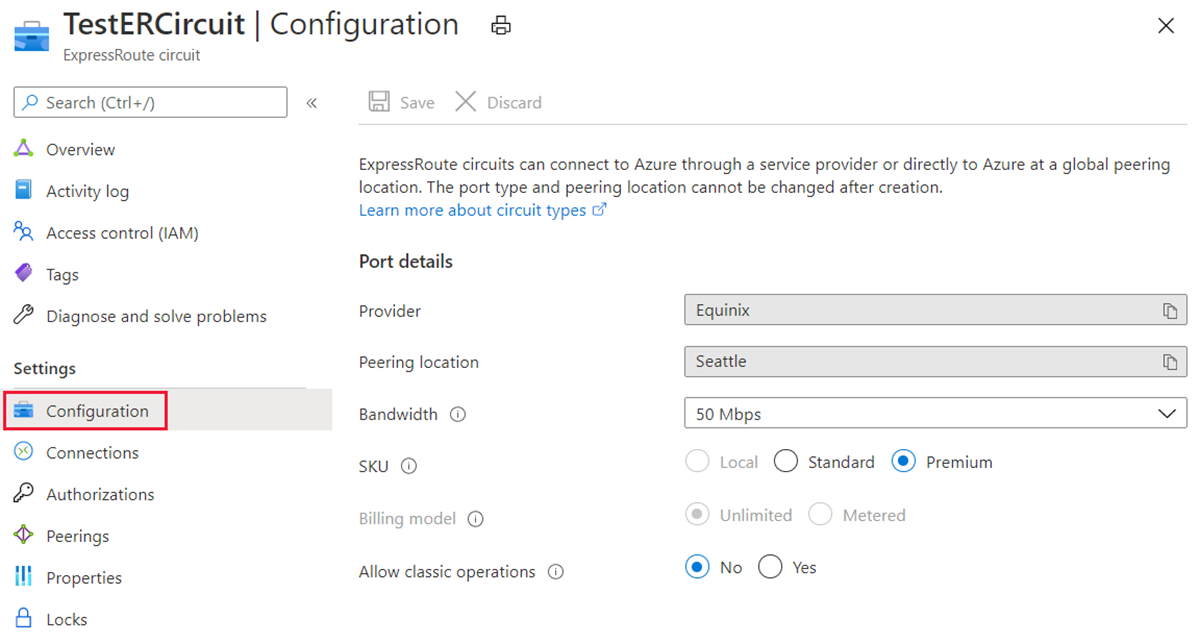
You can modify certain properties of an ExpressRoute circuit without impacting connectivity. You can modify the bandwidth, SKU, billing model and allow classic operations on the Configuration page. For information on limits and limitations, see the ExpressRoute FAQ.
You can do the following tasks with no downtime:
Enable or disable an ExpressRoute Premium add-on for your ExpressRoute circuit.
Increase the bandwidth of your ExpressRoute circuit, provided there's capacity available on the port.
Important
- Downgrading the bandwidth of a circuit isn't supported.
- When upgrading the bandwidth of an ExpressRoute circuit, the Azure portal provides a list of available bandwidth options based on the capacity of the port. If the desired bandwidth isn't available, you need to recreate the circuit to get the desired bandwidth.
Change the metering plan from Metered Data to Unlimited Data.
Important
Changing the metering plan from Unlimited Data to Metered Data isn't supported.
You can enable and disable Allow Classic Operations.
Important
You might have to recreate the ExpressRoute circuit if there's inadequate capacity on the existing port. You can't upgrade the circuit if there's no additional capacity available at that location.
Although you can seamlessly upgrade the bandwidth, you can't reduce the bandwidth of an ExpressRoute circuit without disruption. Downgrading bandwidth requires you to deprovision the ExpressRoute circuit and then reprovision a new ExpressRoute circuit.
Disabling the Premium add-on operation can fail if you're using resources that are greater than what is permitted for the standard circuit.
To modify an ExpressRoute circuit, select Configuration.
Deprovisioning and deleting an ExpressRoute circuit
On the Azure portal menu, go to the ExpressRoute circuit you wish to deprovision.
In the Overview page, select Delete. If there are any associated resources attached to the circuit, you're asked to view the resources. Select Yes to see the associations that need to be removed before starting the deprovisioning process. If there are no associated resources, you can proceed with step 4.
In the View Associated Resources of Circuit pane, you can see the resources associated with the circuit. Ensure you delete the resources before proceeding with the deprovisioning of the circuit.

After deleting all associated resources, work with your circuit service provider to deprovision the circuit on their end. The circuit is required to be deprovisioned before it can be deleted.
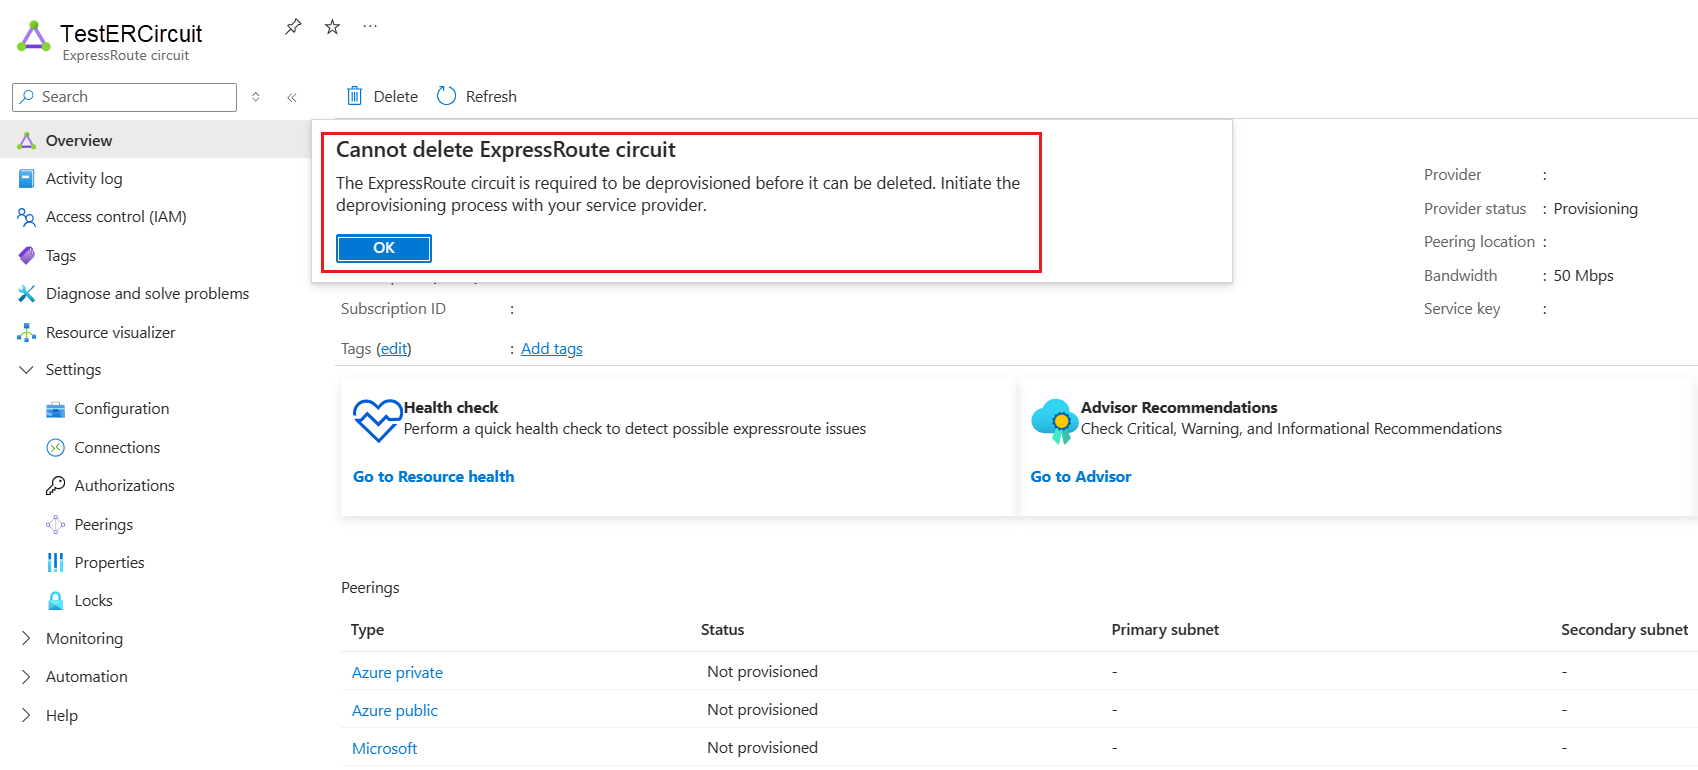
After your circuit service provider has confirmed that they've deprovisioned the circuit, confirm that the Provider status changes to Not provisioned in the Azure portal. Once the Provider status changes to Not provisioned, you can delete the circuit.
Note
- You must delete all associated Virtual Network connections, Route Filter, and Authorizations from the ExpressRoute circuit before deprovisioning. If deprovisioning fails, check whether any associated resources are still linked to the circuit.
- If the circuit service provider has deprovisioned the circuit (The Provider status has updated to Not provisioned), you can delete the circuit. This stops billing for the circuit.
Next steps
After you create your circuit, continue with the following next step: