Note
Access to this page requires authorization. You can try signing in or changing directories.
Access to this page requires authorization. You can try changing directories.
This article provides step-by-step instructions on how to use the Azure Import/Export service to securely import large amounts of data to Azure Blob storage. To import data into Azure Blobs, the service requires you to ship encrypted disk drives containing your data to an Azure datacenter.
In this tutorial, you learn how to:
- Prerequisites to import data to Azure Blob storage
- Step 1: Prepare the drives
- Step 2: Create an import job
- Step 3: Configure customer managed key (Optional)
- Step 4: Ship the drives
- Step 5: Update job with tracking information
- Step 6: Verify data upload to Azure
Prerequisites
Before you create an import job to transfer data into Azure Blob Storage, carefully review and complete the following list of prerequisites for this service. You must:
- Have an active Azure subscription that can be used for the Import/Export service.
- Have at least one Azure Storage account with a storage container. See the list of Supported storage accounts and storage types for Import/Export service.
- For information on creating a new storage account, see How to Create a Storage Account.
- For information on creating storage containers, go to Create a storage container.
- Have adequate number of disks of supported types.
- Have a Windows system running a supported OS version.
- Enable BitLocker on the Windows system. See How to enable BitLocker.
- The .NET Framework 4 must be installed on the copy machine.
- Download the current release of the Azure Import/Export version 1 tool, for blobs, on the Windows system:
- Download WAImportExport version 1. The current version is 1.5.0.300.
- Unzip to the default folder
WaImportExportV1. For example,C:\WaImportExportV1.
- Have a valid carrier account and a tracking number for the order:
- You must use a carrier in the Carrier names list on the Shipping tab for your order. If you don't have a carrier account, contact the carrier to create one.
- The carrier account must be valid, should have a balance, and must have return shipping capabilities. Azure uses the selected carrier to return all storage media.
- Generate a tracking number for the import/export job in the carrier account. Every job should have a separate tracking number. Multiple jobs with the same tracking number aren't supported.
Step 1: Prepare the drives
This step generates a journal file. The journal file stores basic information such as drive serial number, encryption key, and storage account details.
Perform the following steps to prepare the drives.
Connect your disk drives to the Windows system via SATA connectors.
Create a single NTFS volume on each drive. Assign a drive letter to the volume. Don't use mountpoints.
Enable BitLocker encryption on the NTFS volume. If using a Windows Server system, use the instructions in How to enable BitLocker on Windows Server 2012 R2.
Copy data to encrypted volume. Use drag and drop or Robocopy or any such copy tool. A journal (.jrn) file is created in the same folder where you run the tool.
If the drive is locked and you need to unlock the drive, the steps to unlock may be different depending on your use case.
If you have added data to a pre-encrypted drive (WAImportExport tool wasn't used for encryption), use the BitLocker key (a numerical password that you specify) in the popup to unlock the drive.
If you have added data to a drive that was encrypted by WAImportExport tool, use the following command to unlock the drive:
WAImportExport Unlock /bk:<BitLocker key (base 64 string) copied from journal (*.jrn*) file>
Open a PowerShell or command-line window with administrative privileges. To change directory to the unzipped folder, run the following command:
cd C:\WaImportExportV1To get the BitLocker key of the drive, run the following command:
manage-bde -protectors -get <DriveLetter>: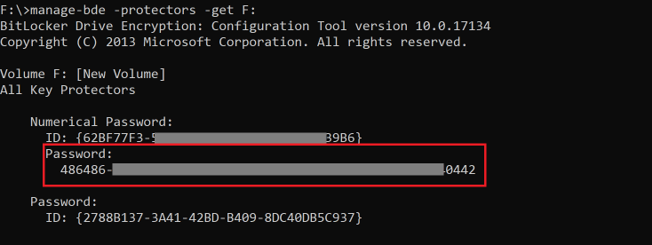
To prepare the disk, run the following command. Depending on the data size, disk preparation may take several hours to days.
./WAImportExport.exe PrepImport /j:<journal file name> /id:session<session number> /t:<Drive letter> /bk:<BitLocker key> /srcdir:<Drive letter>:\ /dstdir:<Container name>/ /blobtype:<BlockBlob or PageBlob> /skipwriteA journal file is created in the same folder where you ran the tool. Two other files are also created - an .xml file (folder where you run the tool) and a drive-manifest.xml file (folder where data resides).
The parameters used are described in the following table:
Option Description /j: The name of the journal file, with the .jrn extension. A journal file is generated per drive. We recommend that you use the disk serial number as the journal file name. /id: The session ID. Use a unique session number for each instance of the command. /t: The drive letter of the disk to be shipped. For example, drive D./bk: The BitLocker key for the drive. Its numerical password from output of manage-bde -protectors -get D:/srcdir: The drive letter of the disk to be shipped followed by :\. For example,D:\./dstdir: The name of the destination container in Azure Storage. /blobtype: This option specifies the type of blobs you want to import the data to. For block blobs, the blob type is BlockBloband for page blobs, it'sPageBlob./skipwrite: Specifies that there's no new data required to be copied and existing data on the disk is to be prepared. /enablecontentmd5: The option when enabled, ensures that MD5 is computed and set as Content-md5property on each blob. Use this option only if you want to use theContent-md5field after the data is uploaded to Azure.
This option doesn't affect the data integrity check (that occurs by default). The setting does increase the time taken to upload data to cloud.Note
- If you import a blob with the same name as an existing blob in the destination container, the imported blob will overwrite the existing blob. In earlier tool versions (before 1.5.0.300), the imported blob was renamed by default, and a \Disposition parameter let you specify whether to rename, overwrite, or disregard the blob in the import.
- If you don't have long paths enabled on the client, and any path and file name in your data copy exceeds 256 characters, the WAImportExport tool will report failures. To avoid this kind of failure, enable long paths on your Windows client.
Repeat the previous step for each disk that needs to be shipped.
A journal file with the provided name is created for every run of the command line.
Together with the journal file, a
<Journal file name>_DriveInfo_<Drive serial ID>.xmlfile is also created in the same folder where the tool resides. The .xml file is used in place of the journal file when creating a job if the journal file is too large.
Important
- Do not modify the journal files or the data on the disk drives, and don't reformat any disks, after completing disk preparation.
- The maximum size of the journal file that the portal allows is 2 MB. If the journal file exceeds that limit, an error is returned.
Step 2: Create an import job
Do the following steps to order an import job in Azure Import/Export job via the portal.
Use your Azure credentials to sign in at this URL: https://portal.azure.cn.
Select + Create a resource, and search for Azure Data Box. Select Azure Data Box.
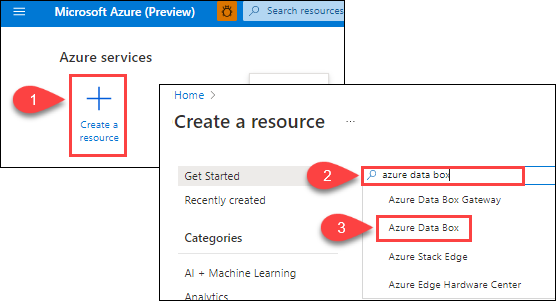
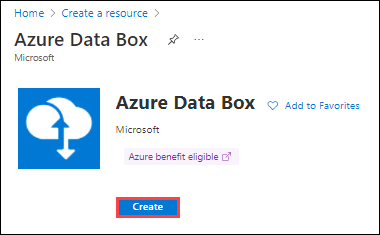
Select Create.
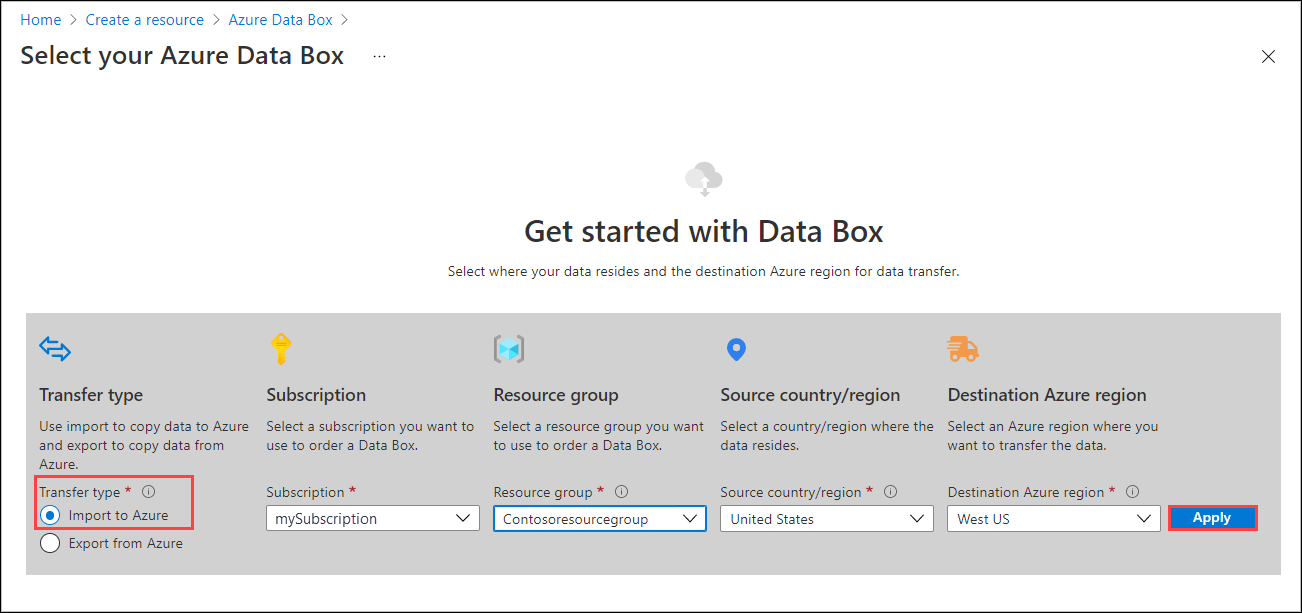
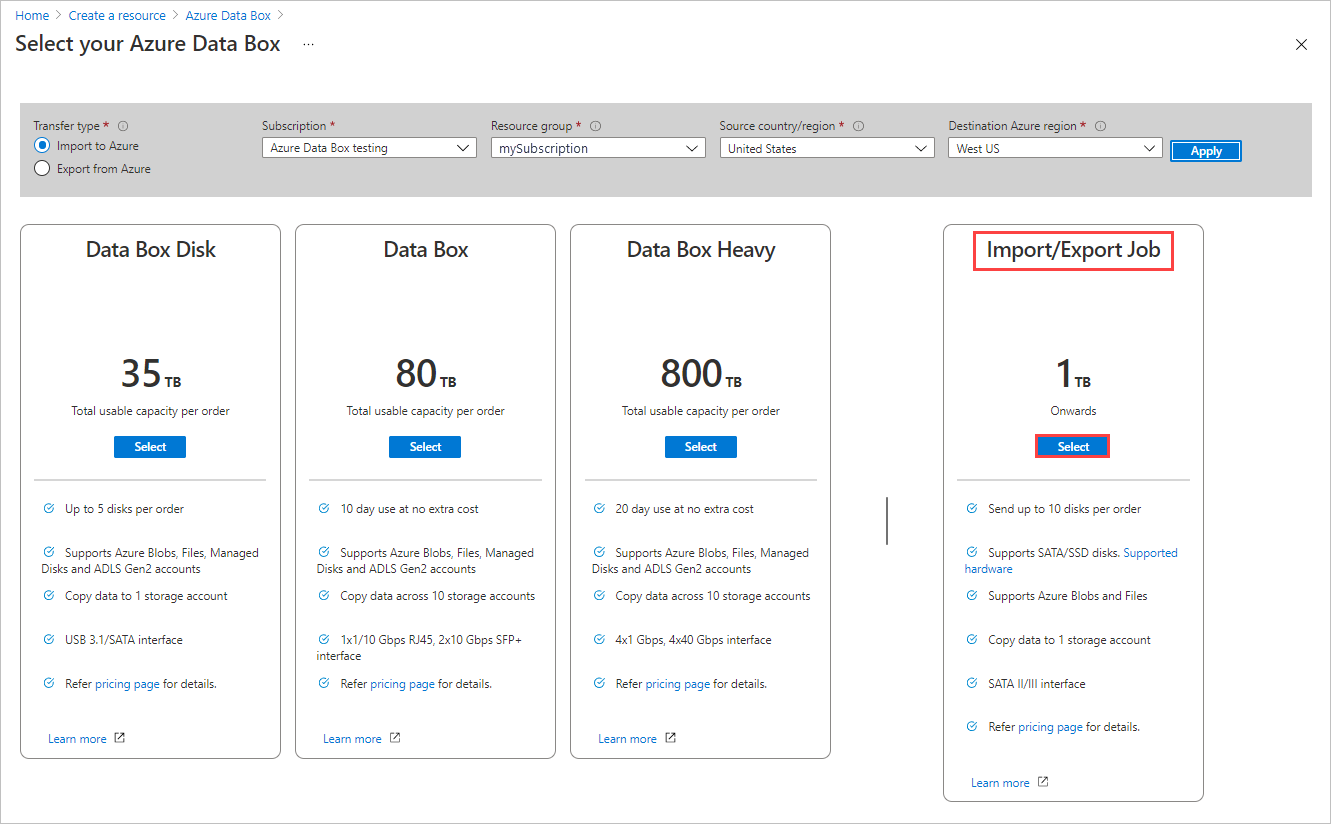
To get started with the import order, select the following options:
- Select the Import to Azure transfer type.
- Select the subscription to use for the Import/Export job.
- Select a resource group.
- Select the Source country/region for the job.
- Select the Destination Azure region for the job.
- Then select Apply.
Choose the Select button for Import/Export Job.
In Basics:
- Enter a descriptive name for the job. Use the name to track the progress of your jobs.
- The name must have from 3 to 24 characters.
- The name must include only letters, numbers, and hyphens.
- The name must start and end with a letter or number.
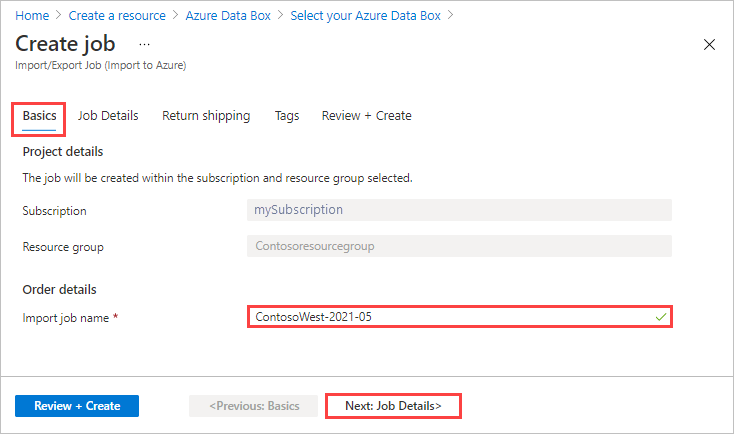
Select Next: Job Details > to proceed.
- Enter a descriptive name for the job. Use the name to track the progress of your jobs.
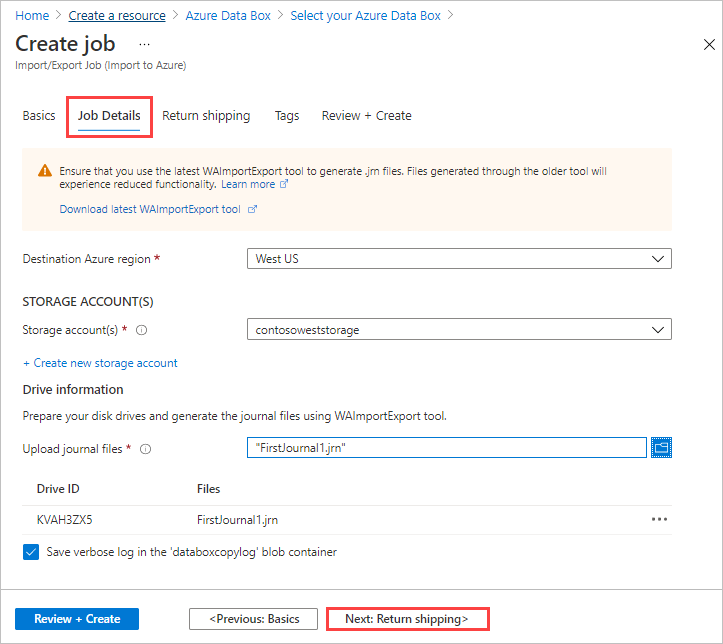
In Job Details:
Before you go further, make sure you're using the latest WAImportExport tool. The tool is used to read the journal file(s) that you upload. You can use the download link to update the tool.

Change the destination Azure region for the job if needed.
Select one or more storage accounts to use for the job. You can create a new storage account if needed.
Under Drive information, use the Copy button to upload each journal file that you created during the preceding Step 1: Prepare the drives. When you upload a journal file, the Drive ID is displayed.
If
waimportexport.exe version1was used, upload one file for each drive that you prepared.If the journal file is larger than 2 MB, then you can use the
<Journal file name>_DriveInfo_<Drive serial ID>.xml, which was created along with the journal file.
In Return shipping:
Select a shipping carrier from the drop-down list for Carrier. The location of the Azure datacenter for the selected region determines which carriers are available.
Enter a Carrier account number. The account number for a valid carrier account is required.
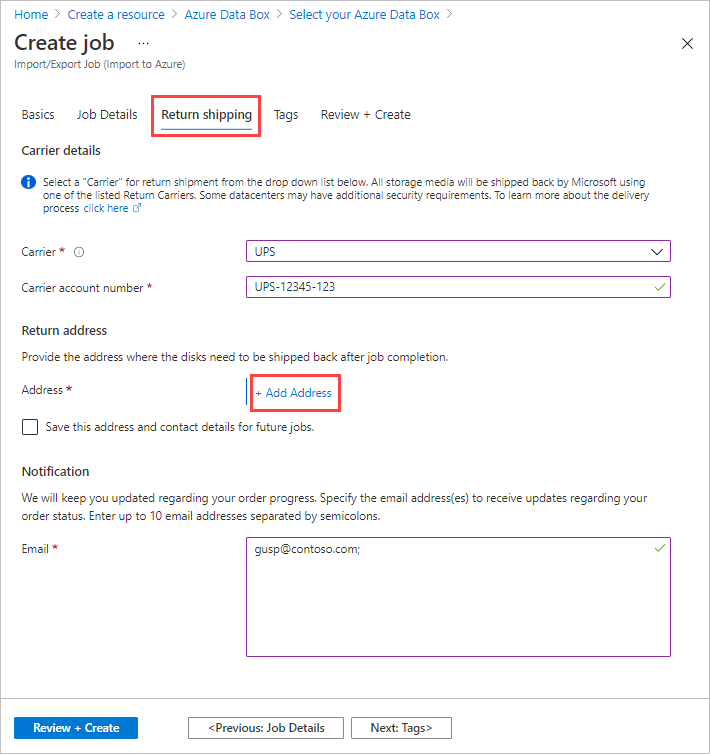
In the Return address area, select the + Add Address button, and add the address to ship to.
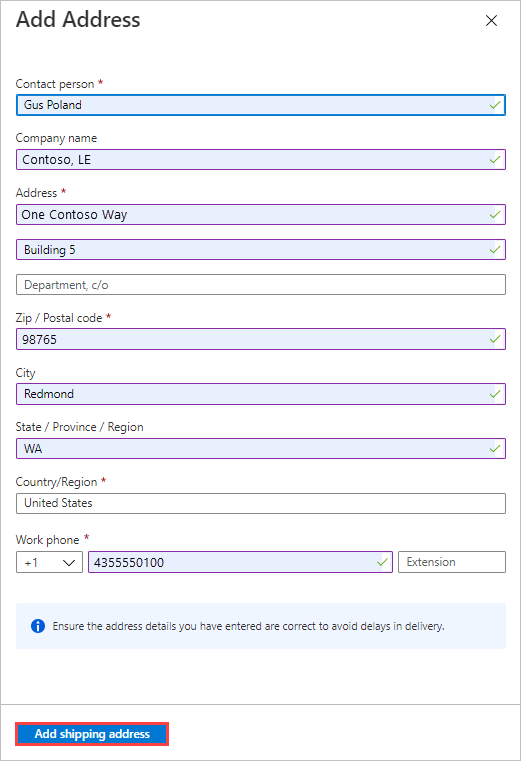
On the Add Address blade, you can add an address or use an existing one. When you complete the address fields, select Add shipping address.
In the Notification area, enter email addresses for the people you want to notify of the job's progress.
Tip
Instead of specifying an email address for a single user, provide a group email to ensure that you receive notifications even if an admin leaves.
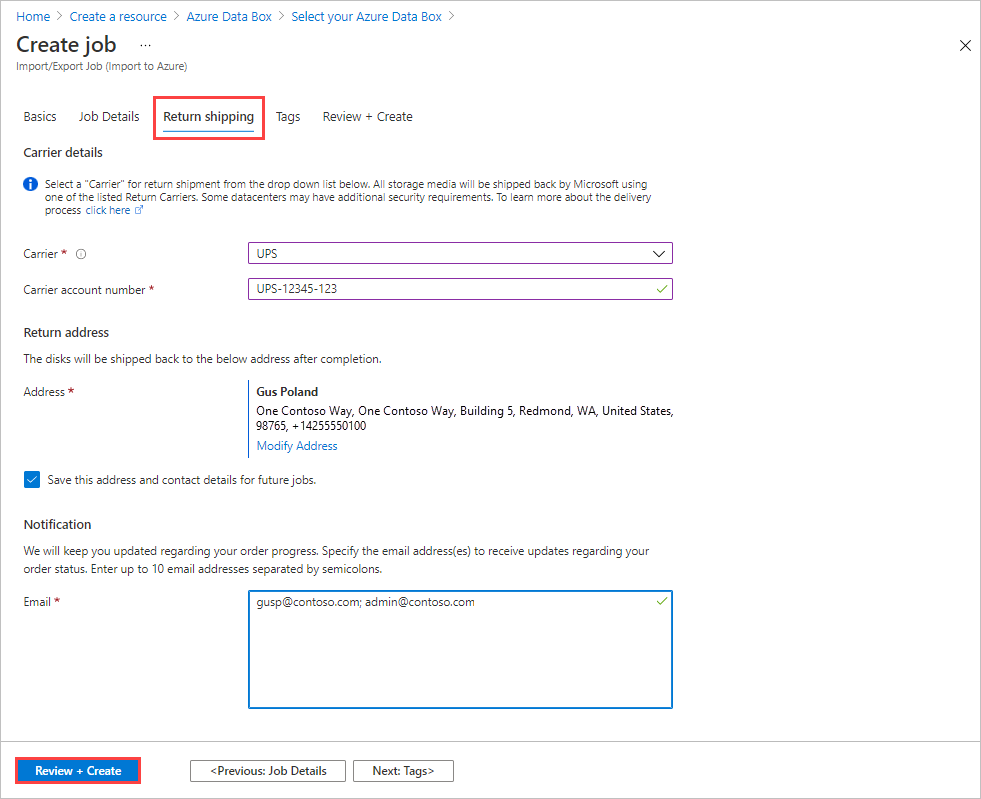
Select Review + Create to proceed.
In Review + Create:
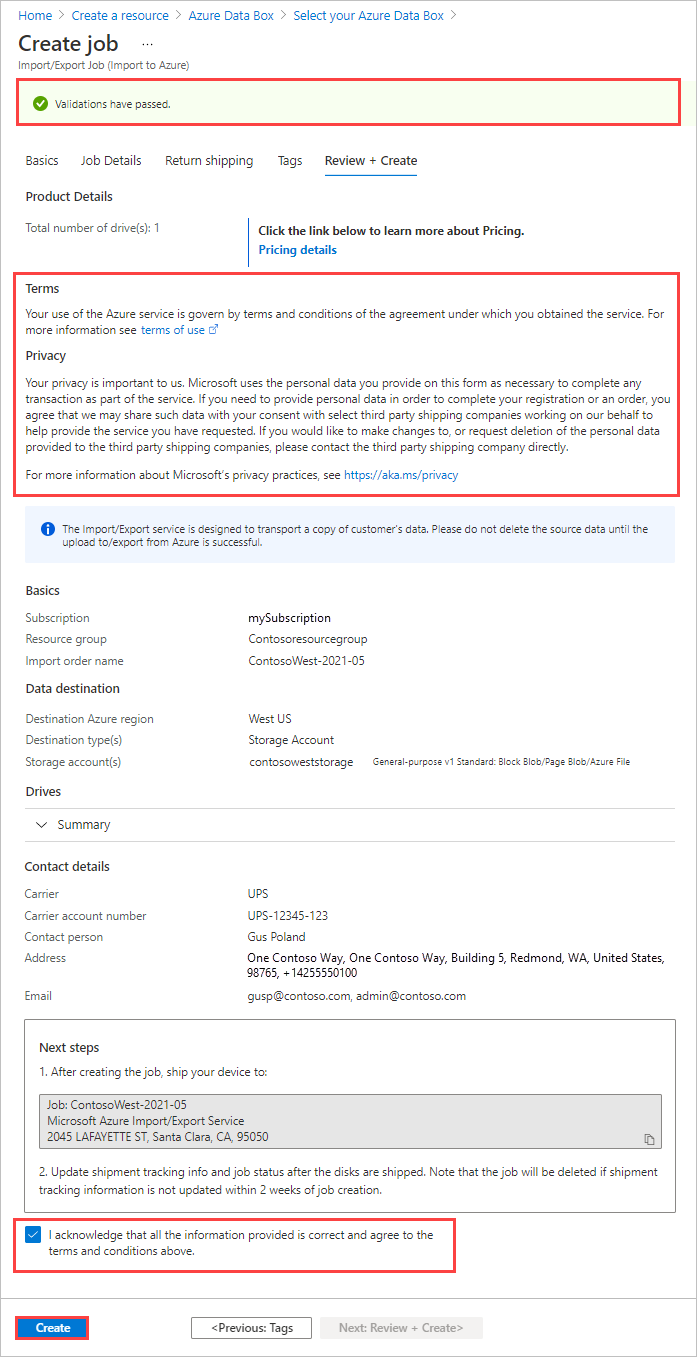
- Review the Terms and Privacy information, and then select the checkbox by "I acknowledge that all the information provided is correct and agree to the terms and conditions." Validation is then done.
- Review the job information. Make a note of the job name and the Azure datacenter shipping address to ship disks back to. This information is used later on the shipping label.
- Select Create.
After the job is created, you'll see the following message.
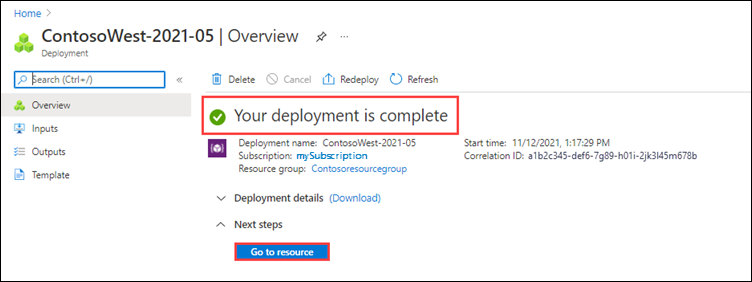
You can select Go to resource to open the Overview of the job.
Step 3 (Optional): Configure customer managed key
Skip this step and go to the next step if you want to use the Microsoft managed key to protect your BitLocker keys for the drives. To configure your own key to protect the BitLocker key, follow the instructions in Configure customer-managed keys with Azure Key Vault for Azure Import/Export in the Azure portal.
Step 4: Ship the drives
FedEx, UPS, or DHL can be used to ship the package to Azure datacenter.
- Provide a valid FedEx, UPS, or DHL carrier account number for use by Azure to return the drives.
- When shipping your packages, you must follow the Azure Service Terms.
- Properly package your disks to avoid potential damage and delays in processing. Follow these recommended best practices:
- Wrap the disk drives securely with protective bubble wrap. Bubble wrap acts as a shock absorber and protects the drive from impact during transit. Before shipping, ensure that the entire drive is thoroughly covered and cushioned.
- Place the wrapped drives within a foam shipper. The foam shipper provides extra protection and keeps the drive securely in place during transit.
Step 5: Update the job with tracking information
After you ship the disks, return to the job in the Azure portal and fill in the tracking information.
After you provide tracking details, the job status changes to Shipping, and the job can't be canceled. You can only cancel a job while it's in Creating state.
Important
If the tracking number is not updated within 2 weeks of creating the job, the job expires.
To complete the tracking information for a job that you created in the portal, do these steps:
Open the job in the Azure portal/.
On the Overview pane, scroll down to Tracking information and complete the entries:
- Provide the Carrier and Tracking number (e.g.ID:000000000000000000;SN:00000000000000).
- For tracking numbers:
- If ship by courier, please type valid courier numbers + Device serial numbers.
- If ship by yourself, please type ID numbers + Device serial numbers.
- Make sure the Ship to address is correct.
- Select the checkbox by "Drives have been shipped to the above mentioned address."
- When you finish, select Update.
- Provide the Carrier and Tracking number (e.g.ID:000000000000000000;SN:00000000000000).
You can track the job progress on the Overview pane. For a description of each job state, go to View your job status.
![]()
Step 6: Verify data upload to Azure
Track the job to completion, then verify that the upload was successful and all data is present.
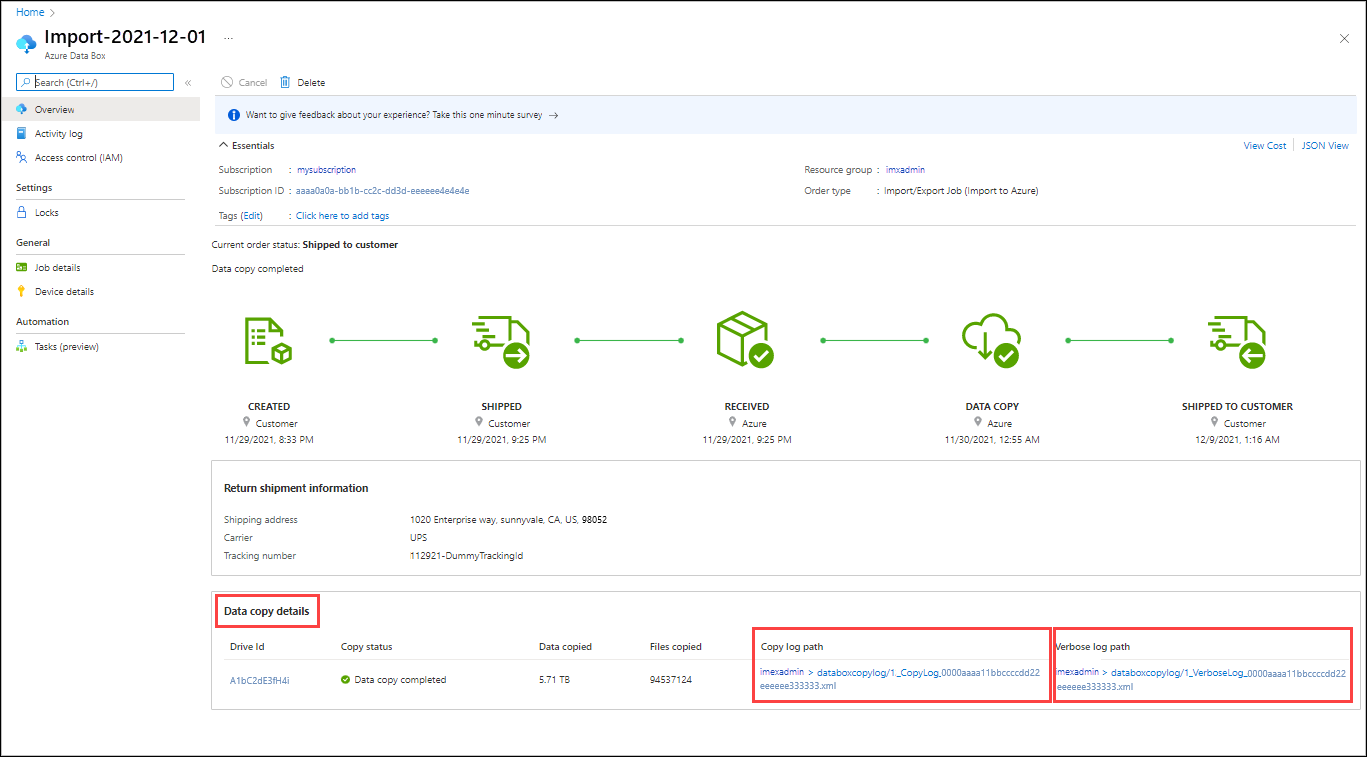
Review the Data copy details of the completed job to locate the logs for each drive included in the job:
- Use the verbose log to verify each successfully transferred file.
- Use the copy log to find the source of each failed data copy.
For more information, see Review copy logs from imports and exports.
After you verify the data transfers, you can delete your on-premises data. Delete your on-premises data only after you verify that the upload was successful.
Note
If any path and file name exceeds 256 characters, and long paths aren't enabled on the client, the data upload will fail. To avoid this kind of failure, enable long paths on your Windows client.
