Note
Access to this page requires authorization. You can try signing in or changing directories.
Access to this page requires authorization. You can try changing directories.
By automating cryptographic key rotation in Key Vault, you can set up Key Vault to automatically create a new key version at a chosen frequency. To set up rotation, use the key rotation policy, which you can define for each individual key.
To follow cryptographic best practices, rotate encryption keys at least every two years.
For more information about how Key Vault versions objects, see Key Vault objects, identifiers, and versioning. For a comprehensive understanding of autorotation concepts across different asset types in Azure Key Vault, see Understanding autorotation in Azure Key Vault.
Integration with Azure services
This feature enables end-to-end zero-touch rotation for encryption at rest for Azure services with customer-managed key (CMK) stored in Azure Key Vault. Check the specific Azure service documentation to see if the service supports end-to-end rotation.
Note
When you rotate customer-managed keys that Azure services use, the time it takes for each service to detect and apply the new key version varies (from one hour to 24 hours or more). Consult the specific Azure service documentation for guidance on when you can safely disable the old key version after rotation.
For more information about data encryption in Azure, see:
Pricing
There's an extra cost for each scheduled key rotation. For more information, see the Azure Key Vault pricing page.
Permissions required
The Key Vault key rotation feature requires key management permissions. Assign the Key Vault Crypto Officer role to manage the rotation policy and on-demand rotation.
For more information on how to use Azure RBAC for Key Vault and assign Azure roles, see Use an Azure RBAC to control access to keys, certificates and secrets.
Note
If you use the access policies permission model, set the 'Rotate', 'Set Rotation Policy', and 'Get Rotation Policy' key permissions to manage the rotation policy on keys.
Key rotation policy
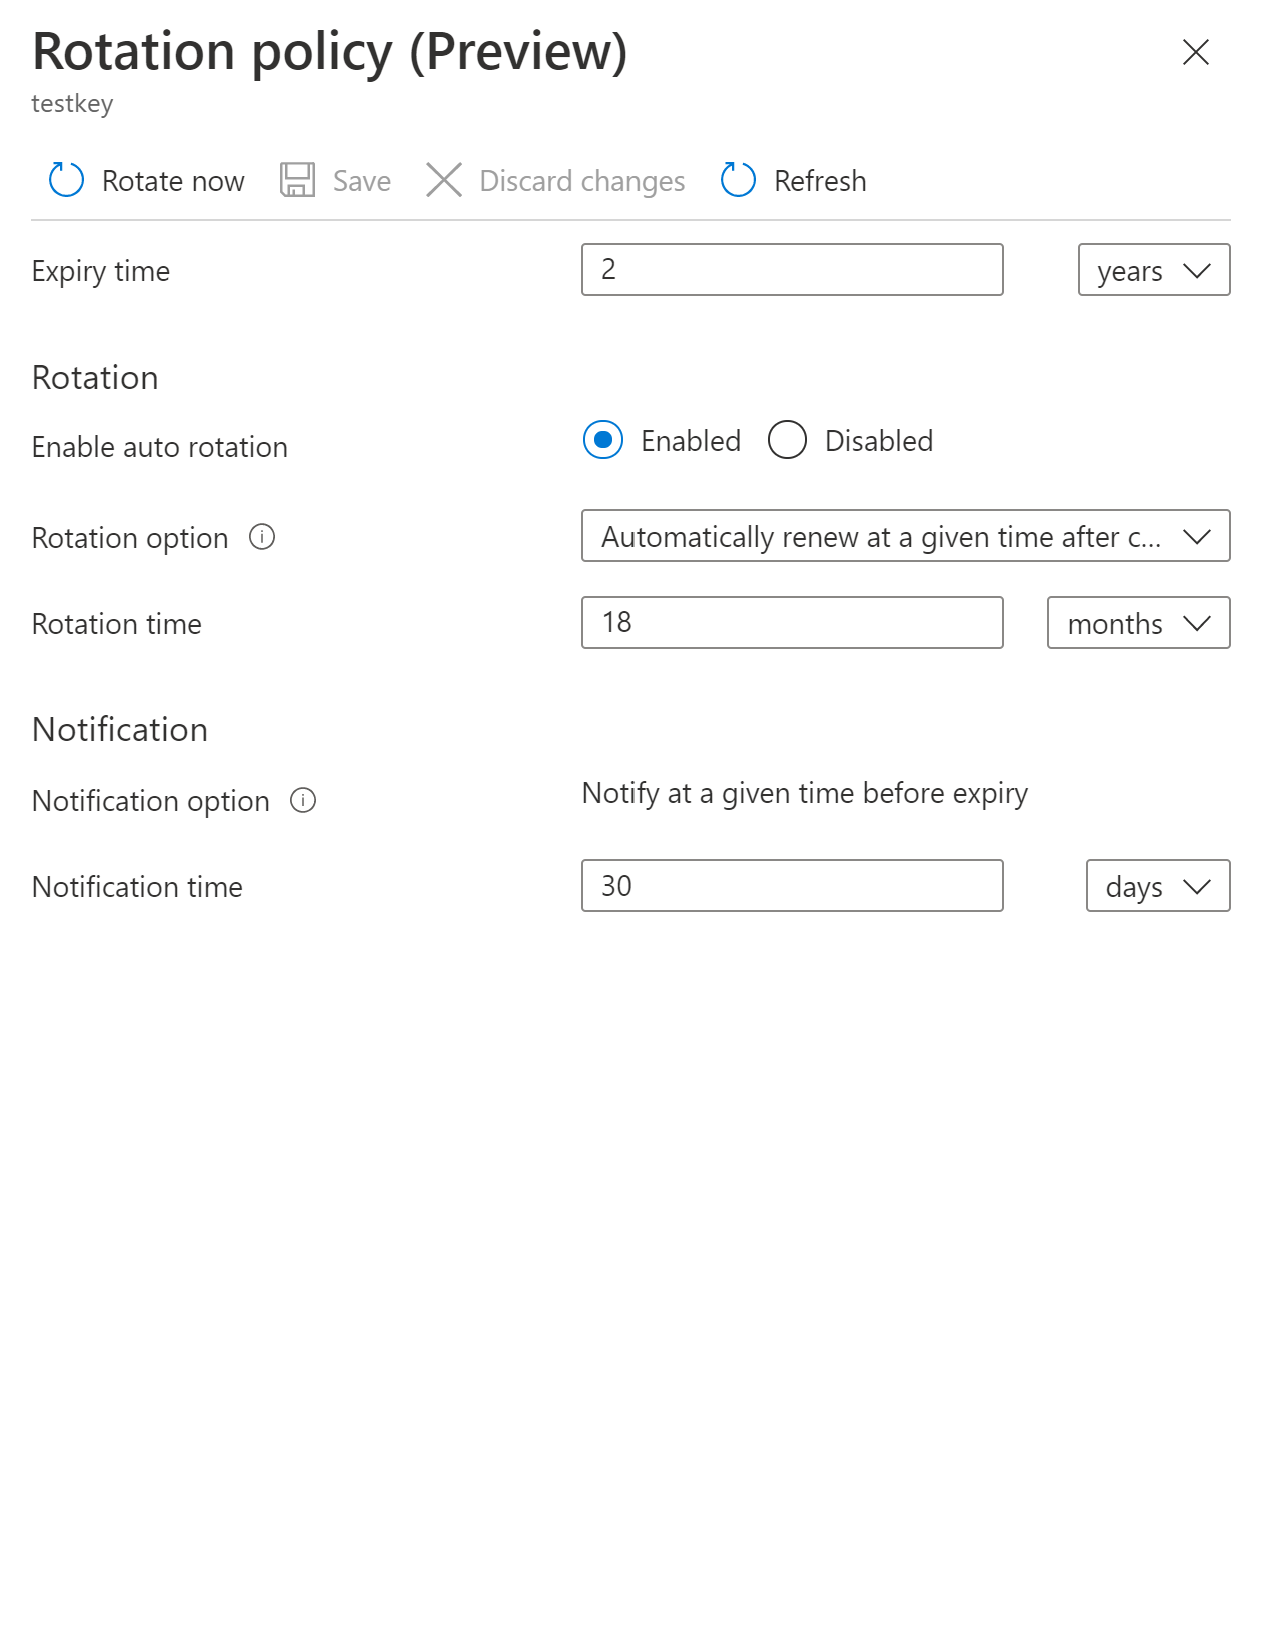
The key rotation policy allows you to configure rotation and Event Grid notifications for near expiry notification.
Key rotation policy settings:
- Expiry time: key expiration interval. It sets the expiration date on the newly rotated key. It doesn't affect the current key.
- Enabled/disabled: flag to enable or disable rotation for the key.
- Rotation types:
- Automatically renew at a given time after creation (default).
- Automatically renew at a given time before expiry. It requires 'Expiry Time' set on rotation policy and 'Expiration Date' set on the key.
- Rotation time: key rotation interval. The minimum value is seven days from creation and seven days from expiration time.
- Notification time: key near expiry event interval for Event Grid notification. It requires 'Expiry Time' set on rotation policy and 'Expiration Date' set on the key.
Important
Key rotation generates a new key version of an existing key with new key material. Target services should use versionless key URI to automatically refresh to the latest version of the key. Ensure that your data encryption solution stores versioned key URI with data to point to the same key material for decrypt/unwrap operations to avoid disruption to your services. All Azure services currently follow that pattern for data encryption.
Key rotation re-wraps data encryption keys (DEKs) with the new key version � it does not re-encrypt the underlying data. Both old and new key versions must remain enabled until re-wrapping is complete, because existing data remains encrypted under DEKs wrapped by the old key version.
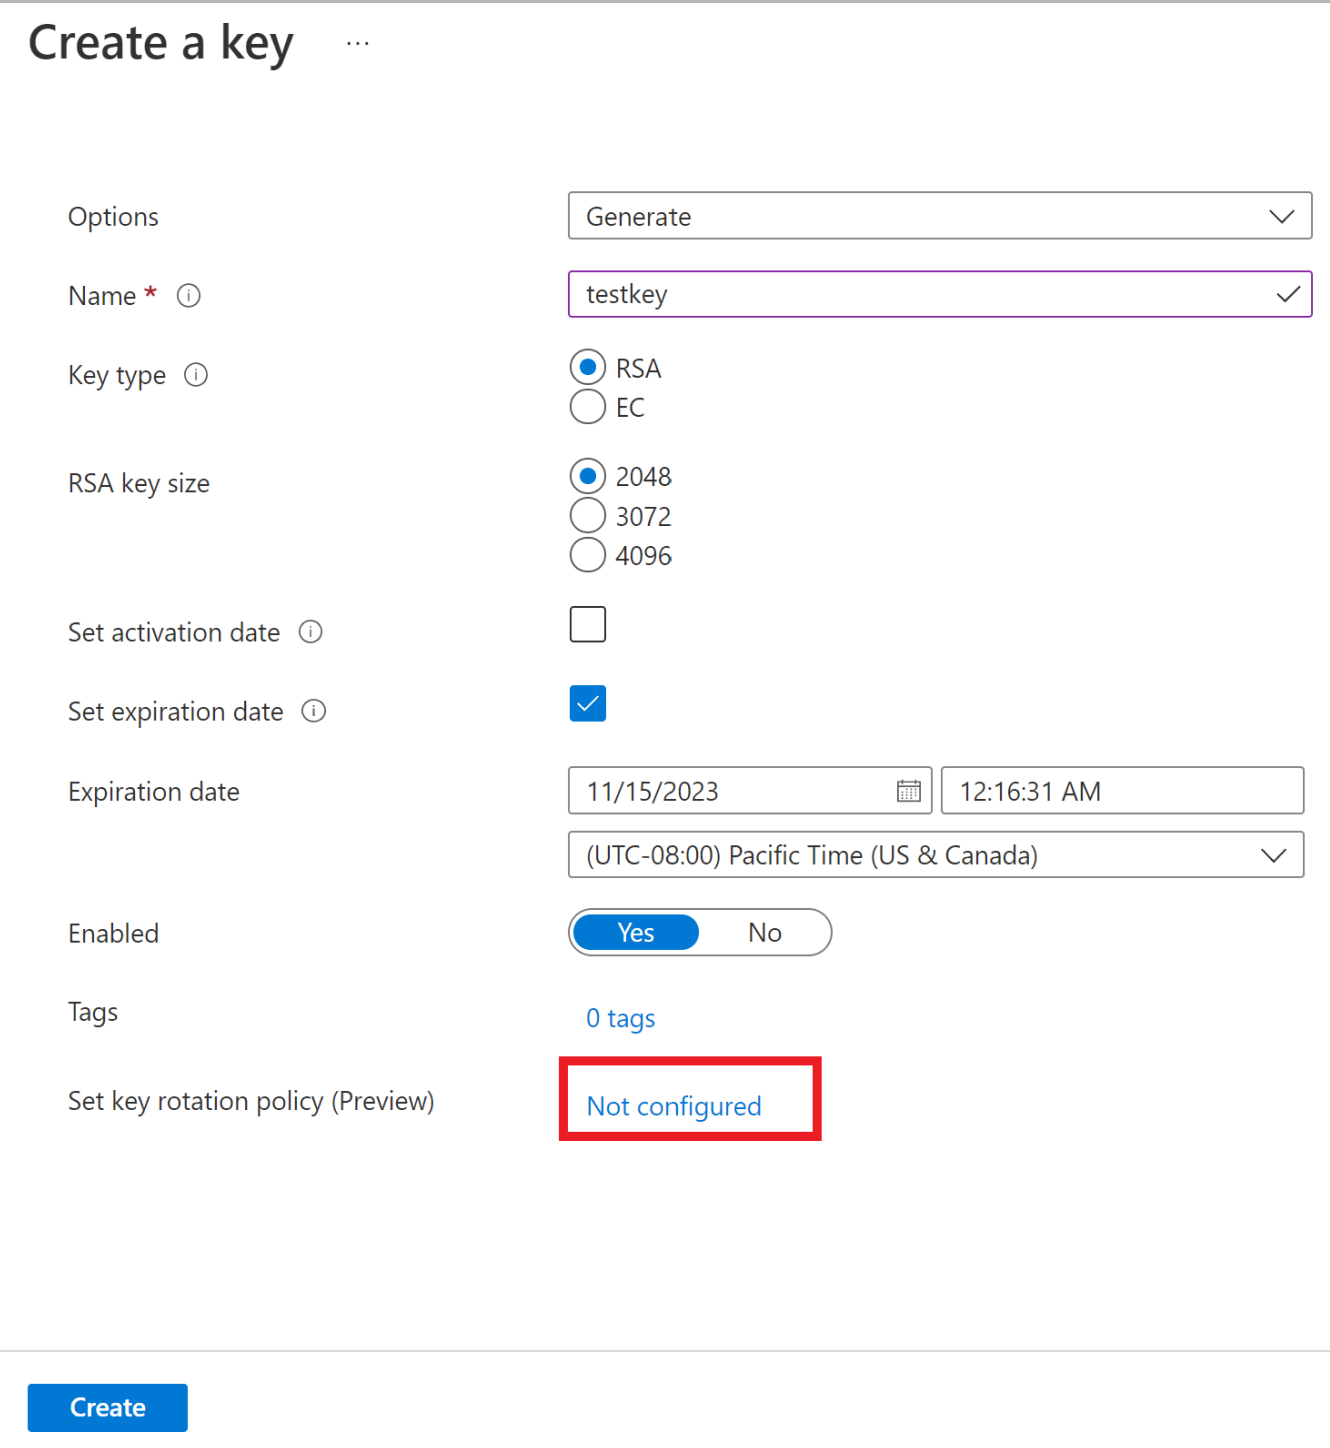
Configure key rotation policy
Configure the key rotation policy during key creation.
Configure the rotation policy on existing keys.

Azure CLI
Save the key rotation policy to a file. Here's an example of a key rotation policy:
{
  "lifetimeActions": [
    {
      "trigger": {
        "timeAfterCreate": "P18M",
        "timeBeforeExpiry": null
      },
      "action": {
        "type": "Rotate"
      }
    },
    {
      "trigger": {
        "timeBeforeExpiry": "P30D"
      },
      "action": {
        "type": "Notify"
      }
    }
  ],
  "attributes": {
    "expiryTime": "P2Y"
  }
}
Set rotation policy on a key passing previously saved file using Azure CLI az keyvault key rotation-policy update command.
az keyvault key rotation-policy update --vault-name <vault-name> --name <key-name> --value </path/to/policy.json>
Azure PowerShell
Set the rotation policy by using the Azure PowerShell Set-AzKeyVaultKeyRotationPolicy cmdlet.
Set-AzKeyVaultKeyRotationPolicy -VaultName <vault-name> -KeyName <key-name> -ExpiresIn (New-TimeSpan -Days 720) -KeyRotationLifetimeAction @{Action="Rotate";TimeAfterCreate= (New-TimeSpan -Days 540)}
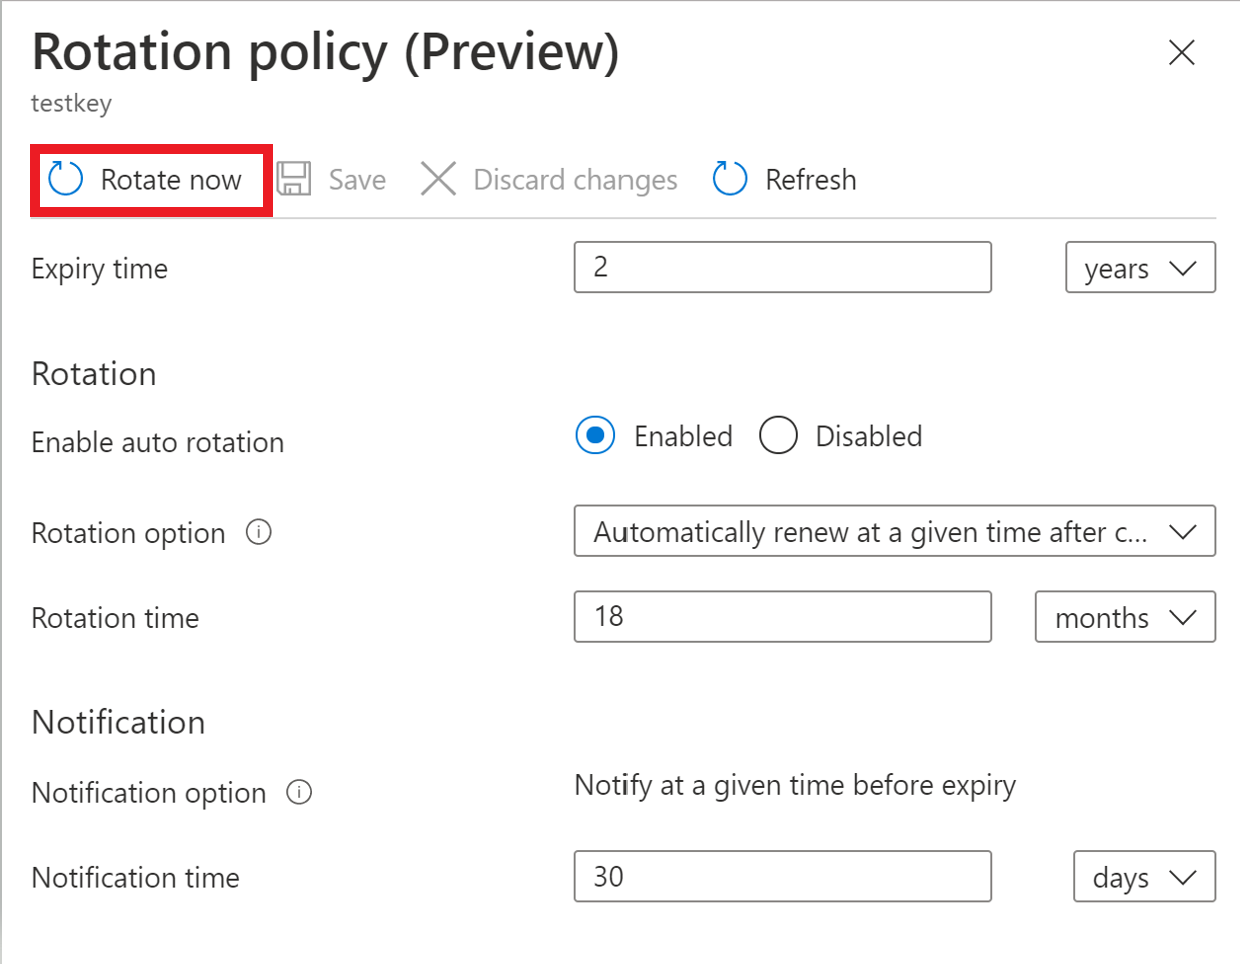
Rotation on demand
You can manually invoke key rotation.
Portal
Select Rotate Now to start the rotation process.
Azure CLI
Use the Azure CLI az keyvault key rotate command to rotate a key.
az keyvault key rotate --vault-name <vault-name> --name <key-name>
Azure PowerShell
Use the Azure PowerShell Invoke-AzKeyVaultKeyRotation cmdlet to rotate a key.
Invoke-AzKeyVaultKeyRotation -VaultName <vault-name> -Name <key-name>
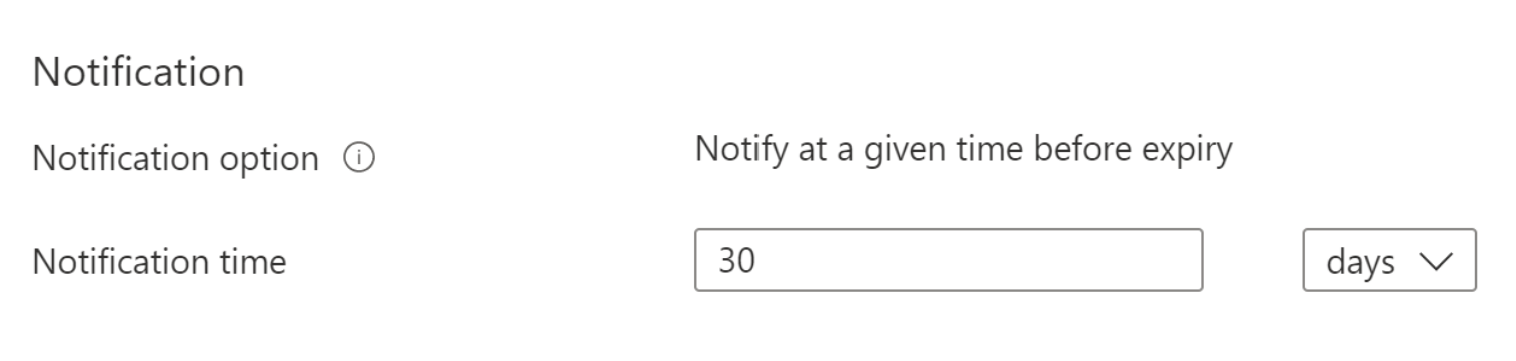
Configure key near expiry notification
You can configure an expiry notification for the Event Grid key near expiry event. If automated rotation can't be used, like when a key is imported from local HSM, you can configure near expiry notification as a reminder for manual rotation or as a trigger to custom automated rotation through integration with Event Grid. You can set the notification to trigger the near expiry event days, months, or years before the key expires.
For more information about Event Grid notifications in Key Vault, see Azure Key Vault as Event Grid source
Configure key rotation by using ARM template
You can configure the key rotation policy by using ARM templates.
Note
To deploy a key through the control plane, you need the Key Vault Contributor role on the Key Vault configured with Azure RBAC.
{
    "$schema": "https://schema.management.azure.com/schemas/2019-04-01/deploymentTemplate.json#",
    "contentVersion": "1.0.0.0",
    "parameters": {
        "vaultName": {
            "type": "String",
            "metadata": {
                "description": "The name of the key vault to be created."
            }
        },
        "keyName": {
            "type": "String",
            "metadata": {
                "description": "The name of the key to be created."
            }
        },
        "rotationTimeAfterCreate": {
            "defaultValue": "P18M",
            "type": "String",
            "metadata": {
                "description": "Time duration to trigger key rotation, for example, P30D, P1M, P2Y."
            }
        },
        "expiryTime": {
            "defaultValue": "P2Y",
            "type": "String",
            "metadata": {
                "description": "The expiry time for new key version, for example, P90D, P2M, P3Y."
            }
        },
        "notifyTime": {
            "defaultValue": "P30D",
            "type": "String",
            "metadata": {
                "description": "Near expiry Event Grid notification, for example, P30D."
            }
        }

    },
    "resources": [
        {
            "type": "Microsoft.KeyVault/vaults/keys",
            "apiVersion": "2024-11-01",
            "name": "[concat(parameters('vaultName'), '/', parameters('keyName'))]",
            "location": "[resourceGroup().location]",
            "properties": {
                "vaultName": "[parameters('vaultName')]",
                "kty": "RSA",
                "rotationPolicy": {
                    "lifetimeActions": [
                        {
                            "trigger": {
                                "timeAfterCreate": "[parameters('rotationTimeAfterCreate')]",
                                "timeBeforeExpiry": ""
                            },
                            "action": {
                                "type": "Rotate"
                            }
                        },
                        {
                            "trigger": {
                                "timeBeforeExpiry": "[parameters('notifyTime')]"
                            },
                            "action": {
                                "type": "Notify"
                            }
                        }

                    ],
                    "attributes": {
                        "expiryTime": "[parameters('expiryTime')]"
                    }
                }
            }
        }
    ]
}
Configure key rotation policy governance
By using the Azure Policy service, you can govern the key lifecycle and ensure that all keys are configured to rotate within a specified number of days.
Create and assign policy definition
- Go to the Policy resource.
- Select Assignments under Authoring on the left side of the Azure Policy page.
- Select Assign policy at the top of the page. This button opens to the Policy assignment page.
- Enter the following information:
- Define the scope of the policy by choosing the subscription and resource group over which the policy is enforced. Select by clicking the three-dot button at on Scope field.
- Select the name of the policy definition: "Keys should have a rotation policy ensuring that their rotation is scheduled within the specified number of days after creation. "
- Go to the Parameters tab at the top of the page.
- Set The maximum days to rotate parameter to desired number of days for example, 730.
- Define the desired effect of the policy (Audit, or Disabled).
- Fill out any additional fields. Navigate the tabs by clicking on Previous and Next buttons at the bottom of the page.
- Select Review + create.
- Select Create.
After you assign the built-in policy, it can take up to 24 hours to complete the scan. When the scan finishes, you can see compliance results like the following.
