Note
Access to this page requires authorization. You can try signing in or changing directories.
Access to this page requires authorization. You can try changing directories.
Applies to: ✔️ Fleet Manager ✔️ Fleet Manager with hub cluster
Get started with Azure Kubernetes Fleet Manager using the Azure portal to create a Fleet Manager and join supported Kubernetes clusters as members.
Before you begin
If you don't have an Azure trail subscription, create a trial subscription before you begin.
Read the conceptual overview of Fleet Manager, which provides an explanation of fleets and member clusters referenced in this document.
An Azure account with an active subscription. Create an account.
An identity (user or service principal) with the following permissions:
- Fleet Manager:
- Microsoft.ContainerService/fleets/read
- Microsoft.ContainerService/fleets/write
- Microsoft.ContainerService/fleets/members/read
- Microsoft.ContainerService/fleets/members/write
- Microsoft.ContainerService/fleetMemberships/read
- Microsoft.ContainerService/fleetMemberships/write
- AKS member clusters:
- Microsoft.ContainerService/managedClusters/read
- Microsoft.ContainerService/managedClusters/write
- Microsoft.ContainerService/managedClusters/listClusterUserCredential/action
- Arc-enabled Kubernetes member clusters:
- Microsoft.Kubernetes/connectedClusters/read
- Microsoft.KubernetesConfiguration/extensions/read
- Microsoft.KubernetesConfiguration/extensions/write
- Microsoft.KubernetesConfiguration/extensions/delete
- Azure resource group:
- Fleet Manager:
Clusters you wish to join as members to Fleet must use supported versions of their respective platforms. For more information, see AKS cluster version support policy and Azure Arc-enabled Kubernetes validation.
Create a Fleet Manager resource
Sign in to the Azure portal.
On the Azure portal home page, select Create a resource.
In the search box, enter Kubernetes Fleet Manager and select Create > Kubernetes Fleet Manager from the search results.
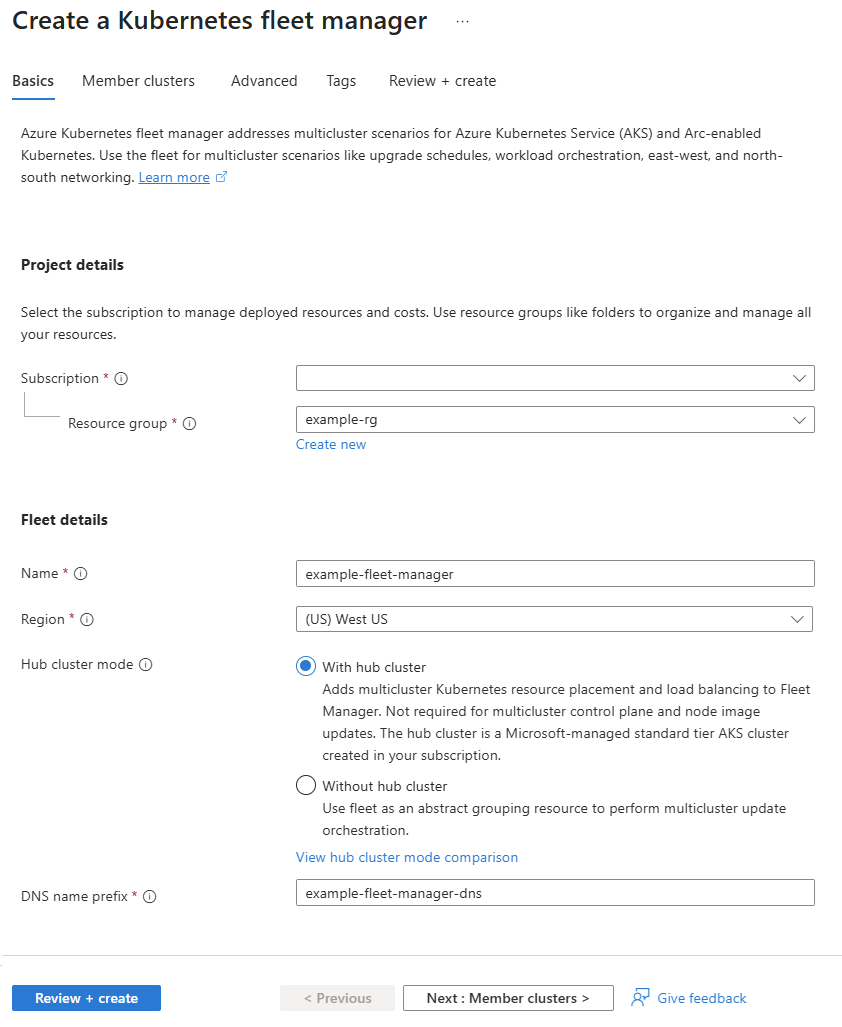
On the Basics tab, configure the following options:
Under Project details:
- Subscription: Select the Azure subscription that you want to use.
- Resource group: Select an existing resource group or select Create new to create a new resource group.
Under Fleet details:
- Name: Enter a name for the Fleet Manager.
- Region: Select the region where you want to create the Fleet Manager.
- Hub cluster mode: Select one of the following options based on features you require:
- With hub cluster multi-cluster Kubernetes resource placement, Managed Fleet Namespaces, DNS load balancing, and cluster upgrades.
- Without hub cluster safe multi-cluster Kubernetes and node image upgrades, cluster observability.
Select Next: Member clusters.
Select + Add to add existing clusters, filtering the cluster list using the search box.

Select Add to add the selected clusters.
In the member list:
- A Name is generated for the member cluster to uniquely identify it within Fleet Manager. Modify the generated name if necessary.
- Enter an update group, such as dev, for the member cluster so the cluster can be safely updated when the group is included in a Fleet Manager update strategy.

Select Next: Advanced.
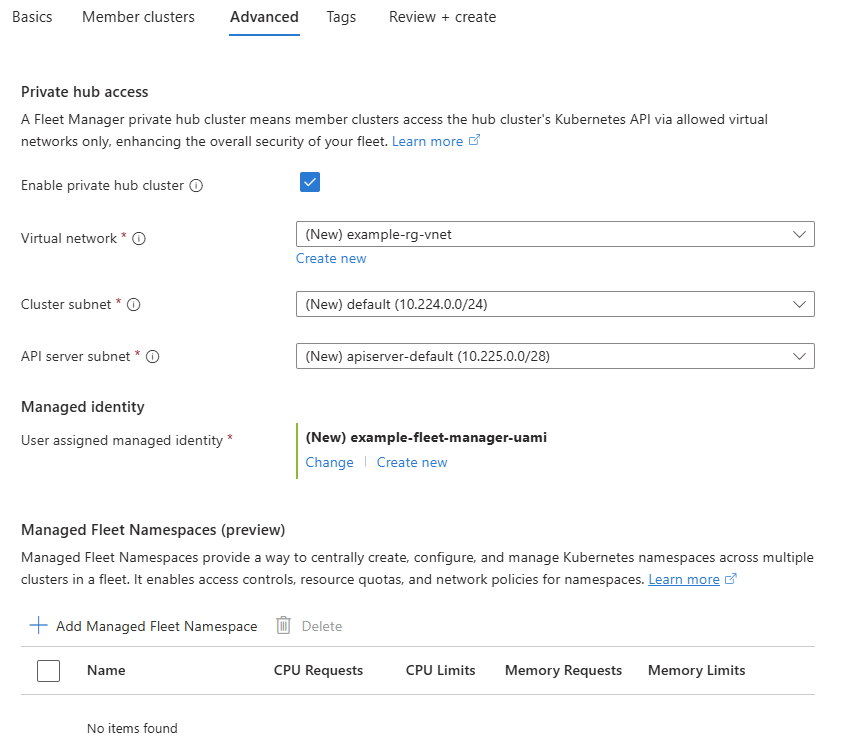
On the Advanced tab, configure the following options:
- Select Enable private hub cluster to provision a private hub cluster
- Virtual network: Select an existing Azure virtual network (VNet) or select Create new to create a new VNet.
- Cluster subnet: Select a VNet subnet for the hub cluster node.
- API server subnet: Select a VNet subnet for the hub cluster's API server integration.
- Select an existing user assigned managed identity or select Create new to create a new user-assigned managed identity.
- Optionally, create one or more Managed Fleet Namespaces to provision with the Fleet Manager.
- Select Enable private hub cluster to provision a private hub cluster
Select Next: Tags and define any Azure resource tags to apply to the new Fleet Manager.
Select Review + create > Create to create the Fleet Manager.
It takes a few minutes to create the Fleet Manager. When your deployment completes, you can select Go to resource to view the Fleet Manager.


