Note
Access to this page requires authorization. You can try signing in or changing directories.
Access to this page requires authorization. You can try changing directories.
Applies to: Azure Logic Apps (Consumption + Standard)
For business-to-business (B2B) integrations, you can automate communication between trading partners by building workflows with B2B artifacts and industry-standard protocols in Azure Logic Apps.
For example, you can create an integration account to define artifacts such as trading partners, agreements, maps, and schemas. Workflows support protocols such as AS2, X12, EDIFACT, and RosettaNet. Create end-to-end integrations by combining these B2B capabilities with 1,400+ connectors available in Azure Logic Apps, such as Office 365 Outlook, SQL Server, and Salesforce.
This guide shows how to create an example B2B workflow that can complete the following tasks:
- Receive HTTPS requests with the Request trigger named When an HTTP request is received.
- Decode incoming message content with the AS2 (v2) decode action and the X12 decode action.
- Return a response to the caller with the Response action.
Prerequisites
An Azure account and subscription. Get a Azure account.
The logic app resource and blank workflow where you want to build the B2B integration in this example.
The AS2 (v2) and X12 operations don't include any triggers. Your workflow can start with any trigger or use any action to receive messages.
The examples in this article use the Request trigger named When an HTTP request is received.
For more information, see:
An integration account resource to define and store artifacts for enterprise integration and B2B workflows.
Both the integration account and logic app resource must exist in the same Azure subscription and Azure region.
Defines at least two trading partners in your integration account. The definitions for both partners must use the same business identity qualifier, such as AS2, X12, EDIFACT, or RosettaNet.
Defines an AS2 agreement and X12 agreement between the trading partners that participate in your workflow. Each agreement requires a host partner and a guest partner.
The content in the messages between the partners must match the agreement type. For information about agreement settings to use when receiving and sending messages, see:
Before you start working with the AS2 and X12 operations, you must link your Consumption logic app or link your Standard logic app to the integration account so you can work with artifacts such as trading partners and agreements. You can link an integration account to multiple Consumption or Standard logic app resources to share the same artifacts.
When you add the AS2 and X12 operations, you might have to create a connection to the integration account:
Logic app workflow Connection required? Consumption - AS2 (v2) connector: No connection required
- X12 connector: Connection requiredStandard - AS2 (v2) connector: No connection required
- X12 built-in connector: No connection required
Add the Request trigger
To start the workflow in this example, add the Request trigger.
In the Azure portal, open your logic app resource.
In the designer, open your workflow. Follow these general steps to add the Request built-in trigger named When an HTTP request is received to your workflow.
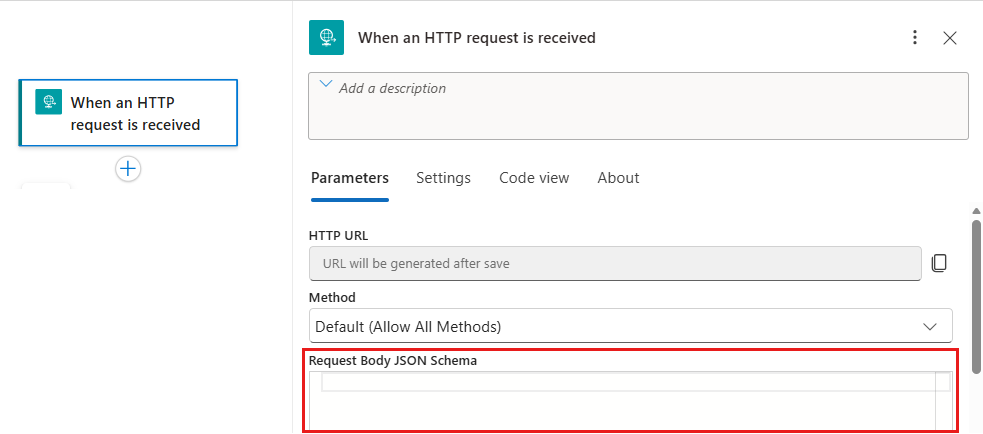
The trigger information pane opens with the Parameters tab selected.
Leave the trigger's Request Body JSON Schema parameter empty because the trigger receives X12 messages in flat file format.
Save your workflow. On the designer toolbar, select Save.
This step generates the HTTP URL, which you later use to send a request that triggers the workflow.
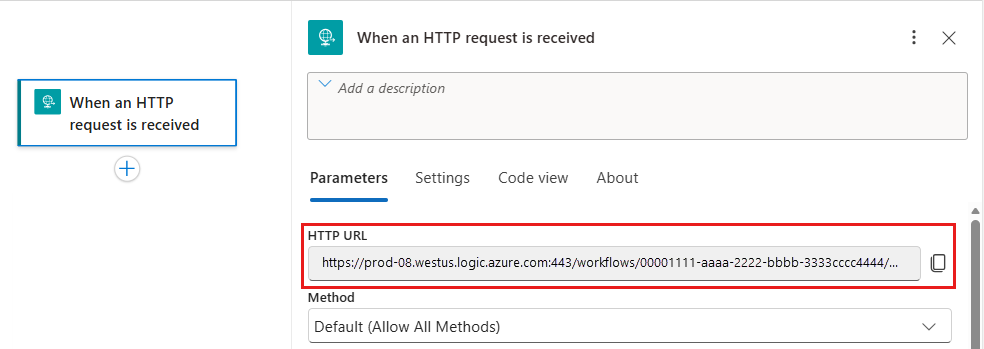
Copy and save the URL for later use.


Add the decode AS2 action
Follow these steps to add the AS2 (v2) decode action.
Under the Request trigger, follow these general steps to add the following AS2 (v2) action, based on your workflow type:
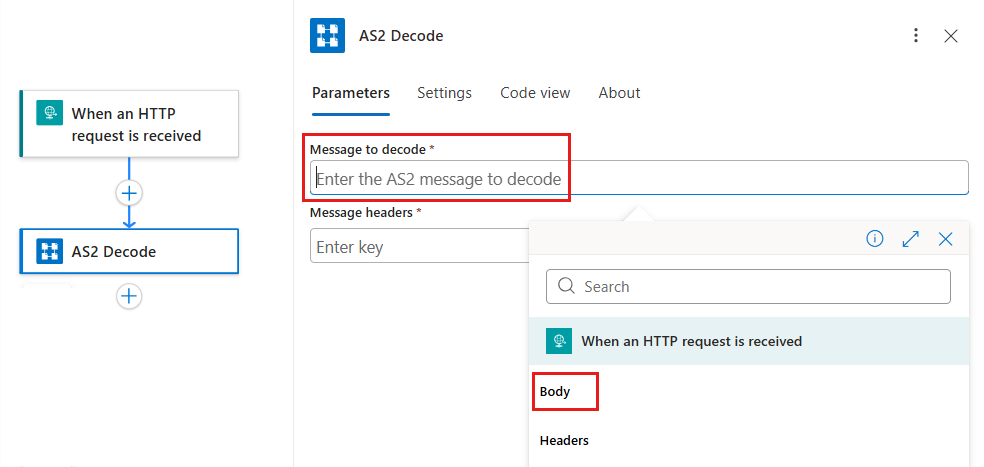
Workflow Action name Consumption AS2 Decode Standard Decode AS2 In the action's Message to decode parameter, provide the message content to decode.
This example specifies the body content from the Request trigger output. You can provide this content either by selecting from the dynamic content list or entering an expression:
To choose output from previous operations, follow these steps for the dynamic content list:
Select inside the Message to decode box, then select the lightning icon to open the dynamic content list.
Under When an HTTP request is received, select Body, for example:
Note
If Body doesn't appear in the dynamic content list, next to the When an HTTP request is received section label, select See more.
To enter an expression that references the content in the
bodyproperty from the Request trigger output, follow these steps:Select inside the Message to decode box, then select the function icon to open the expression editor.
In the editor box, enter the following expression, and select Add:
triggerOutputs()['body']
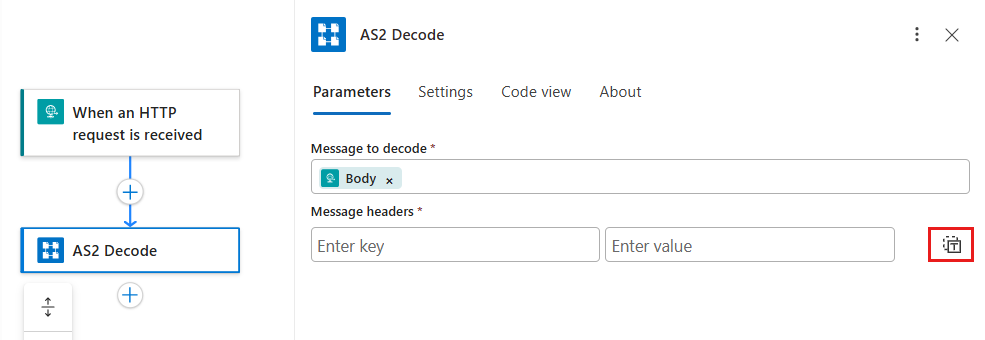
In the action's Message headers parameter, enter any headers that the AS2 action requires. You can find these values in the
headersproperty from the Request trigger output by following these steps:In the Message headers section, select Switch Message headers to text mode:
Select inside the Message headers box, then select the function icon to open the expression editor.
In the editor box, enter the following expression, and select Add:
triggerOutputs()['Headers']
To resolve the expression into the
Headerstoken, on the designer toolbar, select Code view, then select Designer.


Confirm message receipt
To confirm the message receipt, return a response that contains an AS2 Message Disposition Notification (MDN) to the sender by using the Condition and Response actions.
Important
Make sure these actions immediately follow the AS2 action so the workflow continues processing if the AS2 action succeeds. Otherwise, the workflow stops processing if the AS2 action fails.
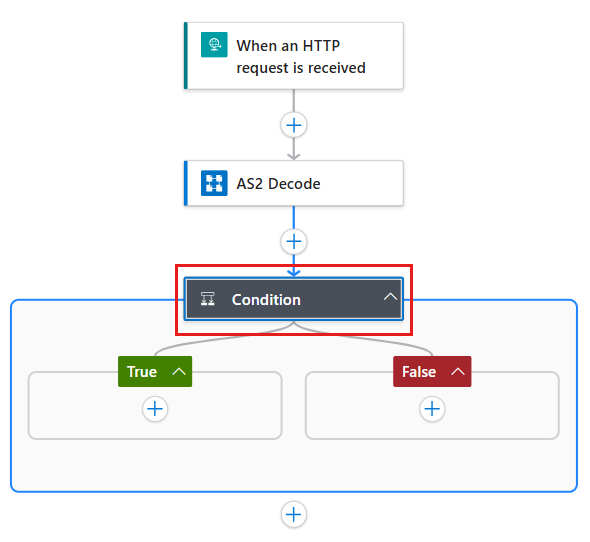
Add a Condition action to choose action path
These steps add the Condition action so you can specify one or multiple conditions to evaluate and choose the actions to take, based on whether the AS2 (v2) decode action succeeds.
On the designer, under the AS2 (v2) decode action, follow these general steps to add the Condition built-in action.
The Condition action appears with the True and False empty paths. You later add the actions to run in these paths, based on whether the condition evaluates to true or false.
Select the Condition title bar to expand the action so you can provide one or more conditions to evaluate.
In the left-side Choose a value box, enter the following expression, based on your workflow type:
Consumption
@body('AS2_Decode')?['messageContent']?['isMdnExpected']Standard
@body('Decode_AS2')?['messageContent']?['isMdnExpected']Important
Make sure the AS2 decode action name and output names matches the names for your selected AS2 action.
From the middle list, select the equal sign (=).
In the right-side Choose a value box, enter the value
Expected.
Save your workflow.
Set up action paths
These steps specify the actions to take and the responses to return based on whether the AS2 (v2) decode action succeeds.
For when the AS2 (v2) decode action succeeds, follow these steps:
In the True box, select the plus sign (+) > Add an action.
In the Add an action search box, enter
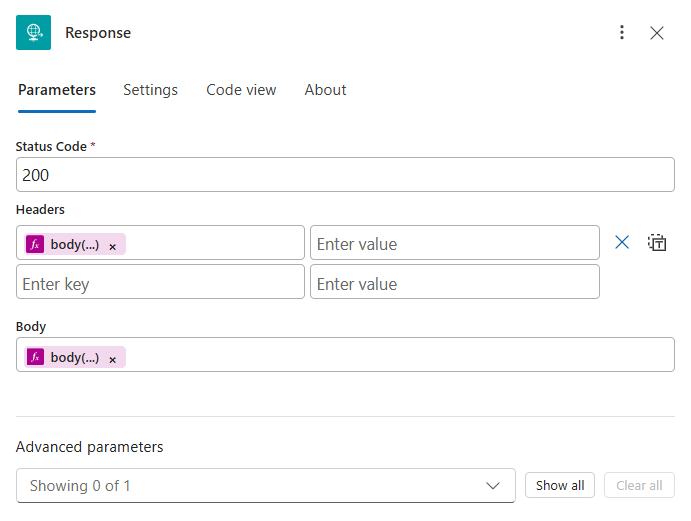
response. Under Request, select the Response built-in action.To reference the AS2 MDN from the AS2 (v2) decode action output, specify the following expressions:
In the action's Headers parameter, for the key value, enter the following expression:
Consumption
@body('AS2_Decode')?['outgoingMdnContent']?['outgoingMdnHeaders']Standard
@body('Decode_AS2')?['outgoingMdnContent']?['outgoingMdnHeaders']In the action's Body parameter, enter the following expression:
Consumption
@body('AS2_Decode')?['outgoingMdnContent']?['messageContent']Standard
@body('Decode_AS2')?['outgoingMdnContent']?['messageContent']
Important
Make sure the AS2 decode action name and output names matches the names for your selected AS2 action.
The following example shows how the Response action looks:
For when the AS2 (v2) decode action fails, follow these steps:
In the False box, select the plus sign (+) > Add an action.
In the Add an action search box, enter
response. Under Request, select the Response built-in action.Set up the Response action to return the status and error that you want.
Save your workflow.
Add the decode X12 message action
Follow these steps to decode X12 messages.
On the designer, under the Response action, follow these general steps to add the following X12 decode action, based on your workflow type:
Workflow Action name Consumption Decode X12 message Standard Decode X12 For more information, see Exchange X12 messages in B2B workflows with Azure Logic Apps.
If the action prompts you to create a connection, provide the following information, and select Create new.
- Connection name
- Integration account ID
- Integration account SAS URL
For more information, see Decode X12 messages.
On the action information pane, specify the content for the action to decode, based on your workflow type:
Workflow Action name Parameter name Consumption Decode X12 message X12 flat file message to decode Standard Decode X12 Message to decode This example uses the message content from the AS2 (v2) action output. However, this output uses JSON object format and is base64 encoded. You must convert the content to a string.
To convert the content, enter the following expression in the message-to-decode box, based on your workflow type:
Consumption
@base64ToString(body('AS2_Decode')?['messageContent'])Standard
@base64ToString(body('Decode_AS2')?['messageContent'])Important
Make sure the AS2 decode action name and output names matches the names for your selected AS2 action.
Save your workflow.
To resolve the expression into a token, switch between code view and designer view. On the designer toolbar, select Code view, then select Designer.
You're now done setting up this example B2B workflow. In a real world app, you might want to store the decoded X12 content in a line-of-business (LOB) app or data store.
For more information, see:
- Connect to SAP systems from Azure Logic Apps
- Monitor, create, and manage SFTP files by using SSH and Azure Logic Apps
To connect your own LOB apps and use these APIs in your workflow, add more actions or write custom APIs.