Note
Access to this page requires authorization. You can try signing in or changing directories.
Access to this page requires authorization. You can try changing directories.
Applies to: Azure Logic Apps (Consumption + Standard)
In enterprise integration business-to-business (B2B) scenarios, trading partners that communicate with each other based on an agreement need to make sure their messages are valid before any data processing can start.
This guide shows how your logic app workflow can validate XML messages and documents using a predefined schema and the XML Operations action that validates XML.
Prerequisites
An Azure account and subscription. Get a Azure account.
The logic app resource and workflow where you want to validate XML.
Your workflow must start with a trigger, but you can use any trigger that works for your scenario. For more information, see these general steps to add any trigger you want.
An integration account resource to define and store artifacts for use in your enterprise integration and B2B workflows across multiple logic app resources.
Both your integration account and logic app resource must exist in the same Azure subscription and Azure region.
The schema to use for validating XML content.
Before you start working with XML operations that use artifacts such as schemas in an integration account, you must link your Consumption logic app or link your Standard logic app to the integration account. You can then use the artifacts across workflows in multiple logic app resources.
You can optionally add specific artifacts directly to a Standard logic app resource. However, only workflows in the same resource can work with those artifacts.
Install or use a tool that can send HTTP requests to test your solution, for example:
- Visual Studio Code with an extension from Visual Studio Marketplace
- PowerShell Invoke-RestMethod
- Microsoft Edge - Network Console tool
- Bruno
- Curl
Caution
For scenarios where you have sensitive data, such as credentials, secrets, access tokens, API keys, and other similar information, make sure to use a tool that protects your data with the necessary security features, works offline or locally, doesn't sync your data to the cloud, and doesn't require that you sign in to an online account. This way, you reduce the risk around exposing sensitive data to the public.
If you use a trigger that waits for a request to start the workflow, you need an HTTP request tool to test the trigger and workflow.
Add a validate XML action
In the Azure portal, open the logic app resource. Open your workflow in the designer.
On the designer, follow these general steps to add the XML Operations action with the name that matches your workflow type:
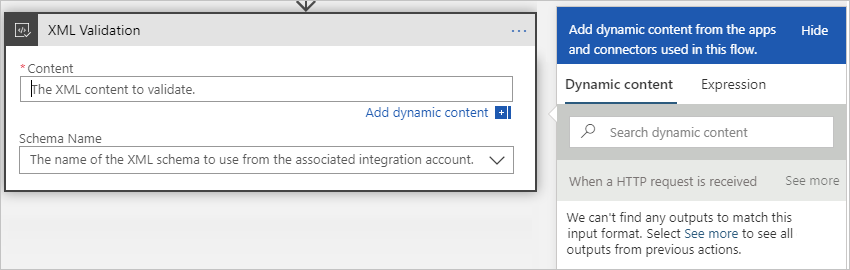
Workflow Action name Consumption XML Validation Standard Validate XML To view the source options for your XML content, follow these steps:
Select inside the Content box, then select an option:
XML content source Select Description Output from a previous workflow operation Lightning icon Open the dynamic content list so you can select the output from the trigger or a previous action. Output from an expression Function icon Open the expression editor so you can use an expression function or build an expression to produce the XML content. This example continues with the dynamic content list, for example:
From the dynamic content list, select the output with the XML content from the operation you want.
This example selects the Body output from the trigger named When an HTTP request is received.
To specify the schema for validation, follow the steps for your workflow type:
Consumption
From the Schema Name list, select the schema from the linked integration account.
Standard
From the Schema source list, select IntegrationAccount or LogicApp.
This example selects IntegrationAccount.
From the Schema name list, select the schema.
Save your workflow.

You're now finished with setting up your validate XML action. In a real world app, you might want to store the validated data in a line-of-business (LOB) app such as SalesForce. To send the validated output to Salesforce, add a Salesforce action.
Test your workflow
Confirm that the workflow works the way that you expect.
On the designer, select the trigger named When an HTTP request is received.
From the HTTP URL property, copy and save the endpoint URL for the trigger.
On the designer toolbar, from the Run menu, select Run.
To fire the Request trigger, use your preferred HTTP request tool to send a request with the XML content to the trigger's endpoint URL.
The validate XML action runs after the trigger fires and XML content is available for validation.
To review the status for each operation, inputs, and outputs, follow the steps in Review workflow run history.