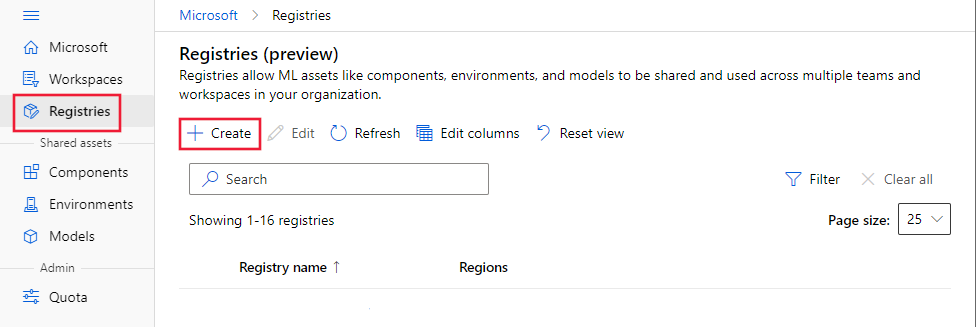
Note
Access to this page requires authorization. You can try signing in or changing directories.
Access to this page requires authorization. You can try changing directories.
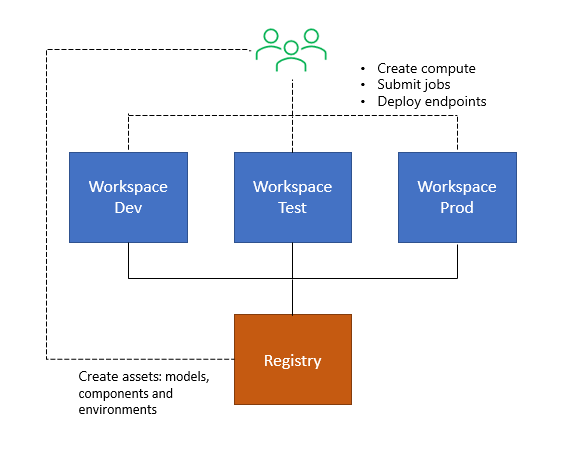
Azure Machine Learning entities can be grouped into two broad categories:
- Assets such as models, environments, components, and datasets are durable entities that are workspace agnostic. For example, a model can be registered with any workspace and deployed to any endpoint.
- Resources such as compute, job, and endpoints are transient entities that are workspace specific. For example, an online endpoint has a scoring URI that is unique to a specific instance in a specific workspace. Similarly, a job runs for a known duration and generates logs and metrics each run.
Assets lend themselves to being stored in a central repository and used in different workspaces, possibly in different regions. Resources are workspace specific.
Azure Machine Learning registries enable you to create and use those assets in different workspaces. Registries support multi-region replication for low latency access to assets, so you can use assets in workspaces located in different Azure regions. Creating a registry provisions Azure resources required to facilitate replication. First, Azure blob storage accounts in each supported region. Second, a single Azure Container Registry with replication enabled to each supported region.
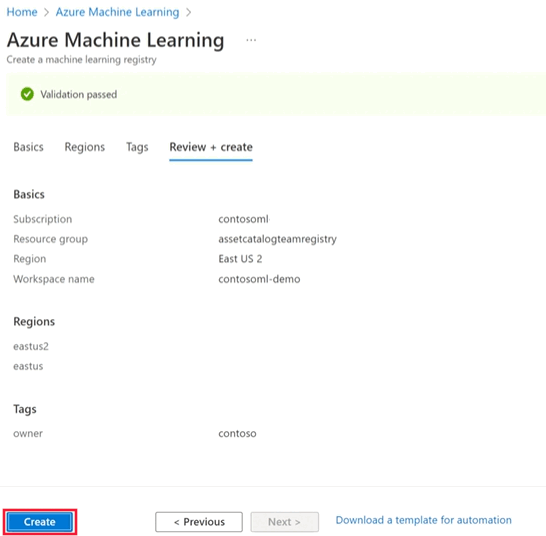
Prerequisites
The Azure CLI and the
mlextension to the Azure CLI, installed and configured. For more information, see Install and set up the CLI (v2).A Bash shell or a compatible shell, for example, a shell on a Linux system or Windows Subsystem for Linux. The Azure CLI examples in this article assume that you use this type of shell.
An Azure Machine Learning workspace. For instructions to create a workspace, see Set up.
Prepare to create registry
You need to decide the following information carefully before proceeding to create a registry:
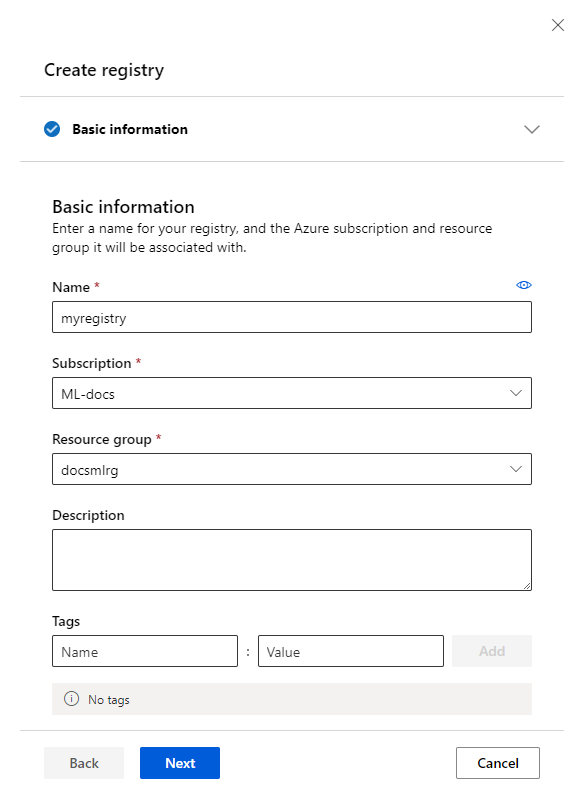
Choose a name
Consider the following factors before picking a name.
- Registries are meant to facilitate sharing of ML assets across teams within your organization across all workspaces. Choose a name that is reflective of the sharing scope. The name should help identify your group, division, or organization.
- Registry name is unique with your organization (Microsoft Entra tenant). For example, you might prefix your team or organization name and avoid generic names.
- Registry names can't be changed once created because they're used in IDs of models, environments, and components that are referenced in code.
- Length can be 2-32 characters.
- Alphanumerics, underscore, hyphen are allowed. No other special characters. No spaces - registry names are part of model, environment, and component IDs that can be referenced in code.
- Name can contain underscore or hyphen but can't start with an underscore or hyphen. Needs to start with an alphanumeric.
Choose Azure regions
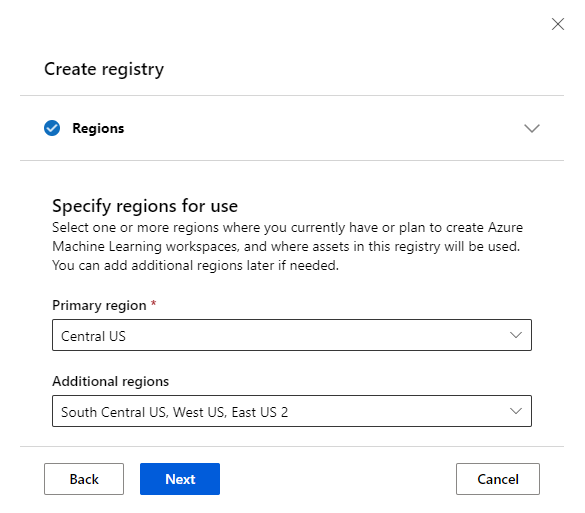
Registries enable sharing of assets across workspaces. To do so, a registry replicates content across multiple Azure regions. You need to define the list of regions that a registry supports when creating the registry. Create a list of all regions in which you have workspaces today and plan to add in near future. This list is a good set of regions to start with. When creating a registry, you define a primary region and a set of other regions. The primary region can't be changed after registry creation, but the other regions can be updated at a later point.
Check permissions
Make sure you're the "Owner" or "Contributor" of the subscription or resource group in which you plan to create the registry. If you don't have one of these built-in roles, review the section on permissions toward the end of this article.
Create a registry
Create the YAML definition and name it registry.yml.
Note
The primary location is listed twice in the YAML file. In the following example, chinaeast2 is listed first as the primary location (location item) and also in the replication_locations list.
name: DemoRegistry1
tags:
  description: Basic registry with one primary region and to additional regions
  foo: bar
location: chinaeast2
replication_locations:
  - location: chinaeast2
  - location: chinaeast2
  - location: chinaeast2
For more information on the structure of the YAML file, see the registry YAML reference article.
Tip
You typically see display names of Azure regions such as 'China East 2' in the Azure portal but the registry creation YAML needs names of regions without spaces and lower case letters. Use az account list-locations -o table to find the mapping of region display names to the name of the region that can be specified in YAML.
Run the registry create command.
az ml registry create --file registry.yml --resource-group <resource-group-name>
Specify storage account type and SKU (optional)
Tip
Specifying the Azure Storage Account type and SKU is only available from the Azure CLI.
Azure storage offers several types of storage accounts with different features and pricing. For more information, see the Types of storage accounts article. Once you identify the optimal storage account SKU that best suites your needs, find the value for the appropriate SKU type. In the YAML file, use your selected SKU type as the value of the storage_account_type field. This field is under each location in the replication_locations list.
Next, decide if you want to use an Azure Blob storage account or Azure Data Lake Storage Gen2. To create Azure Data Lake Storage Gen2, set storage_account_hns to true. To create Azure Blob Storage, set storage_account_hns to false. The storage_account_hns field is under each location in the replication_locations list.
Note
The hns portion of storage_account_hns refers to the hierarchical namespace capability of Azure Data Lake Storage Gen2 accounts.
The following example YAML file demonstrates this advanced storage configuration:
name: DemoRegistry2
tags:
  description: Registry with additional configuration for storage accounts
  foo: bar
location: chinaeast2
replication_locations:
  - location: chinaeast2
    storage_config:
      storage_account_hns: False
      storage_account_type: Standard_LRS
  - location: chinaeast2
    storage_config:
      storage_account_hns: False
      storage_account_type: Standard_LRS
  - location: chinaeast2
    storage_config:
      storage_account_hns: False
      storage_account_type: Standard_LRS
Add users to the registry
Decide if you want to allow users to only use assets (models, environments, and components) from the registry or both use and create assets in the registry. Review steps to assign a role if you aren't familiar how to manage permissions using Azure role-based access control.
Allow users to use assets from the registry
To let a user only read assets, you can grant the user the built-in Reader role. If you don't want to use the built-in role, create a custom role with the following permissions
| Permission | Description |
|---|---|
| Microsoft.MachineLearningServices/registries/read | Allows the user to list registries and get registry metadata |
| Microsoft.MachineLearningServices/registries/assets/read | Allows the user to browse assets and use the assets in a workspace |
Allow users to create and use assets from the registry
To let the user both read and create or delete assets, grant the following write permission in addition to the previous read permissions.
| Permission | Description |
|---|---|
| Microsoft.MachineLearningServices/registries/assets/write | Create assets in registries |
| Microsoft.MachineLearningServices/registries/assets/delete | Delete assets in registries |
Warning
The built-in Contributor and Owner roles allow users to create, update and delete registries. You must create a custom role if you want the user to create and use assets from the registry, but not create or update registries. Review custom roles to learn how to create custom roles from permissions.
Allow users to create and manage registries
To let users create, update, and delete registries, grant them the built-in Contributor or Owner role. If you don't want to use built-in roles, create a custom role with the following permissions, in addition to all the above permissions to read, create, and delete assets in registry.
| Permission | Description |
|---|---|
| Microsoft.MachineLearningServices/registries/write | Allows the user to create or update registries |
| Microsoft.MachineLearningServices/registries/delete | Allows the user to delete registries |
