Note
Access to this page requires authorization. You can try signing in or changing directories.
Access to this page requires authorization. You can try changing directories.
This article explains how to move Azure resources to a different Azure region, using PowerShell in Azure Resource Mover.
In this tutorial, you learn how to:
- Move Azure resources to a different Azure region
Note
Tutorials show the quickest path for trying out a scenario and use default options.
Prerequisites
Verify the following requirements:
| Requirement | Description |
|---|---|
| Subscription permissions | Check you have Owner access on the subscription containing the resources that you want to move. The first time you add a resource for a specific source and destination pair in an Azure subscription, a system-assigned managed identity (formerly known as Managed Service Identify (MSI)) that's trusted by the subscription is necessary. To create the identity, and to assign it the required role (Contributor or User Access administrator in the source subscription), the account you use to add resources needs Owner permissions on the subscription. Learn more about Azure roles. |
| Resource Mover support | Review supported regions and other common questions. |
| VM support | Check that any VMs you want to move are supported. - Verify supported Windows VMs. - Verify supported Linux VMs and kernel versions. - Check supported compute, storage, and networking settings. |
| SQL support | If you want to move SQL resources, review the SQL requirements list. |
| Destination subscription | The subscription in the destination region needs enough quota to create the resources you're moving in the target region. If it doesn't have a quota, request additional limits. |
| Destination region charges | Verify pricing and charges associated with the target region to which you're moving VMs. Use the pricing calculator to help you. |
Review PowerShell requirements
Most move resources operations are the same whether using the Azure portal or PowerShell, with a couple of exceptions.
| Operation | Portal | PowerShell |
|---|---|---|
| Create a move collection | A move collection (a list of all the resources you're moving) is created automatically. Required identity permissions are assigned in the backend by the portal. | You use PowerShell cmdlets to: - Create a resource group for the move collection and specify the location for it. - Assign a managed identity to the collection. - Add resources to the collection. |
| Remove a move collection | You can't directly remove a move collection in the portal. | You use a PowerShell cmdlet to remove a move collection. |
| Resource move operations (Prepare, initiate move, commit, etc.). |
Single steps with automatic validation by Resource Mover. | PowerShell cmdlets to: 1) Validate dependencies. 2) Perform the move. |
| Delete source resources | Directly in the Resource Mover portal. | PowerShell cmdlets at the resource-type level. |
Sample values
We're using these values in our script examples:
| Setting | Value |
|---|---|
| Subscription ID | subscription-id |
| Source region | China East |
| Target region | China North |
| Resource group (holding metadata for move collection) | RG-MoveCollection-demoRMS |
| Move collection name | PS-chinaeast-chinanorth-demoRMS |
| Resource group (source region) | PSDemoRM |
| Resource group (target region) | PSDemoRM-target |
| Resource Move service location | China East 2 |
| IdentityType | SystemAssigned |
| VM to move | PSDemoVM |
Sign in to Azure
If you don't have an Azure subscription, create a trial subscription before you begin. Then sign in to the Azure portal.
Sign in to your Azure subscription with the Connect-AzAccount -Environment AzureChinaCloud cmdlet:
Connect-AzAccount -Environment AzureChinaCloud -Subscription "<subscription-id>"
Set up the move collection
The MoveCollection object stores metadata and configuration information about the resources you want to move. To set up a move collection, you do the following:
- Create a resource group for the move collection.
- Register the service provider to the subscription, so that the MoveCollection resource can be created.
- Create the MoveCollection object with managed identity. For the MoveCollection object to access the subscription in which the Resource Mover service is located, it needs a system-assigned managed identity (formerly known as Managed Service Identity (MSI)) that's trusted by the subscription.
- Grant access to the Resource Mover subscription for the managed identity.
Register the resource provider
Register the resource provider Microsoft.Migrate, so that the MoveCollection resource can be created, as follows:
Register-AzResourceProvider -ProviderNamespace Microsoft.MigrateWait for registration:
While(((Get-AzResourceProvider -ProviderNamespace Microsoft.Migrate)| where {$_.RegistrationState -eq "Registered" -and $_.ResourceTypes.ResourceTypeName -eq "moveCollections"}|measure).Count -eq 0)
{
    Start-Sleep -Seconds 5
    Write-Output "Waiting for registration to complete."
}
Create a MoveCollection object
Create a MoveCollection object, and assign a managed identity to it, as follows:
New-AzResourceMoverMoveCollection -Name "PS-chinaeast-chinanorth-demoRMS" -ResourceGroupName "RG-MoveCollection-demoRMS" -SourceRegion "chinaeast" -TargetRegion "chinanorth" -Location "chinaeast2" -IdentityType "SystemAssigned"
Output:

Grant access to the managed identity
Grant the managed identity access to the Resource Mover subscription as follows. You must be the subscription owner.
Retrieve identity details from the MoveCollection object.
$moveCollection = Get-AzResourceMoverMoveCollection -SubscriptionId $subscriptionId -ResourceGroupName "RG-MoveCollection-demoRMS" -Name "PS-chinaeast-chinanorth-demoRMS"

$identityPrincipalId = $moveCollection.IdentityPrincipalId
Assign the required roles to the identity so Azure Resource Mover can access your subscription to help move resources.
New-AzRoleAssignment -ObjectId $identityPrincipalId -RoleDefinitionName Contributor -Scope "/subscriptions/$subscriptionId"

New-AzRoleAssignment -ObjectId $identityPrincipalId -RoleDefinitionName "User Access Administrator" -Scope "/subscriptions/$subscriptionId"
Add resources to the move collection
Retrieve the IDs for existing source resources you want to move. Create the destination resource settings object, then add resources to the move collection.
Note
Resources added to a move collection must be in the same subscription, but can be in different resource groups.
Add resources as follows:
Get the source resource ID:
Get-AzResource -Name PSDemoVM -ResourceGroupName PSDemoRMOutput

Create the target resource settings object per the resource you're moving. In our case, it's a VM.
$targetResourceSettingsObj = New-Object Microsoft.Azure.PowerShell.Cmdlets.ResourceMover.Models.Api202101.VirtualMachineResourceSettingsSet the resource type and target resource name for the object.
$targetResourceSettingsObj.ResourceType = "Microsoft.Compute/virtualMachines"
$targetResourceSettingsObj.TargetResourceName = "PSDemoVM"
Note
Our target VM has the same name as the VM in the source region. You can choose a different name.
Add the source resources to the move collection, using the resource ID and target settings object you retrieved/created.
Add-AzResourceMoverMoveResource -ResourceGroupName "RG-MoveCollection-demoRMS" -MoveCollectionName "PS-chinaeast-chinanorth-demoRMS" -SourceId "/subscriptions/xxxxxxxx-xxxx-xxxx-xxxx xxxxxxxxxxxx/resourceGroups/
PSDemoRM/providers/Microsoft.Compute/virtualMachines/PSDemoVM" -Name "PSDemoVM" -ResourceSetting $targetResourceSettingsObj
Output
Validate and add dependencies
Check whether the resources you added have any dependencies on other resources, and add as needed.
Validate dependencies as follows:
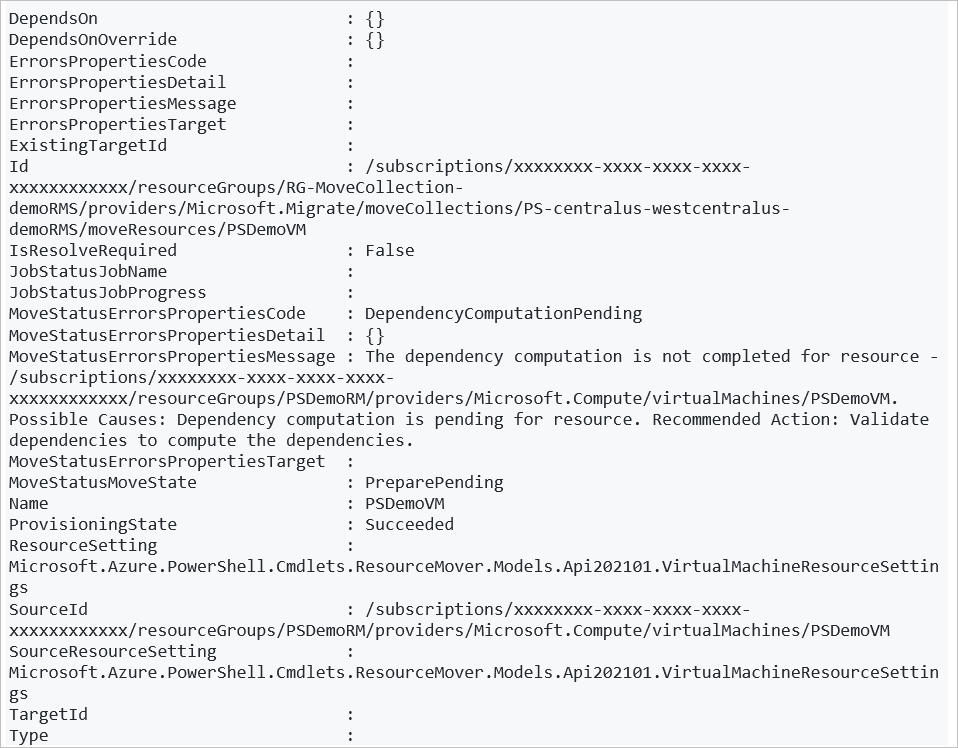
Resolve-AzResourceMoverMoveCollectionDependency -ResourceGroupName "RG-MoveCollection-demoRMS" -MoveCollectionName "PS-chinaeast-chinanorth-demoRMS"Output (when dependencies exist)
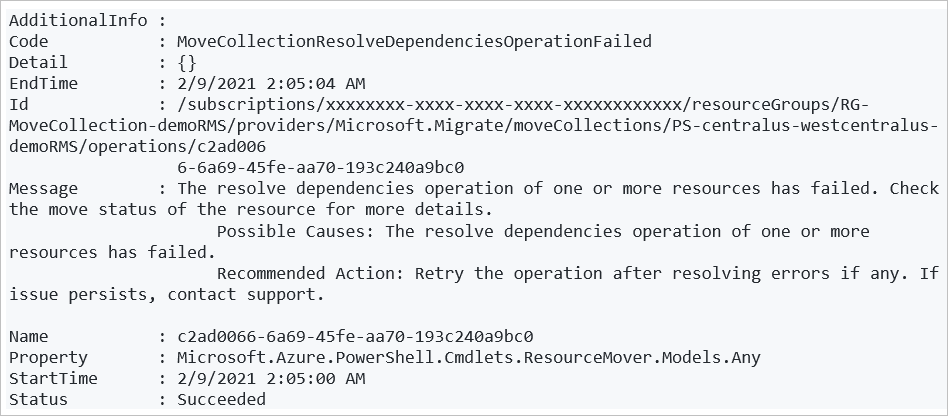
Identity missing dependencies:
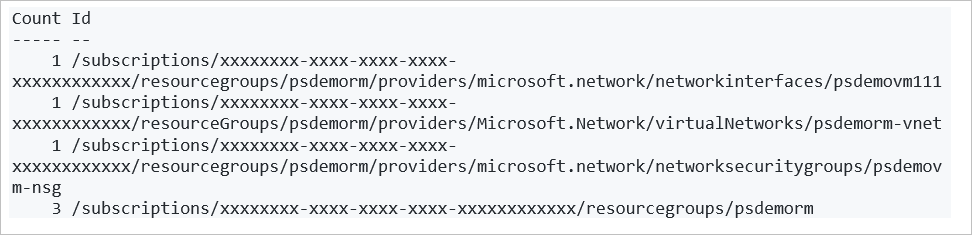
To retrieve a list of all missing dependencies:
Get-AzResourceMoverUnresolvedDependency -MoveCollectionName "PS-chinaeast-chinanorth-demoRMS" -ResourceGroupName "RG-MoveCollection-demoRMS" -DependencyLevel DescendantOutput
To retrieve only first-level dependencies (direct dependencies for the resource):
Get-AzResourceMoverUnresolvedDependency -MoveCollectionName "PS-chinaeast-chinanorth-demoRMS" -ResourceGroupName "RG-MoveCollection-demoRMS" -DependencyLevel DirectOutput

To add any outstanding missing dependencies, repeat the instructions above to add resources to the move collection, and revalidate until there are no outstanding resources.
Note
If for any reason you want to remove resources from the resource collection, follow the instructions in this article.
Prepare resources
You usually need to prepare resources in the source region before the move. For example:
- To move stateless resources such as Azure virtual networks, network adapters, load balancers, and network security groups, you might need to export an Azure Resource Manager template.
- To move stateful resources such as Azure VMs and SQL databases, you might need to start replicating resources from the source to the destination region.
In this tutorial, since we're moving VMs, we need to prepare the source resource group, and then initiate and commit its move, before we can start preparing VMs.
Note
If you have an existing target resource group, you can directly commit the move for the source resource group, and skip the prepare and initiate move stages.
Prepare VM resources
After preparing and moving the source resource group, we can prepare VM resources for the move.
Validate the dependencies before you prepare VM resources.
$resp = Invoke-AzResourceMoverPrepare -ResourceGroupName "RG-MoveCollection-demoRMS" -MoveCollectionName "PS-chinaeast-chinanorth-demoRMS" -MoveResource $('psdemovm') -ValidateOnlyOutput
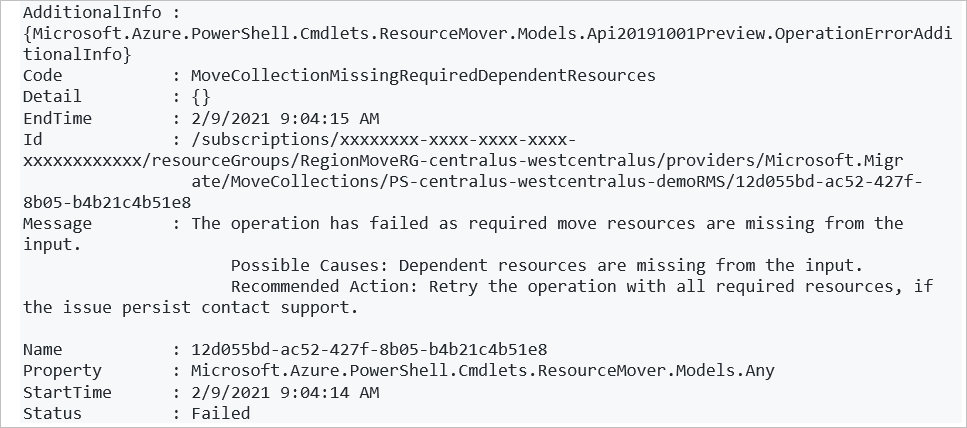
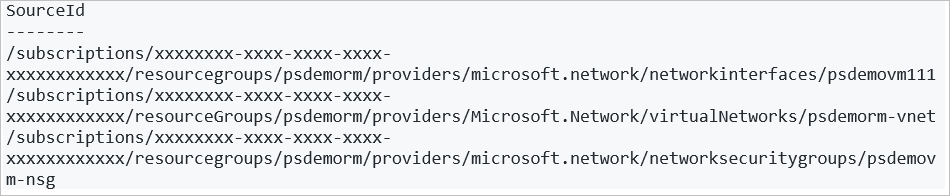
Get the dependent resources that need to be prepared along with the VM.
$resp.AdditionalInfo[0].InfoMoveResourceOutput
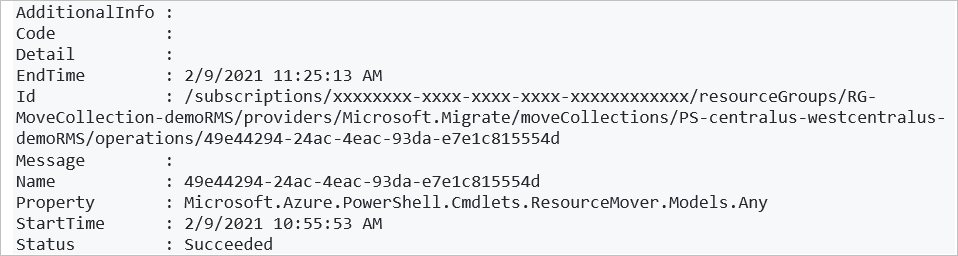
Initiate the prepare process for all dependent resources.
Invoke-AzResourceMoverPrepare -ResourceGroupName "RG-MoveCollection-demoRMS" -MoveCollectionName "PS-chinaeast-chinanorth-demoRMS" -MoveResource $('PSDemoVM','psdemovm111', 'PSDemoRM-vnet','PSDemoVM-nsg')Output
Note
You can provide the source resource ID instead of the resource name as the input parameters for the Prepare cmdlet, as well as in the Initiate Move and Commit cmdlets. To do this, run:
Invoke-AzResourceMoverPrepare -ResourceGroupName "RG-MoveCollection-demoRMS" -MoveCollectionName "PS-chinaeast-chinanorth-demoRMS" -MoveResourceInputType MoveResourceSourceId -MoveResource $('/subscriptions/xxxxxxxx-xxxx-xxxx-xxxx-xxxxxxxxxxxx/resourceGroups/PSDemoRMS/providers/Microsoft.Network/networkSecurityGroups/PSDemoVM-nsg')
Initiate move of VM resources
Verify that the VM resources are in an Initiate Move Pending state:
Get-AzResourceMoverMoveResource -SubscriptionId " xxxxxxxx-xxxx-xxxx-xxxx-xxxxxxxxxxxx " -ResourceGroupName "RG-MoveCollection-demoRMS" -MoveCollectionName "PS-chinaeast-chinanorth-demoRMS " | Where-Object { $_.MoveStatusMoveState -eq "InitiateMovePending" } | Select NameOutput

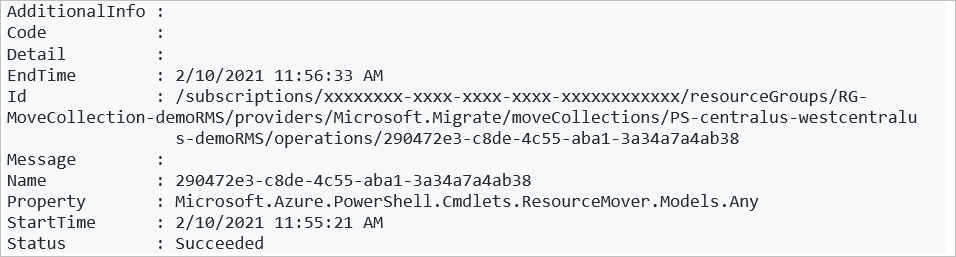
Initiate the move:
Invoke-AzResourceMoverInitiateMove -ResourceGroupName "RG-MoveCollection-demoRMS" -MoveCollectionName "PS-chinaeast-chinanorth-demoRMS" -MoveResource $('psdemovm111', 'PSDemoRM-vnet','PSDemoVM-nsg', 'PSDemoVM') -MoveResourceInputType "MoveResourceId"Output
Discard or commit?
After the initial move, you can decide whether you want to commit the move or discard it.
- Discard: You might discard a move if you're testing, and you don't want to actually move the source resource. Discarding the move returns the resource to a state of Initiate move pending. You can then initiate the move again if needed.
- Commit: Commit completes the move to the target region. After committing, a source resource will be in a state of Delete source pending, and you can decide if you want to delete it.
Discard the move
To discard the move:
Invoke-AzResourceMoverDiscard -ResourceGroupName "RG-MoveCollection-demoRMS" -MoveCollectionName "PS-chinaeast-chinanorth-demoRMS" -MoveResource $('psdemovm111', 'PSDemoRM-vnet','PSDemoVM-nsg', 'PSDemoVM') -MoveResourceInputType "MoveResourceId"
Output
Commit the move
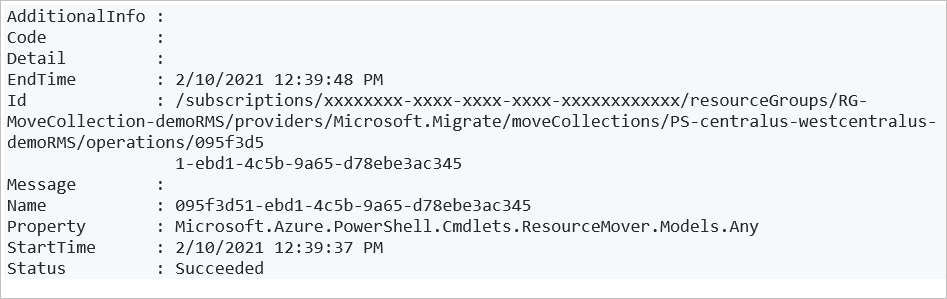
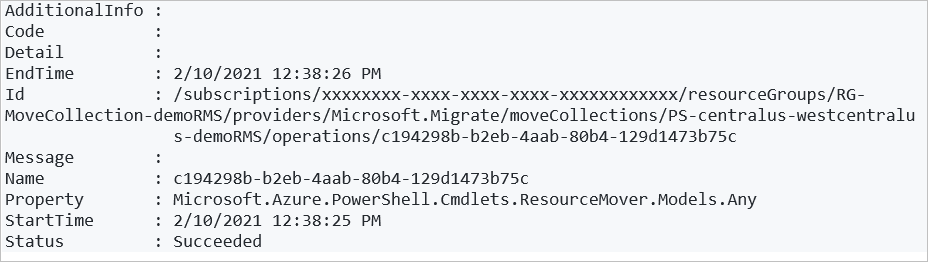
Commit the move as follows:
Invoke-AzResourceMoverCommit -ResourceGroupName "RG-MoveCollection-demoRMS" -MoveCollectionName "PS-chinaeast-chinanorth-demoRMS" -MoveResource $('psdemovm111', 'PSDemoRM-vnet','PSDemoVM-nsg', 'PSDemoVM') -MoveResourceInputType "MoveResourceId"Output
Verify that all resources have moved to the target region:
Get-AzResourceMoverMoveResource -ResourceGroupName "RG-MoveCollection-demoRMS " -MoveCollectionName "PS-chinaeast-chinanorth-demoRMS"All resources are now in a Delete Source Pending state in the target region.
Delete source resources
After committing the move, and verifying that resources work as expected in the target region, you can delete each source resource in the Azure portal, using PowerShell, or using Azure CLI.
Next steps
Learn more about move Azure VMs in the portal.