Note
Access to this page requires authorization. You can try signing in or changing directories.
Access to this page requires authorization. You can try changing directories.
This article describes how to map two instances of Azure virtual networks (VNets) located in different Azure regions, and how to set up IP addressing between networks. Network mapping provides a default behavior for target network selection based on source network at the time of enabling replication.
Prerequisites
Before you map networks, create Azure VNets in the source and target Azure regions.
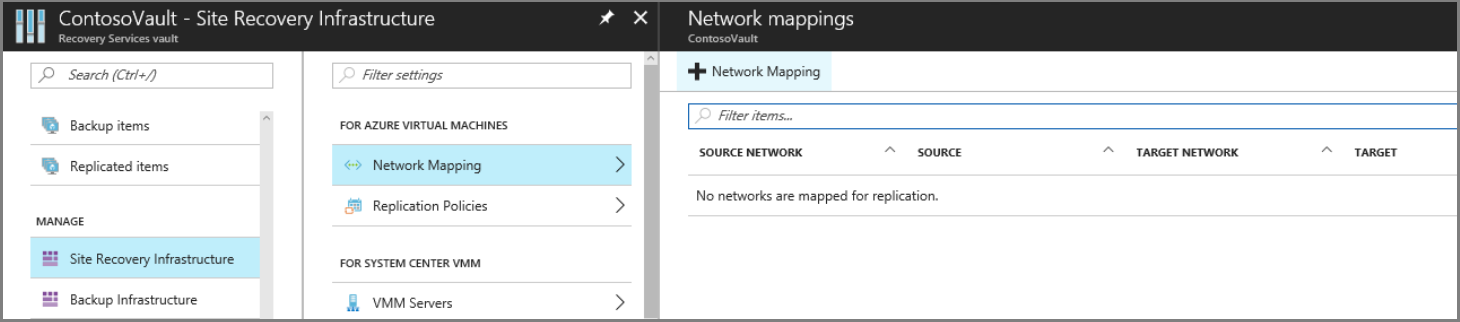
Set up network mapping manually (Optional)
Map networks as follows:
In Site Recovery Infrastructure, select +Network Mapping.
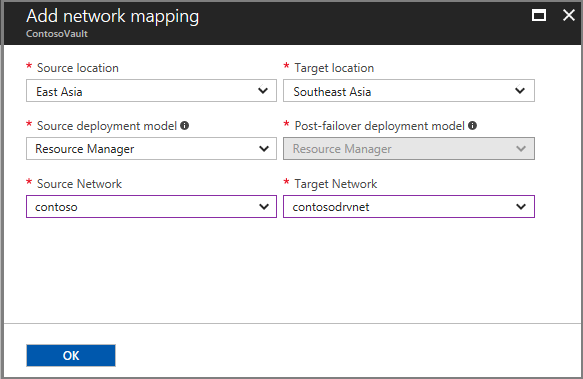
In Add network mapping, select the source and target locations. In our example, the source virtual machine is running in the China East 2 region, and replicates to the China North 3 region.
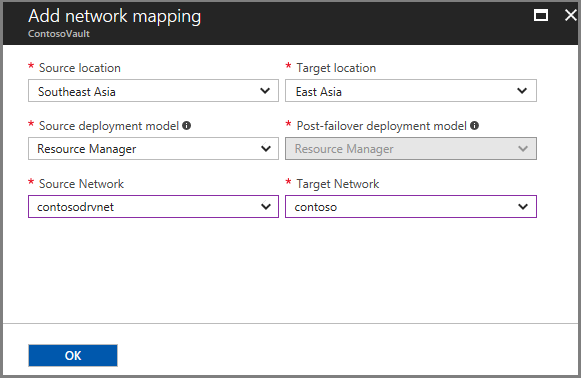
Create a network mapping in the opposite direction. In the following example, the source is now China North 3, and the target is China East 2.


Map networks when you enable replication
If you don't prepare network mapping before you configure disaster recovery for Azure virtual machines, you can specify a target network when you set up and enable replication. When you specify a target network, the following happens:
- Based on the target you select, Site Recovery automatically creates network mappings from the source to target region, and from the target to source region.
- By default, Site Recovery creates a network in the target region that's identical to the source network. Site Recovery adds -asr as a suffix to the name of the target network. You can customize the target network. For example, if the source network name was contoso-vnet, then the target network is named contoso-vnet-asr.
So, if the source network name was "contoso-vnet", the target network name is contoso-vnet-asr. Azure Site Recovery doesn't change the source network name.
- If network mapping already exists for a source network, the mapped target network is always the default at the time of enabling replications for more virtual machines. You can choose to change the target virtual network by choosing other available options from the dropdown.
- To change the default target virtual network for new replications, you need to modify the existing network mapping.
- To modify a network mapping from region A to region B, first delete the network mapping from region B to region A. After reverse mapping deletion, modify the network mapping from region A to region B and then create the relevant reverse mapping.
Note
- Modifying the network mapping changes the defaults for new virtual machine replications. It doesn't impact the target virtual network selections for existing replications.
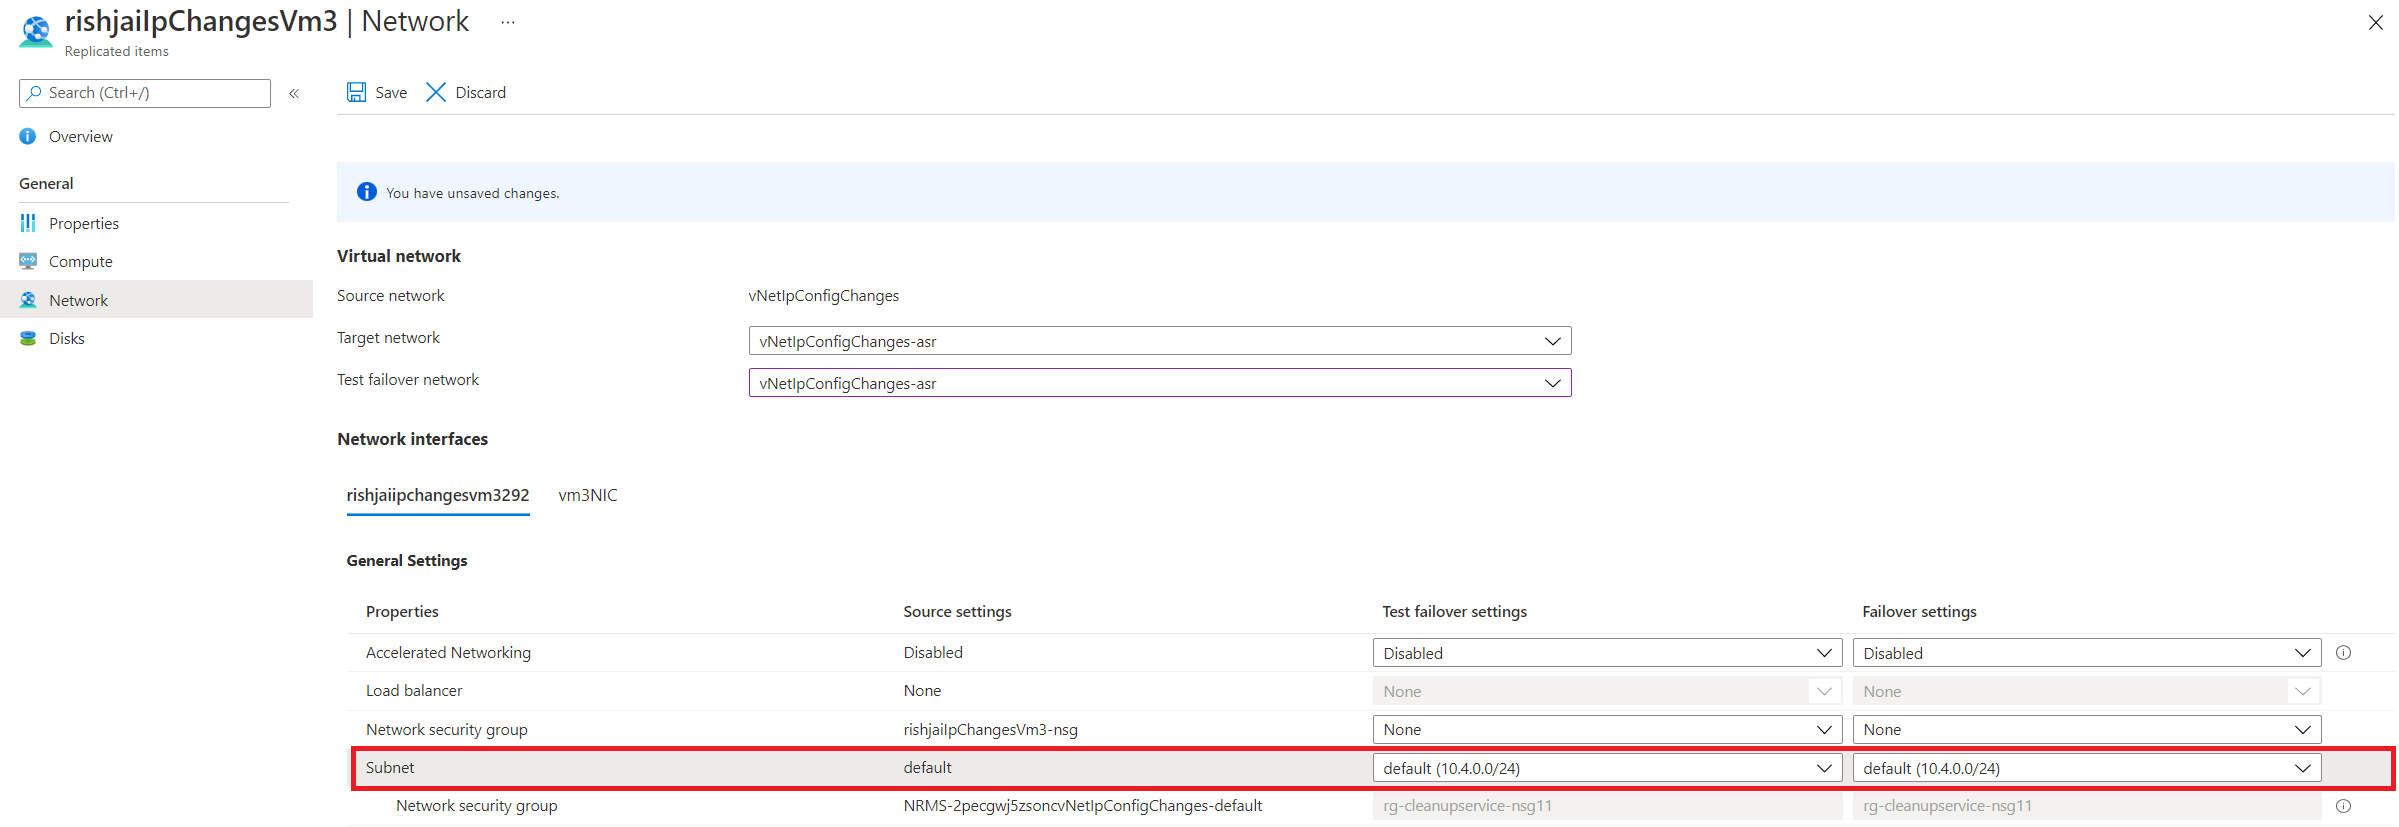
- To modify the target network for an existing replication, go to Network Settings of the replicated item.
Specify a subnet
The subnet of the target virtual machine is selected based on the name of the subnet of the source virtual machine.
If a subnet with the same name as the source virtual machine subnet is available in the target network, that subnet is set for the target virtual machine.
If a subnet with the same name doesn't exist in the target network, the first subnet in the alphabetical order is set as the target subnet.
You can modify the target subnet in the Network settings for the virtual machine.

Set up IP addressing for target virtual machines
Configure the IP address for each NIC on a target virtual machine as follows:
- DHCP: If the NIC of the source virtual machine uses DHCP, set the NIC of the target virtual machine to also use DHCP.
- Static IP address: If the NIC of the source virtual machine uses static IP addressing, the target virtual machine NIC also uses a static IP address.
The same configuration applies to the Secondary IP Configurations.
IP address assignment during failover
Note
The following approach assigns an IP address to the target virtual machine, regardless of the NIC settings.
| Source and target subnets | Details |
|---|---|
| Same address space | Use the IP address of the source virtual machine NIC as the target virtual machine NIC IP address. If the address isn't available, use the next available IP address. |
| Different address space | Use the next available IP address in the target subnet as the target virtual machine NIC address. |
IP address assignment during test failover
| Target network | Details |
|---|---|
| Target network is the failover VNet | - Target IP address is static with the same IP address. - If the same IP address is already assigned, the IP address is the next one available at the end of the subnet range. For example, if the source IP address is 10.0.0.19 and failover network uses range 10.0.0.0/24, the next IP address assigned to the target virtual machine is 10.0.0.254. |
| Target network isn't the failover VNet | - Target IP address is static with the same IP address, only if it's available in the target virtual network. - If the same IP address is already assigned, the IP address is the next one available at the end of the subnet range. For example, if the source static IP address is 10.0.0.19 and failover is on a network that isn't the failover network, with the range 10.0.0.0/24, the target static IP address is 10.0.0.19 if available. Otherwise it is 10.0.0.254. |
- The failover VNet is the target network that you select when you set up disaster recovery.
- Always use a nonproduction network for test failover.
- You can modify the target IP address in the Network settings of the virtual machine.
Next steps
- Review networking guidance for Azure virtual machine disaster recovery.
- Learn more about retaining IP addresses after failover.