Note
Access to this page requires authorization. You can try signing in or changing directories.
Access to this page requires authorization. You can try changing directories.
Applies to: ✔️ SMB file shares
Azure Files supports only one identity source per storage account for identity-based authentication over SMB. If you want to switch from one identity source to another, you must first disable the current identity source and then enable the new one.
For guidance on choosing the right identity source for your environment, see Overview of Azure Files identity-based authentication for SMB access.
Important
Disabling the current identity source removes identity-based access for all file shares in the storage account immediately. Users can't access shares using identity-based authentication until you enable and configure a new identity source.
Step 1: Verify the current identity source
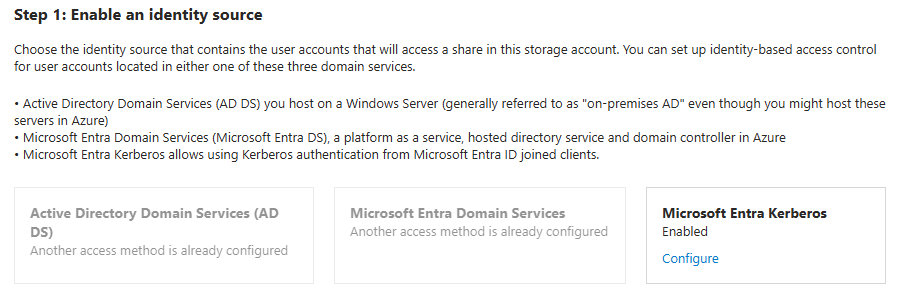
First, verify the identity source that's currently enabled on your storage account. Supported identity sources for SMB Azure file shares are Active Directory Domain Services (AD DS), Microsoft Entra Domain Services, and Microsoft Entra Kerberos.
Sign in to the Azure portal and select the storage account.
From the service menu, under Data storage, select Classic file shares.
Next to Identity-based access, check the configuration status. If it shows Configured, proceed to the next step. If it shows Not configured, then no identity source is enabled on the storage account and you can proceed to Enable a new identity source.
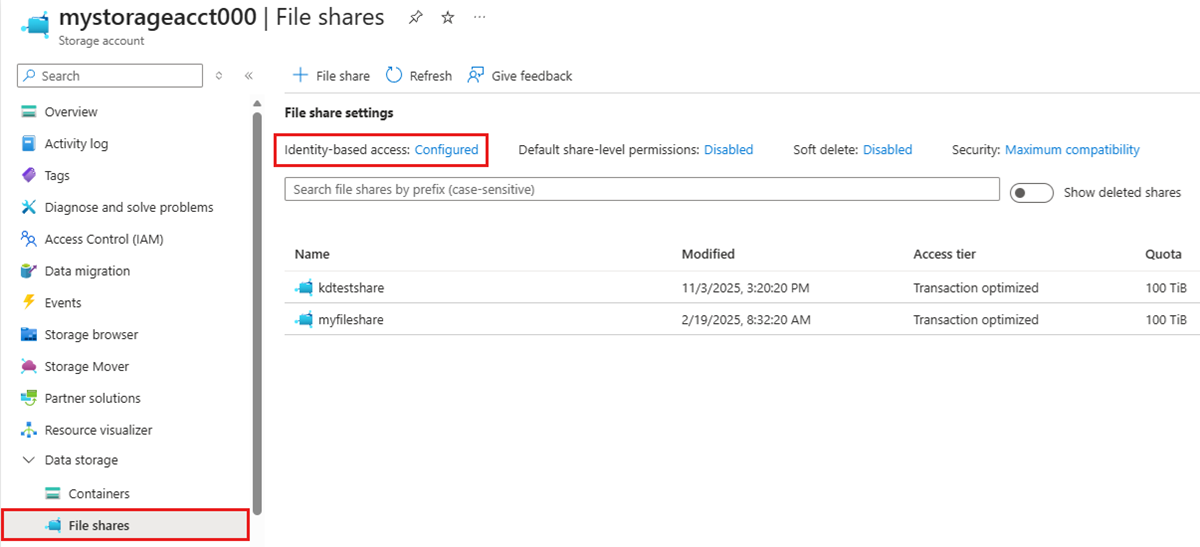
Select Configured.
The portal shows the identity source that's enabled on the storage account and its configuration status. Other identity sources are grayed out. In this example, Microsoft Entra Kerberos is enabled as the identity source for the storage account.


Step 2: Disable the current identity source
Disable your current identity source by using the Azure portal, Azure PowerShell, or Azure CLI.
Active Directory Domain Services (AD DS)
To disable AD DS on the storage account, follow these steps.
- Under Active Directory Domain Services (AD DS), select Configure.
- Select the Disable Active Directory for this storage account checkbox.
- Select Save.
Important
After disabling AD DS authentication, consider deleting the AD DS computer account or service logon account that you created to represent the storage account in your on-premises AD. If you leave the identity in AD DS, it remains as an orphaned object.
Microsoft Entra Domain Services
To disable Microsoft Entra Domain Services on the storage account, follow these steps.
- Under Microsoft Entra Domain Services, select Configure.
- Uncheck the Enable Microsoft Entra Domain Services checkbox.
- Select Save.
Microsoft Entra Kerberos
To disable Microsoft Entra Kerberos on the storage account, follow these steps.
- Under Microsoft Entra Kerberos, select Configure.
- Uncheck the Microsoft Entra Kerberos checkbox.
- Select Save.
Step 3: Enable a new identity source
After disabling the current identity source, follow the instructions for the new identity source you want to enable:
- Active Directory Domain Services (AD DS): See Enable AD DS authentication.
- Microsoft Entra Domain Services: See Enable Microsoft Entra Domain Services authentication.
- Microsoft Entra Kerberos: See Enable Microsoft Entra Kerberos authentication for hybrid and cloud-only identities.