Note
Access to this page requires authorization. You can try signing in or changing directories.
Access to this page requires authorization. You can try changing directories.
Applies to: ✔️ SMB file shares
Azure Files is Microsoft's easy-to-use cloud file system. This article shows you how to mount an SMB Azure file share on Windows and Windows Server.
Ensure port 445 is open
The SMB protocol requires TCP port 445 to be open. Connections fail if port 445 is blocked. To check if your firewall or ISP is blocking port 445, use the Test-NetConnection PowerShell cmdlet. For more information, see Port 445 is blocked.
If you want to mount your Azure file share over SMB from outside of Azure without opening port 445, you can use a point-to-site VPN.
To use an Azure file share via the public endpoint outside of the Azure region it's hosted in, such as on-premises or in a different Azure region, the OS must support SMB 3.x. Older versions of Windows that support only SMB 2.1 can't mount Azure file shares via the public endpoint.
Use identity-based authentication
To improve security and access control, configure identity-based authentication and domain-join your clients. This authentication method allows you to use your Active Directory or Microsoft Entra identity to access the file share rather than using a storage account key.
Before you can mount an Azure file share using identity-based authentication, complete the following steps:
- Configure an identity source for your storage account: either Active Directory Domain Services (AD DS), Microsoft Entra Kerberos, or Microsoft Entra Domain Services.
- Assign share-level permissions and configure directory and file-level permissions. Remember that share-level role assignment can take some time to take effect.
- If you're mounting the file share from a client that previously connected to the file share by using your storage account key, make sure that you first unmount the share and remove the persistent credentials of the storage account key. For instructions on how to remove cached credentials and delete existing SMB connections before initializing a new connection with AD DS or Microsoft Entra credentials, see this process.
- If your identity source is AD DS or Microsoft Entra Kerberos, hybrid clients must have unimpeded network connectivity to your Active Directory. If your machine or VM is outside of the network managed by your Active Directory, you need to enable VPN to reach Active Directory for authentication.
- Sign in to the client by using the credentials of the Active Directory or Entra identity that you granted permissions to.
If you run into problems, see Unable to mount Azure file shares with AD credentials.
Use an Azure file share with Windows
To use an Azure file share with Windows, you must either mount it, which means assigning it a drive letter or mount point path, or access it via its UNC path. Shared access signature (SAS) tokens aren't currently supported for mounting Azure file shares.
Note
A common pattern for lifting and shifting line-of-business (LOB) applications that expect an SMB file share to Azure is to use an Azure file share as an alternative for running a dedicated Windows file server in an Azure virtual machine (VM). One important consideration for successfully migrating an LOB application to use an Azure file share is that many applications run under the context of a dedicated service account with limited system permissions rather than the VM's administrative account. Therefore, you must ensure that you mount and save the credentials for the Azure file share from the context of the service account rather than your administrative account.
Mount the Azure file share
You can mount an SMB Azure file share on Windows by using the Azure portal or Azure PowerShell.
To mount an Azure file share by using the Azure portal, follow these steps:
Sign in to the Azure portal.
Go to the storage account that contains the file share you want to mount.
Select File shares.
Select the file share you want to mount.
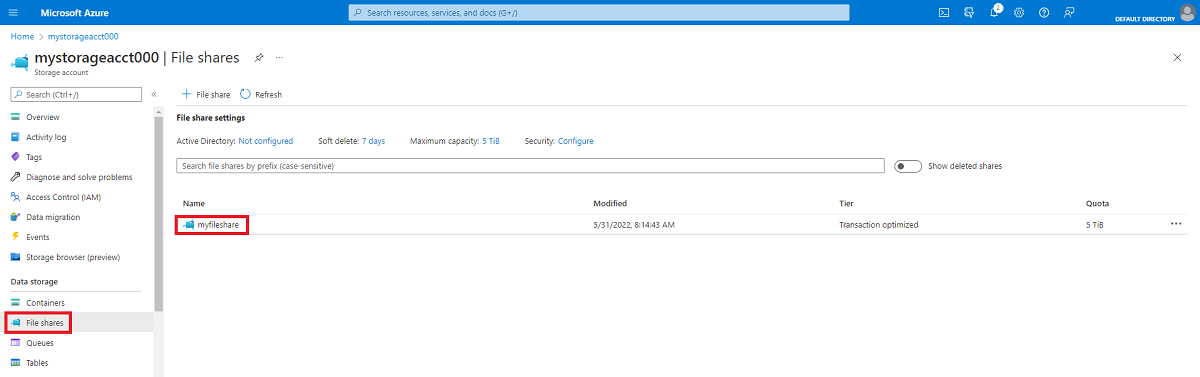
Select Connect.
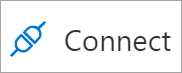
Select the drive letter to mount the share to.
Under Authentication method, select Active Directory or Microsoft Entra. If you see a message that identity-based authentication isn't configured for your storage account, configure it by using one of the methods described in identity-based authentication overview, and try mounting the share again.
Select Show script and then copy the provided script.
Paste the script into a shell on the host where you want to mount the file share, and run it.

You have now mounted your Azure file share.
Mount the Azure file share using the Windows command line
You can also use the net use command from a Windows prompt to mount the file share.
Mount the file share from a domain-joined VM
To mount the file share from a domain-joined VM, run the following command from a Windows command prompt. Replace the placeholder values, including brackets, with your own values.
net use Z: \\<YourStorageAccountName>.file.core.chinacloudapi.cn\<FileShareName>
Mount the file share from a non-domain-joined VM or a VM joined to a different AD domain
If the identity source for your storage account is on-premises AD DS, then non-domain-joined VMs or VMs joined to a different AD domain than the storage account can access Azure file shares if they have unimpeded network connectivity to the AD domain controllers and provide explicit credentials. The user accessing the file share must have an identity and credentials in the AD domain that the storage account is joined to.
If the identity source for your storage account is Microsoft Entra Domain Services, the client must have unimpeded network connectivity to the domain controllers for Microsoft Entra Domain Services, which requires setting up a site-to-site or point-to-site VPN. The user accessing the file share must have an identity (a Microsoft Entra identity synced from Microsoft Entra ID to Microsoft Entra Domain Services) in the Microsoft Entra Domain Services managed domain.
To mount a file share from a non-domain-joined VM, use the notation username@domainFQDN, where domainFQDN is the fully qualified domain name, to allow the client to contact the domain controller to request and receive Kerberos tickets. You can get the value of domainFQDN by running (Get-ADDomain).Dnsroot in Active Directory PowerShell.
For example:
net use Z: \\<YourStorageAccountName>.file.core.chinacloudapi.cn\<FileShareName> /user:<username@domainFQDN>
If the identity source for your storage account is Microsoft Entra Domain services, you can also provide credentials such as DOMAINNAME\username where DOMAINNAME is the Microsoft Entra Domain Services domain and username is the identity's user name in Microsoft Entra Domain Services:
net use Z: \\<YourStorageAccountName>.file.core.chinacloudapi.cn\<FileShareName> /user:<DOMAINNAME\username>
Mount the Azure file share using the storage account key (not recommended)
The Azure portal provides a PowerShell script that you can use to mount your file share directly to a host using the storage account key. However, use identity-based authentication instead of the storage account key for security reasons. If you must use the storage account key, follow the mount instructions, but under Authentication method, select Storage account key.
A storage account key is an administrator key for a storage account, including administrator permissions to all files and folders within the file share you're accessing, and for all file shares and other storage resources (blobs, queues, tables, etc.) contained within your storage account. You can find your storage account key in the Azure portal by navigating to the storage account and selecting Security + networking > Access keys, or you can use the Get-AzStorageAccountKey PowerShell cmdlet.
Mount the Azure file share with File Explorer
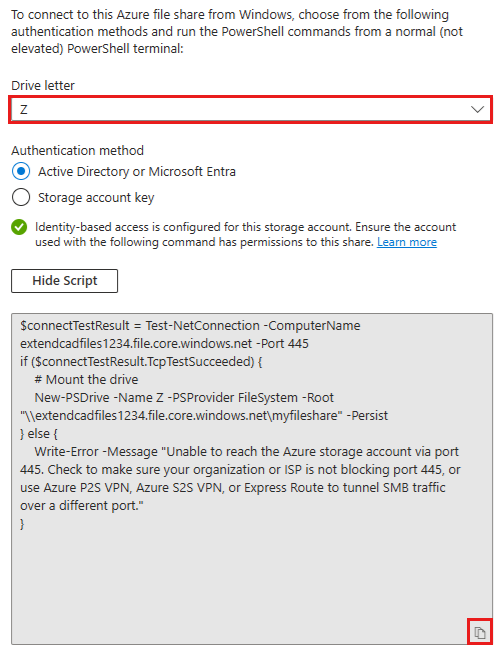
Open File Explorer by opening it from the Start Menu, or by pressing the Win+E shortcut.
Go to This PC on the left side of the window. This action changes the menus available in the ribbon. Under the Computer menu, select Map network drive.
Select the drive letter and enter the UNC path to your Azure file share. The UNC path format is
\\<storageAccountName>.file.core.chinacloudapi.cn\<fileShareName>. For example:\\anexampleaccountname.file.core.chinacloudapi.cn\file-share-name. Check the Connect using different credentials checkbox. Select Finish.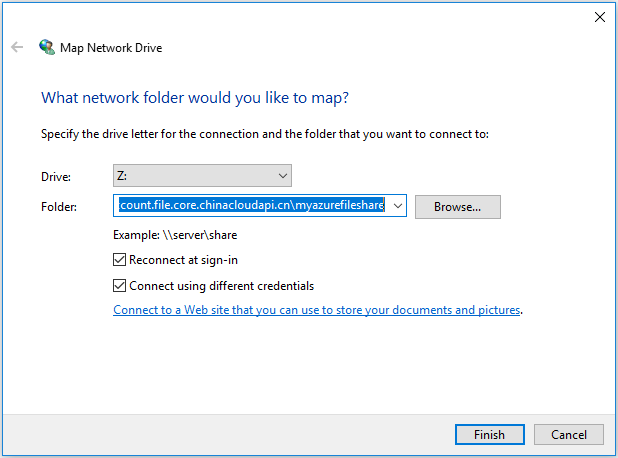
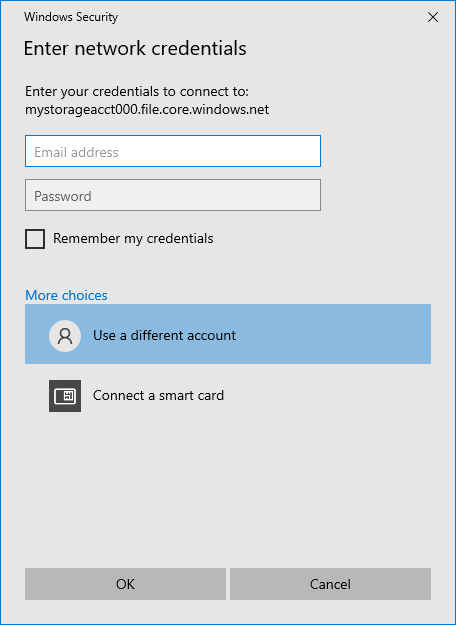
Select More choices > Use a different account. Under Email address, use the storage account name, and use a storage account key as the password. Select OK.
Use Azure file share as desired.
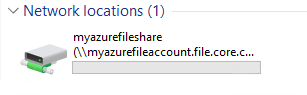
When you're ready to dismount the Azure file share, right-click on the entry for the share under the Network locations in File Explorer and select Disconnect.
Note
Azure Files doesn't support SID to UPN translation for users and groups from a non-domain joined VM or a VM joined to a different domain via Windows File Explorer. If you want to view file/directory owners or view/modify NTFS permissions via Windows File Explorer, you can do so only from domain-joined VMs.
Access an Azure file share via its UNC path
You don't need to mount the Azure file share to a drive letter to use it. You can directly access your Azure file share by using the UNC path. Enter the following path into File Explorer, and be sure to replace storageaccountname with your storage account name and myfileshare with your file share name:
\\storageaccountname.file.core.chinacloudapi.cn\myfileshare
You're prompted to sign in by using your network credentials. Sign in by using the Azure subscription under which you created the storage account and file share. If you're not prompted for credentials, add the credentials by using the following command:
cmdkey /add:StorageAccountName.file.core.chinacloudapi.cn /user:localhost\StorageAccountName /pass:StorageAccountKey
Mount file shares using custom domain names
If you don't want to mount Azure file shares using the suffix file.core.chinacloudapi.cn, you can modify the suffix of the storage account name associated with the Azure file share, and then add a canonical name (CNAME) record to route the new suffix to the endpoint of the storage account. The following instructions are for single-forest AD environments only. To learn how to configure AD environments that have two or more forests, see Use Azure Files with multiple Active Directory forests.
Important
If you use custom domain names with Active Directory Domain Services (AD DS), be sure to upgrade the Kerberos encryption type for your storage account to AES-256.
Note
Azure Files only supports configuring CNAMEs by using the storage account name as a domain prefix. If you don't want to use the storage account name as a prefix, consider using DFS namespaces.
In this example, you have the Active Directory domain onpremad1.com, and you have a storage account called mystorageaccount which contains SMB Azure file shares. First, modify the SPN suffix of the storage account to map mystorageaccount.onpremad1.com to mystorageaccount.file.core.chinacloudapi.cn.
You can mount the file share by using net use \\mystorageaccount.onpremad1.com because clients in onpremad1 know to search onpremad1.com to find the proper resource for that storage account.
To use this method, complete the following steps:
Configure identity-based authentication for your storage account. If you're authenticating hybrid identities, you must sync your AD user accounts to Microsoft Entra ID.
Modify the SPN of the storage account by using the
setspntool. You can find<DomainDnsRoot>by running the following Active Directory PowerShell command:(Get-AdDomain).DnsRootsetspn -s cifs/<storage-account-name>.<DomainDnsRoot> <storage-account-name>Add a CNAME entry by using Active Directory DNS Manager. If you're using a private endpoint, add the CNAME entry to map to the private endpoint name.
- Open Active Directory DNS Manager.
- Go to your domain (for example, onpremad1.com).
- Go to "Forward Lookup Zones".
- Select the node named after your domain (for example, onpremad1.com) and right-click New Alias (CNAME).
- For the alias name, enter your storage account name.
- For the fully qualified domain name (FQDN), enter
<storage-account-name>.<domain-name>, such as mystorageaccount.onpremad1.com. The hostname part of the FQDN must match the storage account name. If the hostname doesn't match the storage account name, the mount fails with an access denied error. - For the target host FQDN, enter
<storage-account-name>.file.core.chinacloudapi.cn - Select OK.
You can now mount the file share by using storageaccount.domainname.com.
Next steps
For more information, see the following articles: