Note
Access to this page requires authorization. You can try signing in or changing directories.
Access to this page requires authorization. You can try changing directories.
Applies to: ✔️ Linux VMs ✔️ Windows VMs ✔️ Flexible scale sets
Note
This article focuses on how to change performance tiers. To learn how to change the performance of disks that don't use performance tiers, like Ultra Disks or Premium SSD v2, see either Adjust the performance of an Ultra Disk or Adjust disk performance of a Premium SSD v2.
The performance of your Azure managed disk is set when you create your disk, in the form of its performance tier. The performance tier determines the IOPS and throughput your managed disk has. When you set the provisioned size of your disk, a performance tier is automatically selected. You can change the performance tier at deployment or afterwards, without changing the size of the disk and without downtime. To learn more about performance tiers, see Performance tiers for managed disks.
Changing your performance tier has billing implications. See Billing impact for details.
Restrictions
- Changing the performance tier is currently only supported for Premium SSD managed disks.
- Performance tiers of shared disks can't be changed while attached to running VMs.
- To change the performance tier of a shared disk, stop all the VMs the disk is attached to.
- Only disks larger than 4,096 GiB can use the P60, P70, and P80 performance tiers.
- A disk's performance tier can be downgraded only once every 12 hours.
- The system doesn't return
Performance Tierfor disks created before June 2020. You can take advantage ofPerformance Tierfor an older disk by updating it with the baseline Tier. - You can't set a disk's performance tier to a tier below its baseline tier.
Caution
If you use Terraform to change the performance tier while a VM is running, Terraform shuts down your VM and attempts to restart it after the process is completed. Changing the performance tier with other methods avoids this.
Prerequisites
Install the latest Azure CLI and sign in to an Azure account with az login.
Note
Before you can use Azure CLI in Microsoft Azure operated by 21Vianet, please run az cloud set -n AzureChinaCloud first to change the cloud environment. If you want to switch back to Azure Public Cloud, run az cloud set -n AzureCloud again.
Create an empty data disk with a tier higher than the baseline tier
Performance tiers apply only to Premium SSD managed disks. Select a tier at or above the baseline tier for the disk size. The P60, P70, and P80 tiers require a disk larger than 4,096 GiB.
Use the az disk create command to create an empty Premium SSD data disk with the specified performance tier.
subscriptionId=<yourSubscriptionIDHere>
resourceGroupName=<yourResourceGroupNameHere>
diskName=<yourDiskNameHere>
diskSize=<yourDiskSizeHere>
performanceTier=<yourDesiredPerformanceTier>
region=chinaeast2

az account set --subscription $subscriptionId

az disk create -n $diskName -g $resourceGroupName -l $region --sku Premium_LRS --size-gb $diskSize --tier $performanceTier
Use az disk show to confirm that the tier value matches $performanceTier.
az disk show -n $diskName -g $resourceGroupName --query tier -o tsv
Create an OS disk with a tier higher than the baseline tier from an Azure Marketplace image
Select a tier at or above the baseline tier for the OS disk size. The following example creates an OS disk from an Azure Marketplace image by using az disk create.
resourceGroupName=<yourResourceGroupNameHere>
diskName=<yourDiskNameHere>
performanceTier=<yourDesiredPerformanceTier>
region=chinaeast2
image=Canonical:UbuntuServer:18.04-LTS:18.04.202002180

az disk create -n $diskName -g $resourceGroupName -l $region --image-reference $image --sku Premium_LRS --tier $performanceTier
Use az disk show to confirm that the tier value matches $performanceTier.
az disk show -n $diskName -g $resourceGroupName --query tier -o tsv
Update the tier of a disk without downtime
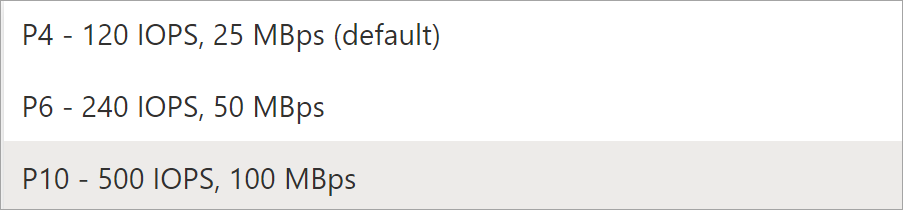
You can change the performance tier of a Premium SSD managed disk without deallocating the VM or detaching the disk. For a shared disk, stop all attached VMs before changing the tier. You can't select a tier that's lower than the disk's baseline tier. You can downgrade the tier only once every 12 hours.
Use the az disk update command to update the tier of a disk, even when the disk is attached to a running VM.
resourceGroupName=<yourResourceGroupNameHere>
diskName=<yourDiskNameHere>
performanceTier=<yourDesiredPerformanceTier>

az disk update -n $diskName -g $resourceGroupName --set tier=$performanceTier
Use az disk show to confirm that the
tiervalue matches$performanceTier.az disk show -n $diskName -g $resourceGroupName --query tier -o tsv
Show the tier of a disk
Use the az disk show command to return the current performance tier.
resourceGroupName=<yourResourceGroupNameHere>
diskName=<yourDiskNameHere>

az disk show -n $diskName -g $resourceGroupName --query tier -o tsv
Next steps
If you need to resize a disk to take advantage of the higher performance tiers, see these articles: