Note
Access to this page requires authorization. You can try signing in or changing directories.
Access to this page requires authorization. You can try changing directories.
Azure virtual machines (VMs) use disks to store operating systems (OS), applications, and data. When you create a VM, it's important to choose an appropriate disk size and configuration for the expected workload.
This tutorial covers deployment and management of VM disks. In this tutorial, you learn how to:
- Create, attach, and initialize a data disk
- Verify a disk's status
- Expand and upgrade a disk
- Detach and delete a disk
Prerequisites
You must have an Azure account with an active subscription. If you don't have an Azure subscription, create a trial subscription before you begin.
Create a VM
The exercises in this tutorial require a VM. Follow the steps in this section to create one.
Before you begin, find the $azRegion variable located in the first line of sample code and update the value to reflect your desired region. For example, to specify the China North 2 region, use $azRegion = "China North 2". Next, use the code to deploy a VM within a new resource group. You're prompted for username and password values for the VM's local administrator account.
$azRegion = "[Your Region]"
$azResourceGroup = "myDemoResourceGroup"
$azVMName = "myDemoVM"
$azDataDiskName = "myDemoDataDisk"

New-AzVm `
    -Location $azRegion `
    -ResourceGroupName $azResourceGroup `
    -Name $azVMName `
    -Size "Standard_D2s_v3" `
    -VirtualNetworkName "myDemoVnet" `
    -SubnetName "myDemoSubnet" `
    -SecurityGroupName "myDemoNetworkSecurityGroup" `
    -PublicIpAddressName "myDemoPublicIpAddress"
The output confirms the VM's successful creation.
ResourceGroupName        : myDemoResourceGroup
Id                       : /subscriptions/{GUID}/resourceGroups/myDemoResourceGroup/providers/Microsoft.Compute/virtualMachines/myDemoTestVM
VmId                     : [{GUID}]
Name                     : myDemoVM
Type                     : Microsoft.Compute/virtualMachines
Location                 : chinanorth2
Tags                     : {}
HardwareProfile          : {VmSize}
NetworkProfile           : {NetworkInterfaces}
OSProfile                : {ComputerName, AdminUsername, WindowsConfiguration, AllowExtensionOperations, RequireGuestProvisionSignal}
ProvisioningState        : Succeeded
StorageProfile           : {ImageReference, OsDisk, DataDisks}
FullyQualifiedDomainName : mydemovm-abc123.chinanorth2.cloudapp.chinacloudapi.cn
The VM is provisioned, and two disks are automatically created and attached.
- An operating system disk, which hosts the virtual machine's operating system.
- A temporary disk, which is primarily used for operations such as temporary data processing.
Add a data disk
We recommend that you separate application and user data from OS-related data when possible. If you need to store user or application data on your VM, you'll typically create and attach additional data disks.
This procedure requires an existing VM and uses the $azRegion, $azResourceGroup, $azVMName, and $azDataDiskName variables defined in Create a VM.
Follow the steps in this section to create, attach, and initialize a data disk on the VM.
Create the data disk
In this section, you create a managed data disk by using the $azRegion, $azResourceGroup, and $azDataDiskName variables defined in Create a VM.
Before a data disk can be created, you must first create a disk object. The following code sample uses the New-AzDiskConfig cmdlet to configure a disk object.
$diskConfig = New-AzDiskConfig `
    -Location $azRegion `
    -CreateOption Empty `
    -DiskSizeGB 128 `
    -SkuName "Standard_LRS"
After the disk object is created, use the New-AzDisk cmdlet to provision a data disk.
$dataDisk = New-AzDisk `
    -ResourceGroupName $azResourceGroup `
    -DiskName $azDataDiskName `
    -Disk $diskConfig
You can use the Get-AzDisk cmdlet to verify that the disk was created.
Get-AzDisk `
    -ResourceGroupName $azResourceGroup `
    -DiskName $azDataDiskName
In this example, the output confirms that the disk was created. The
DiskStateandManagedByproperty values confirm that the disk is not yet attached.ResourceGroupName : myDemoResourceGroup ManagedBy : ManagedByExtended : {} OsType : DiskSizeGB : 128 DiskSizeBytes : 137438953472 ProvisioningState : Succeeded DiskIOPSReadWrite : 500 DiskMBpsReadWrite : 60 DiskState : Unattached Name : myDemoDataDisk
Attach the data disk
A data disk must be attached to a VM before the VM can access it. Complete the steps in this section to create a reference for the VM, connect the disk, and update the VM's configuration.
This section uses the $azResourceGroup, $azVMName, and $azDataDiskName variables and the unattached managed disk referenced by $dataDisk in Create the data disk.
Get the VM to which you'll attach the data disk. The following sample code uses the Get-AzVM cmdlet to create a reference to the VM.
$vm = Get-AzVM `
    -ResourceGroupName $azResourceGroup `
    -Name $azVMName
Next, attach the data disk to the VM's configuration with the Add-AzVMDataDisk cmdlet.
$vm = Add-AzVMDataDisk `
    -VM $vm `
    -Name $azDataDiskName `
    -CreateOption Attach `
    -ManagedDiskId $dataDisk.Id `
    -Lun 1
Finally, update the VM's configuration with the Update-AzVM cmdlet.
Update-AzVM `
    -ResourceGroupName $azResourceGroup `
    -VM $vm
After a brief pause, the output confirms a successful attachment.
RequestId IsSuccessStatusCode StatusCode ReasonPhrase
--------- ------------------- ---------- ------------
                         True         OK OK
Initialize the data disk
After a data disk is attached to the VM, the OS needs to be configured to use the disk. The following section provides guidance on how to connect to the remote VM and configure the first disk added.
This section requires local administrator access to the VM named by $azVMName and the attached, uninitialized data disk from Attach the data disk.
Sign in to the Azure portal.
Locate the VM to which you've attached the data disk. Create a Remote Desktop Protocol (RDP) connection and sign in as the local administrator.
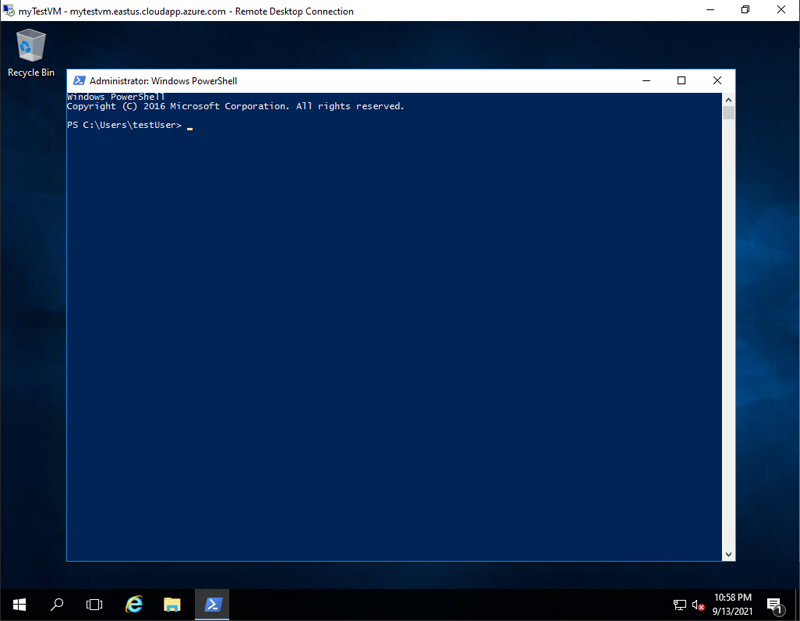
After you establish an RDP connection to the remote VM, select the Windows Start menu. Enter PowerShell in the search box and select Windows PowerShell to open a PowerShell window.
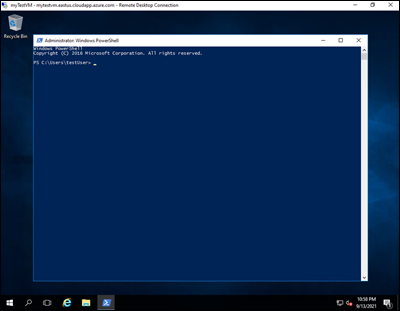
In the open PowerShell window, run the following script.
Get-Disk | Where PartitionStyle -eq 'raw' |
    Initialize-Disk -PartitionStyle MBR -PassThru |
    New-Partition -AssignDriveLetter -UseMaximumSize |
    Format-Volume -FileSystem NTFS -NewFileSystemLabel "myDemoDataDisk" -Confirm:$false
The output confirms a successful initialization.
DriveLetter FileSystemLabel FileSystem DriveType HealthStatus OperationalStatus SizeRemaining   Size
----------- --------------- ---------- --------- ------------ ----------------- -------------   ----
F           myDemoDataDisk  NTFS       Fixed     Healthy      OK                    127.89 GB 128 GB
Expand a disk
You can expand an Azure managed OS disk or data disk when your VM needs more storage capacity.
This procedure requires an existing VM with an attached managed OS disk or data disk and uses the $azResourceGroup and $azVMName variables defined in Create a VM.
Some scenarios require data to be stored on the OS disk. For example, you might need to support legacy applications that install components on the OS drive. You might also need to migrate an on-premises physical PC or VM with a larger OS drive. In these cases, you might need to expand a VM's OS disk.
Update the disk's size
Follow the steps below to resize either the OS disk or a data disk.
Important
If your disk meets the requirements in Expand without downtime, you can skip steps 2 and 6.
Shrinking an existing disk isn’t supported and may result in data loss.
After expanding the disks, you need to expand the volume in the operating system to take advantage of the larger disk.
Select the VM that contains the disk that you'll resize with the
Get-AzVMcmdlet.$vm = Get-AzVM ` -ResourceGroupName $azResourceGroup ` -Name $azVMNameBefore you can resize a VM disk, you must stop the VM. Use the Stop-AzVM cmdlet to stop the VM. You're prompted for confirmation.
Important
Before you initiate a VM shutdown, always confirm that there are no important resources or data that could be lost.
Stop-AzVM `
    -ResourceGroupName $azResourceGroup `
    -Name $azVMName
After a short pause, the output confirms that the machine is successfully stopped.
OperationId : abcd1234-ab12-cd34-123456abcdef
Status      : Succeeded
StartTime   : 9/13/2021 7:10:23 PM
EndTime     : 9/13/2021 7:11:12 PM
Error       :
After the VM is stopped, get a reference to either the OS or data disk attached to the VM with the
Get-AzDiskcmdlet.The following example selects the VM's OS disk.
$disk= Get-AzDisk `
    -ResourceGroupName $azResourceGroup `
    -DiskName $vm.StorageProfile.OsDisk.Name
The following example selects the VM's first data disk.
    $disk= Get-AzDisk `
        -ResourceGroupName $azResourceGroup `
        -DiskName $vm.StorageProfile.DataDisks[0].Name
Now that you have a reference to the disk, set the size of the disk to 250 GiB.
Important
The new size should be greater than the existing disk size. The maximum allowed is 4,095 GiB for OS disks.
$disk.DiskSizeGB = 250Next, update the managed disk by using the Update-AzDisk cmdlet.
Update-AzDisk `
    -ResourceGroupName $azResourceGroup `
    -Disk $disk -DiskName $disk.Name
The managed disk is updated, and the output confirms the disk's new size.
ResourceGroupName            : myDemoResourceGroup
ManagedBy                    : /subscriptions/{GUID}/resourceGroups/myDemoResourceGroup/providers/Microsoft.Compute/virtualMachines/myDemoVM
Sku                          : Microsoft.Azure.Management.Compute.Models.DiskSku
TimeCreated                  : 9/135/2021 6:41:10 PM
CreationData                 : Microsoft.Azure.Management.Compute.Models.CreationData
DiskSizeGB                   : 250
DiskSizeBytes                : 268435456000
UniqueId                     : {GUID}
ProvisioningState            : Succeeded
DiskIOPSReadWrite            : 500
DiskMBpsReadWrite            : 60
DiskState                    : Reserved
Encryption                   : Microsoft.Azure.Management.Compute.Models.Encryption
Id                           : /subscriptions/{GUID}/resourceGroups/myDemoResourceGroup/providers/Microsoft.Compute/disks/myDemoDataDisk
Name                         : myDemoDataDisk
Type                         : Microsoft.Compute/disks
Location                     : chinanorth2
Finally, restart the VM by using the Start-AzVM cmdlet.
Start-AzVM `
    -ResourceGroupName $azResourceGroup `
    -Name $azVMName
After a short pause, the output confirms that the machine is successfully started.
OperationId : abcd1234-ab12-cd34-123456abcdef
Status      : Succeeded
StartTime   : 9/13/2021 7:44:54 PM
EndTime     : 9/13/2021 7:45:15 PM
Error       :
Expand the disk volume in the OS
Before you can take advantage of the new disk size, you need to expand the volume within the OS. Follow the steps below to expand the disk volume and take advantage of the new disk size.
Sign in to the Azure portal.
Locate the VM that has the expanded OS disk or data disk. Create a Remote Desktop Protocol (RDP) connection and sign in. If you no longer have access to an administrative account, create a credential object for a specified user name and password by using the Get-Credential cmdlet.
After you've established an RDP connection to the remote VM, select the Windows Start menu. Enter PowerShell in the search box and select Windows PowerShell to open a PowerShell window.
Open PowerShell and run the following script. Change the value of the
-DriveLettervariable as appropriate. For example, to resize the partition on the F: drive, use$driveLetter = "F".$driveLetter = "[Drive Letter]" $size = (Get-PartitionSupportedSize -DriveLetter $driveLetter) Resize-Partition ` -DriveLetter $driveLetter ` -Size $size.SizeMaxIn the PowerShell window on the remote VM, use the Get-Volume cmdlet to verify that the volume was expanded successfully.
Get-Volume -DriveLetter $driveLetterConfirm that the
Sizevalue reflects the expanded volume size.
Upgrade a disk
There are several ways to respond to changes in your organization's workloads. For example, you may choose to upgrade a Standard HDD to a Premium SSD to handle increased demand.
This procedure requires an existing VM with an attached Standard HDD or Standard SSD. It uses the $azResourceGroup and $azVMName variables that you define in Create a VM.
Follow the steps in this section to upgrade a managed disk from standard to premium.
Select the VM that contains the disk that you'll upgrade with the
Get-AzVMcmdlet.$vm = Get-AzVM ` -ResourceGroupName $azResourceGroup ` -Name $azVMNameBefore you can upgrade a VM's disk, you must stop the VM. Use the
Stop-AzVMcmdlet to stop the VM. You'll be prompted for confirmation.Important
Before you initiate a VM shutdown, always confirm that there are no important resources or data that could be lost.
Stop-AzVM `
    -ResourceGroupName $azResourceGroup `
    -Name $azVMName
After a short pause, the output confirms that the machine is successfully stopped.
OperationId : abcd1234-ab12-cd34-123456abcdef
Status      : Succeeded
StartTime   : 9/13/2021 7:10:23 PM
EndTime     : 9/13/2021 7:11:12 PM
Error       :
After the VM is stopped, get a reference to either the OS or data disk attached to the VM with the
Get-AzDiskcmdlet.The following example selects the VM's OS disk.
$disk= Get-AzDisk `
    -ResourceGroupName $azResourceGroup `
    -DiskName $vm.StorageProfile.OsDisk.Name
The following example selects the VM's first data disk.
    $disk= Get-AzDisk `
        -ResourceGroupName $azResourceGroup `
        -DiskName $vm.StorageProfile.DataDisks[0].Name
Now that you have a reference to the disk, set the disk's SKU to Premium_LRS.
$disk.Sku = [Microsoft.Azure.Management.Compute.Models.DiskSku]::new('Premium_LRS')Next, update the managed disk by using the
Update-AzDiskcmdlet.Update-AzDisk ` -ResourceGroupName $azResourceGroup ` -Disk $disk -DiskName $disk.NameThe managed disk is updated. Use the following example code to validate that the disk's SKU is upgraded.
$disk.Sku.NameThe output confirms the disk's new SKU.
Premium_LRSFinally, restart the VM with the
Start-AzVMcmdlet.Start-AzVM ` -ResourceGroupName $azResourceGroup ` -Name $azVMNameAfter a short pause, the output confirms that the machine is successfully started.
OperationId : abcd1234-ab12-cd34-123456abcdef
Status      : Succeeded
StartTime   : 9/13/2021 7:44:54 PM
EndTime     : 9/13/2021 7:45:15 PM
Error       :
Detach a data disk
You can detach a data disk from a VM when you want to attach it to a different VM, or when it's no longer needed. By default, detached disks are not deleted to prevent unintentional data loss. A detached disk will continue to incur storage charges until it's deleted.
This procedure requires an existing VM with an attached data disk and uses the $azResourceGroup, $azVMName, and $azDataDiskName variables defined in Create a VM.
First, select the VM to which the disk is attached with the
Get-AzVMcmdlet.$vm = Get-AzVM ` -ResourceGroupName $azResourceGroup ` -Name $azVMNameNext, detach the disk from the VM by using the Remove-AzVMDataDisk cmdlet.
Remove-AzVMDataDisk `
    -VM $vm `
    -Name $azDataDiskName
Update the state of the VM with the
Update-AzVMcmdlet to remove the data disk.Update-AzVM ` -ResourceGroupName $azResourceGroup ` -VM $vmAfter a short pause, the output confirms that the VM is successfully updated.
RequestId IsSuccessStatusCode StatusCode ReasonPhrase
--------- ------------------- ---------- ------------
                         True         OK OK
Delete a data disk
When you delete a VM, data disks attached to the VM remain provisioned and continue to incur charges until they're deleted. This default behavior helps prevent data loss caused by unintentional deletion.
This procedure requires an unattached data disk and uses the $azResourceGroup and $azDataDiskName variables defined in Create a VM.
The following PowerShell script uses the Get-AzDisk cmdlet to retrieve the data disk named by $azDataDiskName. The script confirms that the disk is unattached before using the Remove-AzDisk cmdlet to delete it.
$dataDisk = Get-AzDisk `
    -ResourceGroupName $azResourceGroup `
    -DiskName $azDataDiskName `
    -ErrorAction Stop

if ($null -ne $dataDisk.ManagedBy) {
    throw "Disk $($dataDisk.Name) is still attached. Detach it before deletion."
}

$confirm = Read-Host "Delete unattached disk $($dataDisk.Name)? (Y/N)"
if ($confirm.ToUpperInvariant() -eq 'Y') {
    Remove-AzDisk `
        -ResourceGroupName $azResourceGroup `
        -DiskName $dataDisk.Name `
        -Force
    Write-Host "Unattached disk $($dataDisk.Name) deleted."
}
The unattached data disk is deleted as shown by the output.
Name      : abcd1234-ab12-cd34-ef56-abcdef123456
StartTime : 9/13/2021 10:14:05 AM
EndTime   : 9/13/2021 10:14:35 AM
Status    : Succeeded
Error     :
Clean up resources
When you no longer need the resources, delete the resource group, VM, and all related resources. Use the Remove-AzResourceGroup cmdlet to delete the resource group you created earlier in this tutorial.
Caution
Use caution when deleting a resource group. To avoid the loss of important data, always confirm that there are no important resources or data contained within the resource group before it is deleted.
Remove-AzResourceGroup -Name $azResourceGroup
You're prompted for confirmation. After a short pause, the True response confirms that the myDemoResourceGroup is successfully deleted.
Confirm
Are you sure you want to remove resource group 'myDemoResourceGroup'
[Y] Yes  [N] No  [S] Suspend  [?] Help (default is "Y"): Y
True
Next steps
In this tutorial, you learned how to:
- Create, attach, and initialize a data disk
- Verify a disk's status
- Expand and upgrade a disk
- Detach and delete a disk
Advance to the next tutorial to learn how to automate VM configuration.