Note
Access to this page requires authorization. You can try signing in or changing directories.
Access to this page requires authorization. You can try changing directories.
Azure NAT Gateway resources enable outbound Internet connections from subnets in a virtual network. Resources deployed in the NAT gateway virtual network subnet must be the standard SKU. Deployment of a NAT gateway to a virtual network subnet with basic SKU resources is unsupported.
NAT gateway enables Source Network Address Translation (SNAT) connections from resources using the NAT gateway. NAT gateway supports standard SKU public IP addresses and public IP prefixes. Any combination is supported, though the number of IPs given can't exceed 16. Adding IP addresses or an IP prefix scales SNAT connections from resources using the NAT gateway.
In this article, you learn how to:
- Create a NAT gateway using an existing public IP address in your subscription.
- Change the current public IP address associated to a NAT gateway.
- Change the outbound IP configuration from a public IP address to a public IP prefix.
Prerequisites
- An Azure account with an active subscription. Create a trial subscription.
- Two standard SKU public IP addresses in your subscription. The IP addresses can't be associated with any resources. For more information on creating a standard SKU public IP address, see Create a public IP address using the Azure portal.
- For the purposes of the examples in this article, name the new public IP addresses myStandardPublicIP-1 and myStandardPublicIP-2.
- A public IP prefix in your subscription. For more information on creating a public IP prefix, see Create a public IP address prefix using the Azure portal.
- For the purposes of the example in this article, name the new public IP prefix myPublicIPPrefixNAT.
Create NAT gateway using existing public IP
In this section, you create a NAT gateway resource. You select the IP address you created in the prerequisites as the public IP for the NAT gateway.
Sign in to the Azure portal.
In the search box at the top of the portal, enter NAT gateway.
In the search results, select NAT gateways.
Select + Create.
In Create network address translation (NAT) gateway, enter or select the following information.
Setting Value Project details Subscription Select your subscription. Resource group Select Create new.
Enter myResourceGroupNAT.
Select OK.Instance details Name Enter myNATgateway. Region Select China North 2. Availability zone Leave the default of No Zone. Idle timeout Leave the default of 4. Select the Outbound IP tab, or select Next: Outbound IP.
Select myStandardPublicIP-1 for Public IP addresses in the Outbound IP tab.
Select the Review + create tab, or select the blue Review + create button.
Select Create.
Note
This is a simple deployment of a NAT gateway. For advanced configuration and setup, see Quickstart: Create a NAT gateway using the Azure portal
For more information on Azure Virtual Network NAT, see What is Azure Virtual Network NAT?
Change or remove public IP address
In this section, you change the IP address of the NAT gateway.
To change the IP, you associate a new public IP address created previously with the NAT gateway. A NAT gateway must have at least one IP address assigned.
Sign in to the Azure portal.
In the search box at the top of the portal, enter NAT gateway.
In the search results, select NAT gateways.
In NAT gateways, select myNATgateway or the NAT gateway you wish to change.
In settings of myNATgateway, select Outbound IP.
Select Change next to Public IP addresses in Outbound IP.
You can choose to replace the current IP address or add the existing address. In Manage public IP addresses and prefixes next to Public IP addresses, select myStandardPublicIP-2.
Select OK.
Verify myStandardPublicIP-2 was added to the public IP addresses. You can delete the IP address already assigned by selecting the trash can if needed.
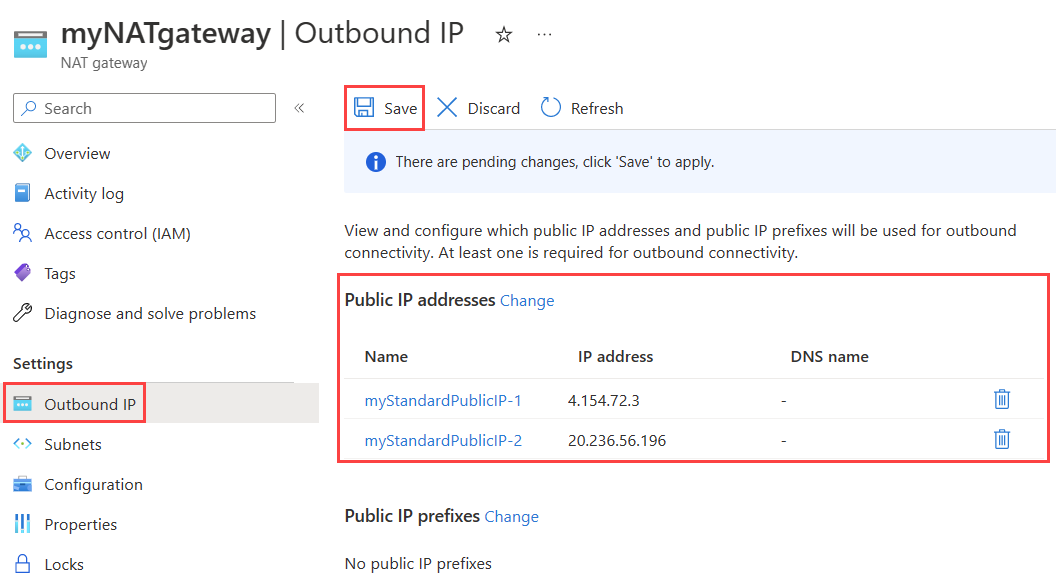
Select Save.
Add public IP prefix
Public IP prefixes extend the extensibility of SNAT for outbound connections from the NAT gateway. A public IP prefix avoids SNAT port exhaustion. Each IP provides 64,512 ephemeral ports to NAT gateway for connecting outbound.
Note
When assigning a public IP prefix to a NAT gateway, the entire range is used.
In this section, you change the outbound IP configuration to use a public IP prefix you created previously.
Note
You can choose to remove the single IP address associated with the NAT gateway and reuse, or leave it associated to the NAT gateway to increase the outbound SNAT ports. NAT gateway supports a combination of public IPs and prefixes in the outbound IP configuration. If you created a public IP prefix with 16 addresses, remove the single public IP. The number of allocated IPs can't exceed 16.
Sign in to the Azure portal.
In the search box at the top of the portal, enter NAT gateway.
In the search results, select NAT gateways.
In NAT gateways, select myNATgateway or the NAT gateway you wish to change.
In settings of myNATgateway, select Outbound IP.
Select Change next to Public IP prefixes in Outbound IP.
Select myPublicIPPrefixNAT or your prefix.
Select OK.
Verify myPublicIPPrefixNAT was added to the public IP prefixes.
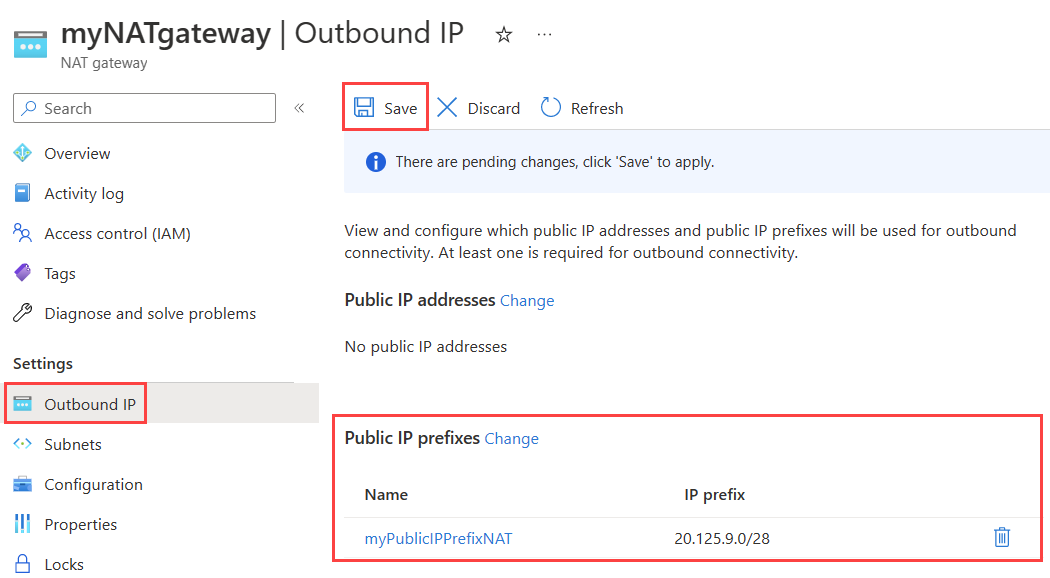
Select Save.
More information
When deploying virtual machines in a virtual network with a NAT gateway, all ingress traffic addressed to the NAT gateway egresses through the NAT gateway. When using a NAT Gateway with a standard public load balancer, all ingress traffic addressed to the NAT gateway public IP address or addresses will egress through the NAT Gateway.
Note
Any outbound configuration from a load-balancing rule or outbound rules is superseded by NAT gateway. Members of the load balancer backend pool would also use the NAT gateway for outbound connections. For more information, see Design virtual networks with NAT gateway.
NAT gateways and public IP addresses can have a TCP timeout value assigned for how long to keep a connection open before hearing keepalives. If a public IP is assigned to a NAT Gateway, the timeout value on the IP takes precedence. For more information, see Design virtual networks with NAT gateway.
Caveats
- Public IPv6 address and public IPv6 prefixes aren't supported on NAT gateways at this time. However, NAT gateways can be deployed on a dual stack virtual network subnet with IPv6 and IPv4 prefixes. For more information, see Troubleshoot Azure Virtual Network NAT connectivity.
Next steps
In this article, you:
- Created a NAT gateway using an existing public IP.
- Added the IP address in a NAT gateway outbound IP configuration.
- Changed an outbound IP configuration to use a public IP prefix.
For more information about Azure Virtual Network NAT, see What is Azure Virtual Network NAT?
To learn more about public IP addresses in Azure, see Public IP addresses.