使用门户和 .NET 设备创建 IoT 中心模块标识和模块孪生入门
模块标识和模块孪生类似于 Azure IoT 中心设备标识和设备孪生,但提供更精细的粒度。 Azure IoT 中心设备标识和设备孪生允许后端应用程序配置设备并提供设备条件的可见性,而模块标识和模块孪生为设备的各个组件提供这些功能。 在支持多个组件的设备上(例如操作系统设备或固件设备),模块标识和模块孪生允许每个部件拥有独立的配置和条件。
注意
本文所述的功能只能用于 IoT 中心的标准层。 有关 IoT 中心基本层和标准/免费层的详细信息,请参阅选择适合你的解决方案的 IoT 中心层。
在本文中,你将学习如何:
在门户中创建模块标识。
使用 .NET 设备 SDK 更新设备的模块孪生。
注意
有关可用于生成设备和后端应用的 SDK 工具的详细信息,请参阅 Azure IoT SDK。
先决条件
在门户中创建模块标识
在一个设备标识中,最多可以创建 20 个模块标识。 若要添加标识,请执行以下步骤:
从 Azure 门户中的现有设备,选择“添加模块标识”以创建你的第一个模块标识。
输入名称“myFirstModule”。 保存模块标识。

新的模块标识将出现在屏幕底部。 选择它即可查看模块标识详细信息。
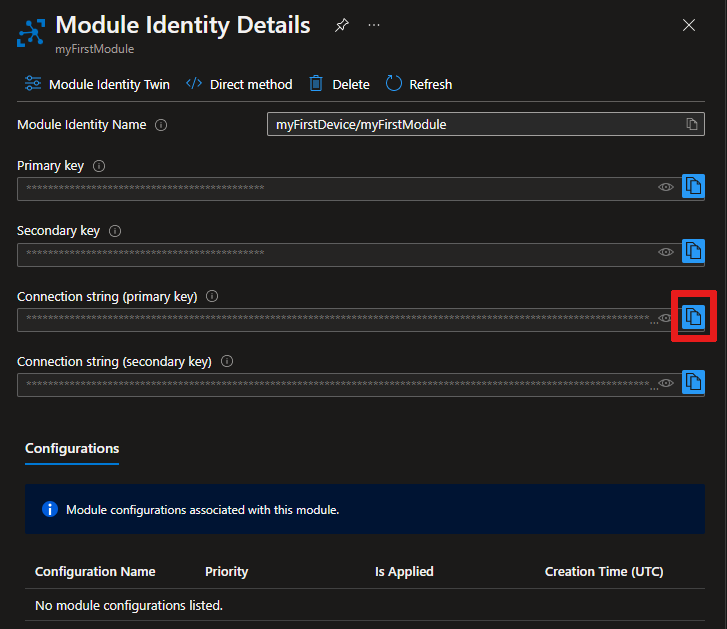

找到“连接字符串(主密钥)”。 可以在下一部分使用它,以便在控制台应用中的设备上设置模块。
使用 .NET 设备 SDK 更新模块孪生
现在让我们从模拟设备与云进行通信。 创建模块标识后,在 IoT 中心内隐式创建模块孪生。 在本节中,将在更新模块孪生报告属性的模拟设备上创建 .NET 控制台应用。
创建 Visual Studio 项目
若要创建一个应用来更新模块孪生报告属性,请执行以下步骤:
在 Visual Studio 中依次选择“创建新项目”、“控制台应用(.NET Framework)”、“下一步”。
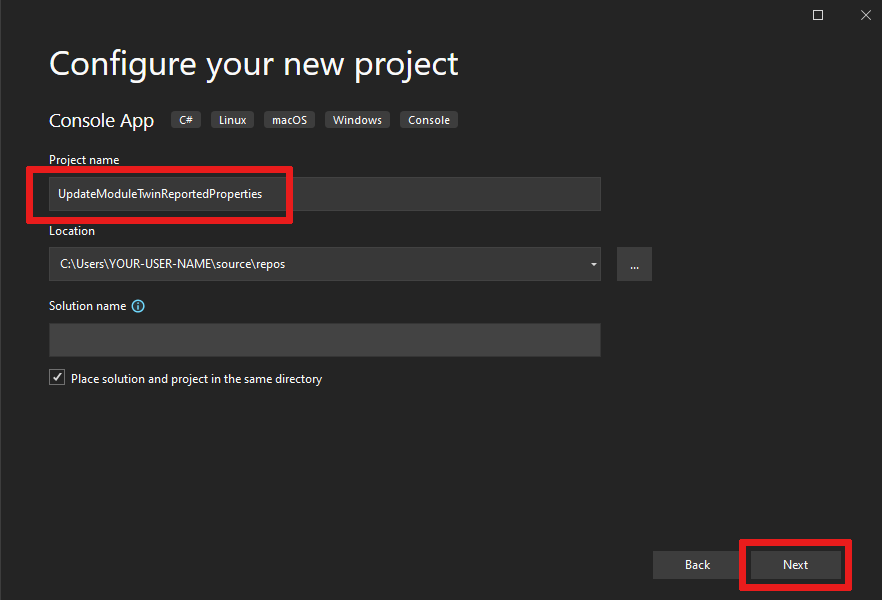
在“配置新项目”中,输入 UpdateModuleTwinReportedProperties 作为“项目名称”。 选择“下一步”继续操作。
保留默认的 .NET 框架,然后选择“创建”。
安装最新的 Azure IoT 中心 .NET 设备 SDK
模块标识和模块孪生仅在 IoT 中心预发行设备 SDK 中可用。 若要安装它,请执行以下步骤:
在 Visual Studio 中,打开“工具”>“NuGet 包管理器”>“管理解决方案的 NuGet 包”。
选择“浏览”,然后选择“包括预发行版” 。 搜索 Microsoft.Azure.Devices.Client。 选择最新版本并安装。

现在可以访问所有模块功能。

创建 UpdateModuleTwinReportedProperties 控制台应用
若要创建应用,请按以下步骤操作:
- 在 Program.cs 文件顶部添加以下
using语句:
using Microsoft.Azure.Devices.Client;
using Microsoft.Azure.Devices.Shared;
using Newtonsoft.Json;
- 将以下字段添加到 Program 类。 将占位符值替换为之前保存的模块连接字符串。
private const string ModuleConnectionString = "<Your module connection string>";
private static ModuleClient Client = null;
- 将以下方法“OnDesiredPropertyChanged”添加到“Program”类 :
private static async Task OnDesiredPropertyChanged(TwinCollection desiredProperties, object userContext)
    {
        Console.WriteLine("desired property change:");
        Console.WriteLine(JsonConvert.SerializeObject(desiredProperties));
        Console.WriteLine("Sending current time as reported property");
        TwinCollection reportedProperties = new TwinCollection
        {
            ["DateTimeLastDesiredPropertyChangeReceived"] = DateTime.Now
        };

        await Client.UpdateReportedPropertiesAsync(reportedProperties).ConfigureAwait(false);
    }
- 最后,将 Main方法替换为以下代码:
static void Main(string[] args)
{
    Microsoft.Azure.Devices.Client.TransportType transport = Microsoft.Azure.Devices.Client.TransportType.Amqp;

    try
    {
        Client = ModuleClient.CreateFromConnectionString(ModuleConnectionString, transport);
        Client.SetConnectionStatusChangesHandler(ConnectionStatusChangeHandler);
        Client.SetDesiredPropertyUpdateCallbackAsync(OnDesiredPropertyChanged, null).Wait();

        Console.WriteLine("Retrieving twin");
        var twinTask = Client.GetTwinAsync();
        twinTask.Wait();
        var twin = twinTask.Result;
        Console.WriteLine(JsonConvert.SerializeObject(twin));

        Console.WriteLine("Sending app start time as reported property");
        TwinCollection reportedProperties = new TwinCollection();
        reportedProperties["DateTimeLastAppLaunch"] = DateTime.Now;

        Client.UpdateReportedPropertiesAsync(reportedProperties);
    }
    catch (AggregateException ex)
    {
        Console.WriteLine("Error in sample: {0}", ex);
    }

    Console.WriteLine("Waiting for Events.  Press enter to exit...");
    Console.ReadKey();
    Client.CloseAsync().Wait();
}

private static void ConnectionStatusChangeHandler(ConnectionStatus status, ConnectionStatusChangeReason reason)
{
    Console.WriteLine($"Status {status} changed: {reason}");
}
可以通过 F5 生成并运行此应用。
现在你了解了如何检索模块孪生和借助 AMQP 协议更新报告属性。
后续步骤
若要继续了解 IoT 中心入门知识并浏览其他 IoT 方案,请参阅: