重要
自 2025 年 5 月 1 日起,Azure AD B2C 将不再可供新客户购买。 在我们的常见问题解答中了解详细信息。
在使用 Azure Active Directory B2C 自定义策略创建和读取用户帐户一文中,用户创建了一个新的用户帐户,但无法登录到该帐户。
本文介绍如何编写 Azure Active Directory B2C (Azure AD B2C) 自定义策略来允许用户创建 Azure AD B2C 本地帐户或登录到本地帐户。 本地帐户是指用户在应用程序中注册时在 Azure AD B2C 租户中创建的帐户。
概述
Azure AD B2C 使用 OpenID Connect 身份验证协议来验证用户凭据。 在 Azure AD B2C 中,将用户凭据与其他信息一起发送到安全终结点,后者将确定这些凭据是否有效。 简而言之,使用 Azure AD B2C 的 OpenID Connect 实现时,可以将 Web 应用程序中的注册、登录和其他标识管理体验转移到 Microsoft Entra ID 中。
Azure AD B2C 自定义策略提供了一个 OpenID Connect 技术配置文件,你使用该配置文件来调用安全的 Microsoft 终结点。 详细了解 OpenID Connect 技术配置文件。
先决条件
如果没有租户,请创建链接到 Azure 订阅的 Azure AD B2C 租户。
必须在计算机上安装 Visual Studio Code (VS Code)。
完成使用 Azure Active Directory B2C 自定义策略创建和读取用户帐户中的步骤。 本文是创建和运行自己的自定义策略操作指南系列教程的一部分。
注意
本文是《在 Azure Active Directory B2C 中创建和运行自己的自定义策略操作指南系列教程》的一部分。 建议从第一篇文章开始本系列教程。
步骤 1 - 配置 OpenID Connect 技术配置文件
若要配置 OpenID Connect 技术配置文件,需要执行以下三个步骤:
- 声明更多声明。
- 在 Azure 门户中注册应用。
- 最后,配置 OpenID Connect 技术配置文件本身
步骤 1.1 - 提供更多声明
在 ContosoCustomPolicy.XML 文件中,找到 ClaimsSchema 部分,然后使用以下代码添加更多声明:
    <!--<ClaimsSchema>-->
        ...
        <ClaimType Id="grant_type">
            <DisplayName>grant_type</DisplayName>
            <DataType>string</DataType>
            <UserHelpText>Special parameter passed for local account authentication to login.partner.microsoftonline.cn.</UserHelpText>
        </ClaimType>

        <ClaimType Id="scope">
            <DisplayName>scope</DisplayName>
            <DataType>string</DataType>
            <UserHelpText>Special parameter passed for local account authentication to login.partner.microsoftonline.cn.</UserHelpText>
        </ClaimType>

        <ClaimType Id="nca">
            <DisplayName>nca</DisplayName>
            <DataType>string</DataType>
            <UserHelpText>Special parameter passed for local account authentication to login.partner.microsoftonline.cn.</UserHelpText>
        </ClaimType>

        <ClaimType Id="client_id">
            <DisplayName>client_id</DisplayName>
            <DataType>string</DataType>
            <AdminHelpText>Special parameter passed to EvoSTS.</AdminHelpText>
            <UserHelpText>Special parameter passed to EvoSTS.</UserHelpText>
        </ClaimType>

        <ClaimType Id="resource_id">
            <DisplayName>resource_id</DisplayName>
            <DataType>string</DataType>
            <AdminHelpText>Special parameter passed to EvoSTS.</AdminHelpText>
            <UserHelpText>Special parameter passed to EvoSTS.</UserHelpText>
        </ClaimType>
    <!--</ClaimsSchema>-->
步骤 1.2 - 注册 Identity Experience Framework 应用程序
Azure AD B2C 要求注册两个应用程序,它们分别用于通过本地帐户实现用户注册和登录:IdentityExperienceFramework(一个 Web API),以及 ProxyIdentityExperienceFramework(一个原生应用,它具有对 IdentityExperienceFramework 应用的委派权限) 。
如果尚未注册,请注册以下应用程序。 若要自动完成以下演练,请访问 IEF 安装应用,并按照说明操作:
使用注册 IdentityExperienceFramework 应用程序中的步骤注册 Identity Experience Framework 应用程序。 复制用于注册 Identity Experience Framework 应用程序的应用程序(客户端)ID(即 appID),以便在下一步中使用。
使用注册 ProxyIdentityExperienceFramework 应用程序中的步骤注册 Proxy Identity Experience Framework 应用程序。 复制用于注册 Proxy Identity Experience Framework 应用程序的应用程序(客户端)ID(即 proxyAppID),以便在下一步中使用。
步骤 1.3 - 配置 OpenID Connect 技术配置文件
在 ContosoCustomPolicy.XML 文件中,找到 ClaimsProviders 部分,然后使用以下代码添加包含 OpenID Connect 技术配置文件的声明提供程序元素:
    <!--<ClaimsProviders>-->
        ...
        <ClaimsProvider>
            <DisplayName>OpenID Connect Technical Profiles</DisplayName>
            <TechnicalProfiles>
                <TechnicalProfile Id="SignInUser">
                    <DisplayName>Sign in with Local Account</DisplayName>
                    <Protocol Name="OpenIdConnect" />
                    <Metadata>
                        <Item Key="UserMessageIfClaimsPrincipalDoesNotExist">We didn't find this account</Item>
                        <Item Key="UserMessageIfInvalidPassword">Your password or username is incorrect</Item>
                        <Item Key="UserMessageIfOldPasswordUsed">You've used an old password.</Item>
                        <Item Key="ProviderName">https://sts.chinacloudapi.cn/</Item>
                        <Item Key="METADATA">https://login.partner.microsoftonline.cn/{tenant}/.well-known/openid-configuration</Item>
                        <Item Key="authorization_endpoint">https://login.partner.microsoftonline.cn/{tenant}/oauth2/token</Item>
                        <Item Key="response_types">id_token</Item>
                        <Item Key="response_mode">query</Item>
                        <Item Key="scope">email openid</Item>
                        <!-- Policy Engine Clients -->
                        <Item Key="UsePolicyInRedirectUri">false</Item>
                        <Item Key="HttpBinding">POST</Item>
                        <Item Key="client_id">proxyAppID</Item>
                        <Item Key="IdTokenAudience">appID</Item>
                    </Metadata>
                    <InputClaims>
                        <InputClaim ClaimTypeReferenceId="email" PartnerClaimType="username" Required="true" />
                        <InputClaim ClaimTypeReferenceId="password" PartnerClaimType="password" Required="true" />
                        <InputClaim ClaimTypeReferenceId="grant_type" DefaultValue="password" />
                        <InputClaim ClaimTypeReferenceId="scope" DefaultValue="openid" />
                        <InputClaim ClaimTypeReferenceId="nca" PartnerClaimType="nca" DefaultValue="1" />
                        <InputClaim ClaimTypeReferenceId="client_id" DefaultValue="proxyAppID" />
                        <InputClaim ClaimTypeReferenceId="resource_id" PartnerClaimType="resource" DefaultValue="appID" />
                    </InputClaims>
                    <OutputClaims>
                        <OutputClaim ClaimTypeReferenceId="objectId" PartnerClaimType="oid" />
                    </OutputClaims>
                </TechnicalProfile>
            </TechnicalProfiles>
        </ClaimsProvider>
    <!--</ClaimsProviders>-->
替换下面两个实例:
将 appID 替换为你在步骤 1.2 中复制的 Identity Experience Framework 应用程序的应用程序(客户端)ID。
将 proxyAppID 替换为你在步骤 1.2 中复制的 Proxy Identity Experience Framework 应用程序的应用程序(客户端)ID。
步骤 2 - 配置登录用户界面
策略运行时,用户需要看到允许他们登录的用户界面。 用户界面还提供注册选项,以方便尚未拥有帐户的用户注册。 为此,你需要执行以下两个步骤:
- 配置自声明技术配置文件,它会向用户显示登录表单。
- 配置登录用户界面的内容定义。
步骤 2.1 - 配置登录用户界面技术配置文件
在 ContosoCustomPolicy.XML 文件中,找到 SignInUser 技术配置文件,然后使用以下代码在其后面添加一个自断言技术配置文件:
    <TechnicalProfile Id="UserSignInCollector">
        <DisplayName>Local Account Signin</DisplayName>
        <Protocol Name="Proprietary"
            Handler="Web.TPEngine.Providers.SelfAssertedAttributeProvider, Web.TPEngine, Version=1.0.0.0, Culture=neutral, PublicKeyToken=null" />
        <Metadata>
            <Item Key="setting.operatingMode">Email</Item>
            <Item Key="SignUpTarget">AccountTypeInputCollectorClaimsExchange</Item>
        </Metadata>
        <DisplayClaims>
            <DisplayClaim ClaimTypeReferenceId="email" Required="true" />
            <DisplayClaim ClaimTypeReferenceId="password" Required="true" />
        </DisplayClaims>
        <OutputClaims>
            <OutputClaim ClaimTypeReferenceId="email" />
            <OutputClaim ClaimTypeReferenceId="password"  />
            <OutputClaim ClaimTypeReferenceId="objectId" />
        </OutputClaims>
        <ValidationTechnicalProfiles>
            <ValidationTechnicalProfile ReferenceId="SignInUser" />
        </ValidationTechnicalProfiles>
    </TechnicalProfile>
我们已经添加了自声明技术配置文件 UserSignInCollector,它会向用户显示登录表单。 我们已将该技术配置文件配置为收集用户的电子邮件地址作为其登录名,如 setting.operatingMode 元数据中所示。 登录窗体包含注册链接,后者会将用户引导到注册窗体,如 SignUpTarget 元数据中所示。 你将了解如何在业务流程步骤中设置 SignUpWithLogonEmailExchange 。ClaimsExchange
此外,我们还将 SignInUser OpenID Connect 技术配置文件添加为一个 验证技术配置文件。 因此,当用户选择“登录”按钮(参见步骤 5 中的屏幕截图)时,SignInUser 技术配置文件将执行。
在下一步(步骤 2.2)中,我们将配置一个内容定义,我们将在此 SelfAsserted 技术配置文件中使用。
步骤 2.2 - 配置登录界面内容定义
在 ContosoCustomPolicy.XML 文件中,找到 ContentDefinitions 部分,然后使用以下代码登录内容定义:
    <!--<ContentDefinitions>-->
        ...
            <ContentDefinition Id="SignupOrSigninContentDefinition">
                <LoadUri>~/tenant/templates/AzureBlue/unified.cshtml</LoadUri>
                <RecoveryUri>~/common/default_page_error.html</RecoveryUri>
                <DataUri>urn:com:microsoft:aad:b2c:elements:contract:unifiedssp:2.1.7</DataUri>
                <Metadata>
                    <Item Key="DisplayName">Signin and Signup</Item>
                </Metadata>
            </ContentDefinition>
    <!--</ContentDefinitions>-->
我们已为自声明技术配置文件 SignupOrSigninContentDefinition 配置了内容定义。 可以使用元数据元素在技术配置文件中指定它,也可以在业务流程步骤中引用技术配置文件时指定它。 在前面,我们已了解如何在自断言技术配置文件中直接指定内容定义,因此在本文中,我们将了解如何在业务流程步骤(步骤 3)中引用技术配置文件时指定内容定义。
步骤 3 - 更新用户旅程业务流程步骤
在 ContosoCustomPolicy.XML 文件中,找到 HelloWorldJourney 用户旅程,然后将其所有业务流程步骤集合替换为以下代码:
    <!--<OrchestrationSteps>-->
        ...
        <OrchestrationStep Order="1" Type="CombinedSignInAndSignUp" ContentDefinitionReferenceId="SignupOrSigninContentDefinition">
            <ClaimsProviderSelections>
                <ClaimsProviderSelection ValidationClaimsExchangeId="LocalAccountSigninEmailExchange" />
            </ClaimsProviderSelections>
            <ClaimsExchanges>
                <ClaimsExchange Id="LocalAccountSigninEmailExchange" TechnicalProfileReferenceId="UserSignInCollector" />
            </ClaimsExchanges>
        </OrchestrationStep>

        <OrchestrationStep Order="2" Type="ClaimsExchange">
            <Preconditions>
                <Precondition Type="ClaimsExist" ExecuteActionsIf="true">
                    <Value>objectId</Value>
                    <Action>SkipThisOrchestrationStep</Action>
                </Precondition>
            </Preconditions>
            <ClaimsExchanges>
                <ClaimsExchange Id="AccountTypeInputCollectorClaimsExchange" TechnicalProfileReferenceId="AccountTypeInputCollector"/>
            </ClaimsExchanges>
        </OrchestrationStep>

        <OrchestrationStep Order="3" Type="ClaimsExchange">
            <Preconditions>
                <Precondition Type="ClaimsExist" ExecuteActionsIf="true">
                    <Value>objectId</Value>
                    <Action>SkipThisOrchestrationStep</Action>
                </Precondition>
                <Precondition Type="ClaimEquals" ExecuteActionsIf="true">
                  <Value>accountType</Value>
                  <Value>company</Value>
                  <Action>SkipThisOrchestrationStep</Action>
                </Precondition>
            </Preconditions>
            <ClaimsExchanges>
                <ClaimsExchange Id="GetAccessCodeClaimsExchange" TechnicalProfileReferenceId="AccessCodeInputCollector" />
            </ClaimsExchanges>
        </OrchestrationStep>

        <OrchestrationStep Order="4" Type="ClaimsExchange">
            <Preconditions>
                <Precondition Type="ClaimsExist" ExecuteActionsIf="true">
                    <Value>objectId</Value>
                    <Action>SkipThisOrchestrationStep</Action>
                </Precondition>
            </Preconditions>
            <ClaimsExchanges>
                <ClaimsExchange Id="SignUpWithLogonEmailExchange" TechnicalProfileReferenceId="UserInformationCollector" />
            </ClaimsExchanges>
        </OrchestrationStep>

        <OrchestrationStep Order="5" Type="ClaimsExchange">
            <ClaimsExchanges>
            <ClaimsExchange Id="AADUserReaderExchange" TechnicalProfileReferenceId="AAD-UserRead"/>
            </ClaimsExchanges>
        </OrchestrationStep>

        <OrchestrationStep Order="6" Type="ClaimsExchange">
            <ClaimsExchanges>
            <ClaimsExchange Id="GetMessageClaimsExchange" TechnicalProfileReferenceId="UserInputMessageClaimGenerator"/>
            </ClaimsExchanges>
        </OrchestrationStep>

        <OrchestrationStep Order="7" Type="SendClaims" CpimIssuerTechnicalProfileReferenceId="JwtIssuer" />
    <!--</OrchestrationSteps>-->
在业务流程的步骤 2 到 5 中,我们使用了前置条件来确定业务流程步骤是否应运行。 我们需要确定用户正在登录还是注册。
当自定义策略运行时:
业务流程步骤 1 - 显示登录页,以便用户能够登录或选择“立即注册”链接。 请注意,我们指定了自声明技术配置文件 UserSignInCollector 用于显示登录表单的内容定义。
编排步骤 2 - 如果用户注册(
objectId不存在),则会运行此步骤,因此我们通过调用 AccountTypeInputCollector 自声明技术配置文件来显示账户类型选择表单。业务流程步骤 3 - 如果用户注册(
objectId不存在),并且用户未选择公司accountType,则会执行这个步骤。 因此,我们必须通过调用自声明技术配置文件 AccessCodeInputCollector 来要求用户输入accessCode。业务流程步骤 4 - 如果用户注册(objectId 不存在),则此步骤将运行,因此我们调用 UserInformationCollector 自声明技术概况以显示注册表单。
业务流程步骤 5 - 此步骤将从 Microsoft Entra ID 读取帐户信息(调用 Microsoft Entra ID 技术配置文件),因此无论用户是注册还是登录,它都会运行
AAD-UserRead。业务流程步骤 6 - 此步骤将调用 UserInputMessageClaimGenerator 技术配置文件来组合用户的问候语。
业务流程步骤 7 - 最后,步骤 8 程序集并在策略执行结束时返回 JWT。
步骤 4 - 上传策略
按照上传自定义策略文件中的步骤上传策略文件。 如果要上传与门户中已有的文件同名的文件,请确保选择“覆盖自定义策略(如果已存在)”。
步骤 5 - 测试策略
按照测试自定义策略中的步骤测试自定义策略。 策略运行后,你将看到类似于以下屏幕截图的界面:
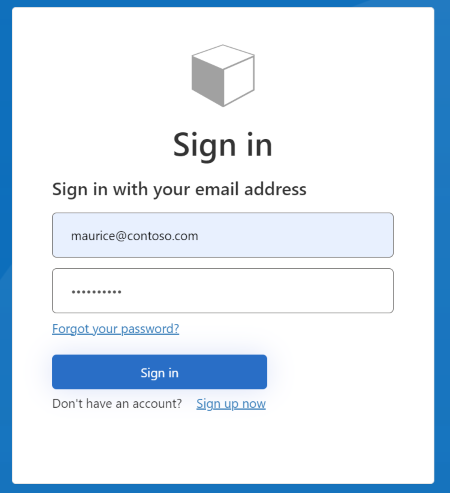
可通过输入现有帐户的电子邮件地址和密码来登录。 如果你还没有帐户,则需要选择“立即注册”链接来创建新的用户帐户。
相关内容
- 详细了解 OpenID Connect 技术配置文件。