在 SQL 数据库中配置一个数据库,并设置客户端应用以便故障转移到其他区域,然后测试故障转移计划。 你将学习如何执行以下操作:
- 创建故障转移组
- 运行 Java 应用程序以在 SQL 数据库中查询数据库
- 测试故障转移
如果没有 Azure 订阅,请在开始前创建一个试用版订阅。
先决条件
注意
本文使用 Azure Az PowerShell 模块,这是与 Azure 交互时推荐使用的 PowerShell 模块。 若要开始使用 Az PowerShell 模块,请参阅安装 Azure PowerShell。 若要了解如何迁移到 Az PowerShell 模块,请参阅 将 Azure PowerShell 从 AzureRM 迁移到 Az。
重要
PowerShell Azure 资源管理器(AzureRM)模块已于 2024 年 2 月 29 日弃用。 所有未来的开发都应使用 Az.Sql 模块。 建议用户从 AzureRM 迁移到 Az PowerShell 模块,以确保持续支持和更新。 不再维护或支持 AzureRM 模块。 Az PowerShell 模块和 AzureRM 模块中命令的参数基本相同。 有关兼容性的详细信息,请参阅 介绍新的 Az PowerShell 模块。
若要完成本教程,请确保已安装以下项目:
- Azure PowerShell
- Azure SQL 数据库中的单一数据库。 若要创建一个用途,
- 本教程使用
AdventureWorksLT示例数据库,这是创建新的 Azure SQL 数据库时加载的可选示例数据库。
重要
请务必设置防火墙规则,以便使用要在其上执行本教程中步骤的计算机的公共 IP 地址。 数据库级防火墙规则会自动复制到辅助服务器。
有关信息,请参阅 “创建数据库级防火墙规则 ”或确定用于计算机服务器级防火墙规则的 IP 地址 ,请参阅快速入门:在 Azure 门户中创建服务器级防火墙规则。
创建故障转移组
使用 Azure PowerShell,在现有的服务器和另一区域中的新服务器之间创建故障转移组。 然后,将示例数据库添加到故障转移组。
重要
本示例需要 Azure PowerShell Az 1.0 或更高版本。 运行 Get-Module -ListAvailable Az,查看已安装哪些版本。
如果需要安装,请参阅安装 Azure PowerShell 模块。
运行 Connect-AzAccount -Environment AzureChinaCloud 以登录到 Microsoft Azure(由世纪互联运营)。
若要创建故障转移组,请运行以下脚本:
$admin = "<adminName>"
$password = "<password>"
$resourceGroup = "<resourceGroupName>"
$location = "<resourceGroupLocation>"
$server = "<serverName>"
$database = "<databaseName>"
$drLocation = "<disasterRecoveryLocation>"
$drServer = "<disasterRecoveryServerName>"
$failoverGroup = "<globallyUniqueFailoverGroupName>"

# create a backup server in the failover region
New-AzSqlServer -ResourceGroupName $resourceGroup -ServerName $drServer `
    -Location $drLocation -SqlAdministratorCredentials $(New-Object -TypeName System.Management.Automation.PSCredential `
    -ArgumentList $admin, $(ConvertTo-SecureString -String $password -AsPlainText -Force))

# create a failover group between the servers
New-AzSqlDatabaseFailoverGroup -ResourceGroupName $resourceGroup -ServerName $server `
    -PartnerServerName $drServer -FailoverGroupName $failoverGroup -FailoverPolicy Automatic -GracePeriodWithDataLossHours 2

# add the database to the failover group
Get-AzSqlDatabase -ResourceGroupName $resourceGroup -ServerName $server -DatabaseName $database | `
    Add-AzSqlDatabaseToFailoverGroup -ResourceGroupName $resourceGroup -ServerName $server -FailoverGroupName $failoverGroup
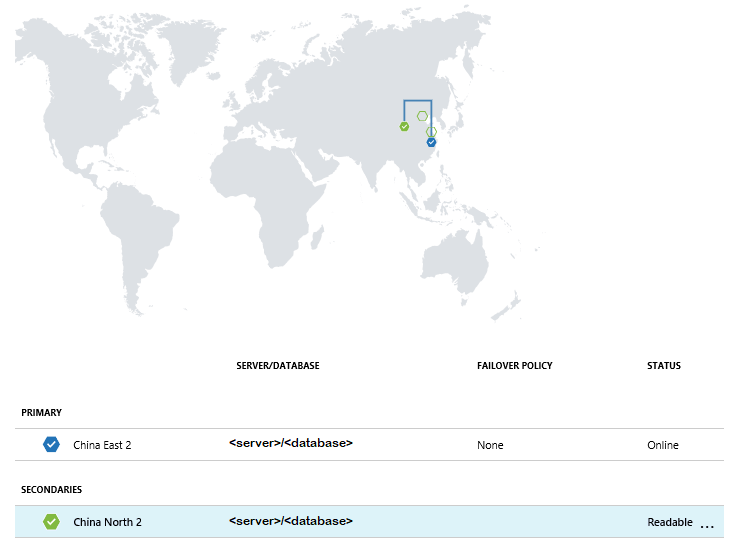
异地复制设置也可在 Azure 门户中更改,方法是:选择数据库,然后选择“设置”“异地复制”。
运行示例项目
在控制台中,使用以下命令创建一个 Maven 项目:
mvn archetype:generate "-DgroupId=com.sqldbsamples" "-DartifactId=SqlDbSample" "-DarchetypeArtifactId=maven-archetype-quickstart" "-Dversion=1.0.0"键入 Y,然后按 Enter。
将目录切换到新项目。
cd SqlDbSample使用最常用的编辑器,打开项目文件夹中的 pom.xml 文件。
通过添加下面的
dependency节来添加 Microsoft JDBC Driver for SQL Server 依赖项。 此依赖项必须粘贴在更大的dependencies节中。<dependency> <groupId>com.microsoft.sqlserver</groupId> <artifactId>mssql-jdbc</artifactId> <version>6.1.0.jre8</version> </dependency>将
properties节添加到dependencies节之后,指定 Java 版本:<properties> <maven.compiler.source>1.8</maven.compiler.source> <maven.compiler.target>1.8</maven.compiler.target> </properties>将
build节添加到properties节之后,为清单文件提供支持:<build> <plugins> <plugin> <groupId>org.apache.maven.plugins</groupId> <artifactId>maven-jar-plugin</artifactId> <version>3.0.0</version> <configuration> <archive> <manifest> <mainClass>com.sqldbsamples.App</mainClass> </manifest> </archive> </configuration> </plugin> </plugins> </build>保存并关闭 pom.xml 文件。
打开位于其中
..\SqlDbSample\src\main\java\com\sqldbsamples文件,并将内容替换为以下代码:package com.sqldbsamples; import java.sql.Connection; import java.sql.Statement; import java.sql.PreparedStatement; import java.sql.ResultSet; import java.sql.Timestamp; import java.sql.DriverManager; import java.util.Date; import java.util.concurrent.TimeUnit; public class App { private static final String FAILOVER_GROUP_NAME = "<your failover group name>"; // add failover group name private static final String DB_NAME = "<your database>"; // add database name private static final String USER = "<your admin>"; // add database user private static final String PASSWORD = "<password>"; // add database password private static final String READ_WRITE_URL = String.format("jdbc:" + "sqlserver://%s.database.chinacloudapi.cn:1433;database=%s;user=%s;password=%s;encrypt=true;" + "hostNameInCertificate=*.database.chinacloudapi.cn;loginTimeout=30;", + FAILOVER_GROUP_NAME, DB_NAME, USER, PASSWORD); private static final String READ_ONLY_URL = String.format("jdbc:" + "sqlserver://%s.secondary.database.chinacloudapi.cn:1433;database=%s;user=%s;password=%s;encrypt=true;" + "hostNameInCertificate=*.database.chinacloudapi.cn;loginTimeout=30;", + FAILOVER_GROUP_NAME, DB_NAME, USER, PASSWORD); public static void main(String[] args) { System.out.println("#######################################"); System.out.println("## GEO DISTRIBUTED DATABASE TUTORIAL ##"); System.out.println("#######################################"); System.out.println(""); int highWaterMark = getHighWaterMarkId(); try { for(int i = 1; i < 1000; i++) { // loop will run for about 1 hour System.out.print(i + ": insert on primary " + (insertData((highWaterMark + i)) ? "successful" : "failed")); TimeUnit.SECONDS.sleep(1); System.out.print(", read from secondary " + (selectData((highWaterMark + i)) ? "successful" : "failed") + "\n"); TimeUnit.SECONDS.sleep(3); } } catch(Exception e) { e.printStackTrace(); } } private static boolean insertData(int id) { // Insert data into the product table with a unique product name so we can find the product again String sql = "INSERT INTO SalesLT.Product " + "(Name, ProductNumber, Color, StandardCost, ListPrice, SellStartDate) VALUES (?,?,?,?,?,?);"; try (Connection connection = DriverManager.getConnection(READ_WRITE_URL); PreparedStatement pstmt = connection.prepareStatement(sql)) { pstmt.setString(1, "BrandNewProduct" + id); pstmt.setInt(2, 200989 + id + 10000); pstmt.setString(3, "Blue"); pstmt.setDouble(4, 75.00); pstmt.setDouble(5, 89.99); pstmt.setTimestamp(6, new Timestamp(new Date().getTime())); return (1 == pstmt.executeUpdate()); } catch (Exception e) { return false; } } private static boolean selectData(int id) { // Query the data previously inserted into the primary database from the geo replicated database String sql = "SELECT Name, Color, ListPrice FROM SalesLT.Product WHERE Name = ?"; try (Connection connection = DriverManager.getConnection(READ_ONLY_URL); PreparedStatement pstmt = connection.prepareStatement(sql)) { pstmt.setString(1, "BrandNewProduct" + id); try (ResultSet resultSet = pstmt.executeQuery()) { return resultSet.next(); } } catch (Exception e) { return false; } } private static int getHighWaterMarkId() { // Query the high water mark id stored in the table to be able to make unique inserts String sql = "SELECT MAX(ProductId) FROM SalesLT.Product"; int result = 1; try (Connection connection = DriverManager.getConnection(READ_WRITE_URL); Statement stmt = connection.createStatement(); ResultSet resultSet = stmt.executeQuery(sql)) { if (resultSet.next()) { result = resultSet.getInt(1); } } catch (Exception e) { e.printStackTrace(); } return result; } }保存并关闭 App.java 文件。
在命令控制台中运行以下命令:
mvn package启动应用程序。如果不手动停止,应用程序将运行大约 1 小时,让你有时间运行故障转移测试。
mvn -q -e exec:java "-Dexec.mainClass=com.sqldbsamples.App"####################################### ## GEO DISTRIBUTED DATABASE TUTORIAL ## ####################################### 1. insert on primary successful, read from secondary successful 2. insert on primary successful, read from secondary successful 3. insert on primary successful, read from secondary successful ...
测试故障转移
运行以下脚本来模拟故障转移,观察应用程序结果。 注意在数据库迁移过程中某些插入和选择操作是如何失败的。
可使用以下命令,检查灾难恢复服务器在测试过程中的角色:
(Get-AzSqlDatabaseFailoverGroup -FailoverGroupName $failoverGroup `
    -ResourceGroupName $resourceGroup -ServerName $drServer).ReplicationRole
若要测试某个故障转移,请执行以下操作:
启动对故障转移组的手动故障转移:
Switch-AzSqlDatabaseFailoverGroup -ResourceGroupName $resourceGroup `
 -ServerName $drServer -FailoverGroupName $failoverGroup
将故障转移组还原到主服务器:
Switch-AzSqlDatabaseFailoverGroup -ResourceGroupName $resourceGroup `
 -ServerName $server -FailoverGroupName $failoverGroup