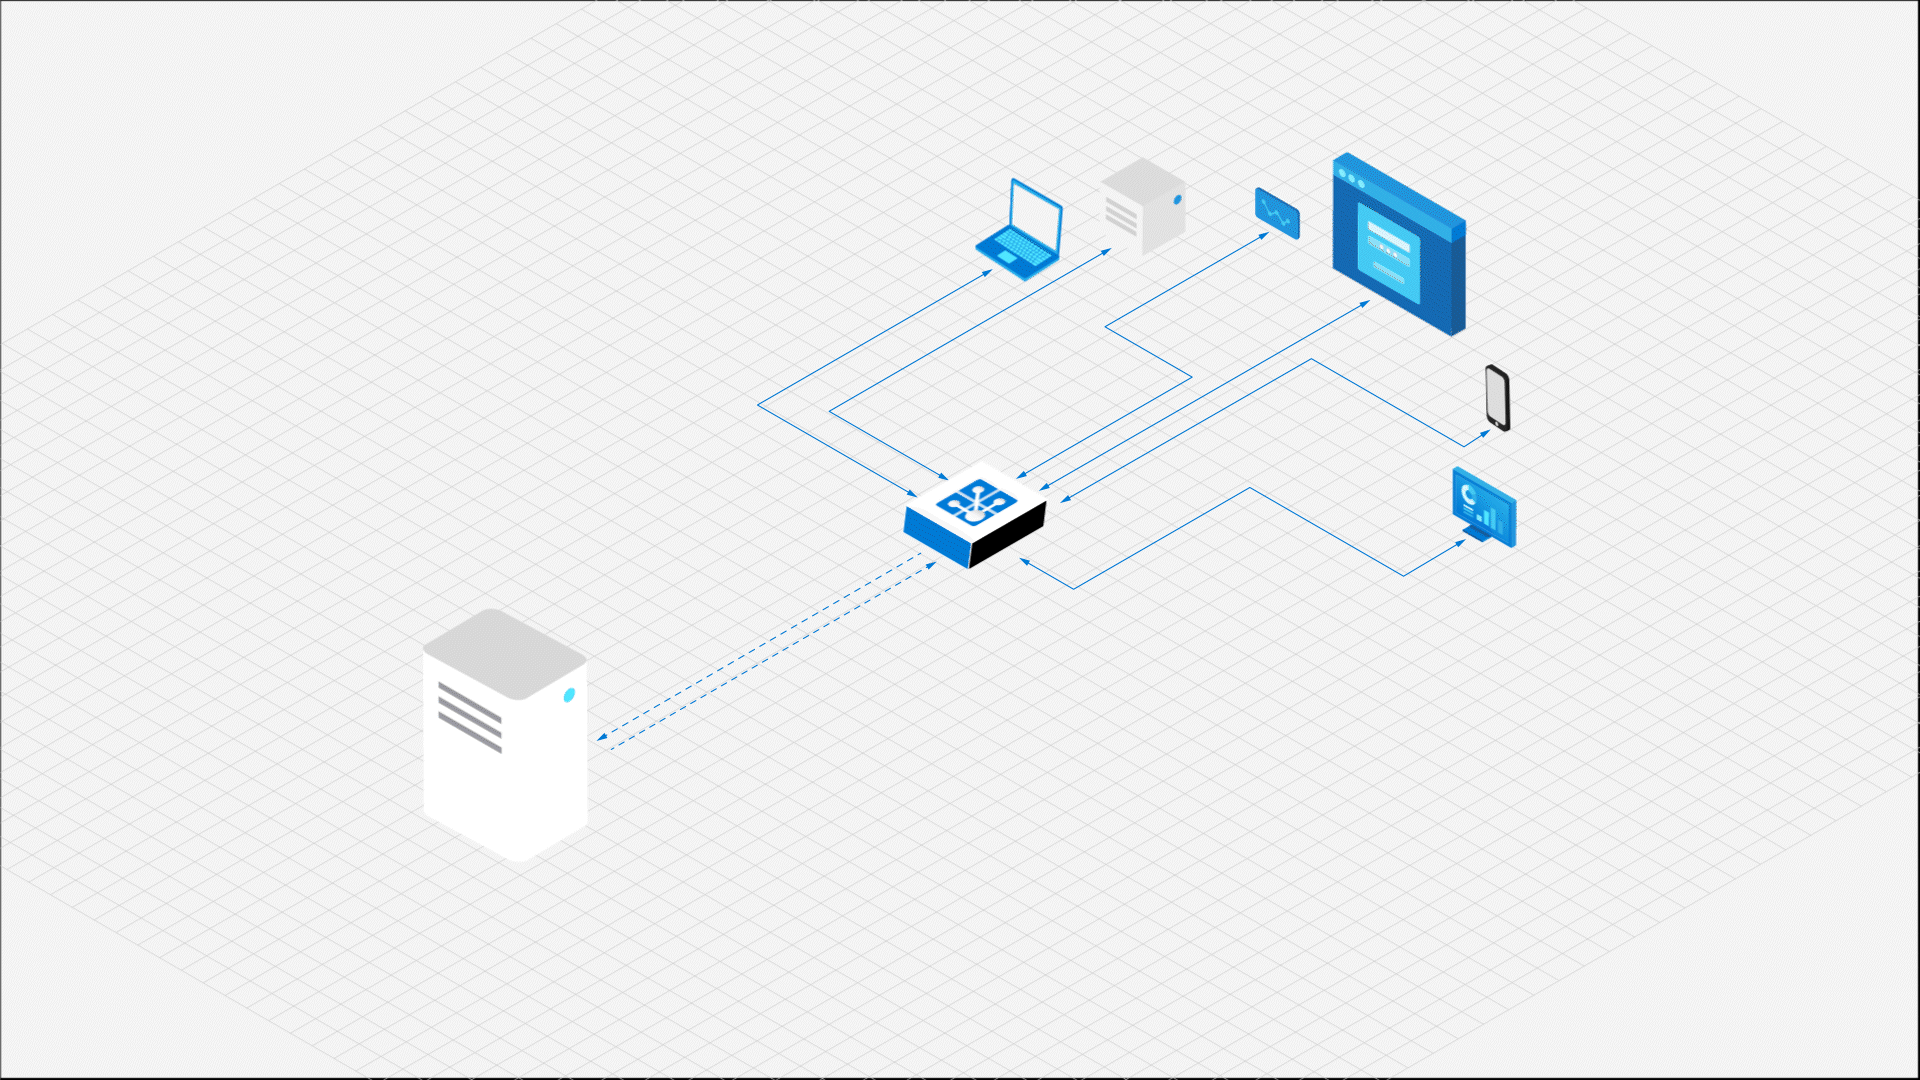
熟悉的 HTTP 请求/响应模型设计为易于使用且可缩放。 但是如今,最终用户对 Web 的需求比最初设计时要多得多。 HTTP 协议要求用户启动请求才能接收响应。 但开发人员需要一种方法来将数据从服务器发送到客户端,而无需他们要求;换句话说,他们需要向客户端“推送”数据,比如在拍卖网站上推送产品的最新出价,或者在金融应用程序中推送快速变化的股价。
本快速入门指南演示了如何
- 订阅来自应用程序服务器的消息
- 将数据从应用程序服务器推送到所有连接的客户端
重要
本文中出现的原始连接字符串仅用于演示目的。
连接字符串包括应用程序访问 Azure Web PubSub 服务所需的授权信息。 连接字符串中的访问密钥类似于服务的根密码。 在生产环境中,请始终保护访问密钥。 使用 Azure Key Vault 安全地管理和轮换密钥,并使用 WebPubSubServiceClient 对连接进行保护。
避免将访问密钥分发给其他用户、对其进行硬编码或将其以纯文本形式保存在其他人可以访问的任何位置。 如果你认为访问密钥可能已泄露,请轮换密钥。
先决条件
- Web PubSub 资源。 如果尚未创建,可以按照以下指导操作:创建 Web PubSub 资源
- 代码编辑器,如 Visual Studio Code
- 安装计划使用的语言的依赖项
创建订阅服务器客户端
若要订阅从应用程序服务器推送的消息,客户端(无论是浏览器、移动应用还是 IoT 设备)需要先连接到 Web PubSub 资源,并侦听相应的消息事件。
创建一个名为 subscriber 的项目目录,并安装所需的依赖项
mkdir subscriber
cd subscriber
npm init -y

# The client SDK is available as a module on NPM
npm install @azure/web-pubsub-client
连接到 Web PubSub 资源并为 server-message 事件注册侦听器
客户端使用客户端访问 URL 连接资源并向其进行身份验证。
此 URL 遵循 wss://<service_name>.webpubsub.azure.com/client/hubs/<hub_name>?access_token=<token> 的模式。 客户端可以通过几种方式获取客户端访问 URL。 对于本快速入门,可以从 Azure 门户复制并粘贴 URL,如下图所示。 最佳做法是不要在代码中对客户端访问 URL 进行硬编码。 在生产环境中,我们通常设置应用服务器按需返回此 URL。 生成客户端访问 URL 详细介绍了相关操作。

如上图所示,客户端加入名为 myHub1 的中心。
在 subscriber 项目文件夹中,使用以下代码创建名为 subscribe.js 的文件
const { WebPubSubClient } = require("@azure/web-pubsub-client");

// Instantiates the client object
// <client-access-url> is copied from Azure portal mentioned above
const client = new WebPubSubClient("<client-access-url>")

// Registers a handler for the "server-message" event
client.on("server-message", (e) => {
    console.log(`Received message ${e.message.data}`)
});

// Before a client can receive a message,
// you must invoke start() on the client object.
client.start();
运行程序
node subscribe.js
现在,此客户端与 Web PubSub 资源建立连接,并准备好接收从应用程序服务器推送的消息。
创建一个名为 subscriber 的项目目录,并安装所需的依赖项
mkdir subscriber
cd subscriber
# Create a .NET console app
dotnet new console

# Add the client SDK
dotnet add package Azure.Messaging.WebPubSub.Client --prerelease
连接到 Web PubSub 资源并为 ServerMessageReceived 事件注册侦听器
客户端使用客户端访问 URL 连接资源并向其进行身份验证。
此 URL 遵循 wss://<service_name>.webpubsub.azure.cn/client/hubs/<hub_name>?access_token=<token> 的模式。 客户端可以通过几种方式获取客户端访问 URL。 对于本快速入门,可以从 Azure 门户复制并粘贴 URL,如下图所示。 最佳做法是不要在代码中对客户端访问 URL 进行硬编码。 在生产环境中,我们通常设置应用服务器按需返回此 URL。 生成客户端访问 URL 详细介绍了相关操作。
如上图所示,客户端加入名为 myHub1 的中心。
将 Program.cs 中的代码替换为以下代码
using Azure.Messaging.WebPubSub.Clients;

// Instantiates the client object
// <client-access-uri> is copied from Azure portal mentioned above
var client = new WebPubSubClient(new Uri("<client-access-uri>"));
client.ServerMessageReceived += eventArgs =>
{
    Console.WriteLine($"Receive message: {eventArgs.Message.Data}");
    return Task.CompletedTask;
};

client.Connected += eventArgs =>
{
    Console.WriteLine("Connected");
    return Task.CompletedTask;
};

await client.StartAsync();

// This keeps the subscriber active until the user closes the stream by pressing Ctrl+C
var streaming = Console.ReadLine();
while (streaming != null)
{
    if (!string.IsNullOrEmpty(streaming))
    {
        await client.SendToGroupAsync("stream", BinaryData.FromString(streaming + Environment.NewLine), WebPubSubDataType.Text);
    }

    streaming = Console.ReadLine();
}

await client.StopAsync();
运行以下命令
dotnet run
现在,此客户端与 Web PubSub 资源建立连接,并准备好接收从应用程序服务器推送的消息。
创建一个名为 subscriber 的项目目录,并安装所需的依赖项:
mkdir subscriber
cd subscriber

# Create venv
python -m venv env
# Activate venv
source ./env/bin/activ

pip install azure-messaging-webpubsubservice
pip install websockets
使用 WebSocket API 连接到 Web PubSub 资源。 使用以下代码创建 subscribe.py 文件
import asyncio
import sys
import websockets

from azure.messaging.webpubsubservice import WebPubSubServiceClient

async def connect(url):
    async with websockets.connect(url) as ws:
        print('connected')
        while True:
            print('Received message: ' + await ws.recv())

if __name__ == '__main__':

    if len(sys.argv) != 3:
        print('Usage: python subscribe.py <connection-string> <hub-name>')
        exit(1)

    connection_string = sys.argv[1]
    hub_name = sys.argv[2]

    service = WebPubSubServiceClient.from_connection_string(connection_string, hub=hub_name)
    token = service.get_client_access_token()

    try:
        asyncio.get_event_loop().run_until_complete(connect(token['url']))
    except KeyboardInterrupt:
        pass
该代码创建与 Web PubSub 中某个中心的 WebSocket 连接。 中心是 Web PubSub 中的一个逻辑单元,你可以在其中向一组客户端发布消息。 关键概念包含有关 Web PubSub 中使用的术语的详细解释。
Web PubSub 服务使用 JSON Web 令牌 (JWT) 身份验证。 示例代码使用 Web PubSub SDK 中的 WebPubSubServiceClient.GetClientAccessUri() 生成服务的 URL,其中包含完整 URL 和有效的访问令牌。
建立连接后,客户端将通过 WebSocket 连接接收消息。 使用 await ws.recv() 侦听传入的消息。
运行以下命令
python subscribe.py $connection_string "myHub1"
创建名为 pubsub 的项目目录
mkdir pubsub
cd pubsub
使用 Maven 创建名为 webpubsub-quickstart-subscriber 的新控制台应用;
mvn archetype:generate --define interactiveMode=n --define groupId=com.webpubsub.quickstart --define artifactId=webpubsub-quickstart-subscriber --define archetypeArtifactId=maven-archetype-quickstart --define archetypeVersion=1.4

cd webpubsub-quickstart-subscriber
将 WebSocket 和 Azure Web PubSub SDK 添加到 pom.xml 中的 dependencies 节点:
azure-messaging-webpubsub:适用于 Java 的 Web PubSub 服务 SDKJava-WebSocket:适用于 Java 的 WebSocket 客户端 SDK
<dependency>
    <groupId>com.azure</groupId>
    <artifactId>azure-messaging-webpubsub</artifactId>
    <version>1.0.0</version>
</dependency>
<dependency>
    <groupId>org.java-websocket</groupId>
    <artifactId>Java-WebSocket</artifactId>
    <version>1.5.1</version>
</dependency>
在 Web PubSub 中,可以通过 WebSocket 连接连接到服务并订阅消息。 WebSocket 是一个全双工信道,使服务能够将消息实时推送到客户端。 可以使用任何支持 WebSocket 的 API 或库。 在本示例中,我们使用 Java-WebSocket 包。
转到 /src/main/java/com/webpubsub/quickstart 目录。
进行编辑,将 App.java 文件的内容替换为以下代码:
package com.webpubsub.quickstart;

import com.azure.messaging.webpubsub.*;
import com.azure.messaging.webpubsub.models.*;

import org.java_websocket.client.WebSocketClient;
import org.java_websocket.handshake.ServerHandshake;

import java.io.IOException;
import java.net.URI;
import java.net.URISyntaxException;

/**
* Connect to Azure Web PubSub service using WebSocket protocol
*/
public class App
{
    public static void main( String[] args ) throws IOException, URISyntaxException
    {
        if (args.length != 2) {
            System.out.println("Expecting 2 arguments: <connection-string> <hub-name>");
            return;
        }

        WebPubSubServiceClient service = new WebPubSubServiceClientBuilder()
            .connectionString(args[0])
            .hub(args[1])
            .buildClient();

        WebPubSubClientAccessToken token = service.getClientAccessToken(new GetClientAccessTokenOptions());

        WebSocketClient webSocketClient = new WebSocketClient(new URI(token.getUrl())) {
            @Override
            public void onMessage(String message) {
                System.out.println(String.format("Message received: %s", message));
            }

            @Override
            public void onClose(int arg0, String arg1, boolean arg2) {
                // TODO Auto-generated method stub
            }

            @Override
            public void onError(Exception arg0) {
                // TODO Auto-generated method stub
            }

            @Override
            public void onOpen(ServerHandshake arg0) {
                // TODO Auto-generated method stub
            }

        };

        webSocketClient.connect();
        System.in.read();
    }
}
此代码创建一个 WebSocket 连接用于连接到 Azure Web PubSub 中的中心。 中心是 Azure Web PubSub 中的一个逻辑单元,你可以在其中向一组客户端发布消息。 关键概念包含有关 Azure Web PubSub 中使用的术语的详细说明。
Web PubSub 服务使用 JSON Web 令牌 (JWT) 身份验证。 示例代码使用 Web PubSub SDK 中的 WebPubSubServiceClient.GetClientAccessUri() 生成服务的 URL,其中包含完整 URL 和有效的访问令牌。
建立连接后,客户端将通过 WebSocket 连接接收消息。 使用 onMessage(String message) 侦听传入的消息。
使用以下命令运行应用
mvn compile & mvn package & mvn exec:java -Dexec.mainClass="com.webpubsub.quickstart.App" -Dexec.cleanupDaemonThreads=false -Dexec.args="$connection_string 'myHub1'"
从应用程序服务器推送消息
现在,你有客户端已连接 Web PubSub 资源,可以使用 Web PubSub 提供的服务器 SDK 随时从应用程序服务器推送消息。
创建一个名为 publisher 的新项目目录,并安装所需的依赖项
mkdir publisher
cd publisher

npm init

# This command installs the server SDK from NPM,
# which is different from the client SDK you used in subscribe.js
npm install --save @azure/web-pubsub
使用以下代码创建 publish.js 文件
const { WebPubSubServiceClient } = require('@azure/web-pubsub');

// This is the hub name we used on Azure portal when generating the Client Access URL.
// It ensures this server can push messages to clients in the hub named "myHub1".
const hub = "myHub1";

let server = new WebPubSubServiceClient(process.env.WebPubSubConnectionString, hub);

// By default, the content type is `application/json`.
// Specify contentType as `text/plain` for this demo.
server.sendToAll(process.argv[2], { contentType: "text/plain" });
server.sendToAll() 调用会将消息发送到中心内所有已连接的客户端。
获取连接字符串
重要
连接字符串包括应用程序访问 Web PubSub 服务所需的授权信息。 连接字符串中的访问密钥类似于服务的根密码。
对于本快速入门指南,我们将从 Azure 门户获取它,如下所示。

运行服务器程序
在新的命令 shell 中运行以下命令。
本文中出现的原始连接字符串仅用于演示目的。 在生产环境中,请始终保护访问密钥。 使用 Azure Key Vault 安全地管理和轮换密钥,并使用 WebPubSubServiceClient 对连接进行保护。
# Set the environment variable for your connection string.
export WebPubSubConnectionString="<Put your connection string here>"

node publish.js "Hello World"
观察客户端收到的消息
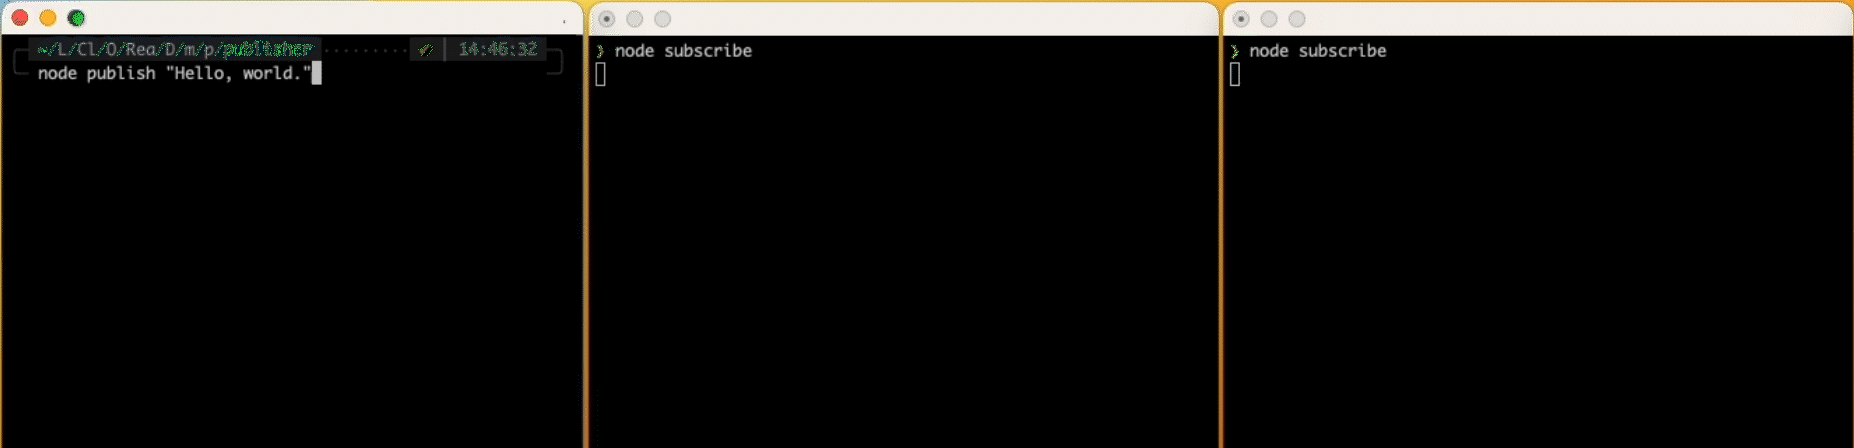
尝试在多个命令 shell 中运行同一个“订阅”程序,以刺激更多客户端。 运行“发布”程序后,应会看到消息实时传递到所有这些客户端。
创建一个名为 publisher 的项目目录,并安装所需的依赖项:
mkdir publisher
cd publisher
dotnet new console
dotnet add package Azure.Messaging.WebPubSub
将 Program.cs 文件替换为以下代码
using System;
using System.Threading.Tasks;
using Azure.Messaging.WebPubSub;

namespace publisher
{
    class Program
    {
        static async Task Main(string[] args)
        {
            if (args.Length != 3) {
                Console.WriteLine("Usage: publisher <connectionString> <hub> <message>");
                return;
            }
            var connectionString = args[0];
            var hub = args[1];
            var message = args[2];

            // Either generate the token or fetch it from server or fetch a temp one from the portal
            var serviceClient = new WebPubSubServiceClient(connectionString, hub);
            await serviceClient.SendToAllAsync(message);
        }
    }
}
SendToAllAsync() 调用会将消息发送到中心内所有已连接的客户端。
运行服务器程序,将消息推送到所有连接的客户端
$connection_string="<connection-string>"
dotnet run $connection_string "myHub1" "Hello World"
观察客户端收到的消息
# On the command shell used for running the "subscribe" program, you should see the received the messaged logged there.
# Try running the same "subscribe" program in multiple command shells, which simulates more than clients.
# Try running the "publish" program several times and you see messages being delivered in real-time to all these clients.
Message received: Hello World
首先,创建一个名为 publisher 的项目目录,并安装所需的依赖项:
mkdir publisher
cd publisher
# Create venv
python -m venv env
# Active venv
source ./env/bin/activate

pip install azure-messaging-webpubsubservice
使用 Azure Web PubSub SDK 将消息发布到服务。 使用以下代码创建一个 publish.py 文件:
import sys
from azure.messaging.webpubsubservice import WebPubSubServiceClient

if __name__ == '__main__':

    if len(sys.argv) != 4:
        print('Usage: python publish.py <connection-string> <hub-name> <message>')
        exit(1)

    connection_string = sys.argv[1]
    hub_name = sys.argv[2]
    message = sys.argv[3]

    service = WebPubSubServiceClient.from_connection_string(connection_string, hub=hub_name)
    res = service.send_to_all(message, content_type='text/plain')
    print(res)
send_to_all() 会将消息发送到中心内所有已连接的客户端。
运行以下命令:
python publish.py $connection_string "myHub1" "Hello World"
检查上述命令 shell,确认订阅服务器是否收到了消息:
Received message: Hello World
转到 pubsub 目录。 使用 Maven 创建发布服务器控制台应用 webpubsub-quickstart-publisher,并转到 webpubsub-quickstart-publisher 目录:
mvn archetype:generate --define interactiveMode=n --define groupId=com.webpubsub.quickstart --define artifactId=webpubsub-quickstart-publisher --define archetypeArtifactId=maven-archetype-quickstart --define archetypeVersion=1.4
cd webpubsub-quickstart-publisher
将 Azure Web PubSub SDK 依赖项添加到 pom.xml 的 dependencies 节点中:
<dependency>
    <groupId>com.azure</groupId>
    <artifactId>azure-messaging-webpubsub</artifactId>
    <version>1.0.0</version>
</dependency>
使用 Azure Web PubSub SDK 将消息发布到服务。 转到 /src/main/java/com/webpubsub/quickstart 目录,在编辑器中打开 App.java 文件,并将内容替换为以下代码:
package com.webpubsub.quickstart;

import com.azure.messaging.webpubsub.*;
import com.azure.messaging.webpubsub.models.*;

/**
* Publish messages using Azure Web PubSub service SDK
*
*/
public class App
{
    public static void main( String[] args )
    {
        if (args.length != 3) {
            System.out.println("Expecting 3 arguments: <connection-string> <hub-name> <message>");
            return;
        }

        WebPubSubServiceClient service = new WebPubSubServiceClientBuilder()
            .connectionString(args[0])
            .hub(args[1])
            .buildClient();
        service.sendToAll(args[2], WebPubSubContentType.TEXT_PLAIN);
    }
}
sendToAll() 调用会将消息发送到中心内所有已连接的客户端。
转到 webpubsub-quickstart-publisher 目录并使用以下命令运行项目:
mvn compile & mvn package & mvn exec:java -Dexec.mainClass="com.webpubsub.quickstart.App" -Dexec.cleanupDaemonThreads=false -Dexec.args="$connection_string 'myHub1' 'Hello World'"
可以看到上述订阅服务器收到了消息:
Message received: Hello World
摘要
本快速入门演示了将消息从应用程序服务器推送到中心内所有连接的客户端是多么容易。 此外,Web PubSub 还允许将消息推送到
- 中心内的一部分客户端
- 中心内的特定组
- 组内的一部分客户端
这些 API 支持大量用例,使开发人员能够专注于独特的业务逻辑,同时确保 Web PubSub 提供低延迟(<100 毫秒)、高可用性和大规模(百万以上的同时连接)。
后续步骤
在下一步中,我们将探讨如何使用 Web PubSub 的事件系统,这是生成完整 Web 应用程序所必需的。