本文介绍如何使用一个应用程序容器以及一个运行 TLS/SSL 提供程序的挎斗容器创建容器组。 使用单独的 TLS 终结点设置容器组,可为应用程序启用 TLS 连接,而无需更改应用程序代码。
设置包含两个容器的示例容器组:
- 一个运行简单 Web 应用且使用公共 Microsoft aci-helloworld 映像的应用程序容器。
- 一个运行公共 Nginx 映像且配置为使用 TLS 的挎斗容器。
在此示例中,容器组仅使用其公共 IP 地址公开 Nginx 的端口 443。 Nginx 将 HTTPS 请求路由到伴侣 Web 应用,后者在内部侦听端口 80。 可以改编侦听其他端口的容器应用程序示例。
有关在容器组中启用 TLS 的其他方法,请参阅后续步骤。
先决条件
如需在本地运行 CLI 参考命令,请安装 Azure CLI。 如果在 Windows 或 macOS 上运行,请考虑在 Docker 容器中运行 Azure CLI。 有关详细信息,请参阅如何在 Docker 容器中运行 Azure CLI。
如果使用的是本地安装,请使用 az login 命令登录到 Azure CLI。 若要完成身份验证过程,请遵循终端中显示的步骤。 有关其他登录选项,请参阅使用 Azure CLI 登录。
出现提示时,请在首次使用时安装 Azure CLI 扩展。 有关扩展详细信息,请参阅使用 Azure CLI 的扩展。
运行 az version 以查找安装的版本和依赖库。 若要升级到最新版本,请运行 az upgrade。
本文需要 2.0.55 或更高版本的 Azure CLI。
注意
在可以在由世纪互联运营的 Microsoft Azure 中使用 Azure CLI 之前,请先运行
az cloud set -n AzureChinaCloud来更改云环境。 若要切换回 Azure 公有云,请再次运行az cloud set -n AzureCloud。
创建自签名证书
若要将 Nginx 设置为 TLS 提供程序,需要一个 TLS/SSL 证书。 本文介绍如何创建和设置自签名的 TLS/SSL 证书。 对于生产方案,应从证书颁发机构获取证书。
若要创建自签名的 TLS/SSL 证书,请使用 Azure 本地 Shell 以及许多 Linux 分发版中提供的 OpenSSL 工具,或使用操作系统中的类似客户端工具。
首先在本地工作目录中创建证书请求(.csr 文件):
openssl req -new -newkey rsa:2048 -nodes -keyout ssl.key -out ssl.csr
按提示添加标识信息。 对于“公用名”,请输入与证书关联的主机名。 当系统提示输入密码时,请直接按 Enter 而不要键入任何内容,以跳过添加密码的步骤。
运行以下命令,基于证书请求创建自签名证书(.crt 文件)。 例如:
openssl x509 -req -days 365 -in ssl.csr -signkey ssl.key -out ssl.crt
现在,该目录中应会出现三个文件:证书请求 (ssl.csr)、私钥 (ssl.key) 和自签名证书 (ssl.crt)。 在后续步骤中将使用 ssl.key 和 ssl.crt。
将 Nginx 配置为使用 TLS
创建 Nginx 配置文件
在本部分,你将为 Nginx 创建配置文件以使用 TLS。 首先,将以下文本复制到名为 nginx.conf 的新文件中。
code nginx.conf
在 location 中,请务必将 proxy_pass 设置为应用的正确端口。 本示例为 aci-helloworld 容器设置了端口 80。
# nginx Configuration File
# https://wiki.nginx.org/Configuration

# Run as a less privileged user for security reasons.
user nginx;

worker_processes auto;

events {
  worker_connections 1024;
}

pid        /var/run/nginx.pid;

http {

    #Redirect to https, using 307 instead of 301 to preserve post data

    server {
        listen [::]:443 ssl;
        listen 443 ssl;

        server_name localhost;

        # Protect against the BEAST attack by not using SSLv3 at all. If you need to support older browsers (IE6) you may need to add
        # SSLv3 to the list of protocols below.
        ssl_protocols              TLSv1.2;

        # Ciphers set to best allow protection from Beast, while providing forwarding secrecy, as defined by Mozilla - https://wiki.mozilla.org/Security/Server_Side_TLS#Nginx
        ssl_ciphers                ECDHE-RSA-AES128-GCM-SHA256:ECDHE-ECDSA-AES128-GCM-SHA256:ECDHE-RSA-AES256-GCM-SHA384:ECDHE-ECDSA-AES256-GCM-SHA384:DHE-RSA-AES128-GCM-SHA256:DHE-DSS-AES128-GCM-SHA256:kEDH+AESGCM:ECDHE-RSA-AES128-SHA256:ECDHE-ECDSA-AES128-SHA256:ECDHE-RSA-AES128-SHA:ECDHE-ECDSA-AES128-SHA:ECDHE-RSA-AES256-SHA384:ECDHE-ECDSA-AES256-SHA384:ECDHE-RSA-AES256-SHA:ECDHE-ECDSA-AES256-SHA:DHE-RSA-AES128-SHA256:DHE-RSA-AES128-SHA:DHE-DSS-AES128-SHA256:DHE-RSA-AES256-SHA256:DHE-DSS-AES256-SHA:DHE-RSA-AES256-SHA:AES128-GCM-SHA256:AES256-GCM-SHA384:ECDHE-RSA-RC4-SHA:ECDHE-ECDSA-RC4-SHA:AES128:AES256:RC4-SHA:HIGH:!aNULL:!eNULL:!EXPORT:!DES:!3DES:!MD5:!PSK;
        ssl_prefer_server_ciphers  on;

        # Optimize TLS/SSL by caching session parameters for 10 minutes. This cuts down on the number of expensive TLS/SSL handshakes.
        # The handshake is the most CPU-intensive operation, and by default it is re-negotiated on every new/parallel connection.
        # By enabling a cache (of type "shared between all Nginx workers"), we tell the client to re-use the already negotiated state.
        # Further optimization can be achieved by raising keepalive_timeout, but that shouldn't be done unless you serve primarily HTTPS.
        ssl_session_cache    shared:SSL:10m; # a 1mb cache can hold about 4000 sessions, so we can hold 40000 sessions
        ssl_session_timeout  24h;

        # Use a higher keepalive timeout to reduce the need for repeated handshakes
        keepalive_timeout 300; # up from 75 secs default

        # remember the certificate for a year and automatically connect to HTTPS
        add_header Strict-Transport-Security 'max-age=31536000; includeSubDomains';

        ssl_certificate      /etc/nginx/ssl.crt;
        ssl_certificate_key  /etc/nginx/ssl.key;

        location / {
            proxy_pass http://localhost:80; # TODO: replace port if app listens on port other than 80

            proxy_set_header Connection "";
            proxy_set_header Host $host;
            proxy_set_header X-Real-IP $remote_addr;
            proxy_set_header X-Forwarded-For $remote_addr;
        }
    }
}
对机密和配置文件进行 Base64 编码
对 Nginx 配置文件、TLS/SSL 证书和 TLS 密钥进行 Base64 编码。 在下一部分,你将在用于部署容器组的 YAML 文件中输入编码的内容。
cat nginx.conf | base64 > base64-nginx.conf
cat ssl.crt | base64 > base64-ssl.crt
cat ssl.key | base64 > base64-ssl.key
部署容器组
现在,通过在 YAML 文件中指定容器配置来部署容器组。
创建 YAML 文件
将以下 YAML 复制到名为 deploy-aci.yaml 的新文件中。
code deploy-aci.yaml
输入 base64 编码文件的内容(在 secret 下指示)。 例如,对每个 base64 编码的文件运行 cat 以查看其内容。 在部署期间,这些文件将添加到容器组中的机密卷。 在本示例中,机密卷已装载到 Nginx 容器。
api-version: 2019-12-01
location: chinaeast2
name: app-with-ssl
properties:
  containers:
  - name: nginx-with-ssl
    properties:
      image: mcr.microsoft.com/oss/nginx/nginx:1.15.5-alpine
      ports:
      - port: 443
        protocol: TCP
      resources:
        requests:
          cpu: 1.0
          memoryInGB: 1.5
      volumeMounts:
      - name: nginx-config
        mountPath: /etc/nginx
  - name: my-app
    properties:
      image: mcr.microsoft.com/azuredocs/aci-helloworld
      ports:
      - port: 80
        protocol: TCP
      resources:
        requests:
          cpu: 1.0
          memoryInGB: 1.5
  volumes:
  - secret:
      ssl.crt: <Enter contents of base64-ssl.crt here>
      ssl.key: <Enter contents of base64-ssl.key here>
      nginx.conf: <Enter contents of base64-nginx.conf here>
    name: nginx-config
  ipAddress:
    ports:
    - port: 443
      protocol: TCP
    type: Public
  osType: Linux
tags: null
type: Microsoft.ContainerInstance/containerGroups
部署容器组
使用 az group create 命令创建资源组:
az group create --name myResourceGroup --location chinaeast2
使用 az container create 命令部署容器组并传递 YAML 文件作为参数。
az container create --resource-group <myResourceGroup> --file deploy-aci.yaml
查看部署状态
若要查看部署状态,请运行以下 az container show 命令:
az container show --resource-group <myResourceGroup> --name app-with-ssl --output table
如果部署成功,输出将如下所示:
Name          ResourceGroup    Status    Image                                                    IP:ports             Network    CPU/Memory       OsType    Location
------------  ---------------  --------  -------------------------------------------------------  -------------------  ---------  ---------------  --------  ----------
app-with-ssl  myresourcegroup  Running   nginx, mcr.microsoft.com/azuredocs/aci-helloworld        52.157.22.76:443     Public     1.0 core/1.5 gb  Linux     chinaeast2
验证 TLS 连接
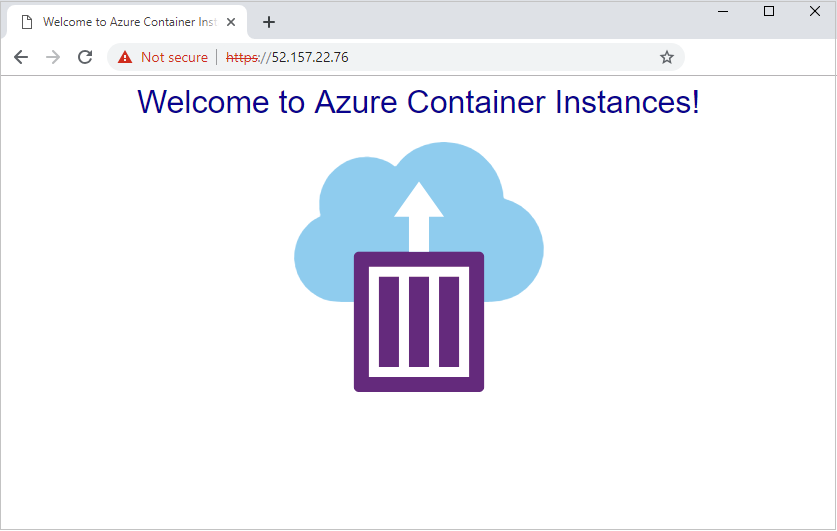
使用浏览器导航到容器组的公共 IP 地址。 本示例中显示的 IP 地址是 52.157.22.76,因此 URL 是 https://52.157.22.76。 由于 Nginx 服务器配置的原因,必须使用 HTTPS 查看正在运行的应用程序。 尝试通过 HTTP 连接失败。
注意
由于本示例使用自签名证书而不是证书颁发机构提供的证书,因此,在通过 HTTPS 连接站点时,浏览器会显示安全警告。 你可能需要接受警告或调整浏览器或证书设置才能继续进入页面。 这是预期的行为。
后续步骤
本文介绍了如何设置 Nginx 容器,以便与容器组中运行的 Web 应用建立 TLS 连接。 对于侦听端口 80 以外的端口的应用,可以改编此示例。 还可以更新 Nginx 配置文件来自动重定向端口 80 (HTTP) 上的服务器连接,以使用 HTTPS。
尽管本文在挎斗中使用 Nginx,但你可以使用另一个 TLS 提供程序,例如 Caddy。
如果在 Azure 虚拟网络中部署容器组,则可考虑使用其他选项为后端容器实例启用 TLS 终结点,其中包括: