在本教程中,你将 DocumentDB 用作 Docker 容器中的本地开发数据库,使用 MongoDB 驱动程序生成 TypeScript 应用程序,然后通过交换连接字符串迁移到 Azure DocumentDB。
在本教程中,你将了解:
- 在 Docker 容器中启动 DocumentDB
- 创建 TypeScript 应用程序
- 将应用程序连接到本地数据库
- 创建 Azure DocumentDB 群集
- 将应用程序部署到 Azure DocumentDB
先决条件
- Node.js 18 或更高版本
- Docker Desktop
- Azure CLI
- 一份 Azure 订阅。 如果没有 Azure 订阅,可在开始前创建一个试用帐户。
启动容器
使用 DocumentDB 的 Docker 容器映像创建本地开发数据库。
拉取 DocumentDB 容器映像。
docker pull ghcr.io/documentdb/documentdb/documentdb-local:latest使用用户名和密码启动容器。
docker run --detach --publish 10260:10260 --name documentdb ghcr.io/documentdb/documentdb/documentdb-local:latest --username <admin-username> --password <admin-password>Important
将
<admin-username>和<admin-password>替换为你自己的凭据。验证容器是否正在运行。
docker ps --filter "name=documentdb"Important
DocumentDB 网关终结点在端口
10260上可用。 使用以下“连接字符串”格式进行连接:mongodb://<admin-username>:<admin-password>@localhost:10260/?tls=true&tlsAllowInvalidCertificates=true设置 价值 终结点 https://localhost:10260用户名 <admin-username>密码 <admin-password>TLS trueTLS 允许无效证书 true将
<admin-username>和<admin-password>替换为你自己的凭据。
创建应用程序
创建 Next.js 应用程序并将其连接到本地数据库。
在空文件夹中创建新的 Next.js 应用程序。
npx create-next-app .安装 Node.js MongoDB 驱动程序。
npm install --save mongodb使用以下代码创建一
app/data.tsx个名为的新文件。 此文件包含与数据库交互的服务器操作。"use server"; import { MongoClient, ObjectId } from "mongodb"; import { revalidatePath } from "next/cache"; const connectionString = "<documentdb-connection-string>"; const client = new MongoClient(connectionString); const db = client.db("work-management"); const collection = db.collection("tasks"); export type Todo = { id: string; title: string; completed: boolean; }; export async function getTodos(): Promise<Todo[]> { const docs = await collection.find().sort({ _id: -1 }).toArray(); return docs.map((doc) => ({ id: doc._id.toString(), title: doc.title, completed: doc.completed, })); } export async function addTodo(formData: FormData) { const title = formData.get("title") as string; if (!title?.trim()) return; await collection.insertOne({ title: title.trim(), completed: false }); revalidatePath("/"); } export async function toggleTodo(formData: FormData) { const id = formData.get("id") as string; const doc = await collection.findOne({ _id: new ObjectId(id) }); if (doc) { await collection.updateOne( { _id: new ObjectId(id) }, { $set: { completed: !doc.completed } } ); } revalidatePath("/"); } export async function deleteTodo(formData: FormData) { const id = formData.get("id") as string; await collection.deleteOne({ _id: new ObjectId(id) }); revalidatePath("/"); }Important
在启动容器时,请将连接字符串占位符替换为本教程前面指定的凭据。
删除现有
app/page.tsx文件并将其替换为以下代码。import { getTodos, addTodo, toggleTodo, deleteTodo } from "./data"; export default async function Home() { const todos = await getTodos(); return ( <div className="min-h-screen bg-black text-zinc-50 font-sans"> <main className="max-w-lg mx-auto py-16 px-8"> <h1 className="text-2xl font-semibold tracking-tight mb-8">Todo App</h1> <form action={addTodo} className="flex gap-2 mb-8"> <input name="title" placeholder="Add a todo..." required className="flex-1 rounded-md border border-zinc-700 bg-zinc-900 px-3 py-2 text-sm text-zinc-100 placeholder:text-zinc-500 focus:outline-none focus:ring-2 focus:ring-zinc-600" /> <button type="submit" className="rounded-md bg-zinc-100 px-4 py-2 text-sm font-medium text-zinc-900 hover:bg-zinc-300 transition-colors"> Add </button> </form> <ul className="space-y-2"> {todos.map((todo) => ( <li key={todo.id} className="flex items-center gap-3 rounded-md border border-zinc-800 bg-zinc-900 px-3 py-2"> <form action={toggleTodo}> <input type="hidden" name="id" value={todo.id} /> <button type="submit" className="text-lg leading-none">{todo.completed ? "✅" : "⬜"}</button> </form> <span className={`flex-1 text-sm ${todo.completed ? "line-through text-zinc-500" : "text-zinc-100"}`}>{todo.title}</span> <form action={deleteTodo}> <input type="hidden" name="id" value={todo.id} /> <button type="submit" className="text-sm text-red-400 hover:text-red-300 transition-colors">✕</button> </form> </li> ))} </ul> {todos.length === 0 && <p className="text-center text-sm text-zinc-500 mt-4">No todos yet.</p>} </main> </div> ); }在本地运行应用程序。
npm run dev在浏览器中打开
http://localhost:3000,验证应用程序是否正在运行并连接到本地数据库。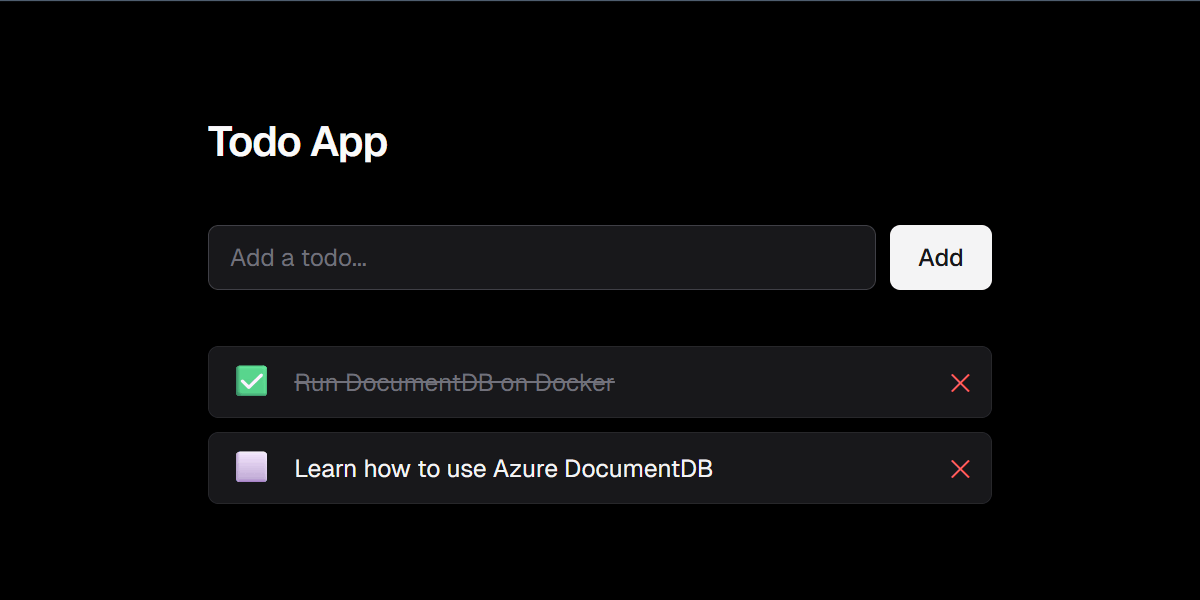
小窍门
可以通过连接 Visual Studio Code DocumentDB 扩展到 DocumentDB 容器来查看此应用程序创建的数据。 数据库已命名
work-management,并且集合已命名tasks。停止应用程序。

创建 Azure DocumentDB 群集
创建 Azure DocumentDB 群集以在云中托管应用程序数据。
为群集名称和目标资源组名称创建变量。
RESOURCE_GROUP_NAME="<resource-group-name>"
CLUSTER_NAME="<cluster-name>"
ADMIN_USERNAME="<admin-username>"
ADMIN_PASSWORD="<admin-password>"
Important
将占位符中的值替换为您自己的值。 群集名称必须多区域唯一。
创建 Azure DocumentDB 群集。
az cosmosdb mongocluster create \
  --resource-group $RESOURCE_GROUP_NAME \
  --cluster-name $CLUSTER_NAME \
  --location "chinanorth3" \
  --administrator-login $ADMIN_USERNAME \
  --administrator-login-password $ADMIN_PASSWORD \
  --server-version "8.0" \
  --shard-node-tier "M30" \
  --shard-node-ha false \
  --shard-node-disk-size-gb 128 \
  --shard-node-count 1
创建防火墙规则以允许从当前 IP 地址进行访问。
MY_IP=$(curl -s ifconfig.me)

az cosmosdb mongocluster firewall rule create \
  --resource-group $RESOURCE_GROUP_NAME \
  --cluster-name $CLUSTER_NAME \
  --rule-name "allow-my-ip" \
  --start-ip-address $MY_IP \
  --end-ip-address $MY_IP
获取群集的连接字符串。
az cosmosdb mongocluster show \
  --resource-group $RESOURCE_GROUP_NAME \
  --cluster-name $CLUSTER_NAME \
  --query "connectionString" \
  --output tsv
记录连接字符串的值。 你在下一步中使用它。
将应用程序连接到 Azure DocumentDB
更新应用程序以连接到 Azure DocumentDB 而不是本地容器。
在
app/data.tsx中,将本地连接字符串替换为 Azure DocumentDB 连接字符串。const connectionString = "<azure-documentdb-connection-string>";Important
将
<azure-documentdb-connection-string>替换为在上一步中记录的连接字符串。 门户中提供的连接字符串不包括密码。 将连接字符串中的<password>占位符替换为创建群集时指定的密码。再次启动应用程序。
npm run dev在浏览器中打开
http://localhost:3000。 应用程序现在将数据读取并写入 Azure DocumentDB 群集。
清理资源
如果不再需要在本教程中创建的资源,请将其删除以避免产生费用。
删除 Azure DocumentDB 群集。
az cosmosdb mongocluster delete \
  --resource-group $RESOURCE_GROUP_NAME \
  --cluster-name $CLUSTER_NAME \
  --yes
停止并删除 DocumentDB 容器。
docker stop documentdb
docker rm documentdb