使用 Azure PowerShell 创建内部负载均衡器和两个虚拟机,通过这种方式开始使用 Azure 负载均衡器。 此外,你还部署了其他资源,包括 Azure Bastion、NAT 网关、虚拟网络和所需的子网。
先决条件
具有活动订阅的 Azure 帐户。 创建试用版订阅
本地安装的 Azure PowerShell 或 Azure 本地 Shell
如果选择在本地安装并使用 PowerShell,则本文需要 Azure PowerShell 模块 5.4.1 或更高版本。 运行 Get-Module -ListAvailable Az 查找已安装的版本。 如果需要进行升级,请参阅 Install Azure PowerShell module(安装 Azure PowerShell 模块)。 如果在本地运行 PowerShell,则还需运行 Connect-AzAccount -Environment AzureChinaCloud 以创建与 Azure 的连接。
创建资源组
Azure 资源组是在其中部署和管理 Azure 资源的逻辑容器。
使用 New-AzResourceGroup 创建资源组。
$rg = @{
    Name = 'CreateINTLBQS-rg'
    Location = 'chinanorth3'
}
New-AzResourceGroup @rg
配置虚拟网络
创建内部负载均衡器时,虚拟网络配置为负载均衡器的网络。 需要先创建支持的虚拟网络资源,然后才能部署 VM 和测试负载均衡器。
为 NAT 网关创建公共 IP
为后端虚拟机创建虚拟网络
创建网络安全组,以定义虚拟网络的入站连接
创建 Azure Bastion 主机以安全管理后端池中的虚拟机
创建公共 IP 地址
使用 New-AzPublicIpAddress 为 NAT 网管创建公共 IP 地址。
## Create public IP address for NAT gateway and place IP in variable ##
$gwpublicip = @{
    Name = 'myNATgatewayIP'
    ResourceGroupName = $rg.name
    Location = 'chinanorth3'
    Sku = 'Standard'
    AllocationMethod = 'static'
    Zone = 1,2,3
}
$gwpublicip = New-AzPublicIpAddress @gwpublicip
若要在区域 1 中创建区域性公共 IP 地址,请使用以下命令:
## Create a zonal public IP address for NAT gateway and place IP in variable ##
$gwpublicip = @{
    Name = 'myNATgatewayIP'
    ResourceGroupName = $rg.name
    Location = 'chinanorth3'
    Sku = 'Standard'
    AllocationMethod = 'static'
    Zone = 1
}
$gwpublicip = New-AzPublicIpAddress @gwpublicip
注意
公共 IP 地址供 NAT 网关使用,以便为后端池中的虚拟机提供出站连接。 建议在创建内部负载均衡器并需要后端池资源进行出站连接时使用此地址。 有关详细信息,请参阅 NAT 网关。
创建虚拟网络、网络安全组、堡垒主机和 NAT 网关
使用 New-AzVirtualNetwork 创建虚拟网络
使用 New-AzNetworkSecurityRuleConfig 创建网络安全组规则
使用 New-AzBastion 创建 Azure 堡垒主机
使用 New-AzNatGateway 创建 NAT 网关资源
使用 AzVirtualNetworkSubnetConfig 将 NAT 网关关联到虚拟网络的子网
重要
小时定价从部署 Bastion 的时刻开始计算,而无论出站数据使用情况如何。 有关详细信息,请参阅定价和 SKU。 如果要将 Bastion 部署为教程或测试的一部分,建议在使用完此资源后将其删除。
## Create NAT gateway resource ##
$nat = @{
    ResourceGroupName = $rg.name
    Name = 'myNATgateway'
    IdleTimeoutInMinutes = '10'
    Sku = 'Standard'
    Location = 'chinanorth3'
    PublicIpAddress = $gwpublicip
}
$natGateway = New-AzNatGateway @nat

## Create backend subnet config ##
$subnet = @{
    Name = 'myBackendSubnet'
    AddressPrefix = '10.1.0.0/24'
    NatGateway = $natGateway
}
$subnetConfig = New-AzVirtualNetworkSubnetConfig @subnet

## Create Azure Bastion subnet. ##
$bastsubnet = @{
    Name = 'AzureBastionSubnet'
    AddressPrefix = '10.1.1.0/24'
}
$bastsubnetConfig = New-AzVirtualNetworkSubnetConfig @bastsubnet

## Create the virtual network ##
$net = @{
    Name = 'myVNet'
    ResourceGroupName = $rg.name
    Location = 'chinanorth3'
    AddressPrefix = '10.1.0.0/16'
    Subnet = $subnetConfig,$bastsubnetConfig
}
$vnet = New-AzVirtualNetwork @net

## Create public IP address for bastion host. ##
$bastionip = @{
    Name = 'myBastionIP'
    ResourceGroupName = $rg.name
    Location = 'chinanorth3'
    Sku = 'Standard'
    AllocationMethod = 'Static'
}
$bastionip = New-AzPublicIpAddress @bastionip

## Create bastion host ##
$bastion = @{
    ResourceGroupName = $rg.name
    Name = 'myBastion'
    PublicIpAddress = $bastionip
    VirtualNetwork = $vnet
}
New-AzBastion @bastion -AsJob

## Create rule for network security group and place in variable. ##
$nsgrule = @{
    Name = 'myNSGRuleHTTP'
    Description = 'Allow HTTP'
    Protocol = '*'
    SourcePortRange = '*'
    DestinationPortRange = '80'
    SourceAddressPrefix = 'Internet'
    DestinationAddressPrefix = '*'
    Access = 'Allow'
    Priority = '2000'
    Direction = 'Inbound'
}
$rule1 = New-AzNetworkSecurityRuleConfig @nsgrule

## Create network security group ##
$nsg = @{
    Name = 'myNSG'
    ResourceGroupName = $rg.name
    Location = 'chinanorth3'
    SecurityRules = $rule1
}
New-AzNetworkSecurityGroup @nsg
创建负载均衡器
本部分详细介绍如何创建和配置负载均衡器的以下组件:
使用 New-AzLoadBalancerFrontendIpConfig 为前端 IP 池创建前端 IP。 此 IP 在负载均衡器上接收传入流量
使用 New-AzLoadBalancerBackendAddressPoolConfig 为从负载均衡器前端发送的流量创建后端地址池
使用 Add-AzLoadBalancerProbeConfig 创建运行状况探测,用于确定后端 VM 实例的运行状况
使用 Add-AzLoadBalancerRuleConfig 创建负载均衡器规则,用于定义流量分发到 VM 的方式
使用 New-AzLoadBalancer 创建公共负载均衡器
## Place virtual network created in previous step into a variable. ##
$net = @{
    Name = 'myVNet'
    ResourceGroupName = $rg.name
}
$vnet = Get-AzVirtualNetwork @net

## Create load balancer frontend configuration and place in variable. ##
$lbip = @{
    Name = 'myFrontEnd'
    PrivateIpAddress = '10.1.0.4'
    SubnetId = $vnet.subnets[0].Id
}
$feip = New-AzLoadBalancerFrontendIpConfig @lbip

## Create backend address pool configuration and place in variable. ##
$bepool = New-AzLoadBalancerBackendAddressPoolConfig -Name 'myBackEndPool'

## Create the health probe and place in variable. ##
$probe = @{
    Name = 'myHealthProbe'
    Protocol = 'tcp'
    Port = '80'
    IntervalInSeconds = '360'
    ProbeCount = '5'
}
$healthprobe = New-AzLoadBalancerProbeConfig @probe

## Create the load balancer rule and place in variable. ##
$lbrule = @{
    Name = 'myHTTPRule'
    Protocol = 'tcp'
    FrontendPort = '80'
    BackendPort = '80'
    IdleTimeoutInMinutes = '15'
    FrontendIpConfiguration = $feip
    BackendAddressPool = $bePool
}
$rule = New-AzLoadBalancerRuleConfig @lbrule -EnableTcpReset

## Create the load balancer resource. ##
$loadbalancer = @{
    ResourceGroupName = $rg.name
    Name = 'myLoadBalancer'
    Location = 'chinanorth3'
    Sku = 'Standard'
    FrontendIpConfiguration = $feip
    BackendAddressPool = $bePool
    LoadBalancingRule = $rule
    Probe = $healthprobe
}
New-AzLoadBalancer @loadbalancer
创建虚拟机
在本部分中,将为负载均衡器的后端池创建两个虚拟机。
使用 New-AzNetworkInterface 创建三个网络接口
使用 Get-Credential 设置 VM 的管理员用户名和密码
使用以下命令创建虚拟机:
# Set the administrator and password for the VMs. ##
$cred = Get-Credential

## Place virtual network created in previous step into a variable. ##
$net = @{
    Name = 'myVNet'
    ResourceGroupName = $rg.name
}
$vnet = Get-AzVirtualNetwork @net

## Place the load balancer into a variable. ##
$lb = @{
    Name = 'myLoadBalancer'
    ResourceGroupName = $rg.name
}
$bepool = Get-AzLoadBalancer @lb  | Get-AzLoadBalancerBackendAddressPoolConfig

## Place the network security group into a variable. ##
$sg = @{
    Name = 'myNSG'
    ResourceGroupName = $rg.name
}
$nsg = Get-AzNetworkSecurityGroup @sg

## For loop with variable to create virtual machines for load balancer backend pool. ##
for ($i=1; $i -le 2; $i++)
{
    ## Command to create network interface for VMs ##
    $nic = @{
    Name = "myNicVM$i"
    ResourceGroupName = $rg.name
    Location = 'chinanorth3'
    Subnet = $vnet.Subnets[0]
    NetworkSecurityGroup = $nsg
    LoadBalancerBackendAddressPool = $bepool
    }
    $nicVM = New-AzNetworkInterface @nic

    ## Create a virtual machine configuration for VMs ##
    $vmsz = @{
        VMName = "myVM$i"
        VMSize = 'Standard_DS1_v2'
    }
    $vmos = @{
        ComputerName = "myVM$i"
        Credential = $cred
    }
    $vmimage = @{
        PublisherName = 'MicrosoftWindowsServer'
        Offer = 'WindowsServer'
        Skus = '2019-Datacenter'
        Version = 'latest'
    }
    $vmConfig = New-AzVMConfig @vmsz `
        | Set-AzVMOperatingSystem @vmos -Windows `
        | Set-AzVMSourceImage @vmimage `
        | Add-AzVMNetworkInterface -Id $nicVM.Id

    ## Create the virtual machine for VMs ##
    $vm = @{
        ResourceGroupName = $rg.name
        Location = 'chinanorth3'
        VM = $vmConfig
        Zone = "$i"
    }
}
New-AzVM @vm -asjob
虚拟机和堡垒主机的部署将作为 PowerShell 作业提交。 若要查看作业的状态,请使用 Get-Job:
Get-Job

Id     Name            PSJobTypeName   State         HasMoreData     Location             Command
-- ----            ------------- -----         ----------- --------             -------
1      Long Running O… AzureLongRunni… Completed     True            localhost            New-AzBastion
2      Long Running O… AzureLongRunni… Completed     True            localhost            New-AzVM
3      Long Running O… AzureLongRunni… Completed     True            localhost            New-AzVM
注意
Azure 会为未分配公共 IP 地址的 VM 或位于内部基本 Azure 负载均衡器的后端池中的 VM 提供默认出站访问 IP。 默认出站访问 IP 机制会提供不可配置的出站 IP 地址。
发生以下事件之一时,将禁用默认出站访问 IP:
- 将公共 IP 地址分配给 VM。
- 虚拟机被放置在标准负载平衡器的后端池中,有无出站规则均可。
- 向 VM 的子网分配了 Azure NAT 网关资源。
在灵活业务流程模式下通过使用虚拟机规模集创建的 VM 没有默认的出站访问权限。
有关 Azure 中的出站连接的详细信息,请参阅 Azure 中的默认出站访问权限和使用用于出站连接的源网络地址转换 (SNAT)。
安装 IIS
使用 Set-AzVMExtension 安装自定义脚本扩展。
该扩展运行 PowerShell Add-WindowsFeature Web-Server 来安装 IIS Web 服务器,然后更新 Default.htm 页以显示 VM 的主机名:
重要
在继续操作之前,请确保已在前面的步骤中完成虚拟机部署。 使用 Get-Job 来检查虚拟机部署作业的状态。
## For loop with variable to install custom script extension on virtual machines. ##
for ($i=1; $i -le 2; $i++)
{
    $ext = @{
        Publisher = 'Microsoft.Compute'
        ExtensionType = 'CustomScriptExtension'
        ExtensionName = 'IIS'
        ResourceGroupName = $rg.name
        VMName = "myVM$i"
        Location = 'chinanorth3'
        TypeHandlerVersion = '1.8'
        SettingString = '{"commandToExecute":"powershell Add-WindowsFeature Web-Server; powershell Add-Content -Path \"C:\\inetpub\\wwwroot\\Default.htm\" -Value $($env:computername)"}'
    }
    Set-AzVMExtension @ext -AsJob
}
扩展部署为 PowerShell 作业。 若要查看安装作业的状态,请使用 Get-Job:
Get-Job

Id     Name            PSJobTypeName   State         HasMoreData     Location             Command
-- ----            ------------- -----         ----------- --------             -------
8      Long Running O… AzureLongRunni… Running       True            localhost            Set-AzVMExtension
9      Long Running O… AzureLongRunni… Running       True            localhost            Set-AzVMExtension
创建测试虚拟机
使用以下内容创建虚拟机:
# Set the administrator and password for the VM. ##
$cred = Get-Credential

## Place the virtual network into a variable. ##
$net = @{
    Name = 'myVNet'
    ResourceGroupName = $rg.name
}
$vnet = Get-AzVirtualNetwork @net

## Place the network security group into a variable. ##
$sg = @{
    Name = 'myNSG'
    ResourceGroupName = $rg.name
}
$nsg = Get-AzNetworkSecurityGroup @sg

## Command to create network interface for VM ##
$nic = @{
    Name = "myNicTestVM"
    ResourceGroupName = $rg.name
    Location = 'chinanorth3'
    Subnet = $vnet.Subnets[0]
    NetworkSecurityGroup = $nsg
}
$nicVM = New-AzNetworkInterface @nic

## Create a virtual machine configuration for VMs ##
$vmsz = @{
    VMName = "myTestVM"
    VMSize = 'Standard_DS1_v2'
}
$vmos = @{
    ComputerName = "myTestVM"
    Credential = $cred
}
$vmimage = @{
    PublisherName = 'MicrosoftWindowsServer'
    Offer = 'WindowsServer'
    Skus = '2019-Datacenter'
    Version = 'latest'
}
$vmConfig = New-AzVMConfig @vmsz `
    | Set-AzVMOperatingSystem @vmos -Windows `
    | Set-AzVMSourceImage @vmimage `
    | Add-AzVMNetworkInterface -Id $nicVM.Id

## Create the virtual machine for VMs ##
$vm = @{
    ResourceGroupName = $rg.name
    Location = 'chinanorth3'
    VM = $vmConfig
}
New-AzVM @vm
测试负载均衡器
登录 Azure 门户。
在“概述”屏幕上找到负载均衡器的专用 IP 地址。 在左侧菜单中选择“所有服务”,选择“所有资源”,然后选择“myLoadBalancer” 。
在 myLoadBalancer 的“概览”中,记下或复制专用 IP 地址旁边的地址 。
在左侧菜单中选择“所有服务”,选择“所有资源”,然后在资源列表中,选择“CreateIntLBQS-rg”资源组中的“myTestVM” 。
在“概述”页上,选择“连接”,然后选择“Bastion” 。
输入在 VM 创建过程中输入的用户名和密码。
在 myTestVM 中打开 Internet Explorer 。
将上一步骤的 IP 地址输入到浏览器的地址栏。 将显示自定义 IIS Web 服务器页。
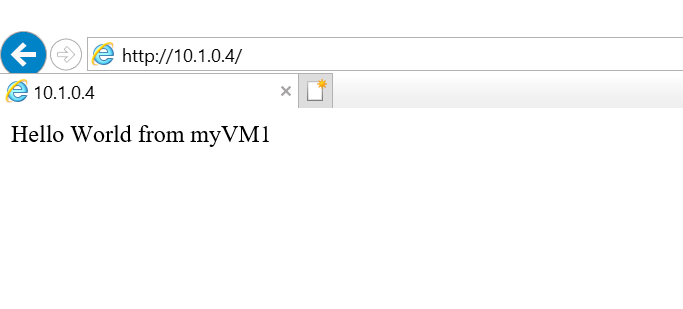
若要查看负载均衡器如何在所有 3 个 VM 之间分配流量,可以从测试计算机强制刷新 Web 浏览器。
清理资源
如果不再需要资源组、负载均衡器和剩余资源,可以使用 Remove-AzResourceGroup 命令将其删除。
Remove-AzResourceGroup -Name $rg.name
后续步骤
在本快速入门:
你创建了内部负载均衡器
附加了虚拟机
配置了负载均衡器流量规则和运行状况探测
测试了负载均衡器
若要详细了解 Azure 负载均衡器,请继续学习: