本文介绍如何将日志记录代码添加到设计器管道。 此外,还介绍了如何使用 Azure 机器学习工作室 Web 门户查看这些日志。
有关如何使用 SDK 创作体验来记录指标的详细信息,请参阅监视 Azure 机器学习试验运行和指标。
使用执行 Python 脚本组件启用设计器管道中的日志记录。 虽然可以使用此工作流记录任何值,但是记录“评估模型”组件中的指标以跟踪不同运行期间的模型性能特别有用。
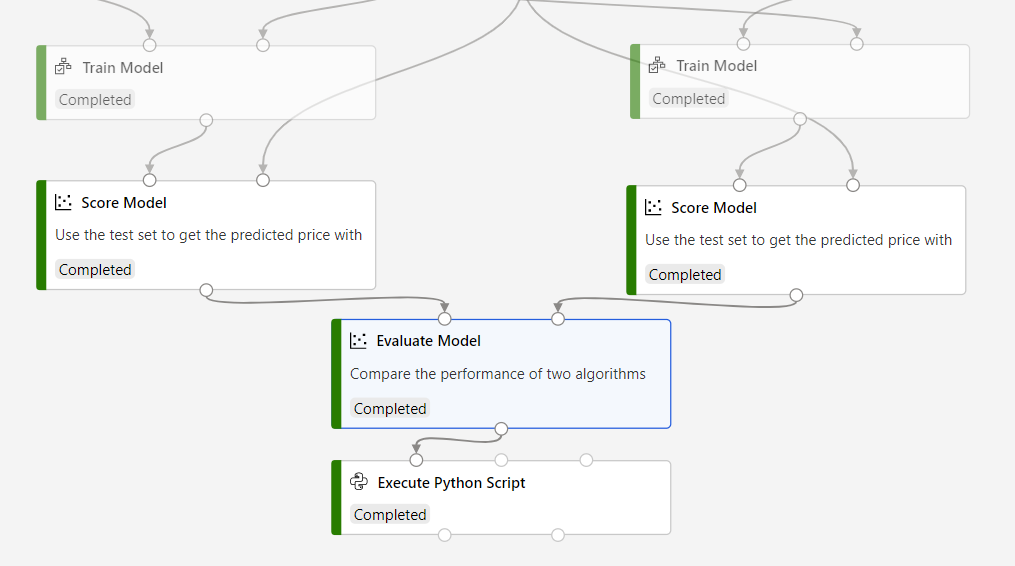
以下示例演示了如何使用“评估模型”和“执行 Python 脚本”这两个组件来记录两个训练模型的均方误差。
将“执行 Python 脚本”组件连接到“评估模型”组件的输出 。
将以下代码粘贴到“执行 Python 脚本”代码编辑器中,以记录训练模型的平均绝对误差。 可以使用类似的模式在设计器中记录任何其他值:
# dataframe1 contains the values from Evaluate Model
def azureml_main(dataframe1=None, dataframe2=None):
    print(f'Input pandas.DataFrame #1: {dataframe1}')

    from azureml.core import Run

    run = Run.get_context()

    # Log the mean absolute error to the parent run to see the metric in the run details page.
    # Note: 'run.parent.log()' should not be called multiple times because of performance issues.
    # If repeated calls are necessary, cache 'run.parent' as a local variable and call 'log()' on that variable.
    parent_run = Run.get_context().parent

    # Log left output port result of Evaluate Model. This also works when evaluate only 1 model.
    parent_run.log(name='Mean_Absolute_Error (left port)', value=dataframe1['Mean_Absolute_Error'][0])
    # Log right output port result of Evaluate Model. The following line should be deleted if you only connect one Score component to the` left port of Evaluate Model component.
    parent_run.log(name='Mean_Absolute_Error (right port)', value=dataframe1['Mean_Absolute_Error'][1])

    return dataframe1,

此代码使用 Azure 机器学习 Python SDK 来记录值。 它使用 Run.get_context() 来获取当前运行的上下文。 然后,它会使用 run.parent.log() 方法将值记录到该上下文中。 它使用 parent 将值记录到父管道运行,而不是组件运行。
有关如何使用 Python SDK 来记录值的详细信息,请参阅在 Azure 机器学习训练运行中启用日志记录。
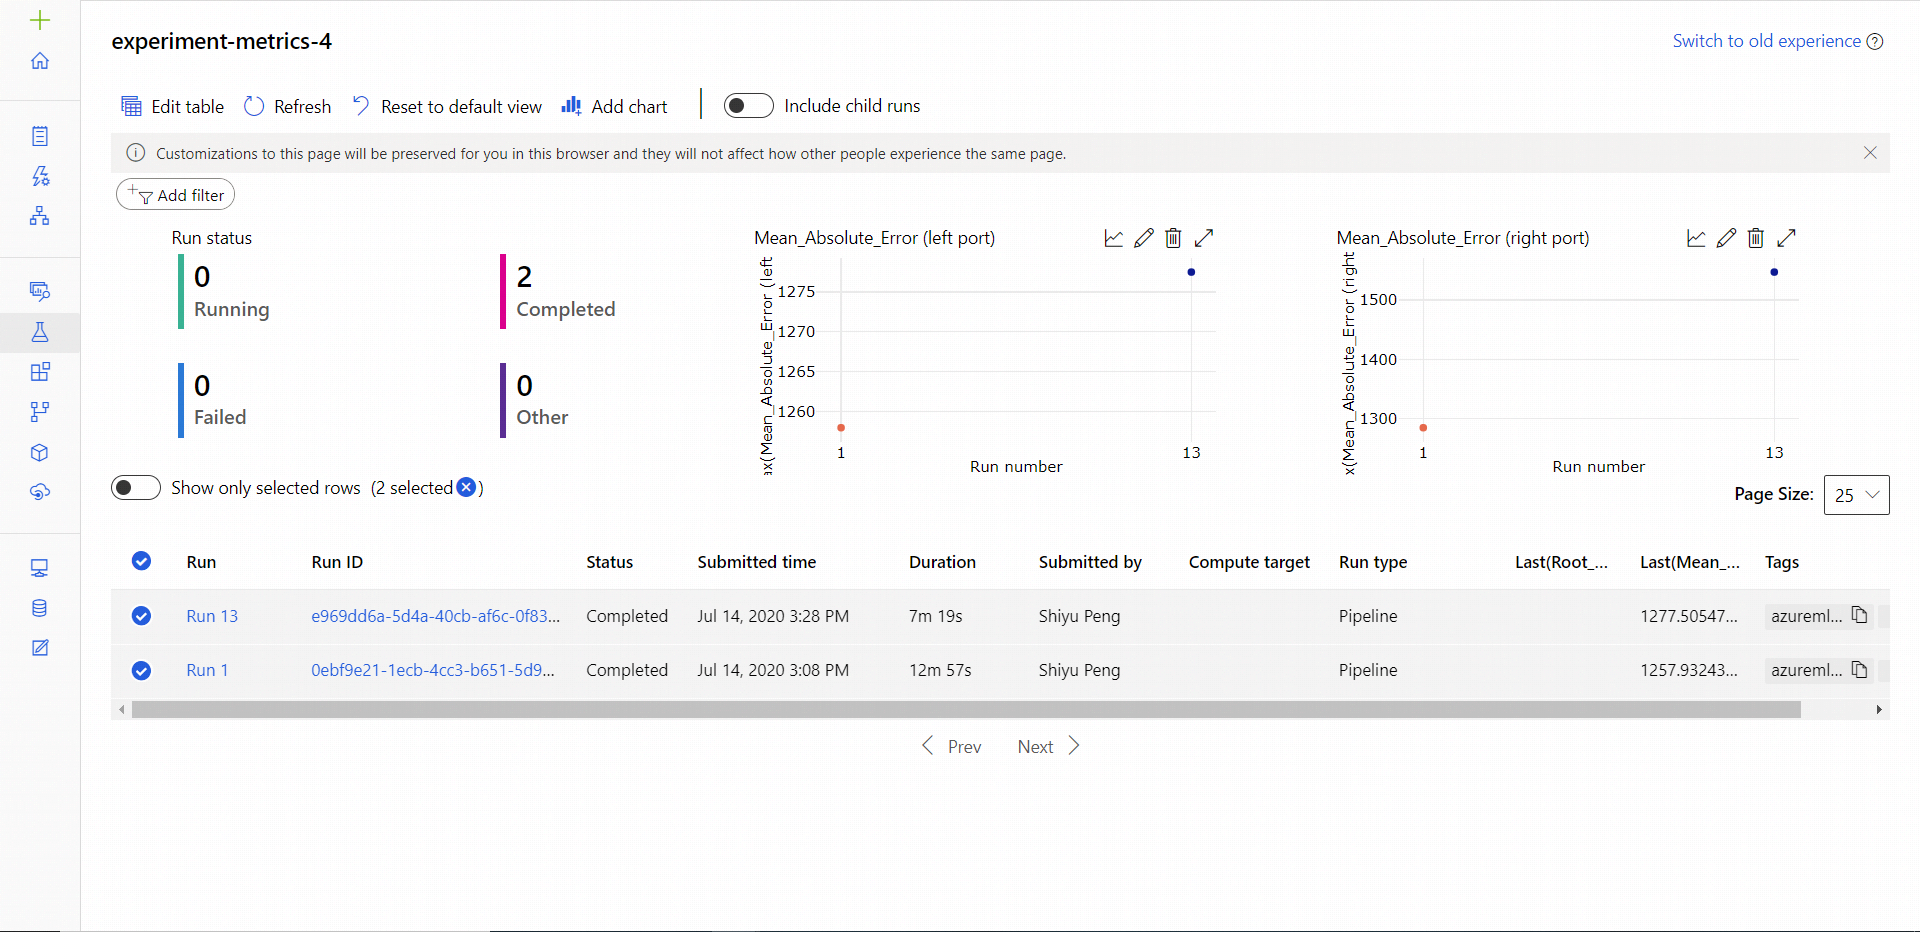
管道运行完成后,“试验”页中将显示 Mean_Absolute_Error。
导航到“作业”部分。
选择试验。
选择要查看的试验中的作业。
选择“指标”。
本教程已介绍如何在设计器中使用日志。 有关后续步骤,请参阅以下相关文章:
- 若要了解如何对设计器管道进行故障排除,请参阅对 ML 管道进行调试和故障排除。
- 若要了解如何使用 Python SDK 在 SDK 创作体验中记录指标,请参阅在 Azure 机器学习训练运行中启用日志记录。
- 了解如何在设计器中使用执行 Python 脚本。