概述
本主题演示在 ASP.NET Web API 执行注册时如何请求向 Azure 通知中心注册推送通知。 本主题是教程使用通知中心通知用户的延伸。 必须在该教程中已完成创建经过身份验证的移动服务所需的步骤。 有关通知用户方案的详细信息,请参阅使用通知中心通知用户。
更新应用程序
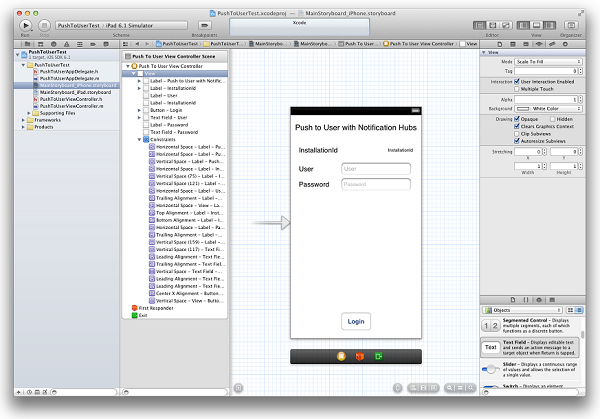
在 MainStoryboard_iPhone.storyboard 中,从对象库添加以下组件:
标签:“使用通知中心推送到用户”
标签:"InstallationId"
标签:“用户”
文本字段:“用户”
标签:“密码”
文本字段:“密码”
按钮:“登录”
此时,Storyboard 应与下图类似:
在助手编辑器中,创建所有带开关控件的容器并调用它们,连接文本字段与视图控制器(委派),并创建“登录”按钮的“操作”。
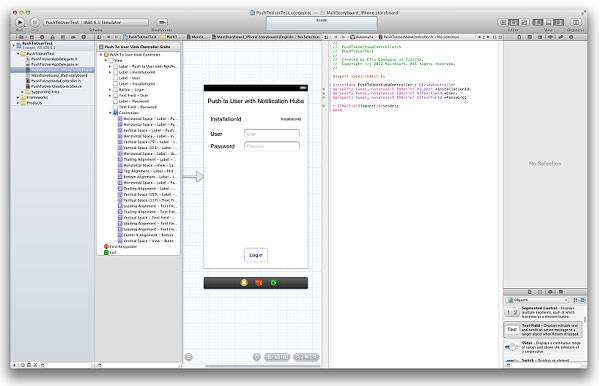
BreakingNewsViewController.h 文件现在应当包含以下代码:
@property (weak, nonatomic) IBOutlet UILabel *installationId;
@property (weak, nonatomic) IBOutlet UITextField *User;
@property (weak, nonatomic) IBOutlet UITextField *Password;

- (IBAction)login:(id)sender;
创建一个名为
DeviceInfo的类,将以下代码复制到 DeviceInfo.h 文件的 interface 部分:@property (readonly, nonatomic) NSString* installationId; @property (nonatomic) NSData* deviceToken;在文件 DeviceInfo.m 的实现部分中复制以下代码:
@synthesize installationId = _installationId;

- (id)init {
    if (!(self = [super init]))
        return nil;

    NSUserDefaults *defaults = [NSUserDefaults standardUserDefaults];
    _installationId = [defaults stringForKey:@"PushToUserInstallationId"];
    if(!_installationId) {
        CFUUIDRef newUUID = CFUUIDCreate(kCFAllocatorDefault);
        _installationId = (__bridge_transfer NSString *)CFUUIDCreateString(kCFAllocatorDefault, newUUID);
        CFRelease(newUUID);

        //store the install ID so we don't generate a new one next time
        [defaults setObject:_installationId forKey:@"PushToUserInstallationId"];
        [defaults synchronize];
    }

    return self;
}

- (NSString*)getDeviceTokenInHex {
    const unsigned *tokenBytes = [[self deviceToken] bytes];
    NSString *hexToken = [NSString stringWithFormat:@"%08X%08X%08X%08X%08X%08X%08X%08X",
                            ntohl(tokenBytes[0]), ntohl(tokenBytes[1]), ntohl(tokenBytes[2]),
                            ntohl(tokenBytes[3]), ntohl(tokenBytes[4]), ntohl(tokenBytes[5]),
                            ntohl(tokenBytes[6]), ntohl(tokenBytes[7])];
    return hexToken;
}
在 PushToUserAppDelegate.h 中,添加以下单一属性:
@property (strong, nonatomic) DeviceInfo* deviceInfo;在 PushToUserAppDelegate.m 中的
didFinishLaunchingWithOptions方法中,添加以下代码:self.deviceInfo = [[DeviceInfo alloc] init]; [[UIApplication sharedApplication] registerForRemoteNotificationTypes: UIRemoteNotificationTypeAlert | UIRemoteNotificationTypeBadge | UIRemoteNotificationTypeSound];第一行初始化
DeviceInfo单一实例。 第二行启动推送通知的注册,前提是已完成通知中心入门教程的学习。在 PushToUserAppDelegate.m 中,在 AppDelegate 中实现
didRegisterForRemoteNotificationsWithDeviceToken方法并添加以下代码:self.deviceInfo.deviceToken = deviceToken;这为请求设置设备标记。
注意
此时,此方法中不应有任何其他代码。 如果已调用在完成使用 Azure 通知中心向 iOS 应用发送推送通知教程时添加的
registerNativeWithDeviceToken方法,必须注释掉或删除该调用。在
PushToUserAppDelegate.m文件中,添加以下处理程序方法:* (void) application:(UIApplication *) application didReceiveRemoteNotification:(NSDictionary *)userInfo { NSLog(@"%@", userInfo); UIAlertView *alert = [[UIAlertView alloc] initWithTitle:@"Notification" message: [userInfo objectForKey:@"inAppMessage"] delegate:nil cancelButtonTitle: @"OK" otherButtonTitles:nil, nil]; [alert show]; }当应用程序接收到它正在运行的通知时,此方法会在 UI 中显示一个警报。
打开
PushToUserViewController.m文件,并在以下实现中返回键盘:- (BOOL)textFieldShouldReturn:(UITextField *)theTextField { if (theTextField == self.User || theTextField == self.Password) { [theTextField resignFirstResponder]; } return YES; }在
PushToUserViewController.m文件中的viewDidLoad方法中,如下所示初始化installationId标签:DeviceInfo* deviceInfo = [(PushToUserAppDelegate*)[[UIApplication sharedApplication]delegate] deviceInfo]; Self.installationId.text = deviceInfo.installationId;在
PushToUserViewController.m中的 interface 部分中添加以下属性:@property (readonly) NSOperationQueue* downloadQueue; - (NSString*)base64forData:(NSData*)theData;然后,添加以下实现:
- (NSOperationQueue *)downloadQueue {
    if (!_downloadQueue) {
        _downloadQueue = [[NSOperationQueue alloc] init];
        _downloadQueue.name = @"Download Queue";
        _downloadQueue.maxConcurrentOperationCount = 1;
    }
    return _downloadQueue;
}

// base64 encoding
- (NSString*)base64forData:(NSData*)theData
{
    const uint8_t* input = (const uint8_t*)[theData bytes];
    NSInteger length = [theData length];

    static char table[] = "ABCDEFGHIJKLMNOPQRSTUVWXYZabcdefghijklmnopqrstuvwxyz0123456789+/=";

    NSMutableData* data = [NSMutableData dataWithLength:((length + 2) / 3) * 4];
    uint8_t* output = (uint8_t*)data.mutableBytes;

    NSInteger i;
    for (i=0; i < length; i += 3) {
        NSInteger value = 0;
        NSInteger j;
        for (j = i; j < (i + 3); j++) {
            value <<= 8;

            if (j < length) {
                value |= (0xFF & input[j]);
            }
        }

        NSInteger theIndex = (i / 3) * 4;
        output[theIndex + 0] =                    table[(value >> 18) & 0x3F];
        output[theIndex + 1] =                    table[(value >> 12) & 0x3F];
        output[theIndex + 2] = (i + 1) < length ? table[(value >> 6)  & 0x3F] : '=';
        output[theIndex + 3] = (i + 2) < length ? table[(value >> 0)  & 0x3F] : '=';
    }

    return [[NSString alloc] initWithData:data encoding:NSASCIIStringEncoding];
}
将以下代码复制到由 XCode 创建的
login处理程序方法:DeviceInfo* deviceInfo = [(PushToUserAppDelegate*)[[UIApplication sharedApplication]delegate] deviceInfo]; // build JSON NSString* json = [NSString stringWithFormat:@"{\"platform\":\"ios\", \"instId\":\"%@\", \"deviceToken\":\"%@\"}", deviceInfo.installationId, [deviceInfo getDeviceTokenInHex]]; // build auth string NSString* authString = [NSString stringWithFormat:@"%@:%@", self.User.text, self.Password.text]; NSMutableURLRequest* request = [NSMutableURLRequest requestWithURL:[NSURL URLWithString:@"http://nhnotifyuser.chinacloudsites.cn/api/register"]]; [request setHTTPMethod:@"POST"]; [request setHTTPBody:[json dataUsingEncoding:NSUTF8StringEncoding]]; [request addValue:[@([json lengthOfBytesUsingEncoding:NSUTF8StringEncoding]) description] forHTTPHeaderField:@"Content-Length"]; [request addValue:@"application/json" forHTTPHeaderField:@"Content-Type"]; [request addValue:[NSString stringWithFormat:@"Basic %@",[self base64forData:[authString dataUsingEncoding:NSUTF8StringEncoding]]] forHTTPHeaderField:@"Authorization"]; // connect with POST [NSURLConnection sendAsynchronousRequest:request queue:[self downloadQueue] completionHandler:^(NSURLResponse* response, NSData* data, NSError* error) { // add UIAlert depending on response. if (error != nil) { NSHTTPURLResponse* httpResponse = (NSHTTPURLResponse*)response; if ([httpResponse statusCode] == 200) { UIAlertView *alert = [[UIAlertView alloc] initWithTitle:@"Back-end registration" message:@"Registration successful" delegate:nil cancelButtonTitle: @"OK" otherButtonTitles:nil, nil]; [alert show]; } else { NSLog(@"status: %ld", (long)[httpResponse statusCode]); } } else { NSLog(@"error: %@", error); } }];此方法获取一个安装 ID 和用于推送通知的通道并将它与设备类型一起发送到在通知中心创建注册的已经身份验证的 Web API 方法。 此 Web API 已在使用通知中心通知用户中定义。
现在客户端应用程序已更新,请返回到使用通知中心通知用户并更新移动服务以使用通知中心发送通知。