Create a custom virtual machine running Windows using the classic deployment model
Important
Classic VMs will be retired on March 1, 2023.
If you use IaaS resources from ASM, please complete your migration by March 1, 2023. We encourage you to make the switch sooner to take advantage of the many feature enhancements in Azure Resource Manager.
For more information, see Migrate your IaaS resources to Azure Resource Manager by March 1, 2023.
Note
Azure has two different deployment models for creating and working with resources: Resource Manager and Classic. This article covers using the Classic deployment model. Microsoft recommends that most new deployments use the Resource Manager model.
Starting November 15, 2017, virtual machines will be available only in the Azure portal.
Starting November 15, 2017, virtual machines will be available only in the Azure portal.
A custom virtual machine simply means a virtual machine that you create using a Featured app from the Marketplace because it does much of the work for you. Yet, you can still make configuration choices that include the following items:
- Connecting the virtual machine to a virtual network.
- Installing the Azure Virtual Machine Agent and Azure Virtual Machine Extensions, such as for antimalware.
- Adding the virtual machine to existing cloud services.
- Adding the virtual machine to an existing Storage account.
- Adding the virtual machine to an availability set.
Important
If you want your virtual machine to use a virtual network, make sure that you specify the virtual network when you create the virtual machine.
- Two benefits of using a virtual network are connecting directly to the virtual machine and to set up cross-premises connections.
- A virtual machine can be configured to join a virtual network only when you create the virtual machine. For details on virtual networks, see Azure Virtual Network overview.
To create the virtual machine
Sign in to the Azure portal.
Starting in the upper left, click Create a resource > Compute > Windows Server 2016 Datacenter.
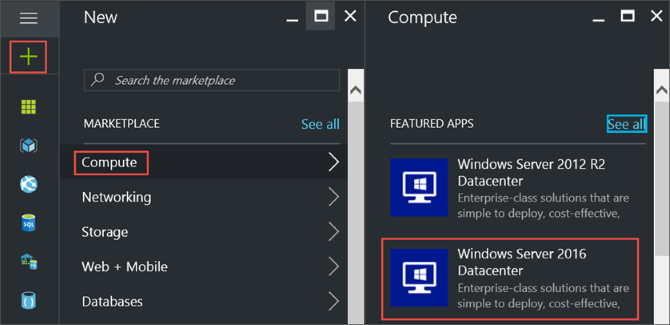
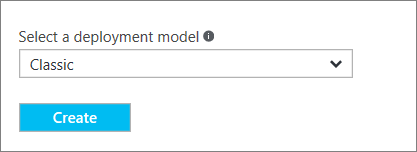
On the Windows Server 2016 Datacenter, select the Classic deployment model. Click Create.
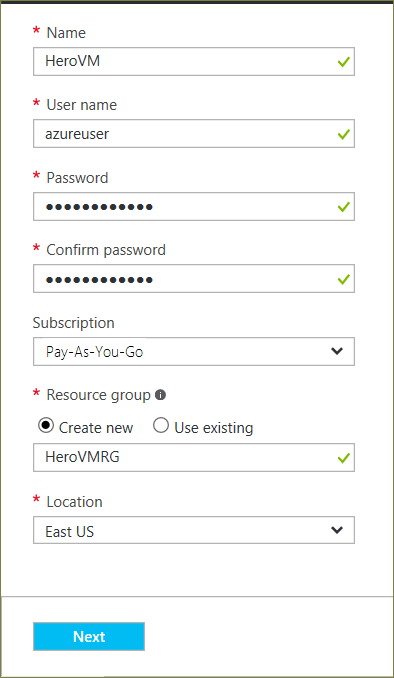
1. Basics blade
The Basics blade requests administrative information for the virtual machine.
Enter a Name for the virtual machine. In the example, HeroVM is the name of the virtual machine. The name must be 1-15 characters long and it cannot contain special characters.
Enter a User name and a strong Password that are used to create a local account on the VM. The local account is used to sign in to and manage the VM. In the example, azureuser is the user name.
The password must be 8-123 characters long and meet three out of the four following complexity requirements: one lower case character, one upper case character, one number, and one special character. See more about username and password requirements.
The Subscription is optional. One common setting is "Pay-As-You-Go".
Select an existing Resource group or type the name for a new one. In the example, HeroVMRG is the name of the resource group.
Select an Azure datacenter Location where you want the VM to run. In the example, East US is the location.
When you are done, click Next to continue to the next blade.
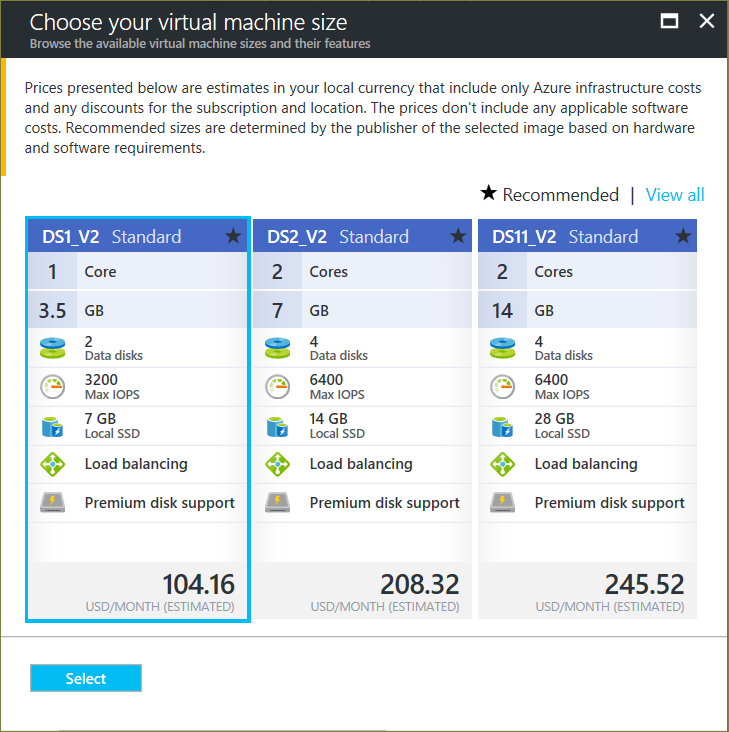
2. Size blade
The Size blade identifies the configuration details of the VM, and lists various choices that include OS, number of processors, disk storage type, and estimated monthly usage costs.
Choose a VM size, and then click Select to continue. In this example, DS1_V2 Standard is the VM size.
3. Settings blade
The Settings blade requests storage and network options. You can accept the default settings. Azure creates appropriate entries where necessary.
If you selected a virtual machine size that supports it, you can try Azure Premium Storage by selecting Premium (SSD) in Disk type.
When you're done making changes, click OK.
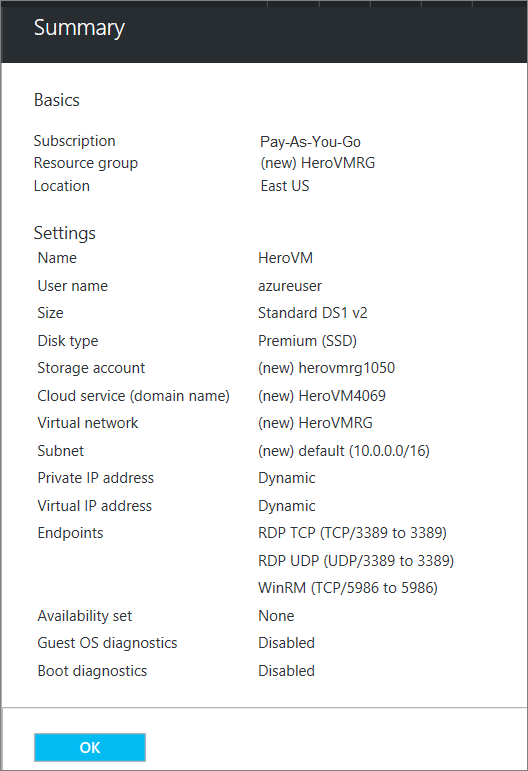
4. Summary blade
The Summary blade lists the settings specified in the previous blades. Click OK when you're ready to make the image.
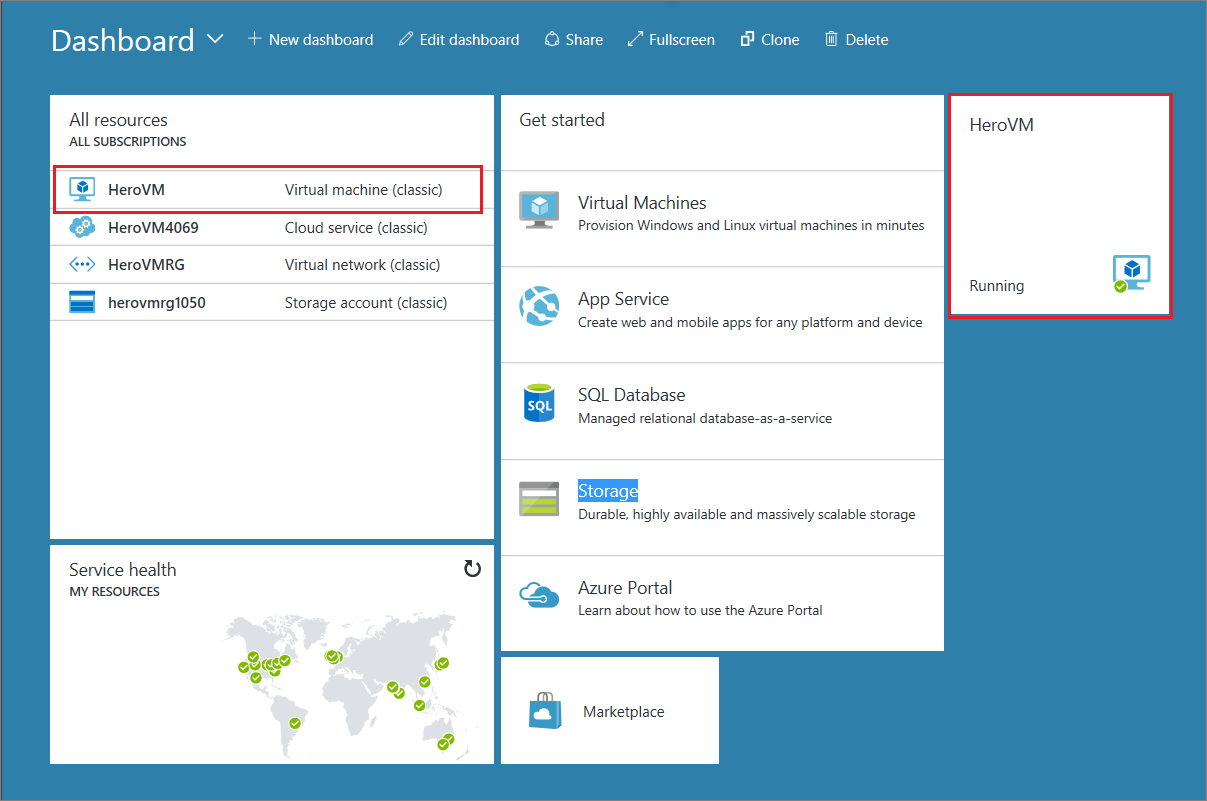
After the virtual machine is created, the portal lists the new virtual machine under All resources, and displays a tile of the virtual machine on the dashboard. The corresponding cloud service and storage account also are created and listed. Both the virtual machine and cloud service are started automatically and their status is listed as Running.
Next steps
You can also create a custom virtual machine running Linux.