本文可帮助你配置 VPN 客户端以使用点到站点 VPN 进行连接,并Microsoft Entra身份验证。 必须先配置Microsoft Entra租户,然后才能使用Microsoft Entra ID进行连接和身份验证。 有关详细信息,请参阅 配置 Microsoft Entra 租户。
注释
仅 OpenVPN® 协议连接支持Microsoft Entra身份验证。
使用客户档案配置
对于希望通过 VPN 客户端连接到 VNet 的每台计算机,需要下载计算机的 Azure VPN 客户端,并配置 VPN 客户端配置文件。 如果要配置多台计算机,则可以在一台计算机上创建客户端配置文件,将其导出后再导入到其他计算机。
下载Azure VPN 客户端
使用以下链接之一下载最新版本的 Azure VPN 客户端安装文件:
- 使用客户端安装程序文件进行安装:https://aka.ms/azvpnclientdownload。
- 直接在客户端计算机上登录时安装:Microsoft Store。
- 使用 Windows Package Manager (WinGet) 进行安装。 可以运行以下命令来安装和了解有关 本文档中 WinGet 方法的详细信息。
winget install Microsoft.AzureVPNClient --source winget
将 Azure VPN 客户端安装到每台计算机。
验证Azure VPN 客户端是否有权在后台运行。 有关步骤,请参阅 Windows 后台应用。
若要验证已安装的客户端版本,请打开Azure VPN 客户端。 转到客户端底部并选择 ... -> ?帮助。 在右窗格中,可以看到客户端版本号。
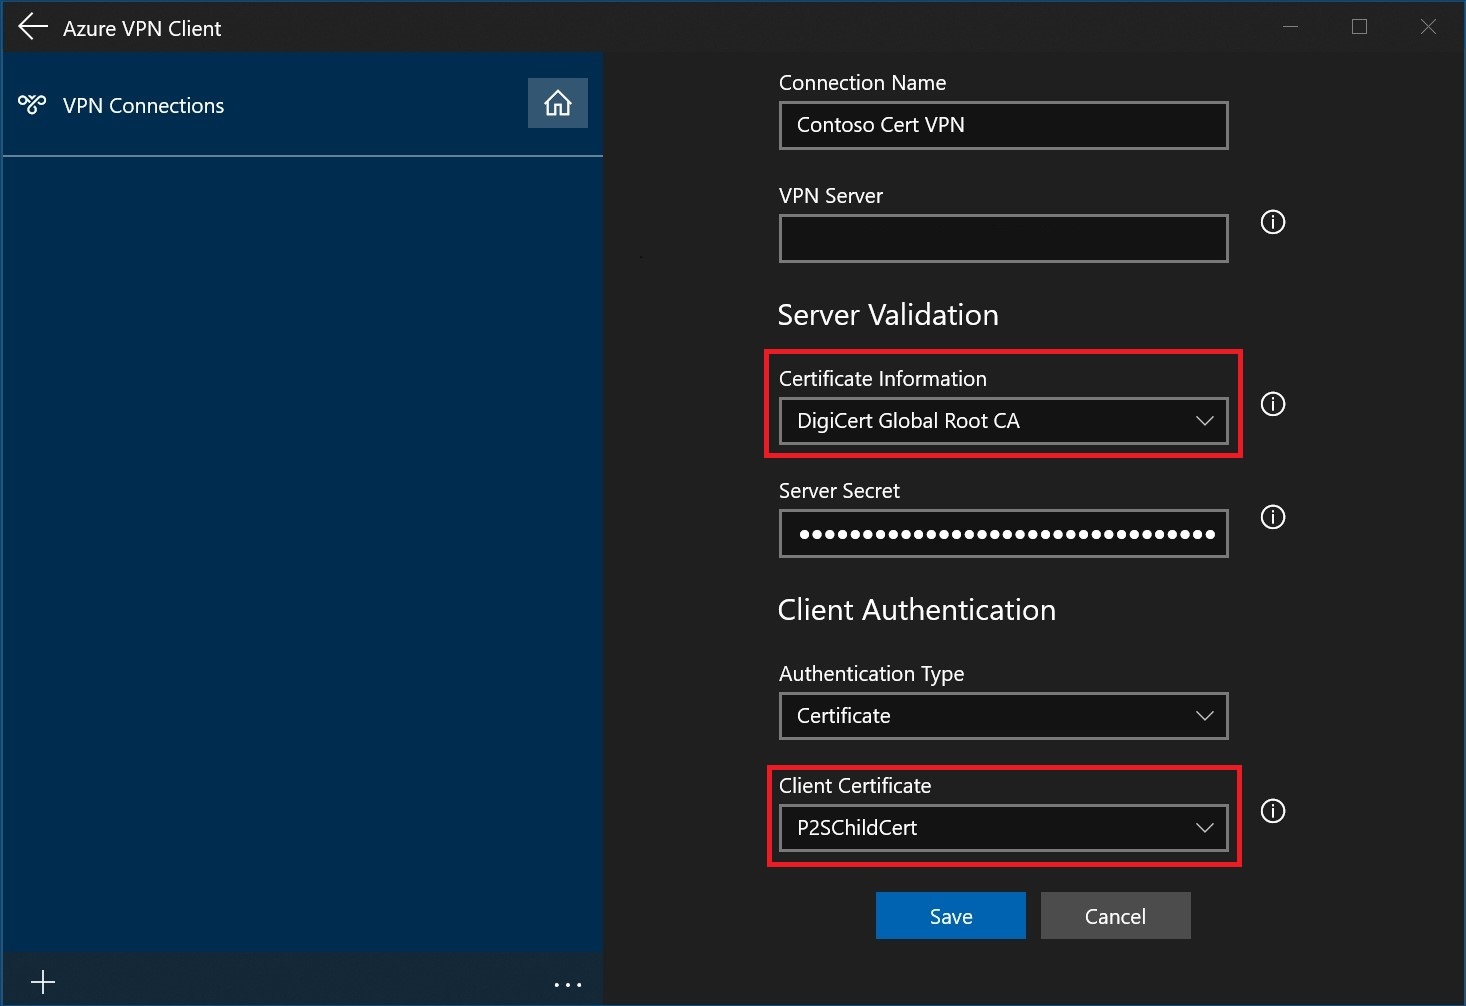
创建基于证书的客户端配置文件
使用基于证书的配置文件时,请确保在客户端计算机上安装相应的证书。 使用 Azure VPN 客户端版本 2.1963.44.0 或更高版本时,可以安装和指定多个证书。 有关证书的详细信息,请参阅 安装客户端证书。
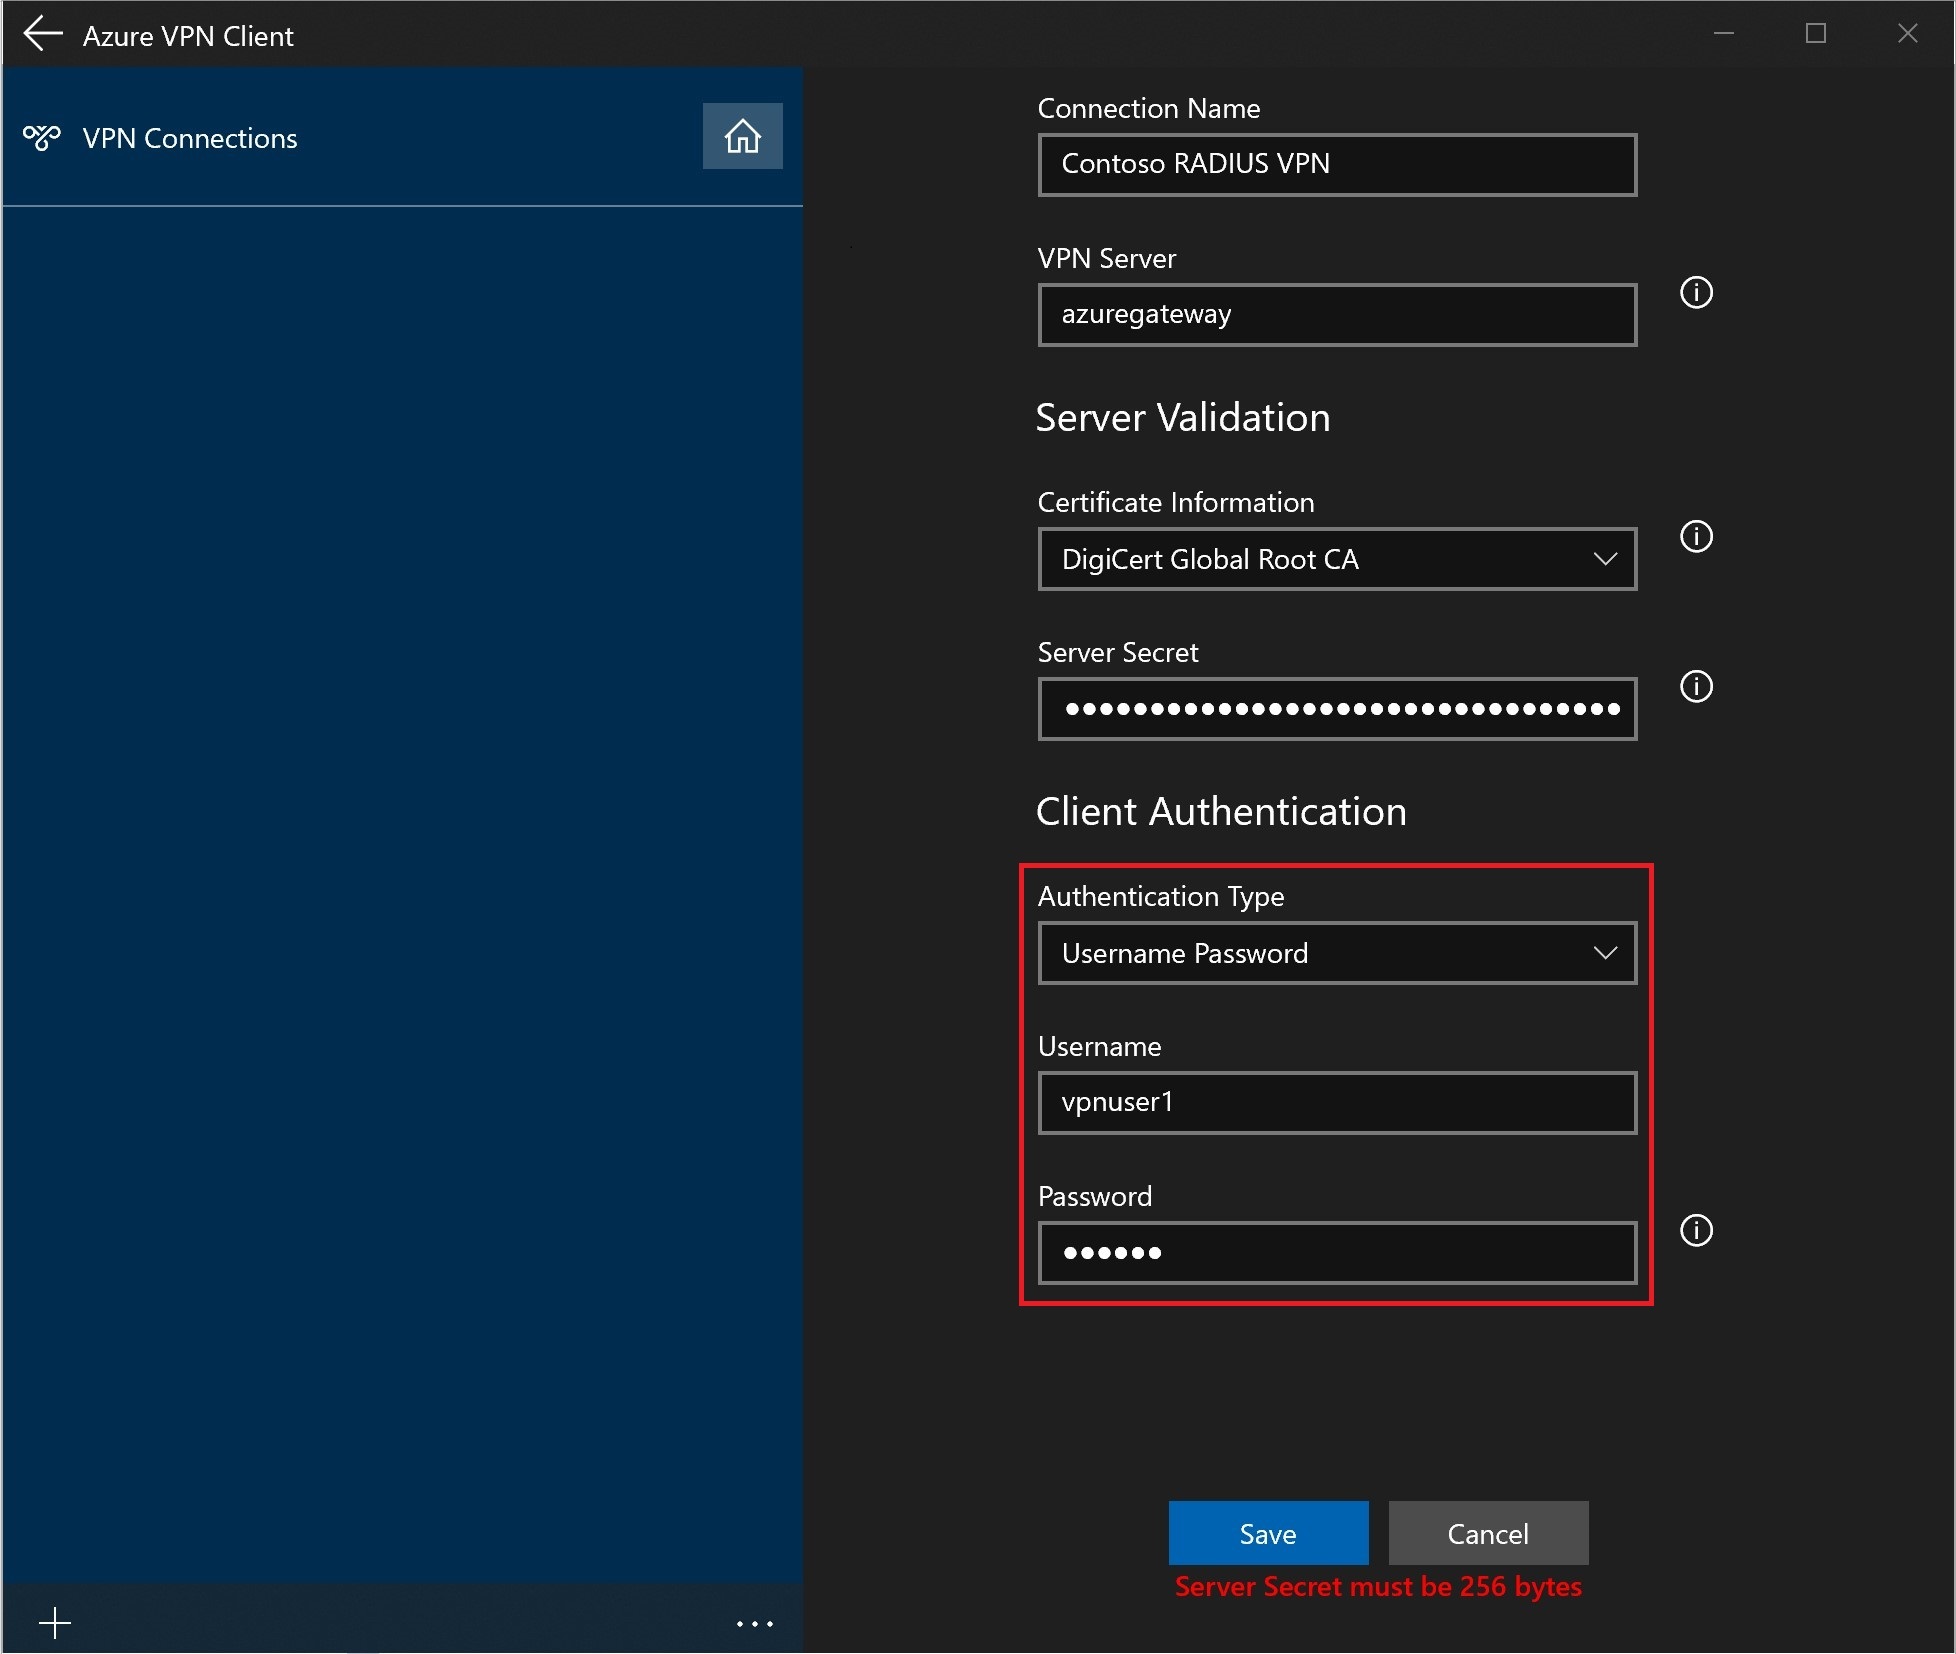
创建 RADIUS 客户端配置文件
注释
可以在 P2S VPN 客户端配置文件中导出服务器机密。 若要导出客户端配置文件,请参阅 用户 VPN 客户端配置文件。
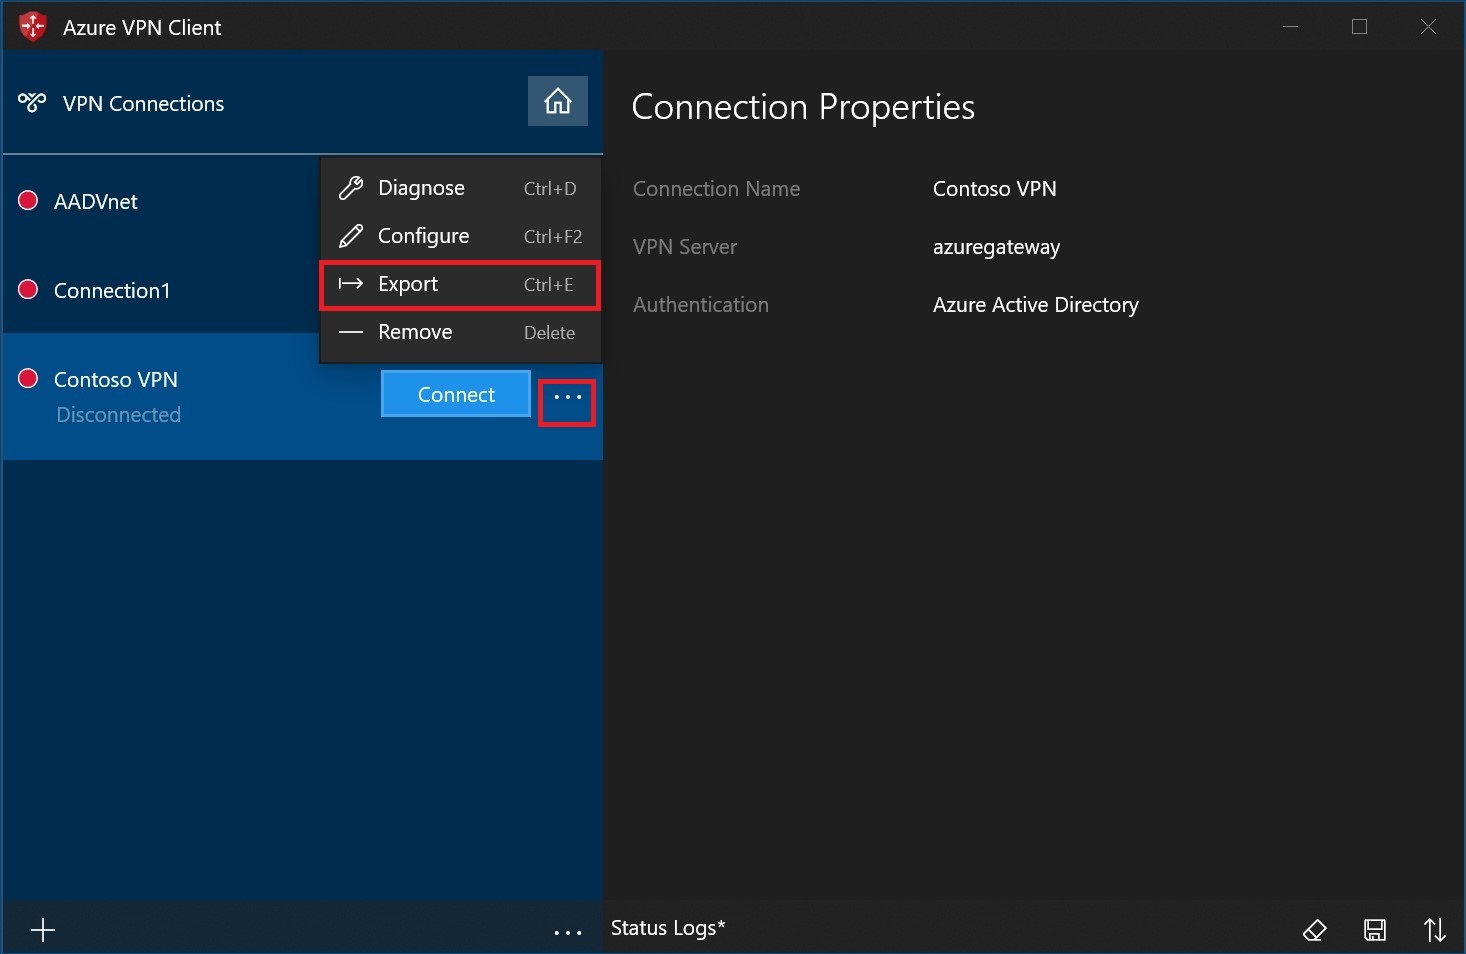
导出和分发客户端配置文件
创建有效的配置文件后,如果需要将其分发给其他用户,可使用以下步骤将其导出:
突出显示您要导出的 VPN 客户端配置文件,先选择...,然后选择导出。
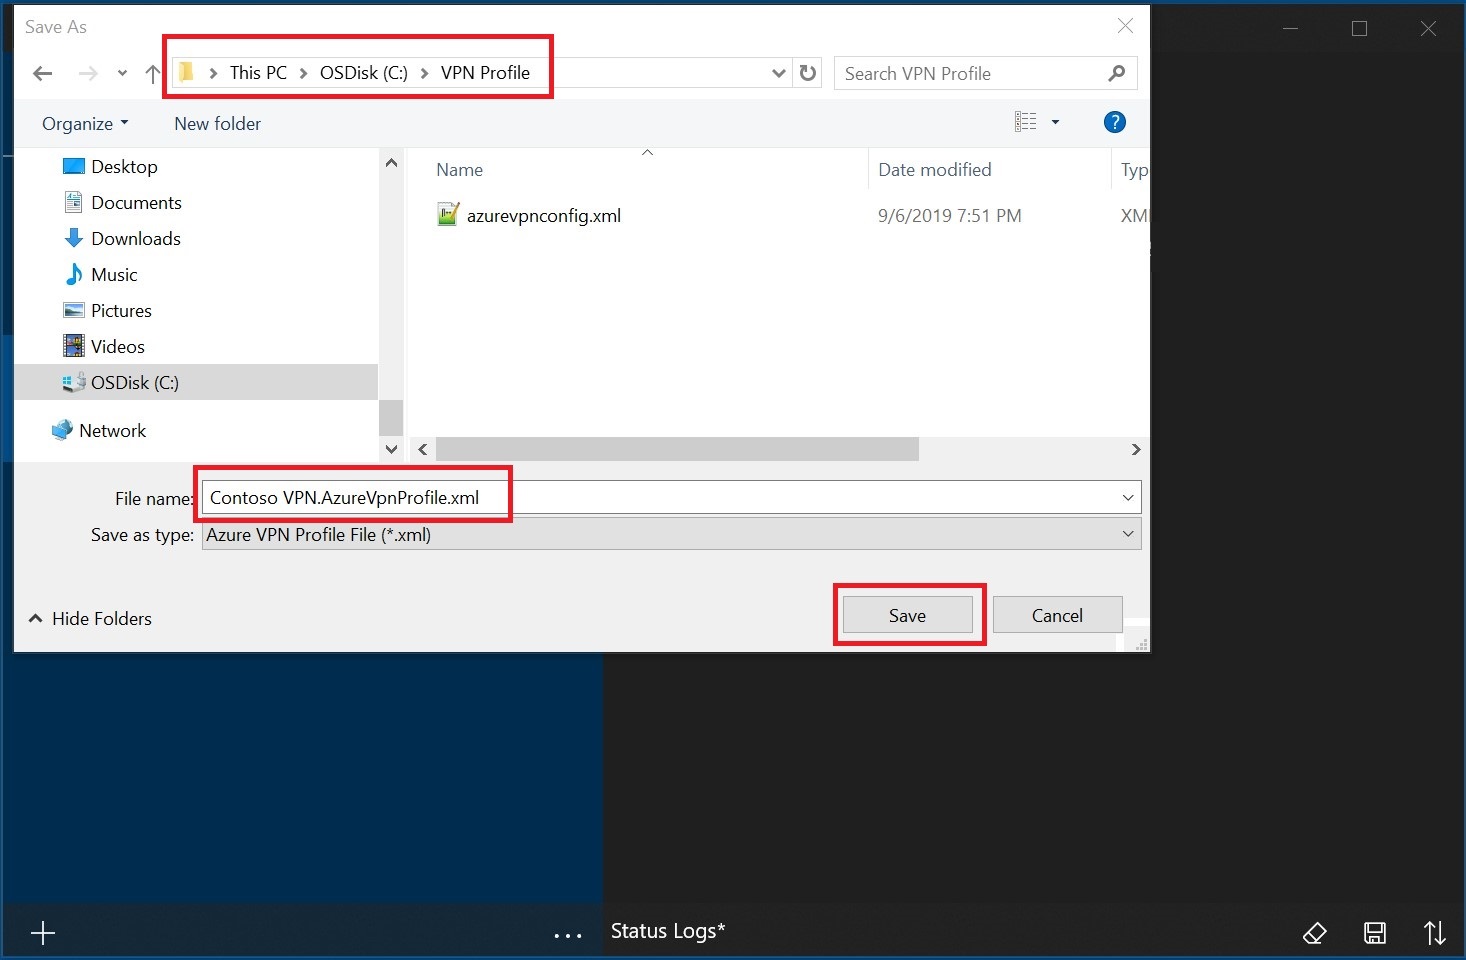
选择要将此配置文件保存到的位置,保留默认的文件名,然后选择“保存”以保存 xml 文件。
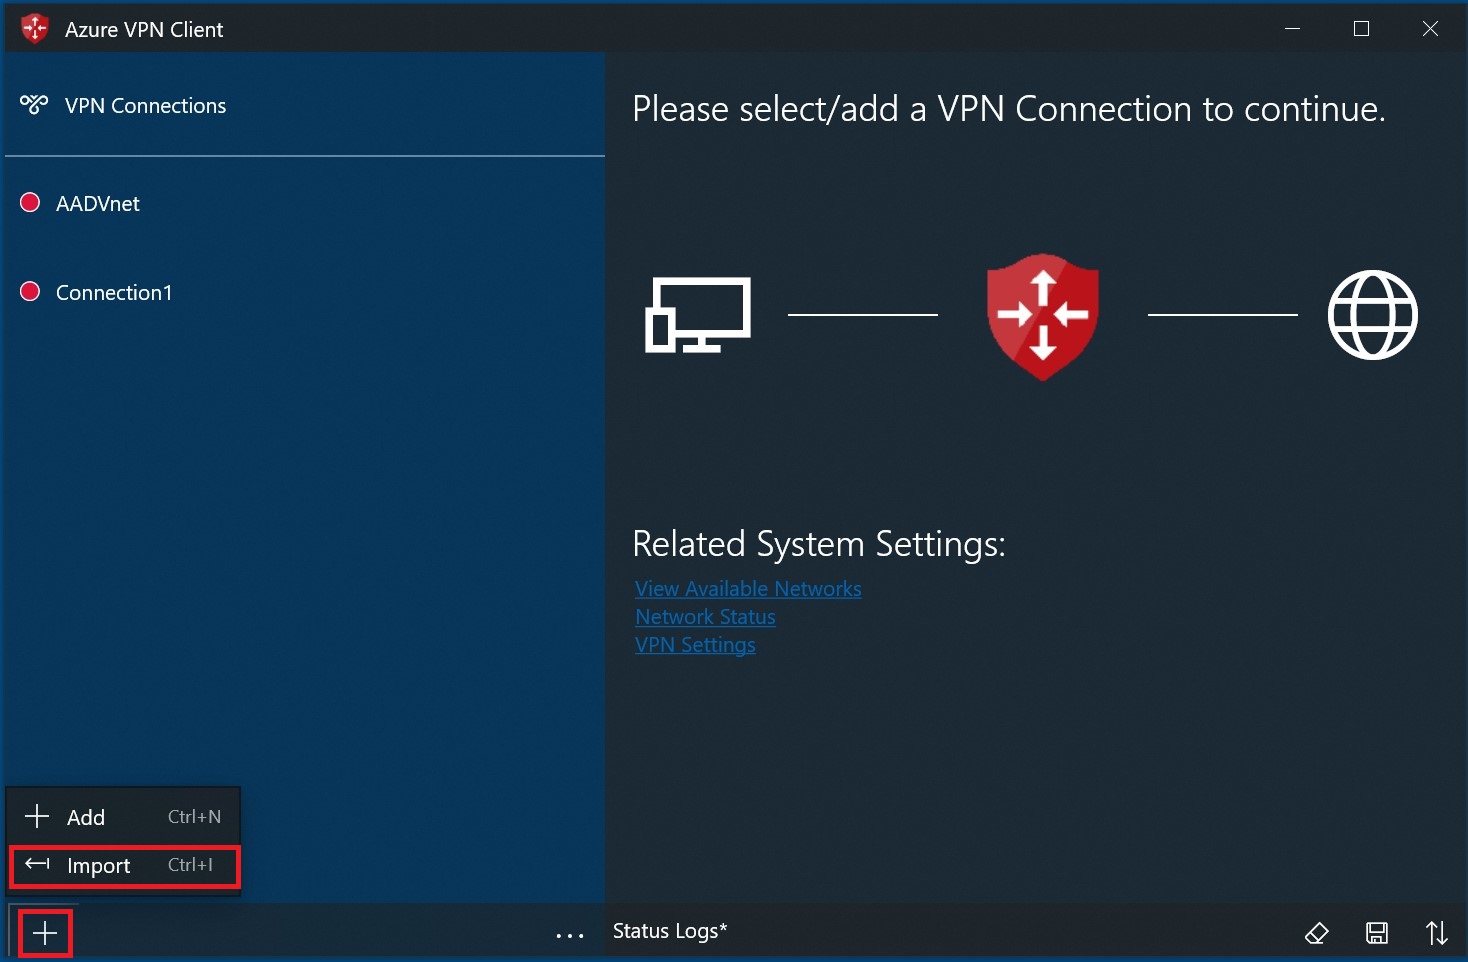
导入客户资料
在页面上,选择“导入”。
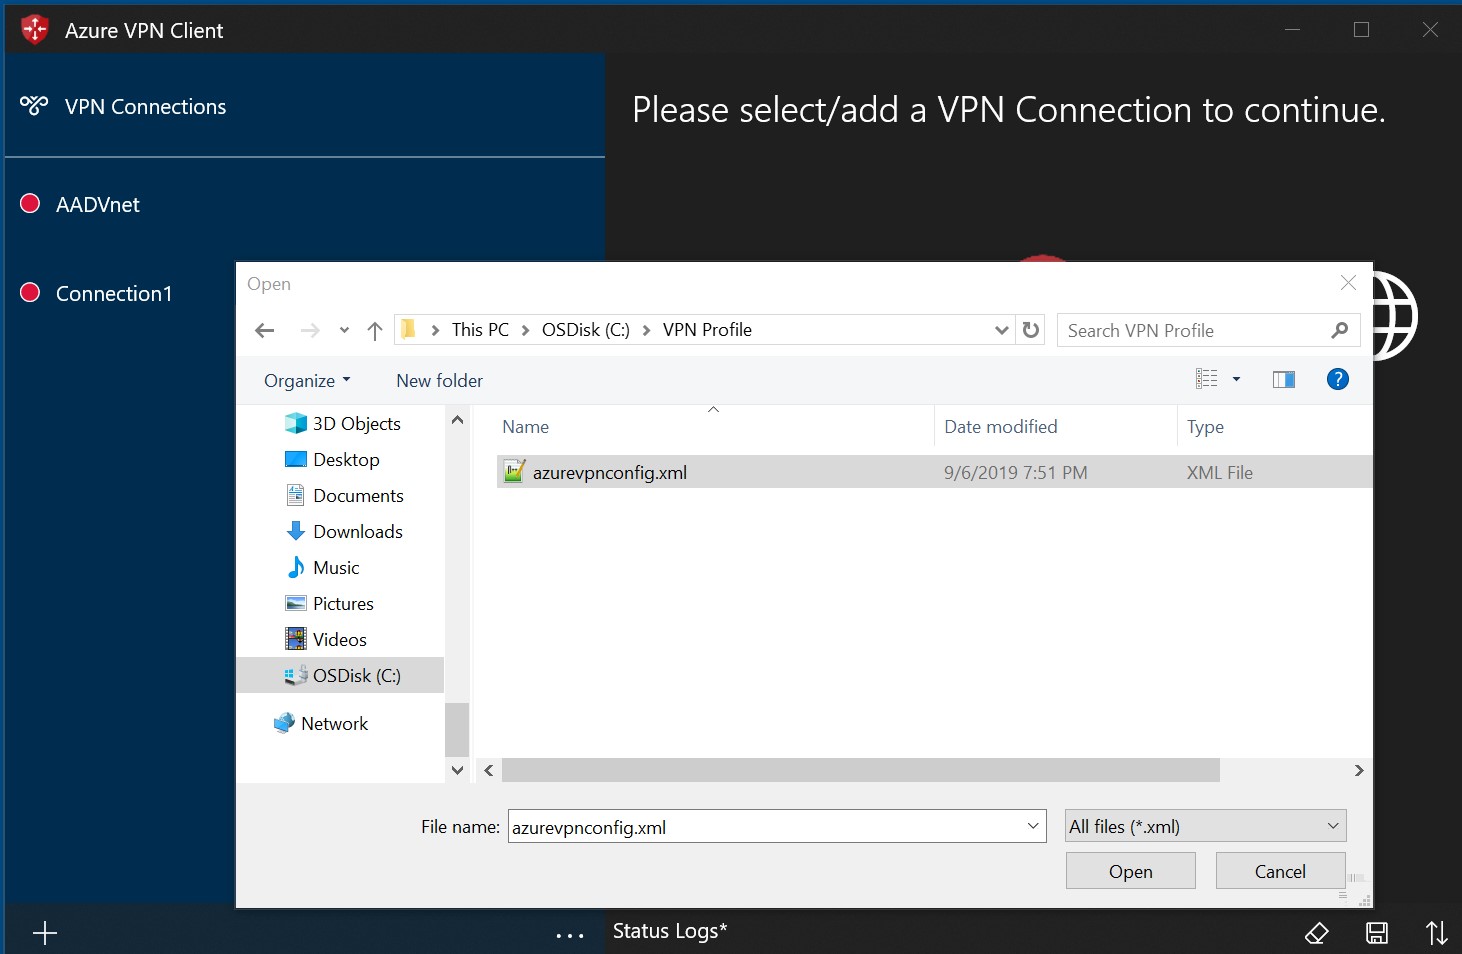
浏览到 profile XML 文件并选中它。 选择该文件后,选择“打开”。
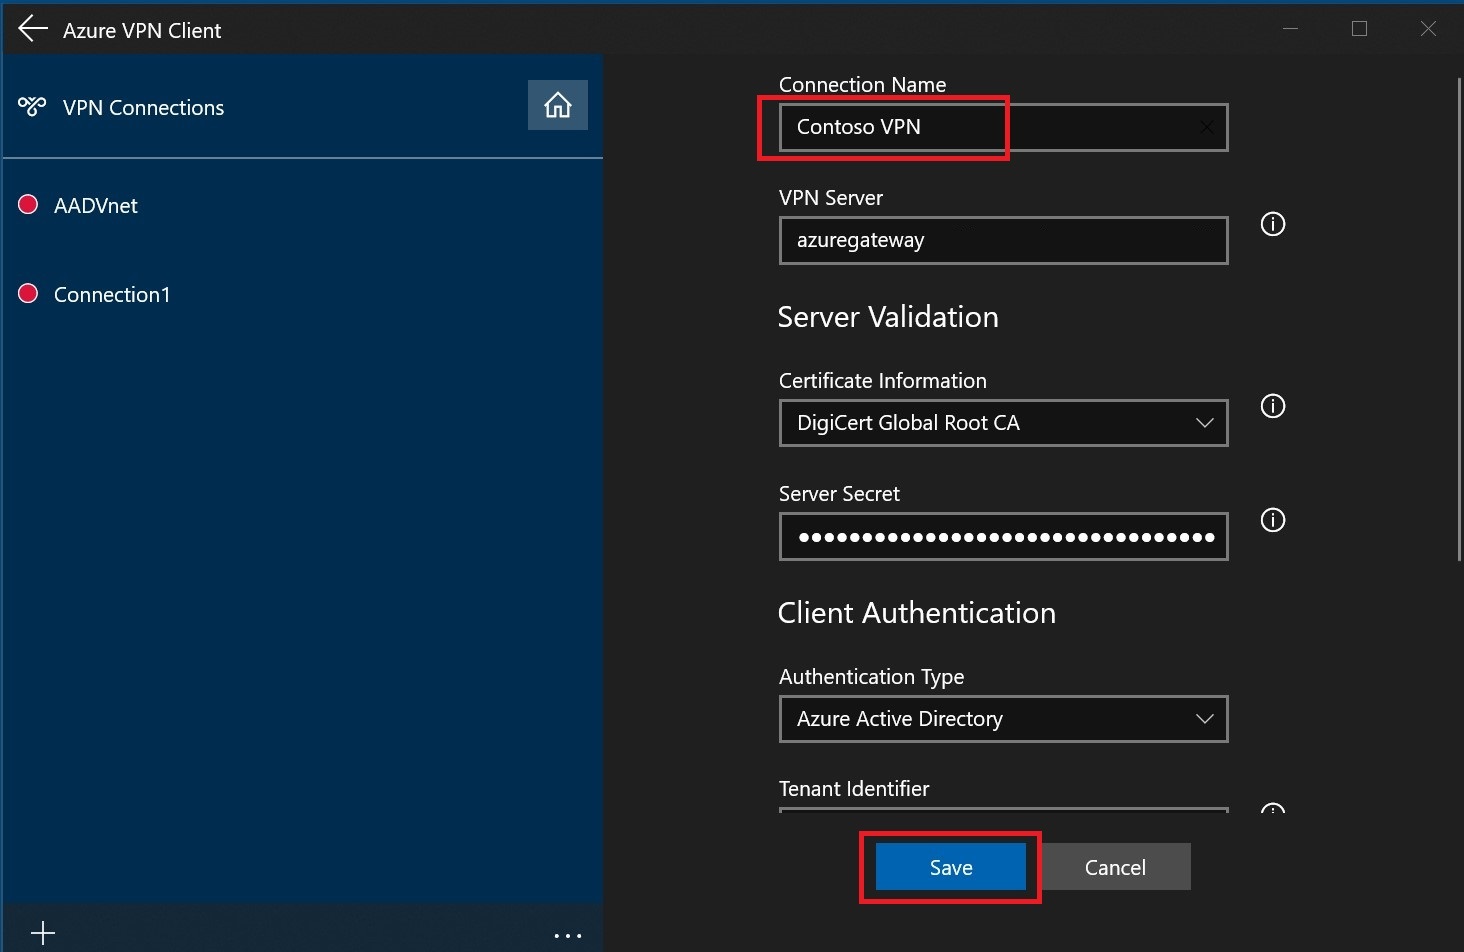
指定配置文件的名称,并选择“保存”。
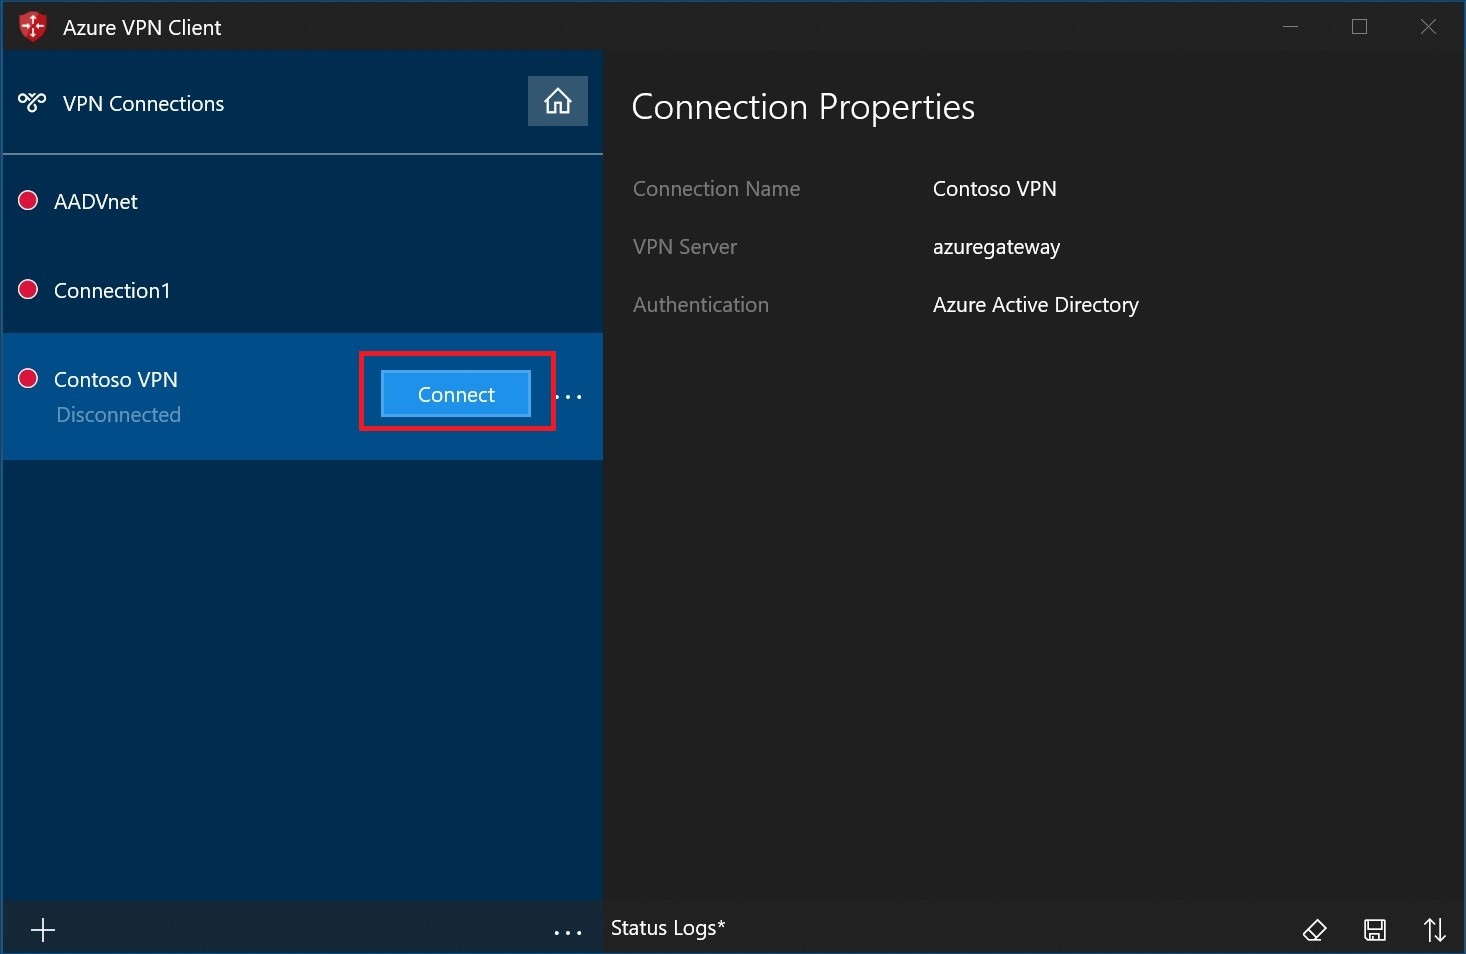
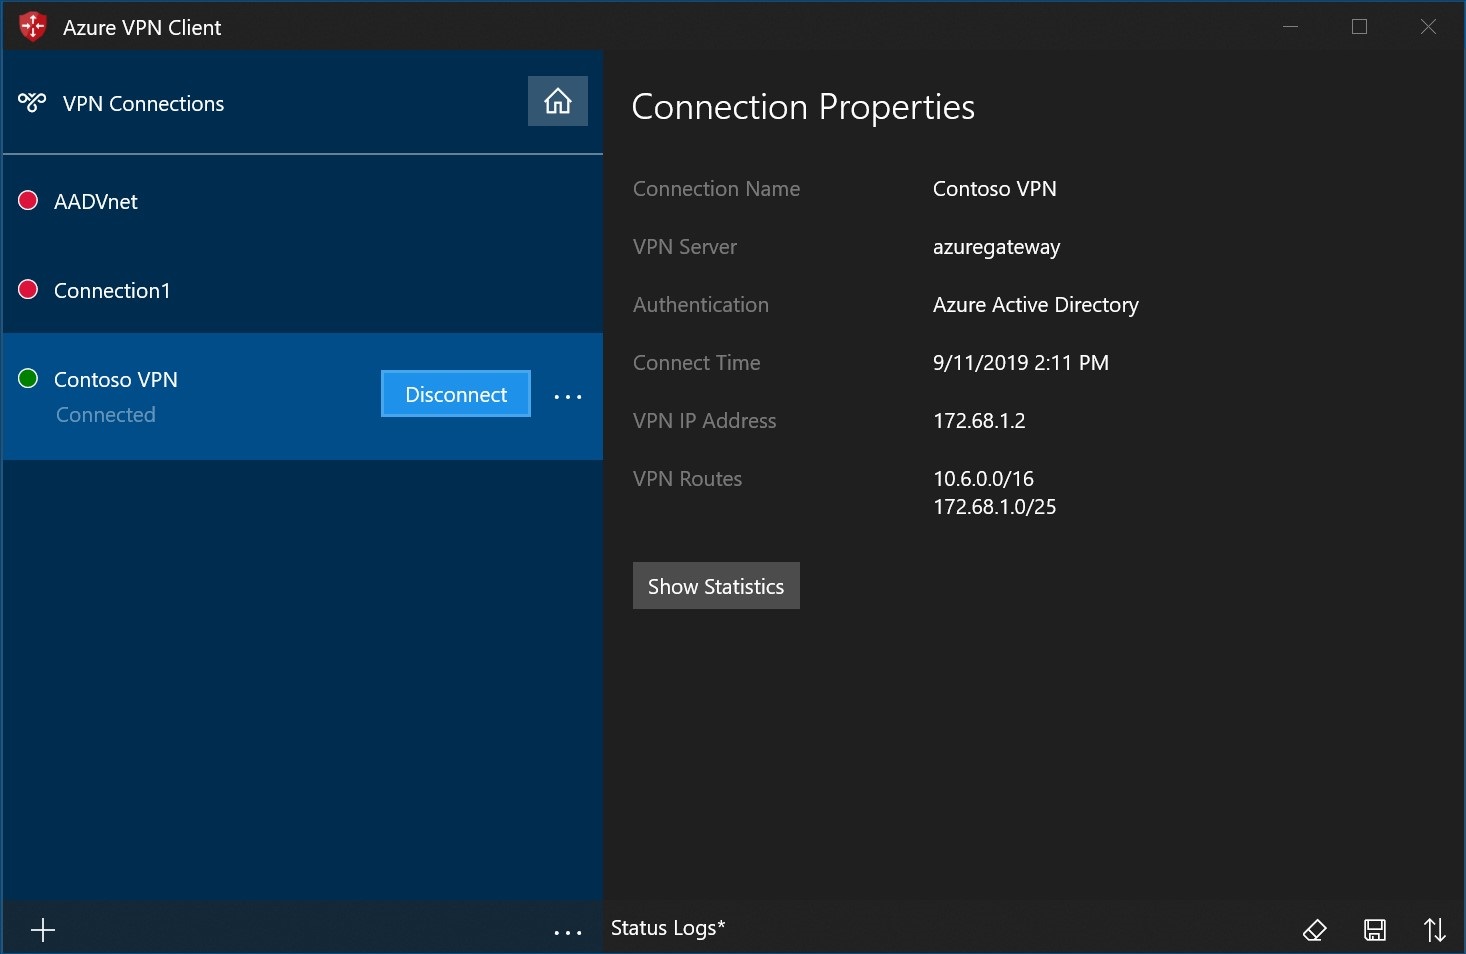
选择“连接”以连接到 VPN。
连接后,图标将变为绿色并指示“已连接”。
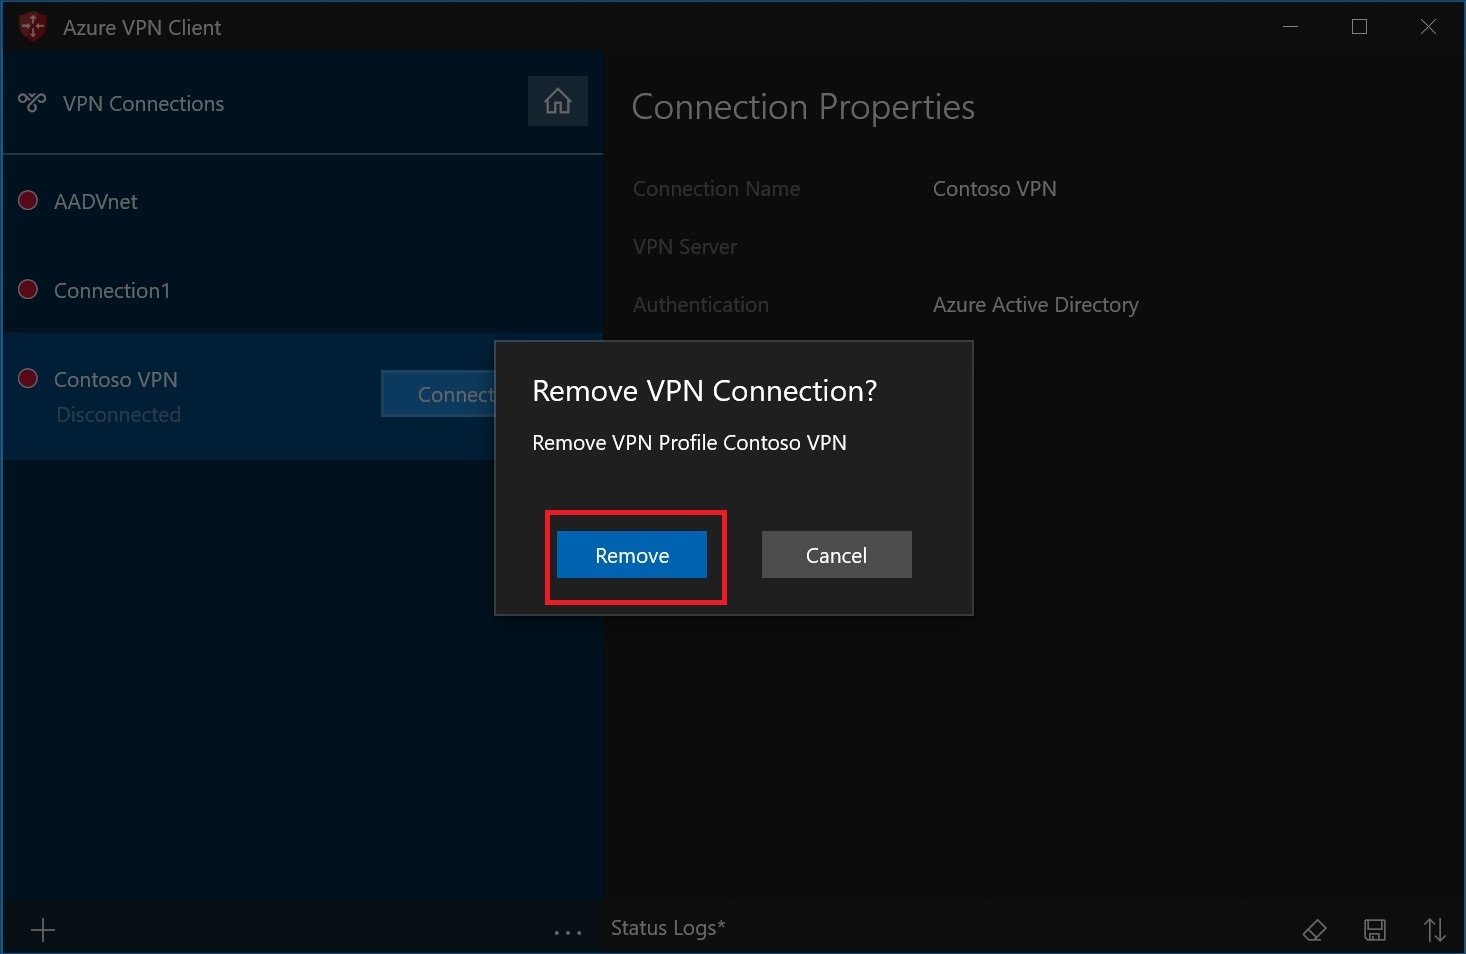
删除客户资料
选择要删除的客户端配置文件旁边的省略号图标。 然后选择“删除” 。

选择“删除”以删除。
创建连接
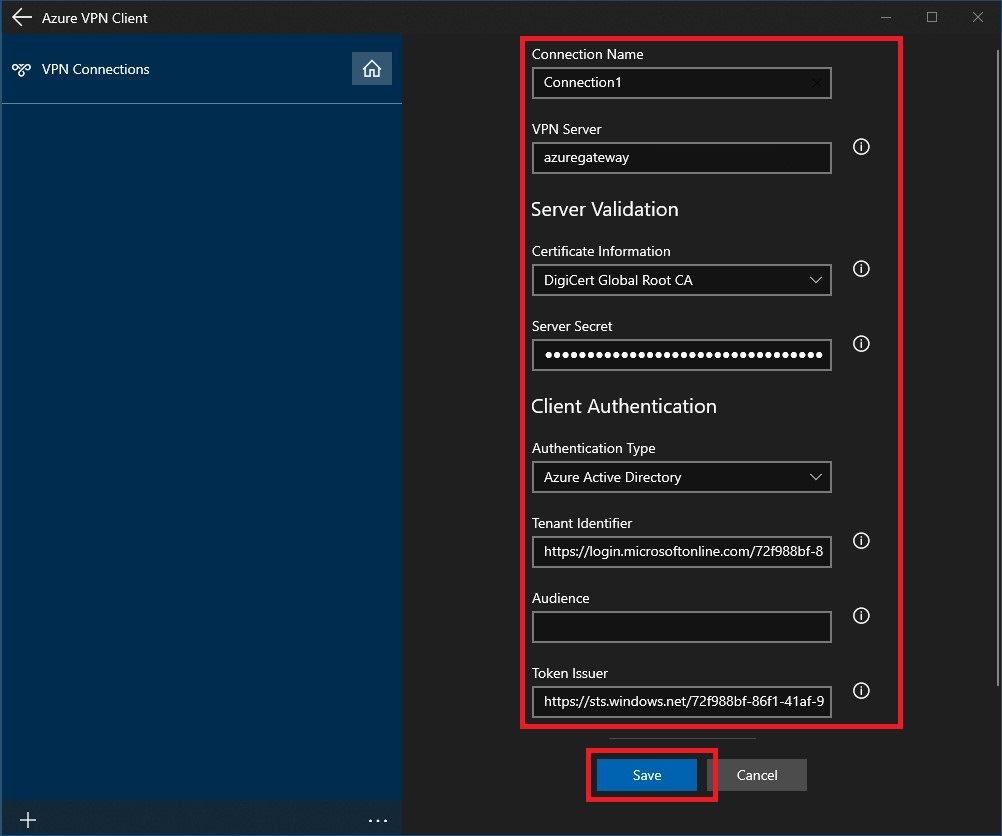
在页面上选择 +,然后选择 + 添加。

填写连接信息。 如果不确定这些值,请联系管理员。 填写值后,选择“保存”。
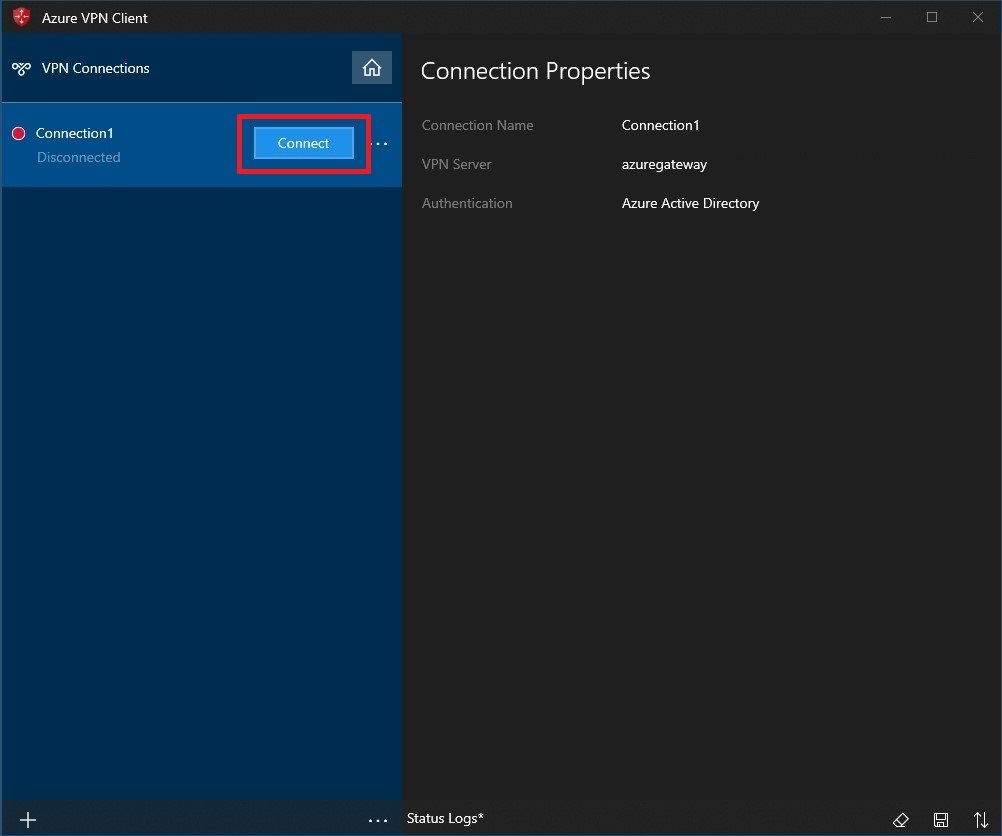
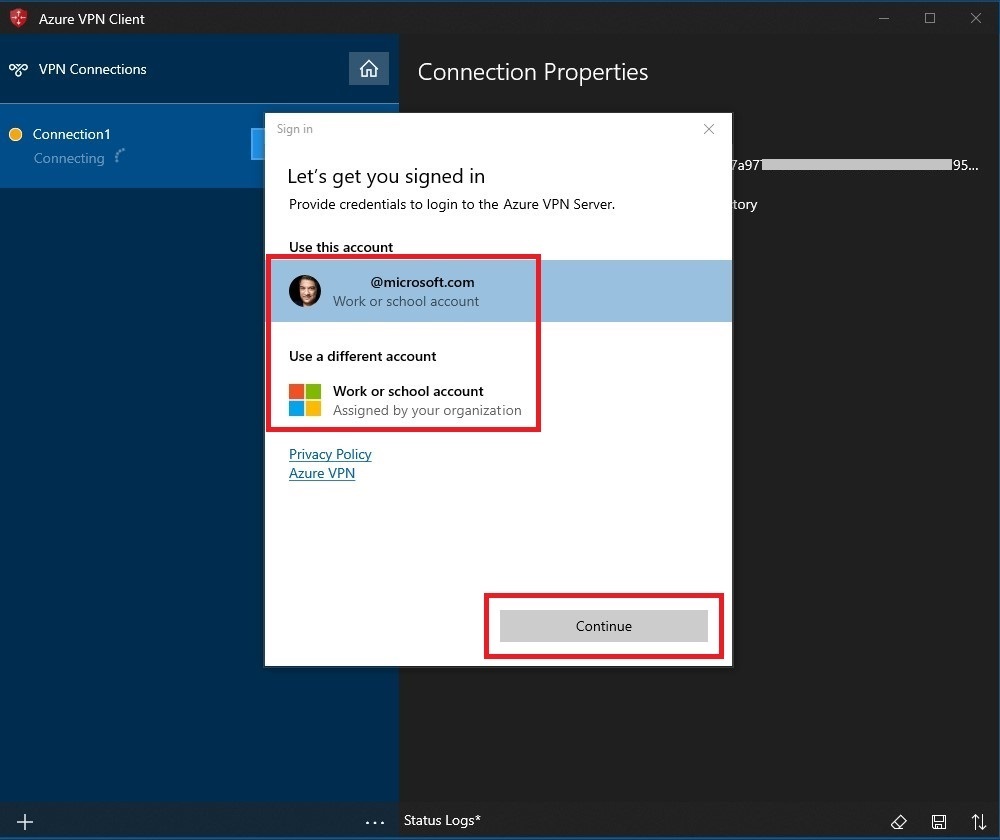
选择“连接”以连接到 VPN。
选择正确的凭据,然后选择“继续”。
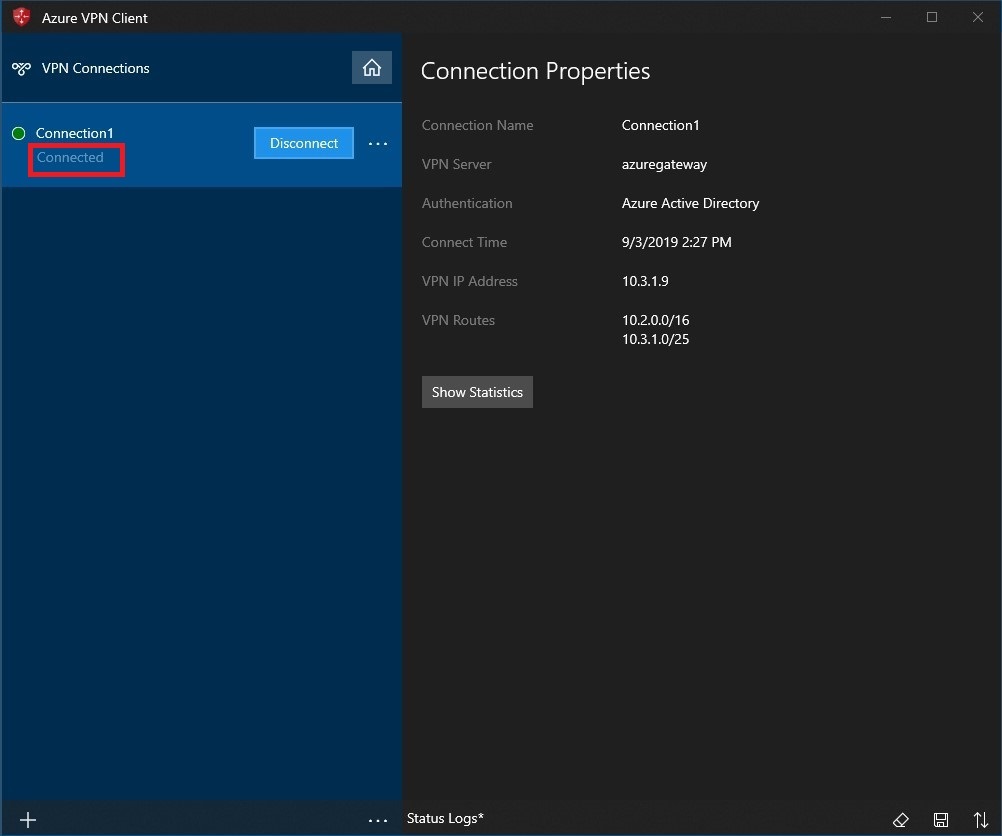
成功连接后,图标将变为绿色并指示“已连接”。
自动连接
以下步骤帮助您配置连接,使其在启用“始终在线”功能时自动连接。
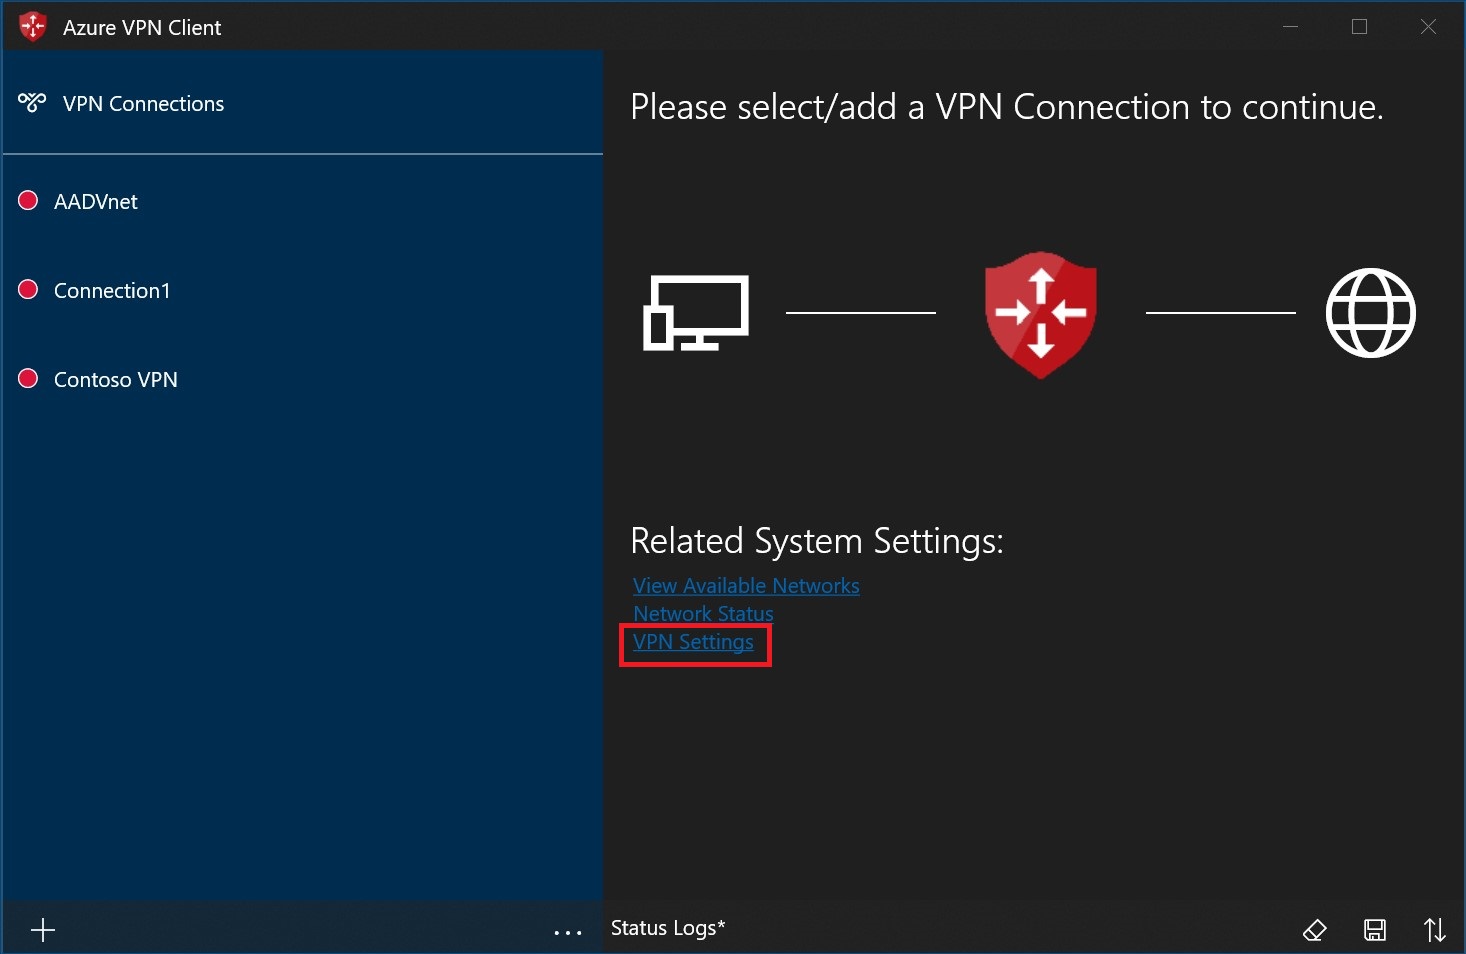
在 VPN 客户端的主页上,选择“VPN 设置”。
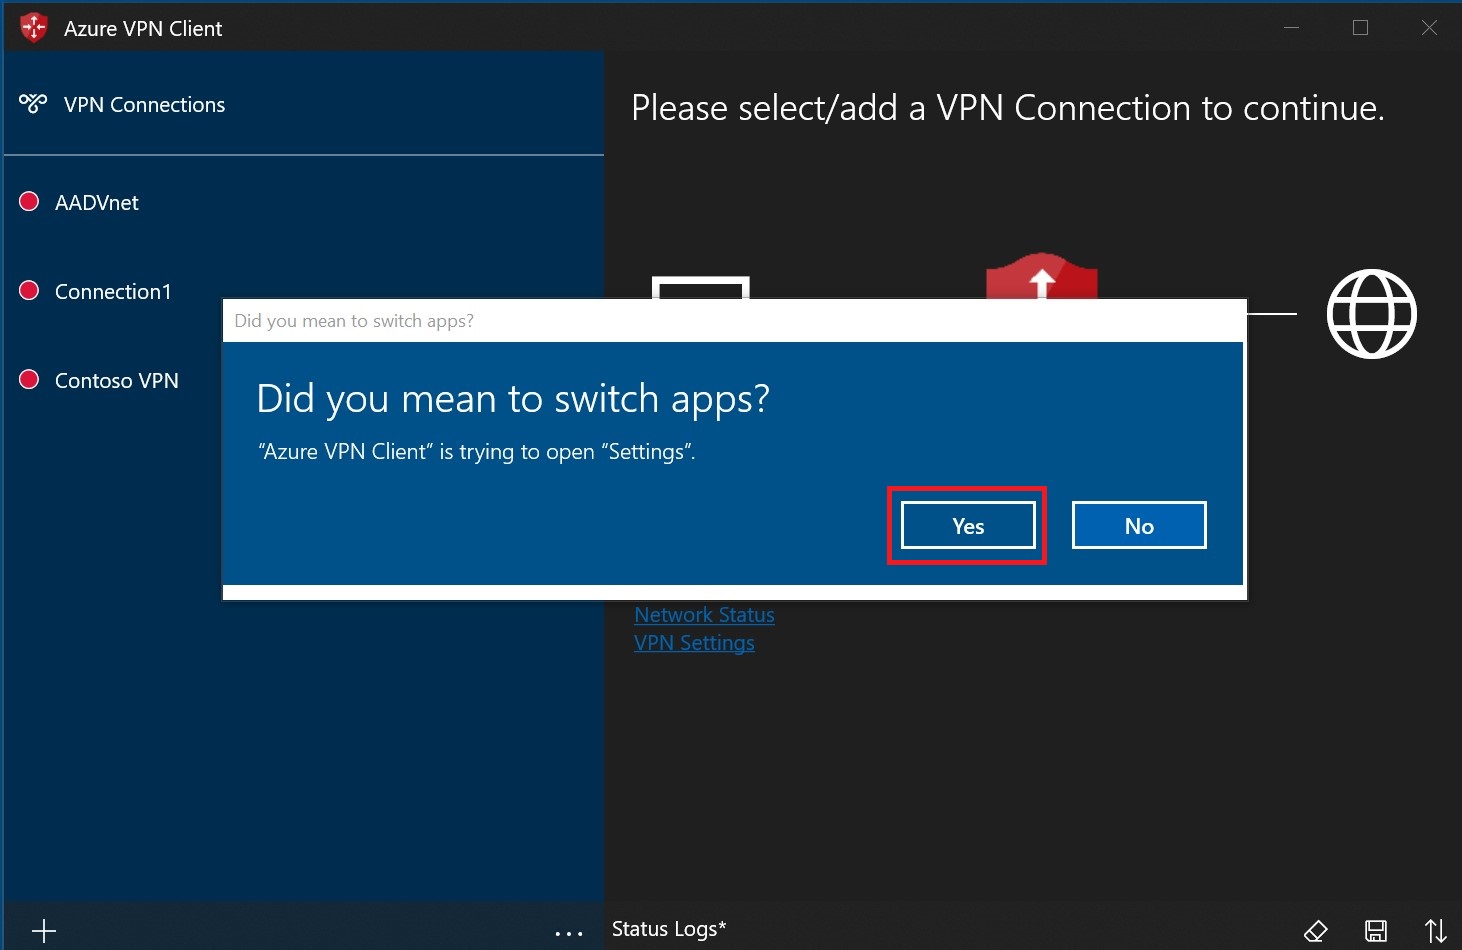
在切换应用对话框中选择“是”。
确保要设置的连接尚未连接,然后突出显示配置文件,并选中“自动连接”复选框。
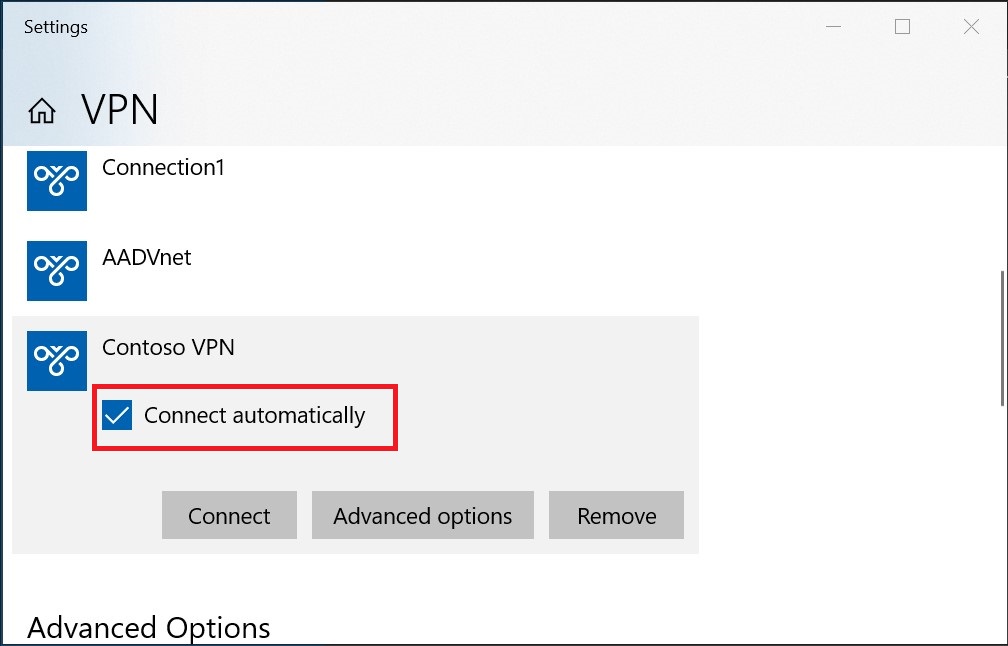
选择“连接”启动 VPN 连接。

诊断连接问题
若要诊断连接问题,可以使用“诊断”工具。 选择要诊断的 VPN 连接旁边的“...”以显示菜单。 然后选择“诊断”。
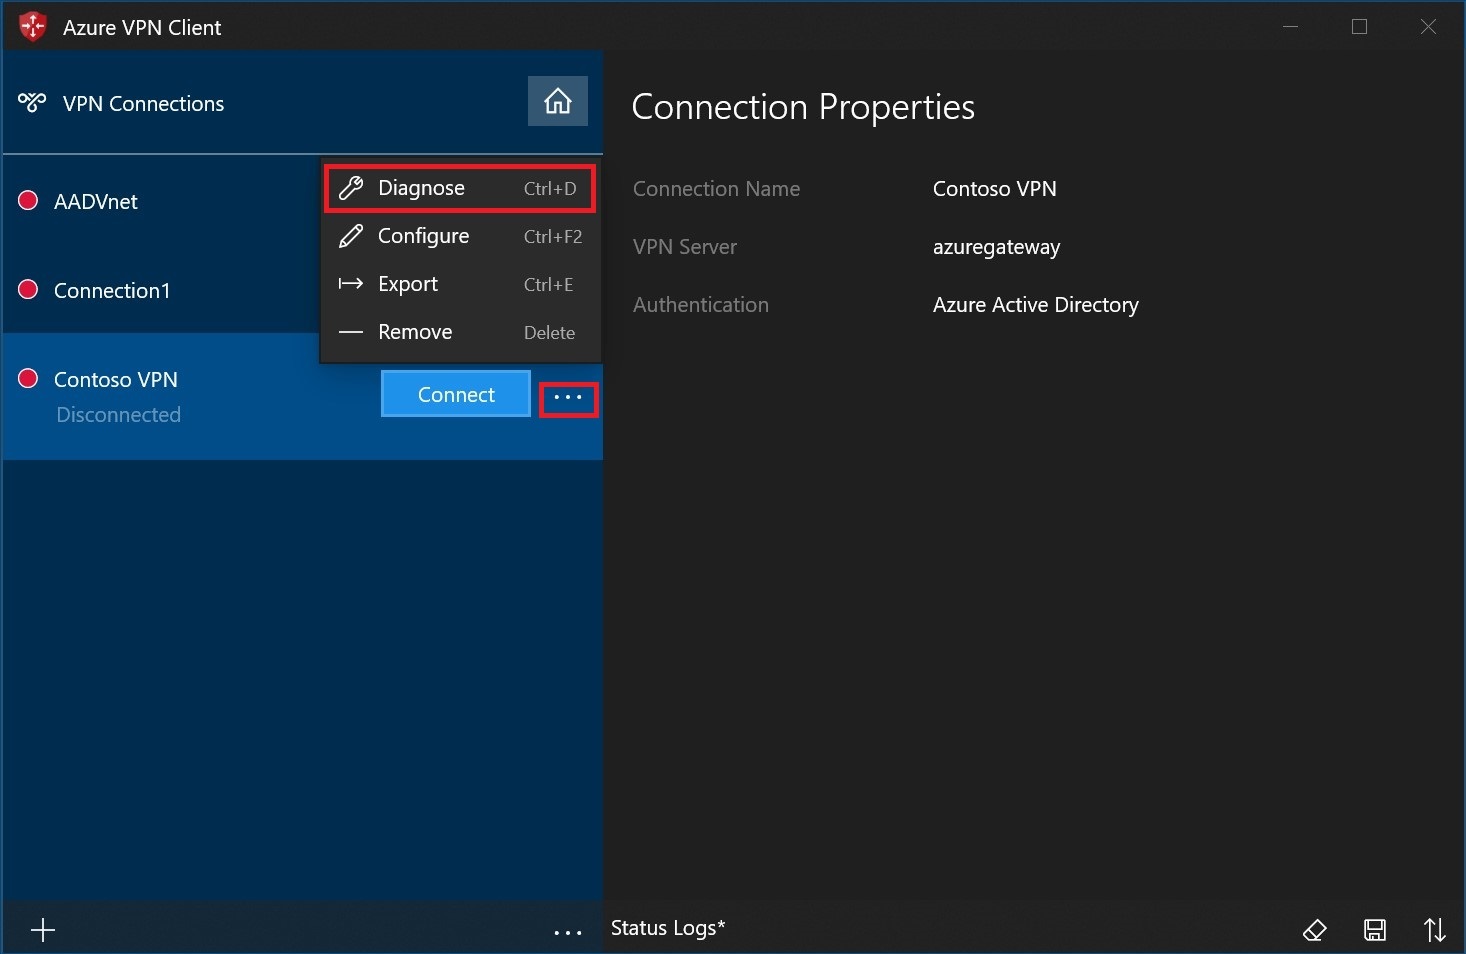
在“连接属性”页上,选择“运行诊断”。
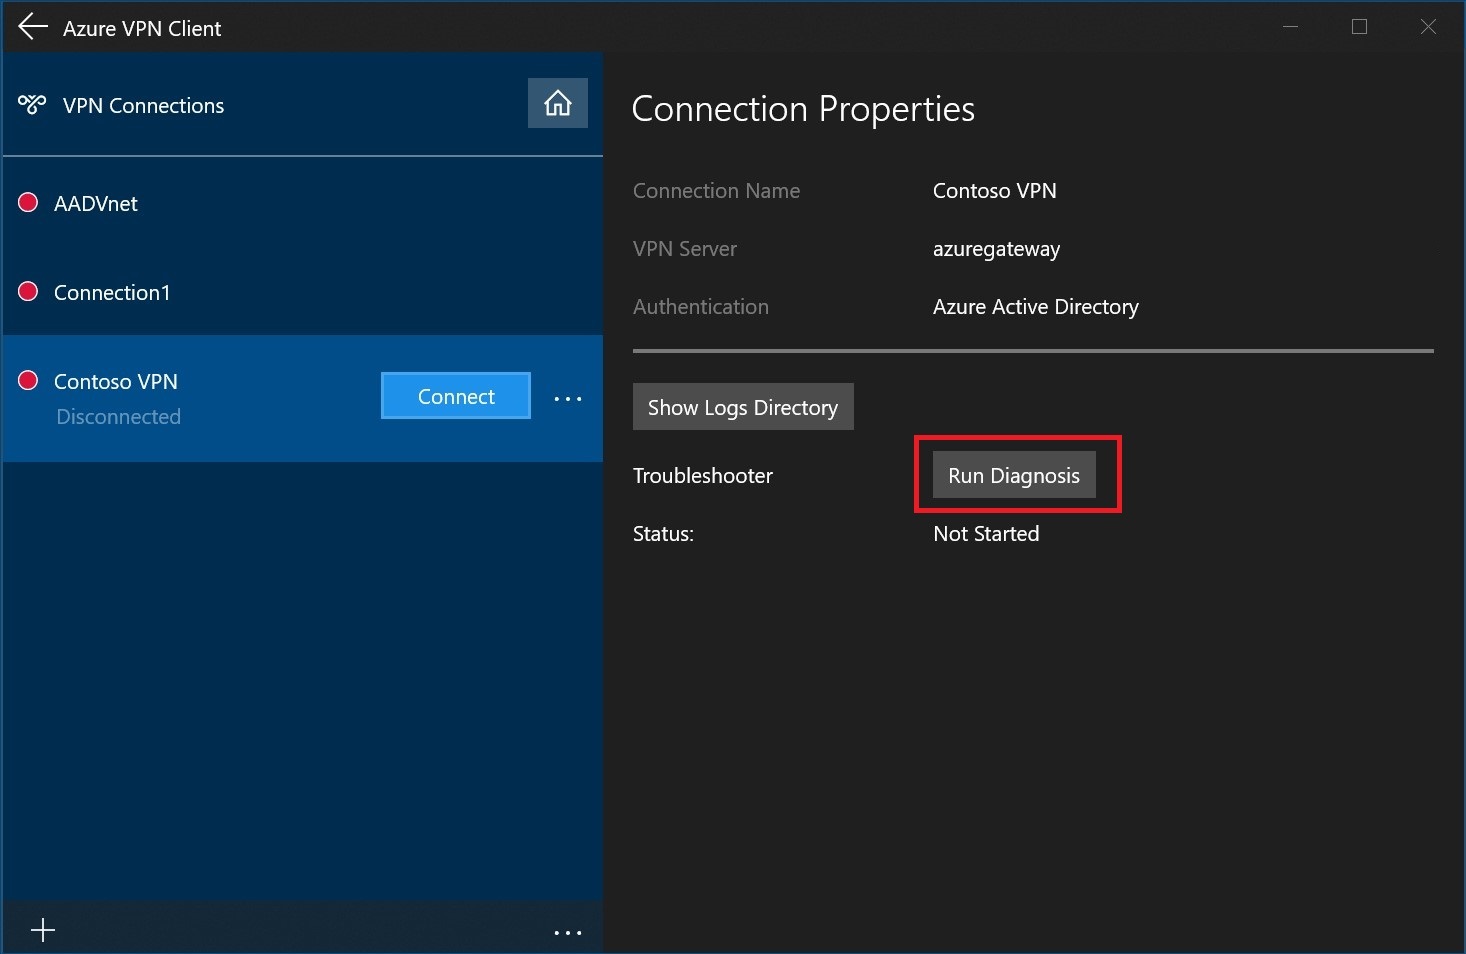
使用凭据登录。

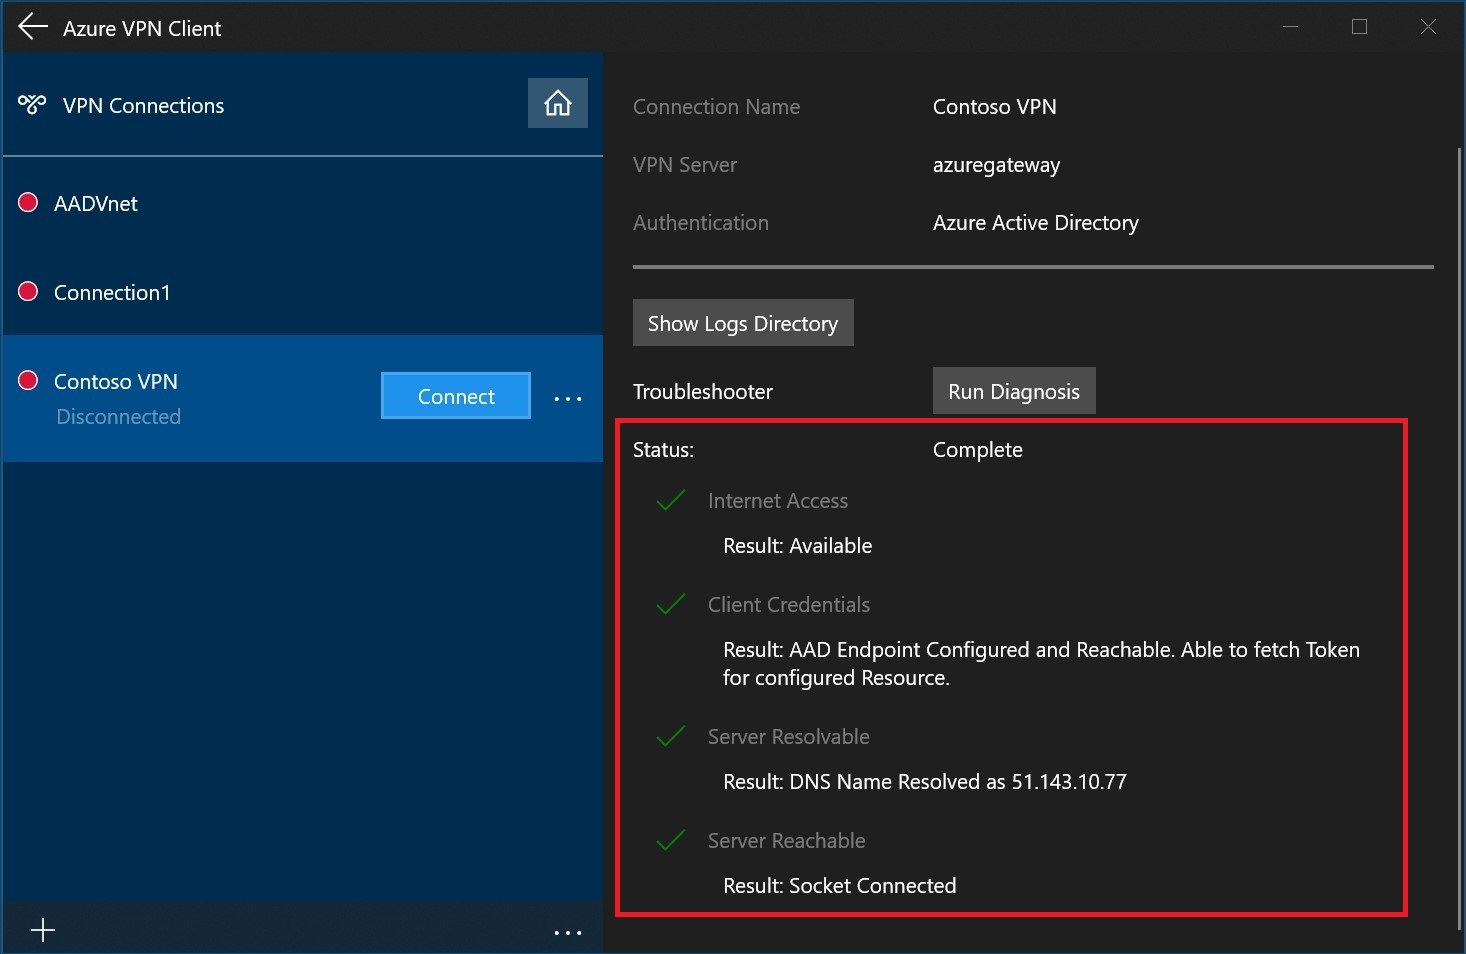
查看诊断结果。
可选客户端设置
可以为 Azure VPN 客户端配置可选设置,例如强制隧道、排除路由、DNS 和证书身份验证设置。
后续步骤
有关详细信息,请参阅 为使用 Microsoft Entra 身份验证的 P2S 开放 VPN 连接创建Microsoft Entra租户。