Note
Access to this page requires authorization. You can try signing in or changing directories.
Access to this page requires authorization. You can try changing directories.
Important
Custom Commands will be retired on April 30th 2026. As of October 30th 2023 you can't create new Custom Commands applications in Speech Studio. Related to this change, LUIS will be retired on October 1st 2025. As of April 1st 2023 you can't create new LUIS resources.
Applications such as voice agents listen to users and take an action in response, often speaking back. They use speech to text to transcribe the user's speech, then take action on the natural language understanding of the text. This action frequently includes spoken output from the agent generated with text to speech. Devices connect to agents with the Speech SDK's DialogServiceConnector object.
Custom Commands makes it easy to build rich voice commanding apps optimized for voice-first interaction experiences. It provides a unified authoring experience, an automatic hosting model, and relatively lower complexity. Custom Commands helps you focus on building the best solution for your voice commanding scenarios.
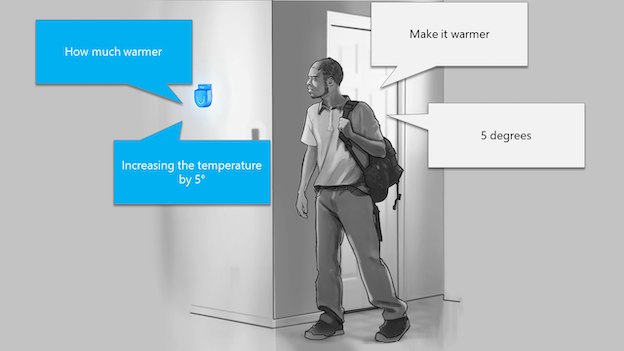
Custom Commands is best suited for task completion or command-and-control scenarios such as "Turn on the overhead light" or "Make it 5 degrees warmer". Custom Commands is well suited for Internet of Things (IoT) devices, ambient and headless devices. Examples include solutions for Hospitality, Retail and Automotive industries, where you want voice-controlled experiences for your guests, in-store inventory management or in-car functionality.
Good candidates for Custom Commands have a fixed vocabulary with well-defined sets of variables. For example, home automation tasks, like controlling a thermostat, are ideal.

Getting started with Custom Commands
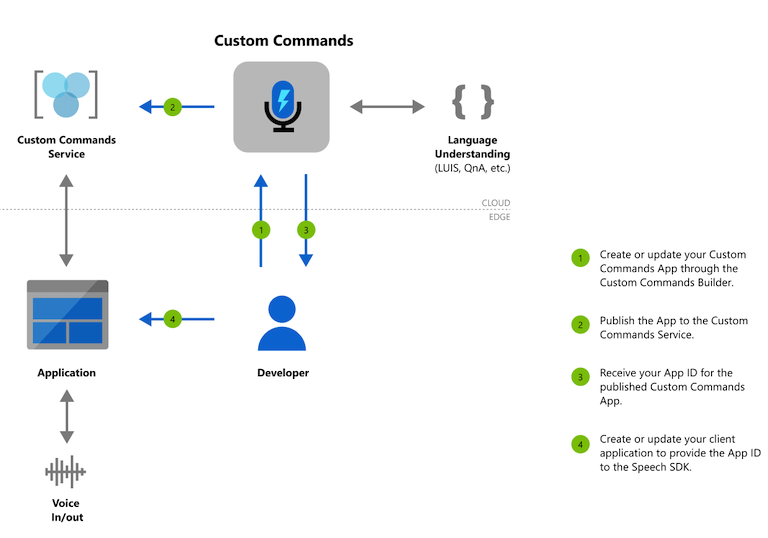
Our goal with Custom Commands is to reduce your cognitive load to learn all the different technologies and focus building your voice commanding app. First step for using Custom Commands to create an AI Services resource for Speech. You can author your Custom Commands app on the Speech Studio and publish it, after which an on-device application can communicate with it using the Speech SDK.
Authoring flow for Custom Commands

Follow our quickstart to have your first Custom Commands app running code in less than 10 minutes.
Once you're done with the quickstart, explore our how-to guides for detailed steps for designing, developing, debugging, deploying and integrating a Custom Commands application.