Note
Access to this page requires authorization. You can try signing in or changing directories.
Access to this page requires authorization. You can try changing directories.
APPLIES TO: All API Management tiers
Configure a resolver to retrieve or set data for a GraphQL field in an object type specified in a GraphQL schema. The schema must be imported to API Management as a GraphQL API.
Currently, API Management supports resolvers that can access the following data sources:
- HTTP-based data source (REST or SOAP API)
- Cosmos DB database
- Azure SQL database
Things to know
- A resolver is a resource containing a policy definition that's invoked only when a matching object type and field in the schema is executed.
- Each resolver resolves data for a single field. To resolve data for multiple fields, configure a separate resolver for each.
- Resolver-scoped policies are evaluated after any
inboundandbackendpolicies in the policy-execution pipeline. They don't inherit policies from other scopes. For more information, see Policies in Azure API Management. - You can configure API-scoped policies for a GraphQL API, independent of the resolver-scoped policies. For example, add a validate-graphql-request policy to the
inboundscope to validate the request before the resolver is invoked. Configure API-scoped policies on the API policies tab for the API. - To support interface and union types in GraphQL resolvers, the backend response must either already contain the
__typenamefield or be altered using the set-body policy to include__typename.
Prerequisites
- An existing API Management instance. Create one if you haven't already.
- Import a pass-through or synthetic GraphQL API.
Create a resolver
The following steps create a resolver using an HTTP-based data source. The general steps are similar for any resolver that uses a supported data source.
In the Azure portal, navigate to your API Management instance.
In the left menu, select APIs, then select the name of your GraphQL API.
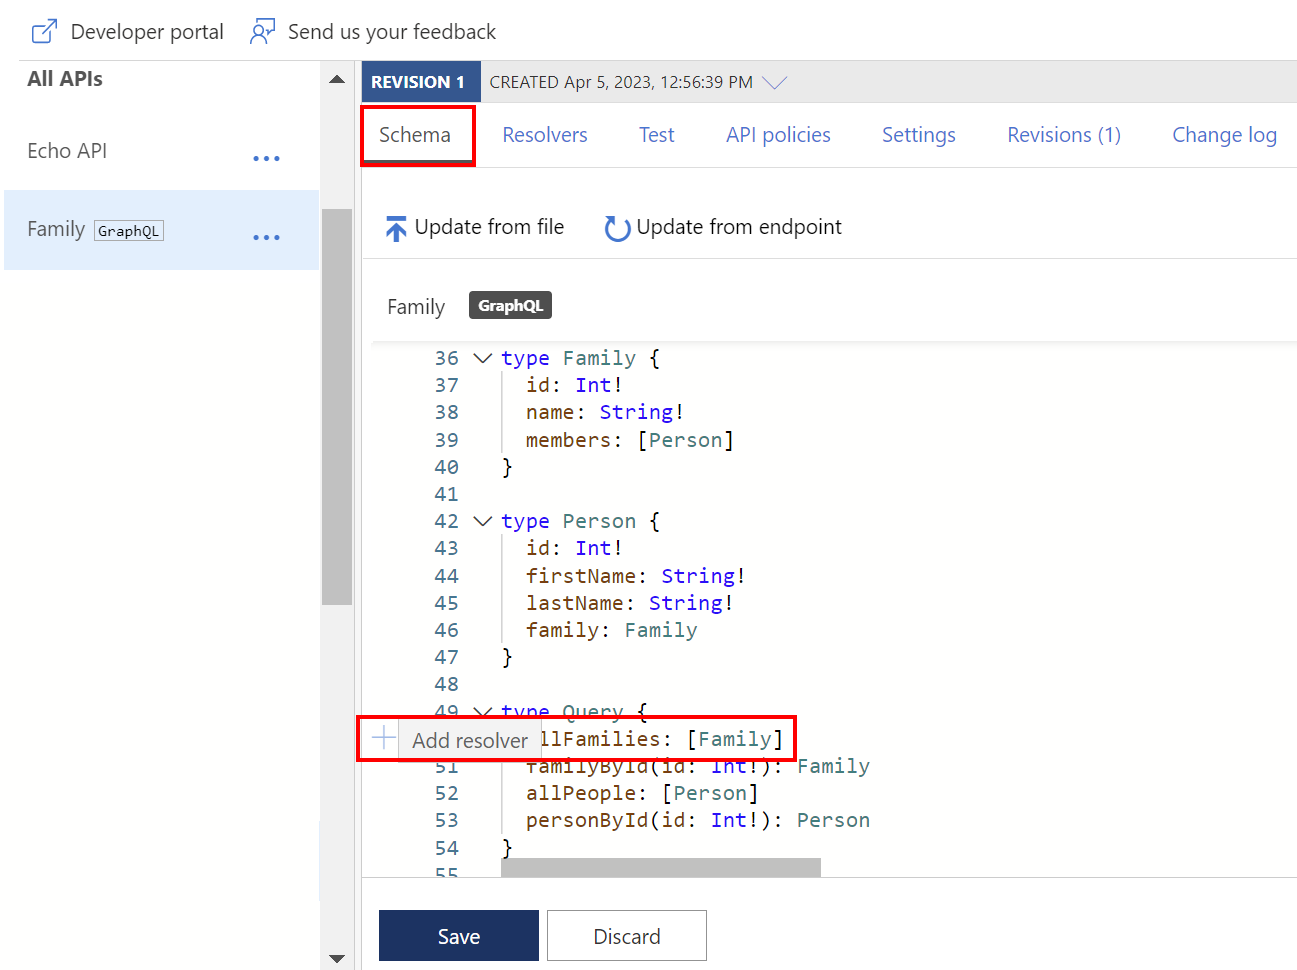
On the Schema tab, review the schema for a field in an object type where you want to configure a resolver.
Select a field, and then in the left margin, hover the pointer.
Select + Add Resolver.

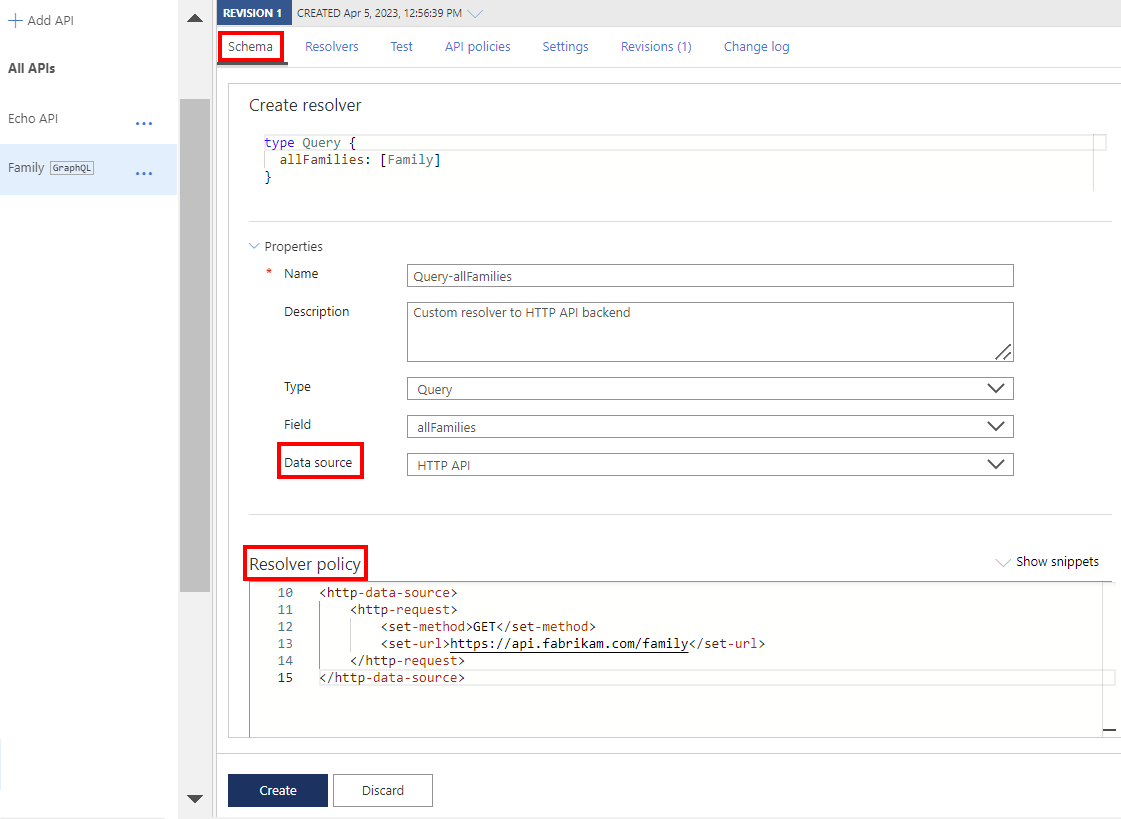
On the Create Resolver page:
- Update the Name property if you want to, optionally enter a Description, and confirm or update the Type and Field selections.
- Select the resolver's Data source. For this example, select HTTP API.
In the Resolver policy editor, update the
http-data-sourcepolicy with child elements for your scenario.Update the required
http-requestelement with policies to transform the GraphQL operation to an HTTP request.Optionally add an
http-responseelement and add child policies to transform the HTTP response of the resolver. If thehttp-responseelement isn't specified, the response is returned as a raw string.Select Create.
The resolver is attached to the field and appears on the Resolvers tab.
Manage resolvers
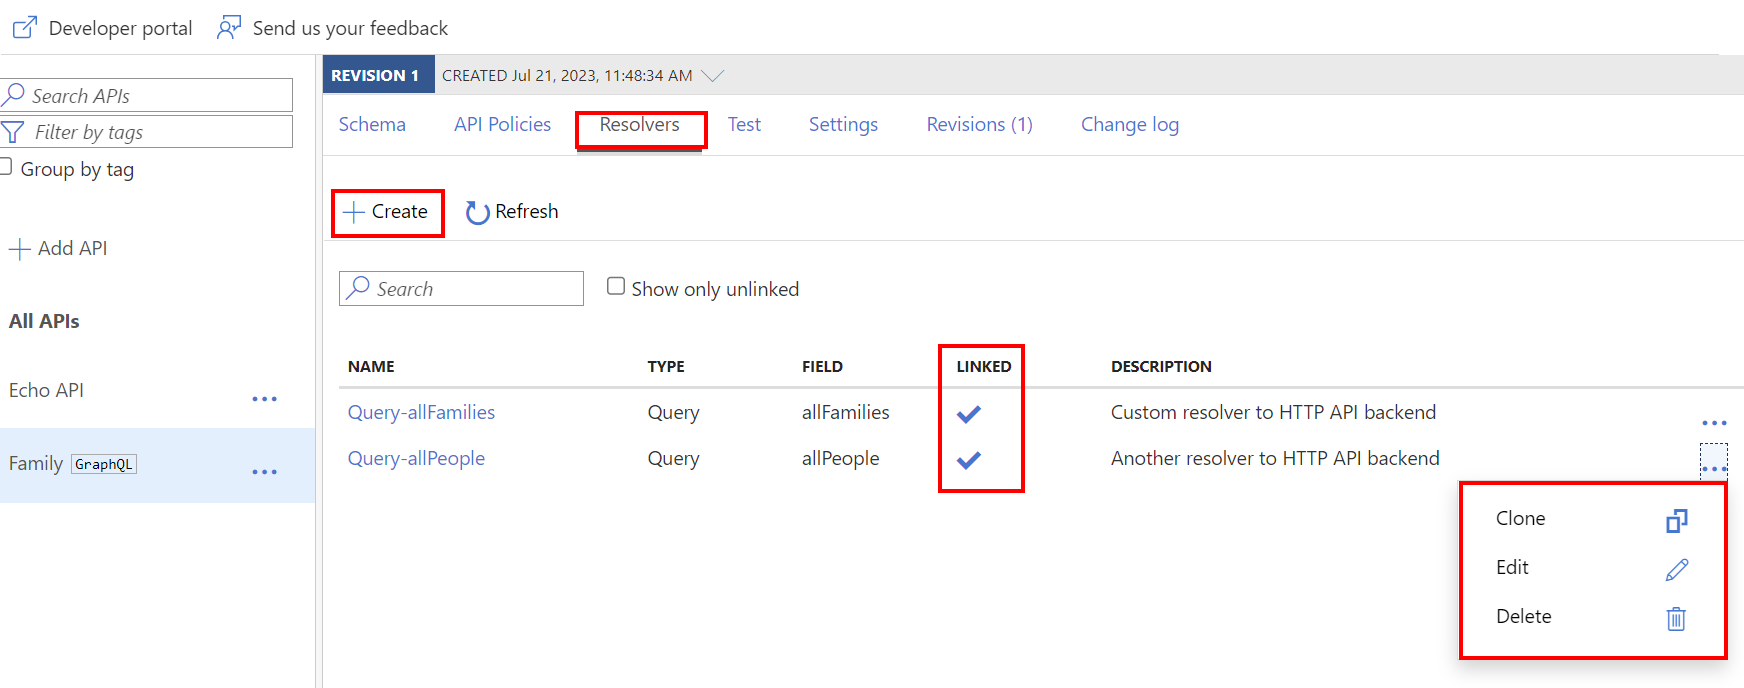
You can list and manage the resolvers for a GraphQL API on the API's Resolvers tab.
On the Resolvers tab:
The Linked column indicates whether the resolver is configured for a field that's currently in the GraphQL schema. If a resolver isn't linked, it can't be invoked.
In the context menu (...) for a resolver, find commands to Clone, Edit, or Delete a resolver. Clone a listed resolver to quickly create a similar resolver that targets a different type and field.
You can create a new resolver by selecting + Create.
Edit and test a resolver
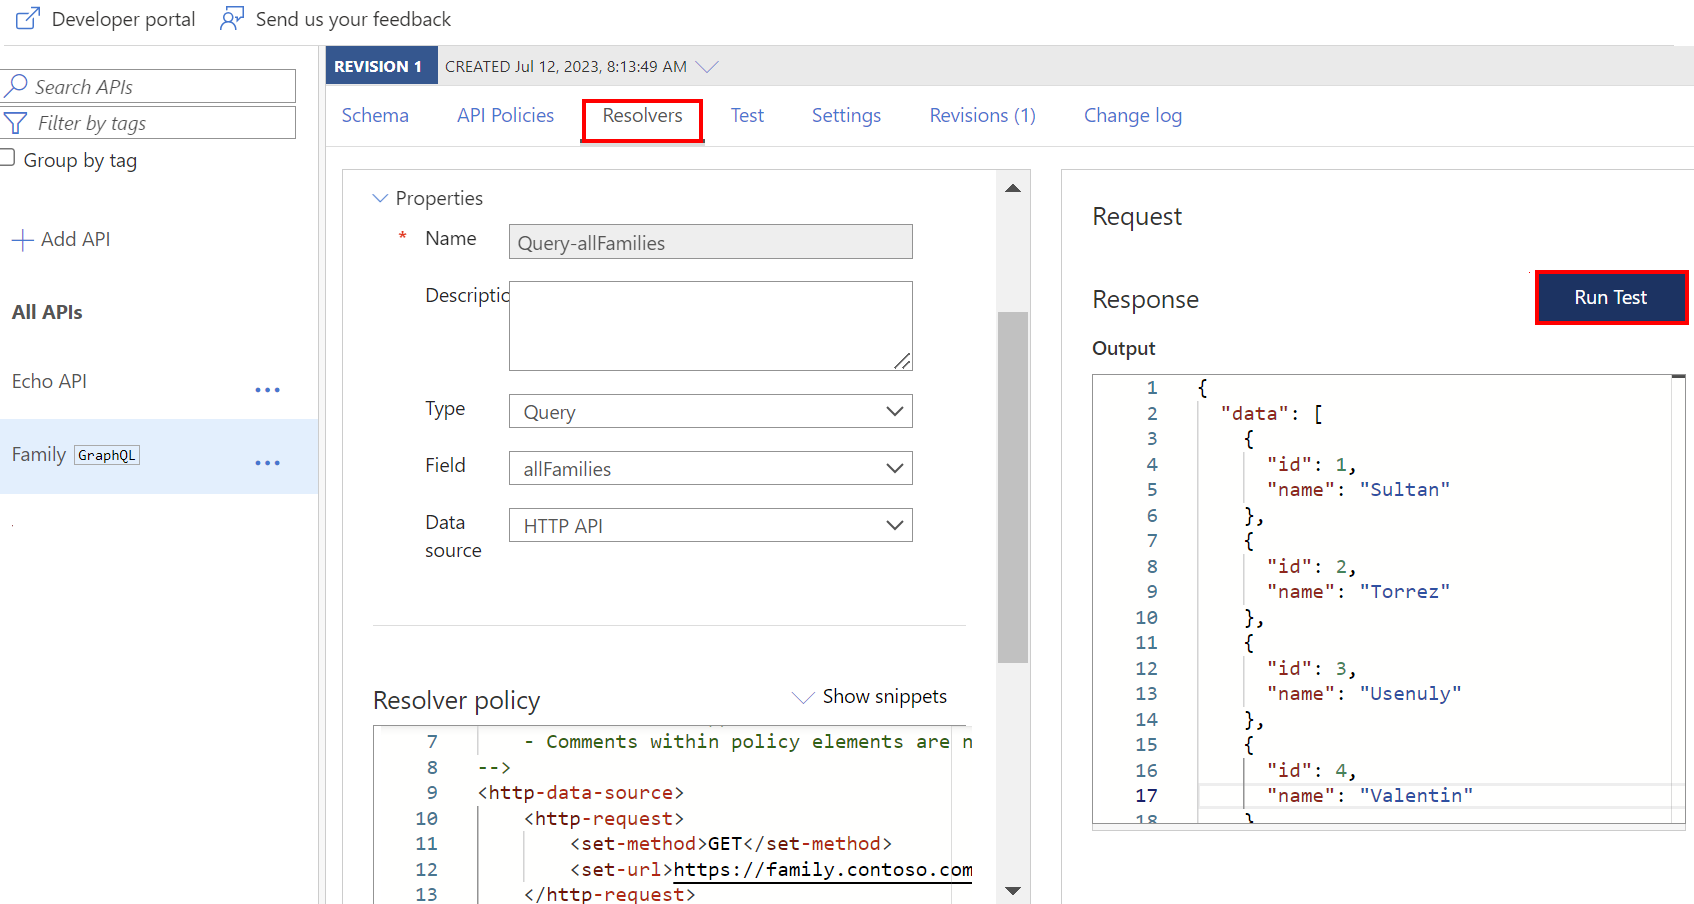
When you edit a single resolver, the Edit resolver page opens. You can:
Update the resolver policy and optionally the data source. Changing the data source overwrites the current resolver policy.
Change the type and field that the resolver targets.
Test and debug the resolver's configuration. As you edit the resolver policy, select Run Test to check the output from the data source, which you can validate against the schema. If errors occur, the response includes troubleshooting information.
GraphQL context
- The context for the resolver's request and response (if specified) differs from the context for the original gateway API request:
context.GraphQLproperties are set to the arguments (Arguments) and parent object (Parent) for the current resolver execution.- The request context contains arguments that are passed in the GraphQL query as its body.
- The response context is the response from the independent call made by the resolver, not the context for the complete response for the gateway request.
The
contextvariable that is passed through the request and response pipeline is augmented with the GraphQL context when used with a GraphQL resolver.
context.GraphQL.parent
The context.GraphQL.parent is set to the parent object for the current resolver execution. Consider the following partial schema:
type Comment {
    id: ID!
    owner: string!
    content: string!
}

type Blog {
    id: ID!
    title: string!
    content: string!
    comments: [Comment]!
    comment(id: ID!): Comment
}

type Query {
    getBlog(): [Blog]!
    getBlog(id: ID!): Blog
}
Also, consider a GraphQL query for all the information for a specific blog:
query {
    getBlog(id: 1) {
        title
        content
        comments {
            id
            owner
            content
        }
    }
}
If you set a resolver for the comments field in the Blog type, you'll want to understand which blog ID to use. You can get the blog ID using context.GraphQL.Parent["id"] as shown in the following resolver:
<http-data-source>
    <http-request>
        <set-method>GET</set-method>
        <set-url>@($"https://data.contoso.com/api/blog/{context.GraphQL.Parent["id"]}")
        </set-url>
    </http-request>
</http-data-source>
context.GraphQL.Arguments
The arguments for a parameterized GraphQL query are added to context.GraphQL.Arguments. For example, consider the following two queries:
query($id: Int) {
    getComment(id: $id) {
        content
    }
}

query {
    getComment(id: 2) {
        content
    }
}
These queries are two ways of calling the getComment resolver. GraphQL sends the following JSON payload:
{
    "query": "query($id: Int) { getComment(id: $id) { content } }",
    "variables": { "id": 2 }
}

{
    "query": "query { getComment(id: 2) { content } }"
}
You can define the resolver as follows:
<http-data-source>
    <http-request>
        <set-method>GET</set-method>
        <set-url>@($"https://data.contoso.com/api/comment/{context.GraphQL.Arguments["id"]}")</set-url>
    </http-request>
</http-data-source>
Related content
For more resolver examples, see:


